2008 NISSAN MAXIMA warning light
[x] Cancel search: warning lightPage 133 of 328
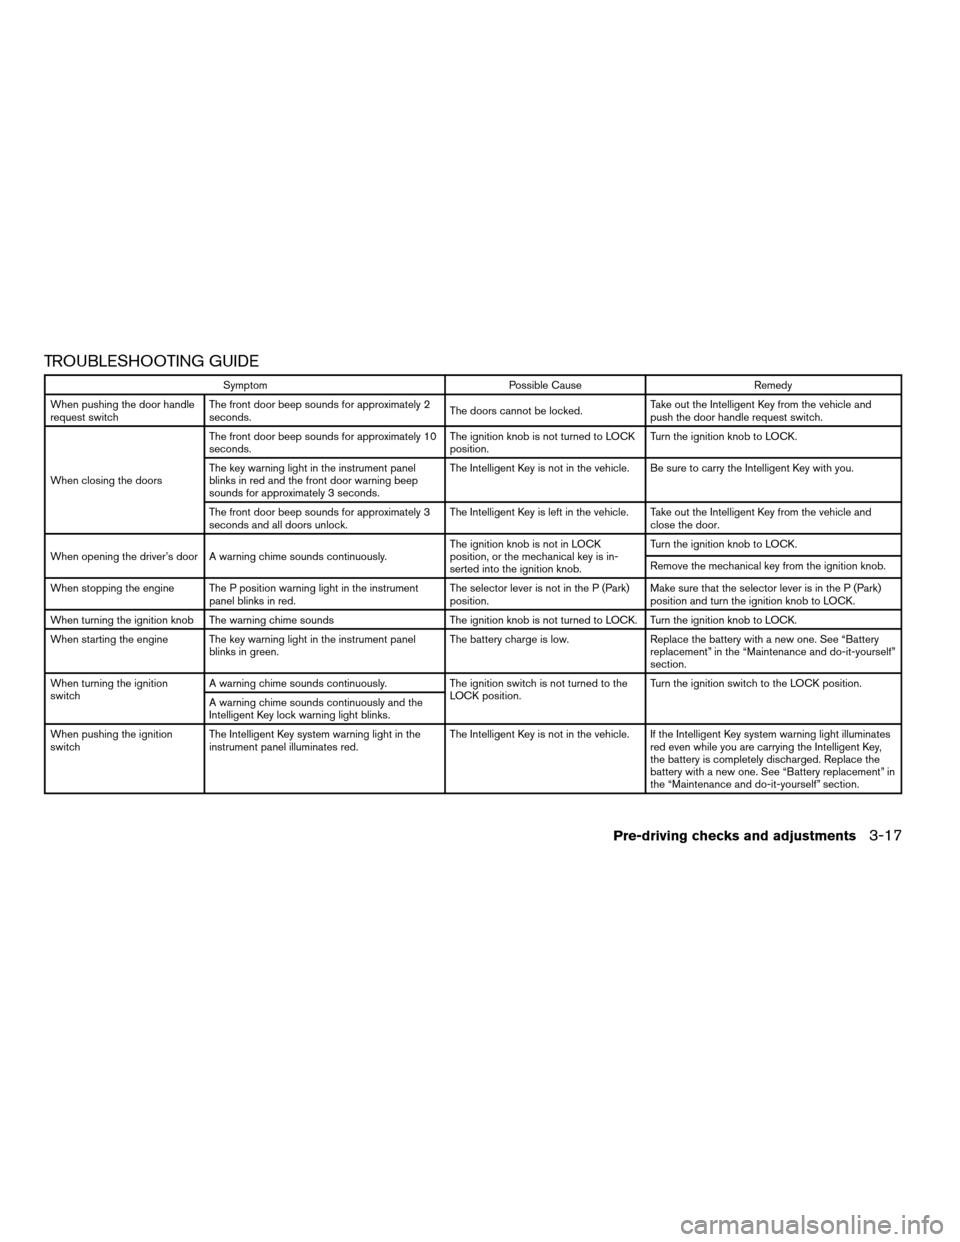
TROUBLESHOOTING GUIDE
Symptom Possible Cause Remedy
When pushing the door handle
request switchThe front door beep sounds for approximately 2
seconds.The doors cannot be locked.Take out the Intelligent Key from the vehicle and
push the door handle request switch.
When closing the doorsThe front door beep sounds for approximately 10
seconds.The ignition knob is not turned to LOCK
position.Turn the ignition knob to LOCK.
The key warning light in the instrument panel
blinks in red and the front door warning beep
sounds for approximately 3 seconds.The Intelligent Key is not in the vehicle. Be sure to carry the Intelligent Key with you.
The front door beep sounds for approximately 3
seconds and all doors unlock.The Intelligent Key is left in the vehicle. Take out the Intelligent Key from the vehicle and
close the door.
When opening the driver’s door A warning chime sounds continuously.The ignition knob is not in LOCK
position, or the mechanical key is in-
serted into the ignition knob.Turn the ignition knob to LOCK.
Remove the mechanical key from the ignition knob.
When stopping the engine The P position warning light in the instrument
panel blinks in red.The selector lever is not in the P (Park)
position.Make sure that the selector lever is in the P (Park)
position and turn the ignition knob to LOCK.
When turning the ignition knob The warning chime sounds The ignition knob is not turned to LOCK. Turn the ignition knob to LOCK.
When starting the engine The key warning light in the instrument panel
blinks in green.The battery charge is low. Replace the battery with a new one. See “Battery
replacement” in the “Maintenance and do-it-yourself”
section.
When turning the ignition
switchA warning chime sounds continuously. The ignition switch is not turned to the
LOCK position.Turn the ignition switch to the LOCK position.
A warning chime sounds continuously and the
Intelligent Key lock warning light blinks.
When pushing the ignition
switchThe Intelligent Key system warning light in the
instrument panel illuminates red.The Intelligent Key is not in the vehicle. If the Intelligent Key system warning light illuminates
red even while you are carrying the Intelligent Key,
the battery is completely discharged. Replace the
battery with a new one. See “Battery replacement” in
the “Maintenance and do-it-yourself” section.
Pre-driving checks and adjustments3-17
ZREVIEW COPYÐ2008 Maxima(max)
Owners ManualÐUSA_English(nna)
06/08/07Ðdebbie
X
Page 134 of 328
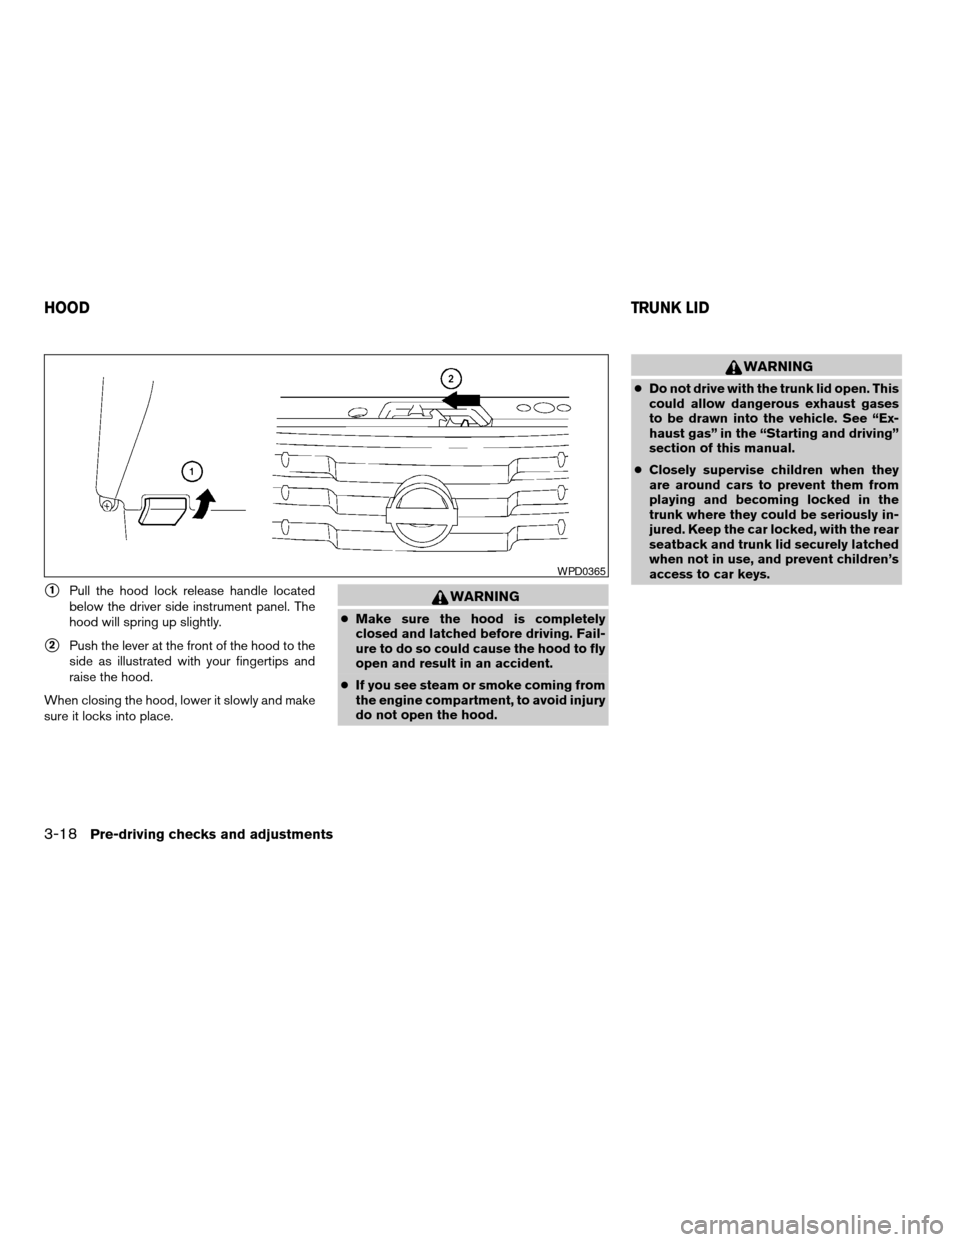
s1Pull the hood lock release handle located
below the driver side instrument panel. The
hood will spring up slightly.
s2Push the lever at the front of the hood to the
side as illustrated with your fingertips and
raise the hood.
When closing the hood, lower it slowly and make
sure it locks into place.
WARNING
cMake sure the hood is completely
closed and latched before driving. Fail-
ure to do so could cause the hood to fly
open and result in an accident.
cIf you see steam or smoke coming from
the engine compartment, to avoid injury
do not open the hood.
WARNING
cDo not drive with the trunk lid open. This
could allow dangerous exhaust gases
to be drawn into the vehicle. See “Ex-
haust gas” in the “Starting and driving”
section of this manual.
cClosely supervise children when they
are around cars to prevent them from
playing and becoming locked in the
trunk where they could be seriously in-
jured. Keep the car locked, with the rear
seatback and trunk lid securely latched
when not in use, and prevent children’s
access to car keys.
WPD0365
HOODTRUNK LID
3-18Pre-driving checks and adjustments
ZREVIEW COPYÐ2008 Maxima(max)
Owners ManualÐUSA_English(nna)
06/08/07Ðdebbie
X
Page 137 of 328
WARNING
cGasoline is extremely flammable and
highly explosive under certain condi-
tions. You could be burned or seriously
injured if it is misused or mishandled.
Always stop the engine and do not
smoke or allow open flames or sparks
near the vehicle when refueling.
cDo not attempt to top off the fuel tank
after the fuel pump nozzle shuts off
automatically. Continued refueling may
cause fuel overflow, resulting in fuel
spray and possibly a fire.
cUse only an original equipment type
fuel-filler cap as a replacement. It has a
built-in safety valve needed for proper
operation of the fuel system and emis-
sion control system. An incorrect cap
can result in a serious malfunction and
possible injury. It could also cause the
malfunction indicator light to come on.
cNever pour fuel into the throttle body to
attempt to start your vehicle.cDo not fill a portable fuel container in
the vehicle or trailer. Static electricity
can cause an explosion of flammable
liquid, vapor or gas in any vehicle or
trailer. To reduce the risk of serious
injury or death when filling portable fuel
containers:
– Always place the container on the
ground when filling.
– Do not use electronic devices when
filling.
– Keep the pump nozzle in contact
with the container while you are fill-
ing it.
– Use only approved portable fuel con-
tainers for flammable liquid.
CAUTION
cIf fuel is spilled on the vehicle body,
flush it away with water to avoid paint
damage.
cTighten until the fuel-filler cap clicks.
Failure to tighten the fuel-filler cap
properly may cause the
Mal-
function Indicator Light (MIL) to illumi-
nate. If the
light illuminates be-
cause the fuel-filler cap is loose or
missing, tighten or install the cap and
continue to drive the vehicle.
The
light should turn off after a
few driving trips. If the
light
does not turn off after a few driving
trips, have the vehicle inspected by a
NISSAN dealer.
cFor additional information, see the
“Malfunction Indicator Light (MIL)” in
the “Instruments and Controls” section
earlier in this manual.
Pre-driving checks and adjustments3-21
ZREVIEW COPYÐ2008 Maxima(max)
Owners ManualÐUSA_English(nna)
06/08/07Ðdebbie
X
Page 142 of 328
WARNING
cObjects viewed in the outside mirror on
the passenger side are closer than they
appear. Be careful when moving to the
right. Using only this mirror could cause
an accident. Use the inside mirror or
glance over your shoulder to properly
judge distances to other objects.
cDo not adjust the mirrors while driving.
You could lose control of your vehicle
and cause an accident.
Automatic anti-glare outside mirrors (if
so equipped)
The outside mirrors will automatically dim during
nighttime conditions to reduce the glare from the
headlights of trailing vehicles. The automatic anti-
glare feature operates only when the ignition
switch is in the ON position.
The automatic anti-glare feature will be on when
starting the vehicle. The indicator light on the
automatic anti-glare rearview mirror will illuminate
when the automatic anti-glare feature is on.
To turn off the automatic anti-glare feature, press:
cthe O button on rearview mirrors without
compass.cthe
button on rearview mirrors with
compass.
The indicator light will turn off.
To turn on the automatic anti-glare feature again,
press:
cthe | button on rearview mirrors without
compass.
cthe
button on rearview mirrors
equipped with compass.
The indicator light will turn on.
For information on the automatic anti-glare rear-
view mirror, see “Automatic anti-glare rearview
mirror” earlier in this section.
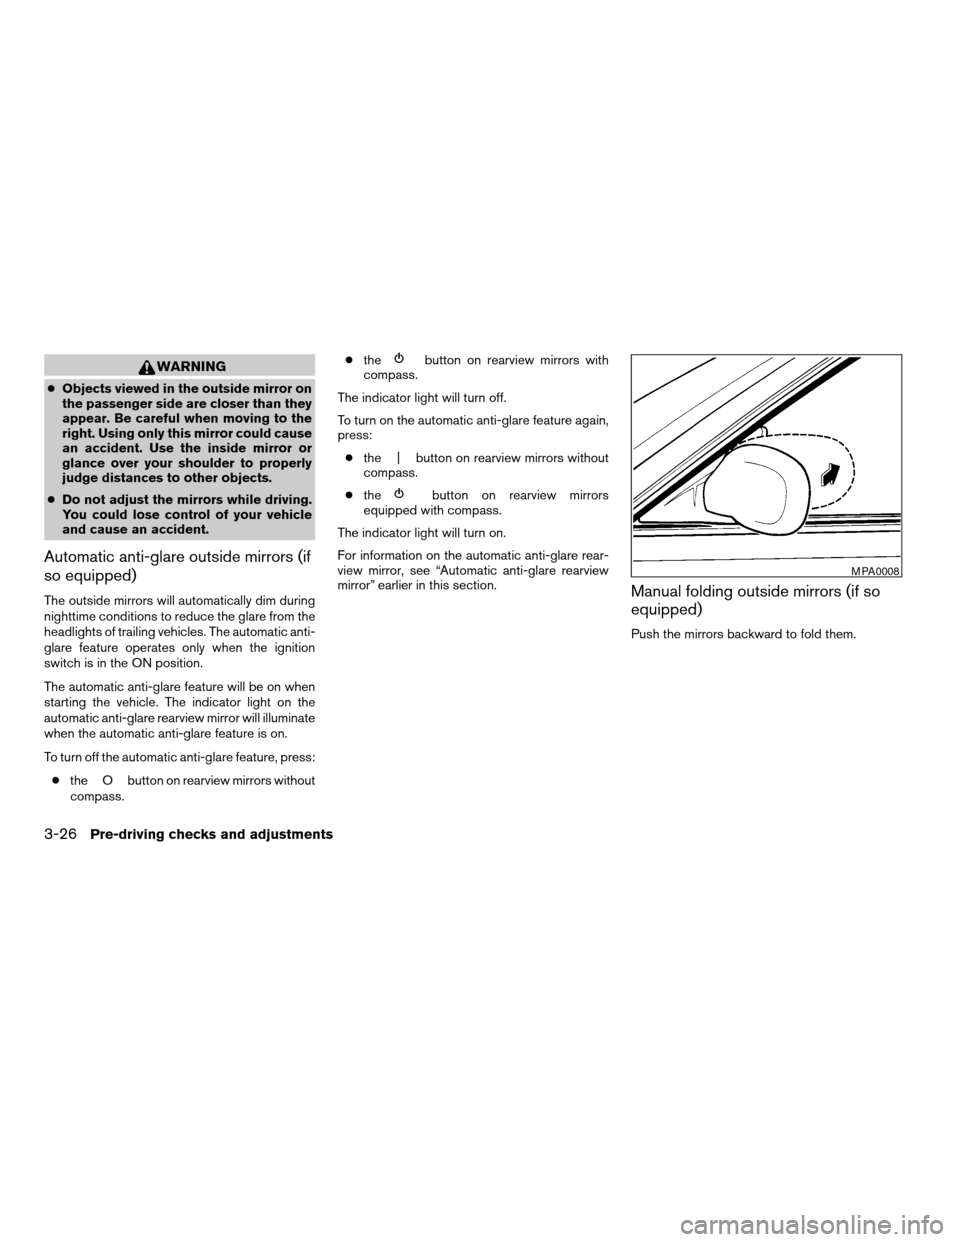
Manual folding outside mirrors (if so
equipped)
Push the mirrors backward to fold them.
MPA0008
3-26Pre-driving checks and adjustments
ZREVIEW COPYÐ2008 Maxima(max)
Owners ManualÐUSA_English(nna)
06/08/07Ðdebbie
X
Page 156 of 328
cThe ignition key is turned ON the next time
the vehicle will be driven.
To return to the previous display after the MAIN-
TENANCE NOTICE screen is displayed, press
the BACK button.
The MAINTENANCE NOTICE screen displays
each time the key is turned ON until one of the
following conditions are met:
c“Reset” key is selected.
c“Display Maintenance Notification” is set to
OFF.
cThe maintenance interval is set again.
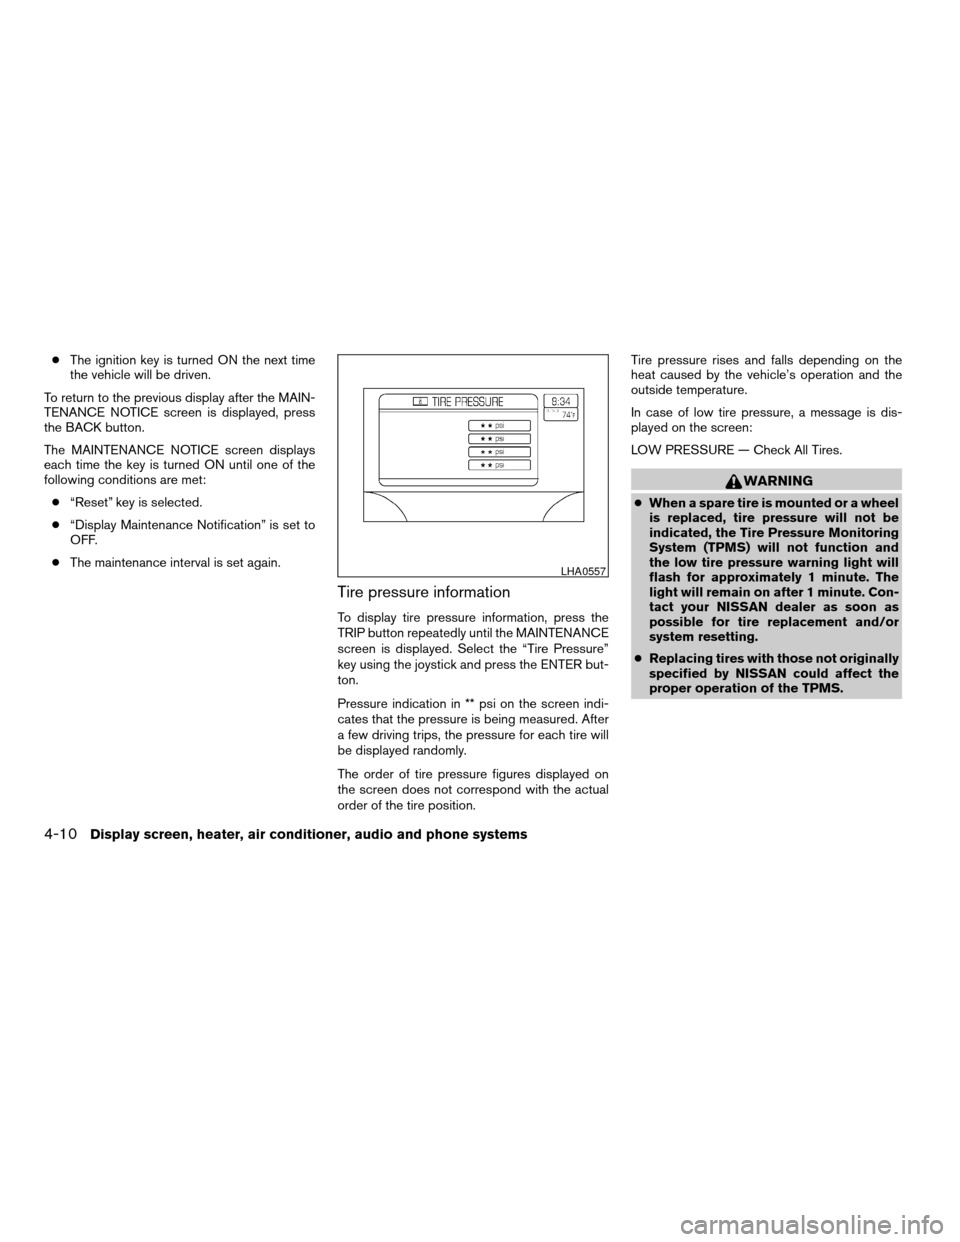
Tire pressure information
To display tire pressure information, press the
TRIP button repeatedly until the MAINTENANCE
screen is displayed. Select the “Tire Pressure”
key using the joystick and press the ENTER but-
ton.
Pressure indication in ** psi on the screen indi-
cates that the pressure is being measured. After
a few driving trips, the pressure for each tire will
be displayed randomly.
The order of tire pressure figures displayed on
the screen does not correspond with the actual
order of the tire position.Tire pressure rises and falls depending on the
heat caused by the vehicle’s operation and the
outside temperature.
In case of low tire pressure, a message is dis-
played on the screen:
LOW PRESSURE — Check All Tires.
WARNING
cWhen a spare tire is mounted or a wheel
is replaced, tire pressure will not be
indicated, the Tire Pressure Monitoring
System (TPMS) will not function and
the low tire pressure warning light will
flash for approximately 1 minute. The
light will remain on after 1 minute. Con-
tact your NISSAN dealer as soon as
possible for tire replacement and/or
system resetting.
cReplacing tires with those not originally
specified by NISSAN could affect the
proper operation of the TPMS.
LHA0557
4-10Display screen, heater, air conditioner, audio and phone systems
ZREVIEW COPYÐ2008 Maxima(max)
Owners ManualÐUSA_English(nna)
06/08/07Ðdebbie
X
Page 191 of 328
Next/Previous track (CD):
Push the tuning switch
orfor less
than 1.5 seconds to return to the beginning of the
present track or skip to the next track. Push
several times to skip back or skip through tracks.
Change disc (CD) (if so equipped):
Push the tuning switch
orfor more
than 1.5 seconds to change the playing disc up
or down.
ANTENNA
Window antenna
The antenna pattern is printed inside the rear
window.
CAUTION
cDo not place metalized film near the
rear window glass or attach any metal
parts to it. This may cause poor recep-
tion or noise.
cWhen cleaning the inside of the rear
window, be careful not to scratch or
damage the rear window antenna.
Lightly wipe along the antenna with a
dampened soft cloth.When installing a CB, ham radio or car phone in
your NISSAN, be sure to observe the following
precautions, otherwise the new equipment may
adversely affect the engine control system and
other electronic parts.
WARNING
cA cellular telephone should not be used
while driving so full attention may be
given to vehicle operation. Some juris-
dictions prohibit the use of cellular tele-
phones while driving.
cIf you must make a call while your ve-
hicle is in motion, the hands free cellu-
lar phone operational mode (if so
equipped) is highly recommended. Ex-
ercise extreme caution at all times so
full attention may be given to vehicle
operation.
cIf a conversation in a moving vehicle
requires you to take notes, pull off the
road to a safe location and stop your
vehicle before doing so.
CAUTION
cKeep the antenna as far away as pos-
sible from the electronic control
modules.
cKeep the antenna wire more than 8 in
(20 cm) away from the electronic con-
trol system harnesses. Do not route the
antenna wire next to any harness.
cAdjust the antenna standing-wave ratio
as recommended by the manufacturer.
cConnect the ground wire from the CB
radio chassis to the body.
cFor details, consult a NISSAN dealer.
CAR PHONE OR CB RADIO
Display screen, heater, air conditioner, audio and phone systems4-45
ZREVIEW COPYÐ2008 Maxima(max)
Owners ManualÐUSA_English(nna)
06/08/07Ðdebbie
X
Page 208 of 328
cThe low tire pressure warning light does not
automatically turn off when the tire pressure
is adjusted. After the tire is inflated to the
recommended pressure, the vehicle must be
driven at speeds above 16 MPH (25 km/h)
to activate the TPMS and turn off the low tire
pressure warning light. Use a tire pressure
gauge to check the tire pressure.
cTire pressure rises and falls depending on
the heat caused by the vehicle’s operation
and the outside temperature. Low outside
temperature can lower the temperature of
the air inside the tire which can cause a
lower tire inflation pressure. This may cause
the low tire pressure warning light to illumi-
nate. If the warning light illuminates in low
ambient temperature, check the tire pres-
sure for all four tires.
cYou can also check the pressure of all tires
(except the spare tire) on the display screen
(if so equipped) . The order of the tire pres-
sure figures displayed on the screen does
not correspond with the actual order of the
tire position. See “Tire pressure information”
in the “Display screen, heater, air conditioner
and audio and phone systems” section.For additional information, see “Low tire pressure
warning light” in the “Instruments and controls”
section and “Tire pressure monitoring system
(TPMS)” in the “In case of emergency” section.
WARNING
cIf the low tire pressure warning light
illuminates while driving, avoid sudden
steering maneuvers or abrupt braking,
reduce vehicle speed, pull off the road
to a safe location and stop the vehicle
as soon as possible. Driving with under-
inflated tires may permanently damage
the tires and increase the likelihood of
tire failure. Serious vehicle damage
could occur and may lead to an acci-
dent and could result in serious per-
sonal injury. Check the tire pressure for
all four tires. Adjust the tire pressure to
the recommended COLD tire pressure
shown on the Tire and Loading Informa-
tion label to turn the low tire pressure
warning light OFF. If you have a flat tire,
replace it with a spare tire as soon as
possible. (See “Flat tire” in the “In case
of emergency” section for changing a
flat tire.)cWhen a spare tire is mounted or a wheel
is replaced, tire pressure will not be
indicated, the TPMS will not function
and the low tire pressure warning light
will flash for approximately 1 minute.
The light will remain on after 1 minute.
Contact your NISSAN dealer as soon as
possible for tire replacement and/or
system resetting.
cReplacing tires with those not originally
specified by NISSAN could affect the
proper operation of the TPMS.
cDo not inject any tire liquid or aerosol
tire sealant into the tires, as this may
cause a malfunction of the tire pressure
sensors.
CAUTION
Do not place metalized film or any metal
parts (antenna, etc.) on the windows. This
may cause poor reception of the signals
from the tire pressure sensors, and the
TPMS will not function properly.
Some devices and transmitters may temporarily
interfere with the operation of the TPMS and
cause the low tire pressure warning light to illu-
minate.
5-4Starting and driving
ZREVIEW COPYÐ2008 Maxima(max)
Owners ManualÐUSA_English(nna)
06/08/07Ðdebbie
X
Page 210 of 328
WARNING
Never turn the ignition knob to the LOCK
position while driving. The steering wheel
will lock. This may cause the driver to lose
control of the vehicle and could result in
serious vehicle damage or personal injury.
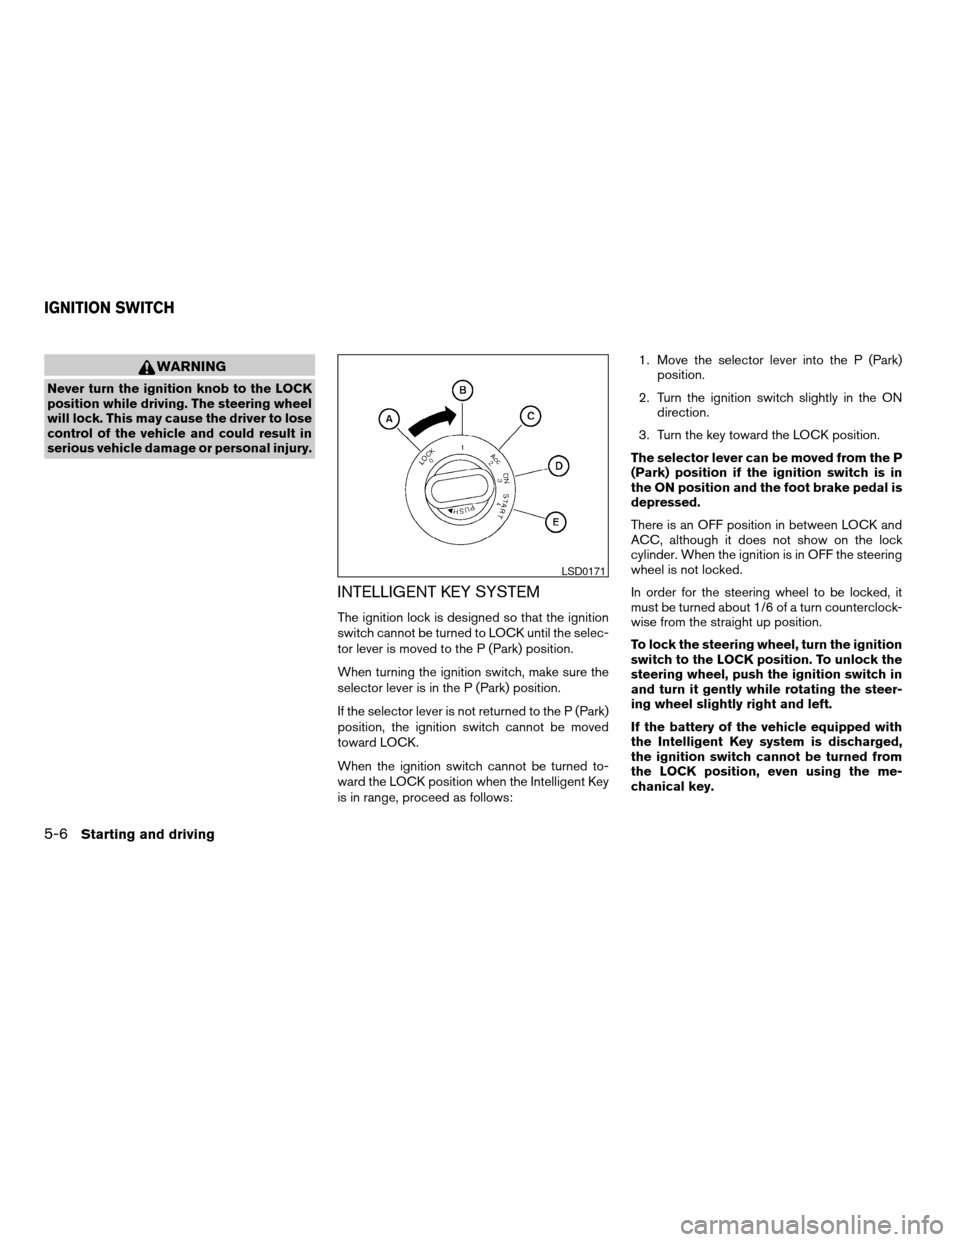
INTELLIGENT KEY SYSTEM
The ignition lock is designed so that the ignition
switch cannot be turned to LOCK until the selec-
tor lever is moved to the P (Park) position.
When turning the ignition switch, make sure the
selector lever is in the P (Park) position.
If the selector lever is not returned to the P (Park)
position, the ignition switch cannot be moved
toward LOCK.
When the ignition switch cannot be turned to-
ward the LOCK position when the Intelligent Key
is in range, proceed as follows:1. Move the selector lever into the P (Park)
position.
2. Turn the ignition switch slightly in the ON
direction.
3. Turn the key toward the LOCK position.
The selector lever can be moved from the P
(Park) position if the ignition switch is in
the ON position and the foot brake pedal is
depressed.
There is an OFF position in between LOCK and
ACC, although it does not show on the lock
cylinder. When the ignition is in OFF the steering
wheel is not locked.
In order for the steering wheel to be locked, it
must be turned about 1/6 of a turn counterclock-
wise from the straight up position.
To lock the steering wheel, turn the ignition
switch to the LOCK position. To unlock the
steering wheel, push the ignition switch in
and turn it gently while rotating the steer-
ing wheel slightly right and left.
If the battery of the vehicle equipped with
the Intelligent Key system is discharged,
the ignition switch cannot be turned from
the LOCK position, even using the me-
chanical key.
LSD0171
IGNITION SWITCH
5-6Starting and driving
ZREVIEW COPYÐ2008 Maxima(max)
Owners ManualÐUSA_English(nna)
06/08/07Ðdebbie
X