2008 NISSAN MAXIMA steering
[x] Cancel search: steeringPage 72 of 328

1. Side and center ventilators (P. 4-18)
2. Headlight/fog light/turn signal switch
(P. 2-22)
3. Steering wheel switch for audio control
and BluetoothTHands-Free Phone
System (if so equipped) (P. 4-44, 4-46)4. Meters and gauges (P. 2-3)
5. Driver supplemental air bag/horn
(P. 1-35, P. 2-28)
6. Security indicator light (P. 2-17)
7. Cruise control main/set switches
(P. 5-14)8. Windshield wiper/washer switch
(P. 2-20)
9. Display screen/Navigation system*
(P. 4-2, P. 4-6)
10. Display screen/Navigation system*
controls (P. 4-2, P. 4-6)
11. Front passenger supplemental air bag
(P. 1-35)
12. Glove box (P. 2-34)
13. Audio system controls (P. 4-22)
14. Climate controls (P. 4-19)
15. Storage (P. 2-32)
16. Power outlet (P. 2-31)
17. Shift selector lever (P. 5-9)
18. Hazard warning flasher switch (P. 2-27)
19. Passenger air bag status light (P. 1-45)
20. Ignition switch (P. 5-6)
21. Tilt/telescopic steering wheel controls
(P. 3-22)
22. Traction Control System (TCS) off
switch (if so equipped) (P. 2-29) or
Vehicle Dynamic Control (VDC) off
switch (if so equipped) (P. 2-30)
23. Rear sonar system off switch (if so
equipped) (P. 2-30)
24. Outside mirror controls (P. 3-25)
25. Instrument brightness control (P. 2-26)
LIC0988
INSTRUMENT PANEL
2-2Instruments and controls
ZREVIEW COPYÐ2008 Maxima(max)
Owners ManualÐUSA_English(nna)
06/08/07Ðdebbie
X
Page 83 of 328

TPMS and turn off the low tire pressure warning
light. Use a tire pressure gauge to check the tire
pressure.
For additional information, see “Tire Pressure
Monitoring System (TPMS)” in the “Starting and
driving” section and in the “In case of emergency”
section.
TPMS malfunction:
If the TPMS is not functioning properly, the low
tire pressure warning light will flash for approxi-
mately 1 minute when the ignition switch is
placed in the ON position. The light will remain on
after the 1 minute. Have the system checked by a
NISSAN dealer.
For additional information, see “Tire Pressure
Monitoring System (TPMS)” in the “Starting and
driving” section.
WARNING
cIf the light does illuminate with the ig-
nition switch in the ON position, have
the vehicle checked by a NISSAN dealer
as soon as possible.cIf the light illuminates while driving,
avoid sudden steering maneuvers or
abrupt braking, reduce vehicle speed,
pull off the road to a safe location and
stop the vehicle as soon as possible.
Driving with under-inflated tires may
permanently damage the tires and in-
crease the likelihood of tire failure. Se-
rious vehicle damage could occur and
may lead to an accident and could re-
sult in serious personal injury. Check
the tire pressure for all four tires. Adjust
the tire pressure to the recommended
COLD tire pressure shown on the Tire
and Loading Information label to turn
the low tire pressure warning light OFF.
If the light still comes on while driving
after adjusting the tire pressure, a tire
may be flat. If you have a flat tire, re-
place it with a spare tire as soon as
possible.
cWhen a spare tire is mounted or a wheel
is replaced, tire pressure will not be
indicated, the TPMS will not function
and the low tire pressure warning light
will flash for approximately 1 minute.
The light will remain on after 1 minute.
Contact your NISSAN dealer as soon as
possible for tire replacement and/or
system resetting.cReplacing tires with those not originally
specified by NISSAN could affect the
proper operation of the TPMS.
CAUTION
cThe TPMS is not a substitute for the
regular tire pressure check. Be sure to
check the tire pressure regularly.
cIf the vehicle is being driven at speeds
of less than 16 MPH (25 km/h) , the
TPMS may not operate correctly.
cBe sure to install the specified size of
tires to the 4 wheels correctly.
Low windshield washer fluid
warning light
This light comes on when the windshield washer
fluid is at a low level. Add windshield washer fluid
as necessary. See “Window washer fluid” in the
“Maintenance and do-it-yourself” section of this
manual.
P position selecting warning
light
The light blinks red and warning buzzer beeps
when the selector lever is not in the P position
and you are outside the vehicle with the Intelli-
gent Key.
Instruments and controls2-13
ZREVIEW COPYÐ2008 Maxima(max)
Owners ManualÐUSA_English(nna)
06/08/07Ðdebbie
X
Page 98 of 328

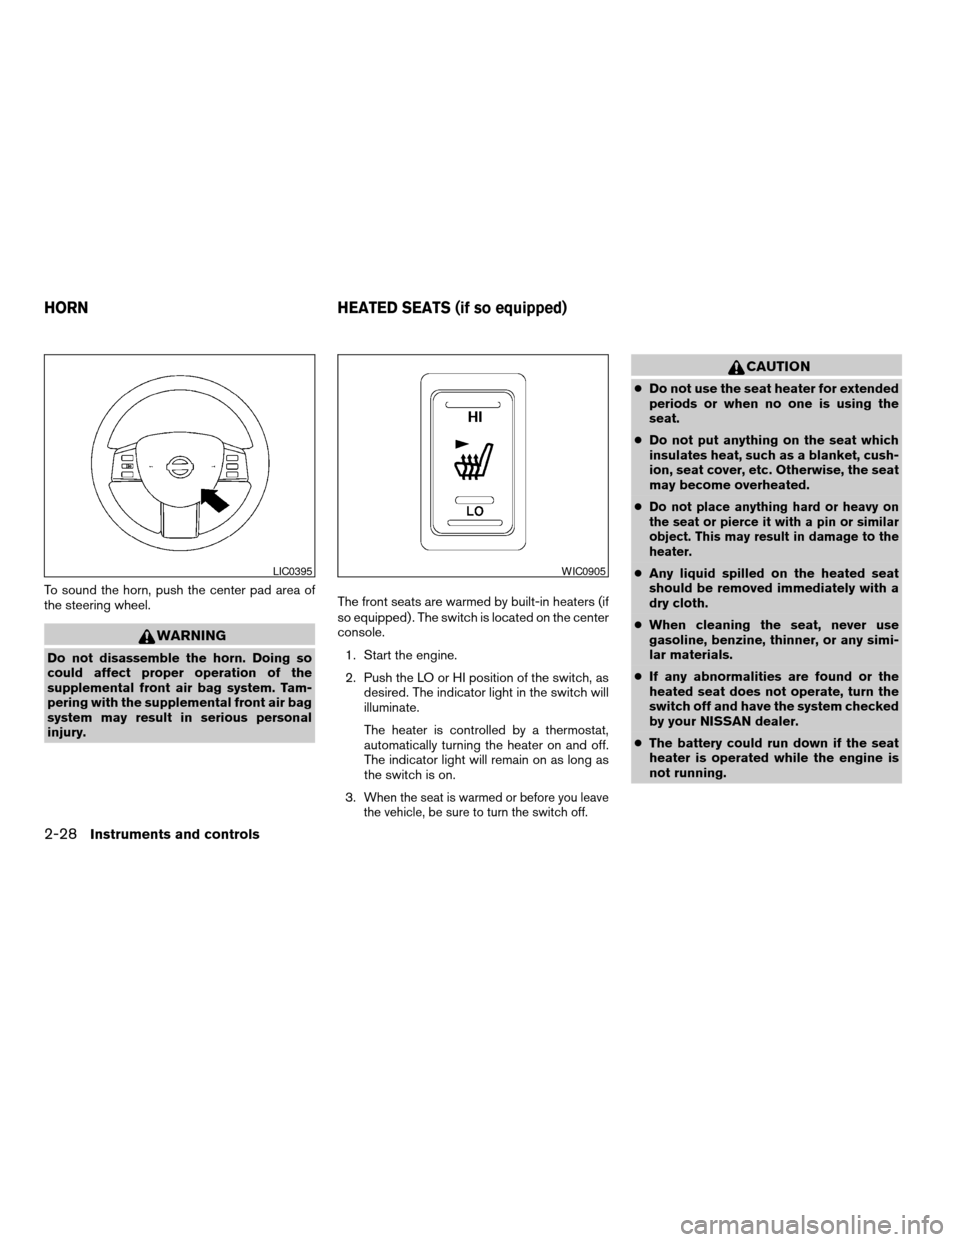
To sound the horn, push the center pad area of
the steering wheel.
WARNING
Do not disassemble the horn. Doing so
could affect proper operation of the
supplemental front air bag system. Tam-
pering with the supplemental front air bag
system may result in serious personal
injury.The front seats are warmed by built-in heaters (if
so equipped) . The switch is located on the center
console.
1. Start the engine.
2. Push the LO or HI position of the switch, as
desired. The indicator light in the switch will
illuminate.
The heater is controlled by a thermostat,
automatically turning the heater on and off.
The indicator light will remain on as long as
the switch is on.
3.
When the seat is warmed or before you leave
the vehicle, be sure to turn the switch off.
CAUTION
cDo not use the seat heater for extended
periods or when no one is using the
seat.
cDo not put anything on the seat which
insulates heat, such as a blanket, cush-
ion, seat cover, etc. Otherwise, the seat
may become overheated.
c
Do not place anything hard or heavy on
the seat or pierce it with a pin or similar
object. This may result in damage to the
heater.
cAny liquid spilled on the heated seat
should be removed immediately with a
dry cloth.
cWhen cleaning the seat, never use
gasoline, benzine, thinner, or any simi-
lar materials.
cIf any abnormalities are found or the
heated seat does not operate, turn the
switch off and have the system checked
by your NISSAN dealer.
cThe battery could run down if the seat
heater is operated while the engine is
not running.LIC0395WIC0905
HORN HEATED SEATS (if so equipped)
2-28Instruments and controls
ZREVIEW COPYÐ2008 Maxima(max)
Owners ManualÐUSA_English(nna)
06/08/07Ðdebbie
X
Page 99 of 328

The heated steering wheel system is designed to
operate only when the surface temperature of the
steering wheel is below approximately 68°F
(20°C) .
The heated steering wheel switch is located on
the front of the console box.
Push the heated steering wheel switch to warm
the steering wheel after the engine starts. The
indicator light will come on.
If the surface temperature of the steering wheel is
below 68°F (20°C) , the system will heat the
steering wheel to approximately 86°F (30°C) ,
then turn off automatically.Push the switch again to turn the heated steering
off manually. The indicator light will go off.
NOTE:
If the surface temperature of the steering
wheel is above 68°F (20°C) when the switch
is turned on, the system will not heat the
steering wheel. This is not a malfunction.The vehicle should be driven with the Traction Con-
trol System (TCS) on for most driving conditions.
If the vehicle is stuck in mud or snow, the TCS
reduces the engine output to reduce wheel spin.
The engine speed will be reduced even if the
accelerator is depressed to the floor. If maximum
engine power is needed to free a stuck vehicle,
turn the TCS off.
To turn off the TCS, push the TCS OFF switch.
The
indicator will come on.
Push the TCS OFF switch again or restart the
engine to turn ON the system. See “Traction
Control System (TCS)” in the “Starting and driv-
ing” section.
LIC0421LIC0451
HEATED STEERING WHEEL (if so
equipped)TRACTION CONTROL SYSTEM (TCS)
OFF SWITCH (if so equipped)
Instruments and controls2-29
ZREVIEW COPYÐ2008 Maxima(max)
Owners ManualÐUSA_English(nna)
06/08/07Ðdebbie
X
Page 117 of 328

3 Pre-driving checks and adjustments
Keys .............................................3-2
Intelligent Keys.................................3-2
NISSAN vehicle immobilizer system keys..........3-3
Doors............................................3-4
Locking with key................................3-4
Locking with inside lock knob....................3-5
Locking with power door lock switch.............3-5
Child safety rear door lock.......................3-6
Intelligent Key system..............................3-6
Operating range................................3-8
Door locks/unlocks precaution...................3-8
Intelligent Key operation.........................3-9
How to use the remote keyless entry
function......................................3-12
Warning lights and audible reminders............3-15
Warning signals...............................3-15
Troubleshooting guide.........................3-17
Hood...........................................3-18Trunk lid.........................................3-18
Trunk lid release switch........................3-19
Interior trunk lid release........................3-19
Fuel-filler door...................................3-20
Opener operation..............................3-20
Fuel-filler cap.................................3-20
Tilting telescopic steering column..................3-22
Automatic operation (if so equipped).............3-22
Manual operation..............................3-23
Sun visors.......................................3-23
Vanity mirrors.................................3-24
Mirrors..........................................3-24
Automatic anti-glare rearview mirror.............3-24
Outside mirrors...............................3-25
Automatic drive positioner (if so equipped)..........3-28
Memory storage function.......................3-28
Entry/exit function.............................3-30
System operation..............................3-30
ZREVIEW COPYÐ2008 Maxima(max)
Owners ManualÐUSA_English(nna)
06/08/07Ðdebbie
X
Page 138 of 328

WARNING
Do not adjust the steering wheel while
driving. You could lose control of your
vehicle and cause an accident.
CAUTION
Do not adjust the steering wheel any
closer to you than is necessary for proper
steering operation and comfort. The driv-
er’s air bag inflates with great force. If you
are unrestrained, leaning forward, sitting
sideways or out of position in any way, you
are at greater risk of injury or death in a
crash. You may also receive serious or
fatal injuries from the air bag if you are up
against it when it inflates. Always sit back
against the seatback and as far away as
practical from the steering wheel. Always
use the seat belts.
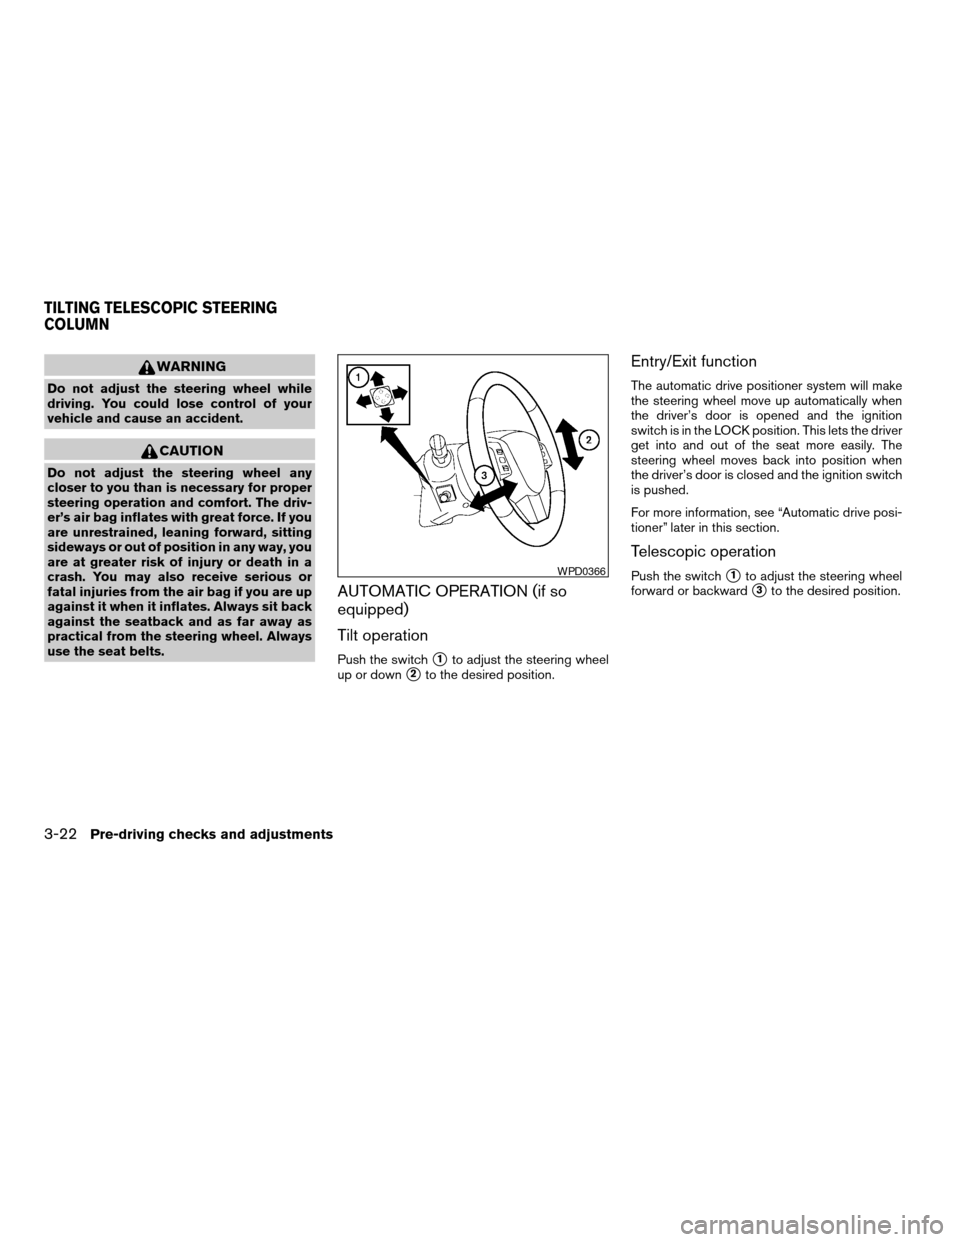
AUTOMATIC OPERATION (if so
equipped)
Tilt operation
Push the switchs1to adjust the steering wheel
up or down
s2to the desired position.
Entry/Exit function
The automatic drive positioner system will make
the steering wheel move up automatically when
the driver’s door is opened and the ignition
switch is in the LOCK position. This lets the driver
get into and out of the seat more easily. The
steering wheel moves back into position when
the driver’s door is closed and the ignition switch
is pushed.
For more information, see “Automatic drive posi-
tioner” later in this section.
Telescopic operation
Push the switchs1to adjust the steering wheel
forward or backward
s3to the desired position.
WPD0366
TILTING TELESCOPIC STEERING
COLUMN
3-22Pre-driving checks and adjustments
ZREVIEW COPYÐ2008 Maxima(max)
Owners ManualÐUSA_English(nna)
06/08/07Ðdebbie
X
Page 139 of 328

MANUAL OPERATION
Tilt operation
Pull the lock levers1forward and adjust the
steering wheel up or down
s2to the desired
position.
Push the lock lever back to lock the steering
wheel in place.
Telescopic operation
Push the lock levers3down and adjust the
steering wheel forward or backward
s4to the
desired position.
Pull the lock lever up firmly to lock the steering
wheel in place.
WPD0367
WPD0297
SUN VISORS
Pre-driving checks and adjustments3-23
ZREVIEW COPYÐ2008 Maxima(max)
Owners ManualÐUSA_English(nna)
06/08/07Ðdebbie
X
Page 144 of 328

The automatic drive positioner system has two
features:
cMemory storage function
cEntry/exit function
MEMORY STORAGE FUNCTION
Two positions for the driver’s seat, steering col-
umn, and outside mirrors can be stored in the
automatic drive positioner memory. Follow these
procedures to use the memory system.
1. Set the Continuously Variable Transmission
(CVT) selector lever to the P (Park) position.
2. Turn the ignition ON.3. Adjust the driver’s seat, steering column,
and outside mirrors to the desired positions
by manually operating each adjusting
switch. For additional information, see
“Seats” in the “Safety—Seats, seat belts and
supplemental restraint system” section and
“Pedal position adjustment” and “Outside
mirrors” earlier in this section.
During this step, do not turn the ignition to
any position other than ON.
4. Push the SET switch and, within 5 seconds,
push the memory switch (1 or 2) fully for at
least 1 second.
The indicator light for the pushed memory
switch will come on and stay on for approxi-
mately 5 seconds after pushing the switch.
After the indicator light goes off, the se-
lected positions are stored in the selected
memory (1 or 2) .
If a new memory is stored in the same memory
switch, the previous memory will be deleted.
Linking a keyfob to a stored memory
position
Each keyfob can be linked to a stored memory
position (memory switch 1 or 2) with the follow-
ing procedure.
LPD0197
AUTOMATIC DRIVE POSITIONER (if
so equipped)
3-28Pre-driving checks and adjustments
ZREVIEW COPYÐ2008 Maxima(max)
Owners ManualÐUSA_English(nna)
06/08/07Ðdebbie
X