2008 NISSAN FRONTIER child lock
[x] Cancel search: child lockPage 58 of 352

3. Route the seat belt tongue through the child
restraint and insert it into the buckle until you
hear and feel the latch engage.
Be sure to follow the child restraint manu-
facturer’s instructions for belt routing.4. Pull on the shoulder belt until all of the belt is
fully extended. At this time, the seat belt
retractor is in the Automatic Locking Retrac-
tor (ALR) mode (child restraint mode) . It
reverts back to the Emergency Locking Re-
tractor (ELR) mode when the seat belt is fully
retracted.5. Allow the seat belt to retract. Pull up on the
shoulder belt to remove any slack in the belt.
Front Facing — step 3
LRS0541
Front Facing — step 4
LRS0542
Front Facing — step 5
LRS0574
1-40Safety—Seats, seat belts and supplemental restraint system
ZREVIEW COPYÐ2008 08+ Truck/Frontier(fro)
Owners ManualÐUSA_English(nna)
06/30/07Ðdebbie
X
Page 59 of 352

6. Remove any additional slack from the seat
belt; press downward and rearward firmly in
the center of the child restraint with your
knee to compress the vehicle seat cushion
and seatback while pulling up on the seat
belt.7. If the child restraint is equipped with a top
tether strap, route the top tether strap and
secure the tether strap to the tether anchor
point. See “Top tether strap child restraint” in
this section. Do not install child restraints
that require the use of a top tether strap to
seating positions that do not have a top
tether anchor.8. Before placing the child in the child restraint,
hold the child restraint near the seat belt
path and use force to push the child restraint
from side to side, and tug it forward to make
sure that it is securely held in place. It should
not move more than 1 inch (25 mm) . If it
does move more than 1 inch (25 mm) , pull
again on the shoulder belt to further tighten
the child restraint. If you are unable to prop-
erly secure the restraint, move the restraint
to another seating position and try again, or
try a different child restraint. Not all child
restraints fit in all types of vehicles.
9. Check that the retractor is in the ALR mode
by trying to pull more seat belt out of the
retractor. If you cannot pull any more belt
webbing out of the retractor, the retractor is
in the ALR mode.
10. Check to make sure that the child restraint is
properly secured prior to each use. If the belt
is not locked, repeat steps 3 through 9.
After the child restraint is removed and the seat
belt is fully retracted, the ALR mode (child re-
straint mode) is canceled.
Front facing – step 6
WRS0681
Front Facing — step 7
WRS0698
Safety—Seats, seat belts and supplemental restraint system1-41
ZREVIEW COPYÐ2008 08+ Truck/Frontier(fro)
Owners ManualÐUSA_English(nna)
06/30/07Ðdebbie
X
Page 62 of 352

4. Pull on the shoulder belt until all of the belt is
fully extended. At this time, the seat belt
retractor is in the Automatic Locking Retrac-
tor (ALR) mode (child restraint mode) . It
reverts to the Emergency Locking Retractor
(ELR) mode when the seat belt is fully re-
tracted.5. Allow the seat belt to retract. Pull up on the
shoulder belt to remove any slack in the belt.
Rear Facing — step 4
LRS0546
Rear Facing — step 5
LRS0547
Rear facing – step 5
WRS0683
1-44Safety—Seats, seat belts and supplemental restraint system
ZREVIEW COPYÐ2008 08+ Truck/Frontier(fro)
Owners ManualÐUSA_English(nna)
06/30/07Ðdebbie
X
Page 63 of 352

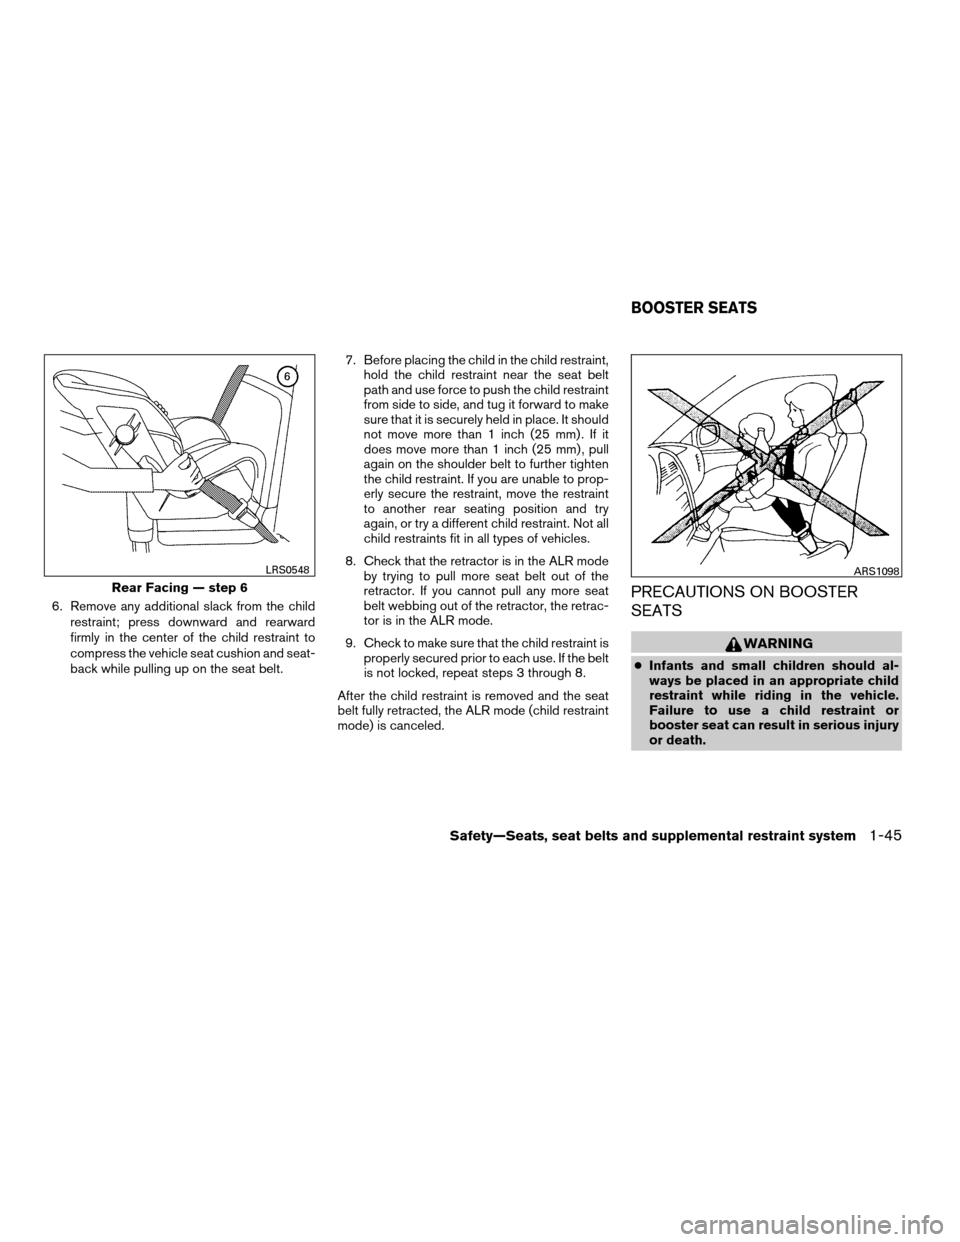
6. Remove any additional slack from the child
restraint; press downward and rearward
firmly in the center of the child restraint to
compress the vehicle seat cushion and seat-
back while pulling up on the seat belt.7. Before placing the child in the child restraint,
hold the child restraint near the seat belt
path and use force to push the child restraint
from side to side, and tug it forward to make
sure that it is securely held in place. It should
not move more than 1 inch (25 mm) . If it
does move more than 1 inch (25 mm) , pull
again on the shoulder belt to further tighten
the child restraint. If you are unable to prop-
erly secure the restraint, move the restraint
to another rear seating position and try
again, or try a different child restraint. Not all
child restraints fit in all types of vehicles.
8. Check that the retractor is in the ALR mode
by trying to pull more seat belt out of the
retractor. If you cannot pull any more seat
belt webbing out of the retractor, the retrac-
tor is in the ALR mode.
9. Check to make sure that the child restraint is
properly secured prior to each use. If the belt
is not locked, repeat steps 3 through 8.
After the child restraint is removed and the seat
belt fully retracted, the ALR mode (child restraint
mode) is canceled.PRECAUTIONS ON BOOSTER
SEATS
WARNING
cInfants and small children should al-
ways be placed in an appropriate child
restraint while riding in the vehicle.
Failure to use a child restraint or
booster seat can result in serious injury
or death.
Rear Facing — step 6
LRS0548ARS1098
BOOSTER SEATS
Safety—Seats, seat belts and supplemental restraint system1-45
ZREVIEW COPYÐ2008 08+ Truck/Frontier(fro)
Owners ManualÐUSA_English(nna)
06/30/07Ðdebbie
X
Page 78 of 352

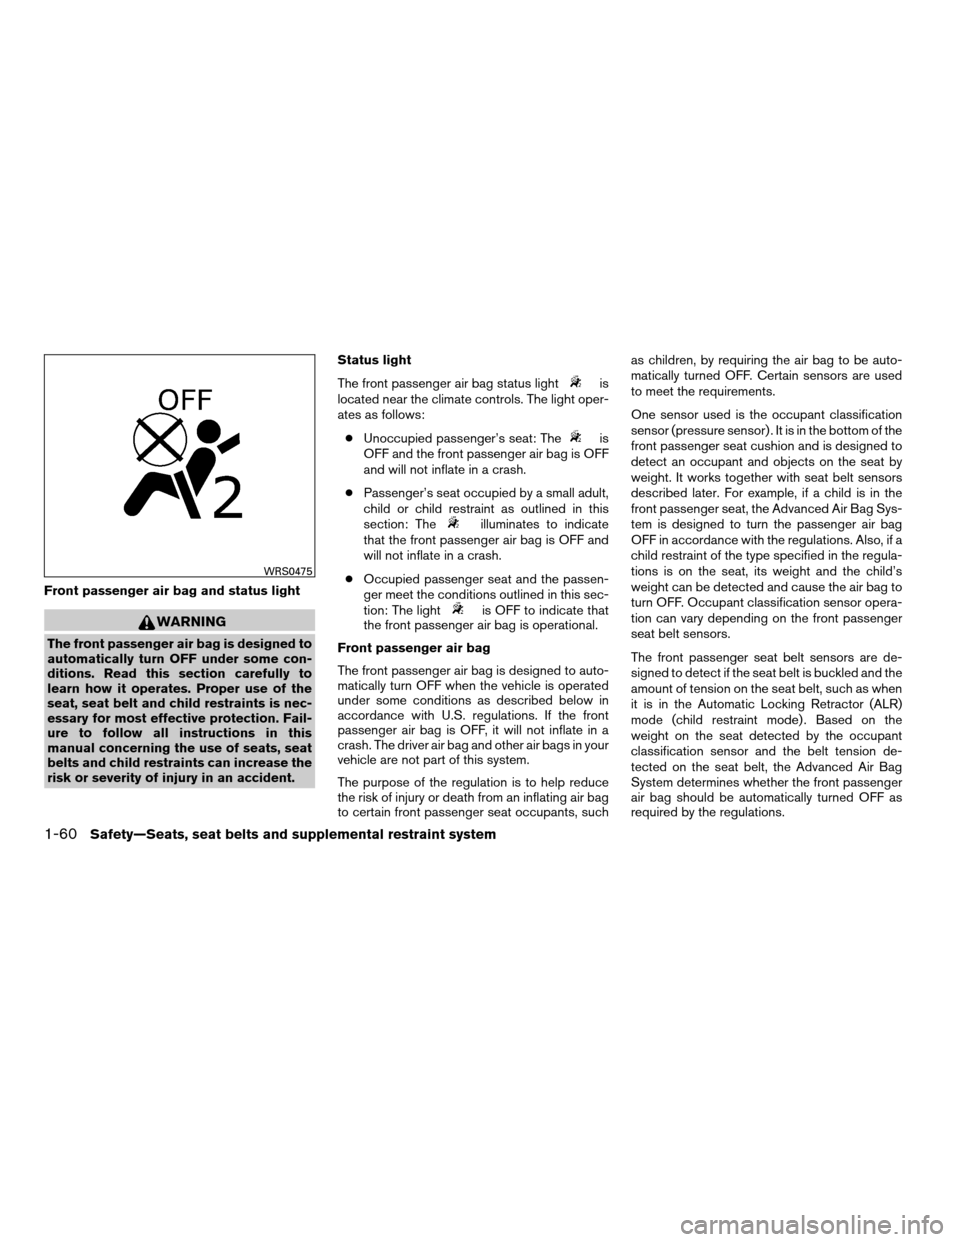
Front passenger air bag and status light
WARNING
The front passenger air bag is designed to
automatically turn OFF under some con-
ditions. Read this section carefully to
learn how it operates. Proper use of the
seat, seat belt and child restraints is nec-
essary for most effective protection. Fail-
ure to follow all instructions in this
manual concerning the use of seats, seat
belts and child restraints can increase the
risk or severity of injury in an accident.Status light
The front passenger air bag status light
is
located near the climate controls. The light oper-
ates as follows:
cUnoccupied passenger’s seat: The
is
OFF and the front passenger air bag is OFF
and will not inflate in a crash.
cPassenger’s seat occupied by a small adult,
child or child restraint as outlined in this
section: The
illuminates to indicate
that the front passenger air bag is OFF and
will not inflate in a crash.
cOccupied passenger seat and the passen-
ger meet the conditions outlined in this sec-
tion: The light
is OFF to indicate that
the front passenger air bag is operational.
Front passenger air bag
The front passenger air bag is designed to auto-
matically turn OFF when the vehicle is operated
under some conditions as described below in
accordance with U.S. regulations. If the front
passenger air bag is OFF, it will not inflate in a
crash. The driver air bag and other air bags in your
vehicle are not part of this system.
The purpose of the regulation is to help reduce
the risk of injury or death from an inflating air bag
to certain front passenger seat occupants, suchas children, by requiring the air bag to be auto-
matically turned OFF. Certain sensors are used
to meet the requirements.
One sensor used is the occupant classification
sensor (pressure sensor) . It is in the bottom of the
front passenger seat cushion and is designed to
detect an occupant and objects on the seat by
weight. It works together with seat belt sensors
described later. For example, if a child is in the
front passenger seat, the Advanced Air Bag Sys-
tem is designed to turn the passenger air bag
OFF in accordance with the regulations. Also, if a
child restraint of the type specified in the regula-
tions is on the seat, its weight and the child’s
weight can be detected and cause the air bag to
turn OFF. Occupant classification sensor opera-
tion can vary depending on the front passenger
seat belt sensors.
The front passenger seat belt sensors are de-
signed to detect if the seat belt is buckled and the
amount of tension on the seat belt, such as when
it is in the Automatic Locking Retractor (ALR)
mode (child restraint mode) . Based on the
weight on the seat detected by the occupant
classification sensor and the belt tension de-
tected on the seat belt, the Advanced Air Bag
System determines whether the front passenger
air bag should be automatically turned OFF as
required by the regulations.
WRS0475
1-60Safety—Seats, seat belts and supplemental restraint system
ZREVIEW COPYÐ2008 08+ Truck/Frontier(fro)
Owners ManualÐUSA_English(nna)
06/30/07Ðdebbie
X
Page 129 of 352

Always evenly distribute the cargo on the tubular
roof rack.The maximum total load is 125 lb
(56 kg) evenly distributed.Be careful that your
vehicle does not exceed the Gross Vehicle
Weight Rating (GVWR) or the Gross Axle
Weight Ratings (GAWR front and rear) . The
GVWR and GAWR are located on the F.M.V.S.S.
label (located on the driver’s side door jamb
pillar) . For more information regarding GVWR
and GAWR, refer to “Vehicle loading information”
in the “Technical and consumer information” sec-
tion later in this manual.
The front crossbar can be adjusted or removed.
Use the Torxdriver provided in the tool kit to
loosen both crossbar adjusting screws.
To adjust:
1. Loosen the adjusting screws with the
Torxdriver
s1by turning counterclockwise
sA.
2. When the clamp is loosened, move the
crossbar so the cargo can be positioned on
the crossbar
sB.
3. Tighten the crossbar adjusting screws with
the Torxdriver by turning clockwise.
4. Secure the cargo with rope.
5. Always check the tightness of the crossbar
adjusting screws.To remove:
1. Loosen the adjusting screws with the
Torxdriver
s1by turning counterclockwise
sA.
2. Rotate the clamps
sC.
3. Remove the crossbar.
4. Reverse to install.
5. Always check the tightness of the crossbar
adjusting screws.
If you hear wind noise coming from the roof rack
while driving, adjust the roof rack crossbar to the
neutral position, rearward ofDon the side rails.
POWER WINDOWS (if so equipped)
WARNING
cMake sure that all passengers have
their hands, etc. inside the vehicle while
it is in motion and before closing the
windows. Use the window lock switch
to prevent unexpected use of the power
windows.
cDo not leave children unattended inside
the vehicle. They could unknowingly ac-
tivate switches or controls and become
trapped in a window. Unattended chil-
dren could become involved in serious
accidents.
The power windows operate when the ignition
switch is in the ON position, or for about 45
seconds after the ignition switch is turned to the
OFF position. If the driver’s or passenger’s door
is opened during this period of about 45 sec-
onds, power to the windows is canceled.
WINDOWS
Instruments and controls2-43
ZREVIEW COPYÐ2008 08+ Truck/Frontier(fro)
Owners ManualÐUSA_English(nna)
06/30/07Ðdebbie
X
Page 141 of 352

3 Pre-driving checks and adjustments
Keys .............................................3-2
NISSAN vehicle immobilizer system keys
(if so equipped)................................3-2
Doors............................................3-3
Locking with key................................3-3
Locking with inside lock knob....................3-4
Locking with power door lock switch
(if so equipped)................................3-4
Rear doors (King Cab models)...................3-5
Child safety rear door lock
(Crew Cab models only)........................3-6
Remote keyless entry system (if so equipped).........3-6
How to use remote keyless entry system..........3-7
Hood............................................3-9Fuel-filler door...................................3-10
Fuel-filler cap.................................3-10
Steering wheel...................................3-11
Tilt operation (if so equipped)...................3-11
Sun visors.......................................3-11
Vanity mirrors.................................3-12
Mirrors..........................................3-12
Rearview mirror (if so equipped).................3-12
Automatic anti-glare rearview mirror
(if so equipped)...............................3-13
Outside mirrors...............................3-13
Truck box........................................3-15
Tailgate.......................................3-15
Tie down hooks (if so equipped)................3-16
ZREVIEW COPYÐ2008 08+ Truck/Frontier(fro)
Owners ManualÐUSA_English(nna)
06/30/07Ðdebbie
X
Page 143 of 352

WARNING
cAlways have the doors locked while
driving. Along with the use of seat belts,
this provides greater safety in the event
of an accident by helping to prevent
persons from being thrown from the
vehicle. This also helps keep children
and others from unintentionally open-
ing the doors, and will help keep out
intruders.
cBefore opening any door, always look
for and avoid oncoming traffic.
cDo not leave children unattended inside
the vehicle. They could unknowingly ac-
tivate switches or controls. Unattended
children could become involved in seri-
ous accidents.
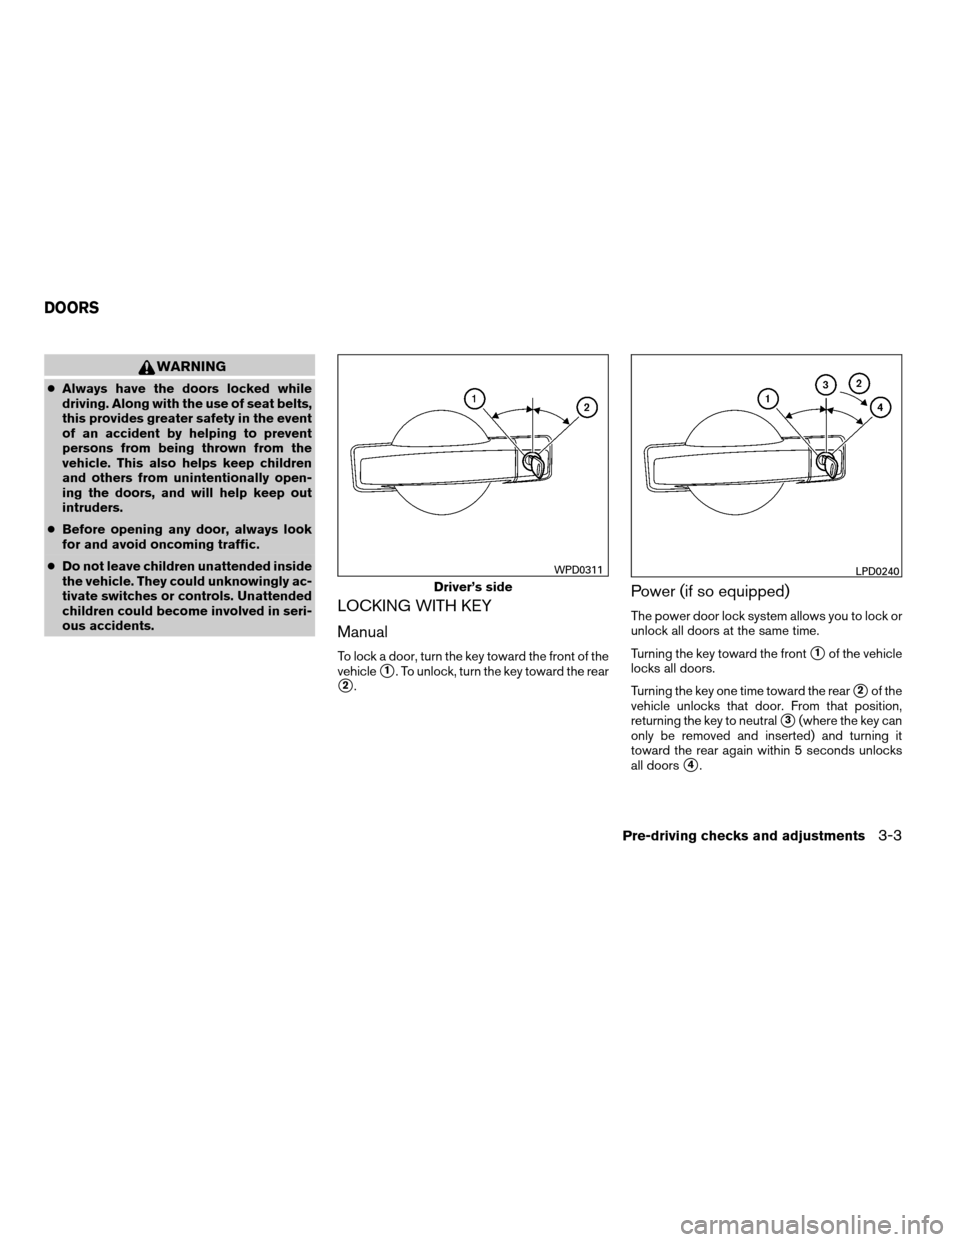
LOCKING WITH KEY
Manual
To lock a door, turn the key toward the front of the
vehicle
s1. To unlock, turn the key toward the rear
s2.
Power (if so equipped)
The power door lock system allows you to lock or
unlock all doors at the same time.
Turning the key toward the front
s1of the vehicle
locks all doors.
Turning the key one time toward the rear
s2of the
vehicle unlocks that door. From that position,
returning the key to neutral
s3(where the key can
only be removed and inserted) and turning it
toward the rear again within 5 seconds unlocks
all doors
s4.
Driver’s side
WPD0311LPD0240
DOORS
Pre-driving checks and adjustments3-3
ZREVIEW COPYÐ2008 08+ Truck/Frontier(fro)
Owners ManualÐUSA_English(nna)
06/30/07Ðdebbie
X