2008 NISSAN ARMADA check transmission fluid
[x] Cancel search: check transmission fluidPage 14 of 456

1. Battery (P. 8-13)
2. Fuse/fusible link box (P. 8-22)
3. Transmission dipstick (P. 8-11)
4. Engine oil filler cap (P. 8-8)
5. Brake fluid reservoir (P. 8-12)
6. Windshield washer fluid reservoir
(P. 8-12)
7. Air cleaner (P. 8-17)
8. Drive belt location (P.8-15)
9. Radiator cap (P. 8-7)
10. Power steering fluid reservoir (P. 8-11)
11. Engine oil dipstick (P. 8-8)
12. Engine coolant reservoir (P. 8-7)
See the page number indicated in paren-
theses for operating details.
WDI0630
ENGINE COMPARTMENT CHECK
LOCATIONS
0-8Illustrated table of contents
ZREVIEW COPYÐ2008 Armada(wzw)
Owners ManualÐUSA_English(nna)
03/05/07Ðarosenma
X
Page 82 of 456

2 Instruments and controls
Instrument panel...................................2-2
Meters and gauges................................2-4
Speedometer and odometer.....................2-5
Tachometer....................................2-6
Engine coolant temperature gauge...............2-6
Fuel gauge....................................2-7
Engine oil pressure gauge.......................2-7
Voltmeter......................................2-8
Automatic transmission fluid temperature
gauge (if so equipped)..........................2-8
Compass and outside temperature display...........2-9
Outside temperature display.....................2-9
Compass display..............................2-10
Warning/indicator lights and audible reminders......2-13
Checking bulbs...............................2-13
Warning lights................................2-13
Indicator lights................................2-18
Audible reminders.............................2-20
Vehicle Information Display........................2-20
How to use the Vehicle Information Display.......2-21
Security systems.................................2-27
Vehicle security system.........................2-27
NISSAN vehicle immobilizer system.............2-29Windshield wiper and washer switch...............2-30
Switch operation..............................2-30
Rear window wiper and washer switch..............2-31
Rear window and outside mirror defroster switch.....2-31
Headlight and turn signal switch....................2-32
Headlight control switch........................2-32
Daytime running light system (Canada only)......2-34
Instrument brightness control...................2-35
Turn signal switch.............................2-35
Fog light switch (if so equipped)................2-35
Hazard warning flasher switch.....................2-36
Horn............................................2-36
Heated seat (if so equipped).......................2-37
Heated steering wheel (if so equipped).............2-37
Vehicle dynamic control (VDC) off switch............2-38
Rear sonar system off switch......................2-38
Front sonar system off switch (If so equipped).......2-39
Tow mode switch.................................2-40
Power outlet.....................................2-40
Cigarette lighter..................................2-41
Storage.........................................2-42
Instrument panel storage trays..................2-42
Console box..................................2-42
ZREVIEW COPYÐ2008 Armada(wzw)
Owners ManualÐUSA_English(nna)
03/05/07Ðarosenma
X
Page 90 of 456

cIf the gauge needle does not move with
the proper amount of engine oil, have
the vehicle checked by a NISSAN
dealer. Continued vehicle operation in
such a condition could cause serious
damage to the engine.
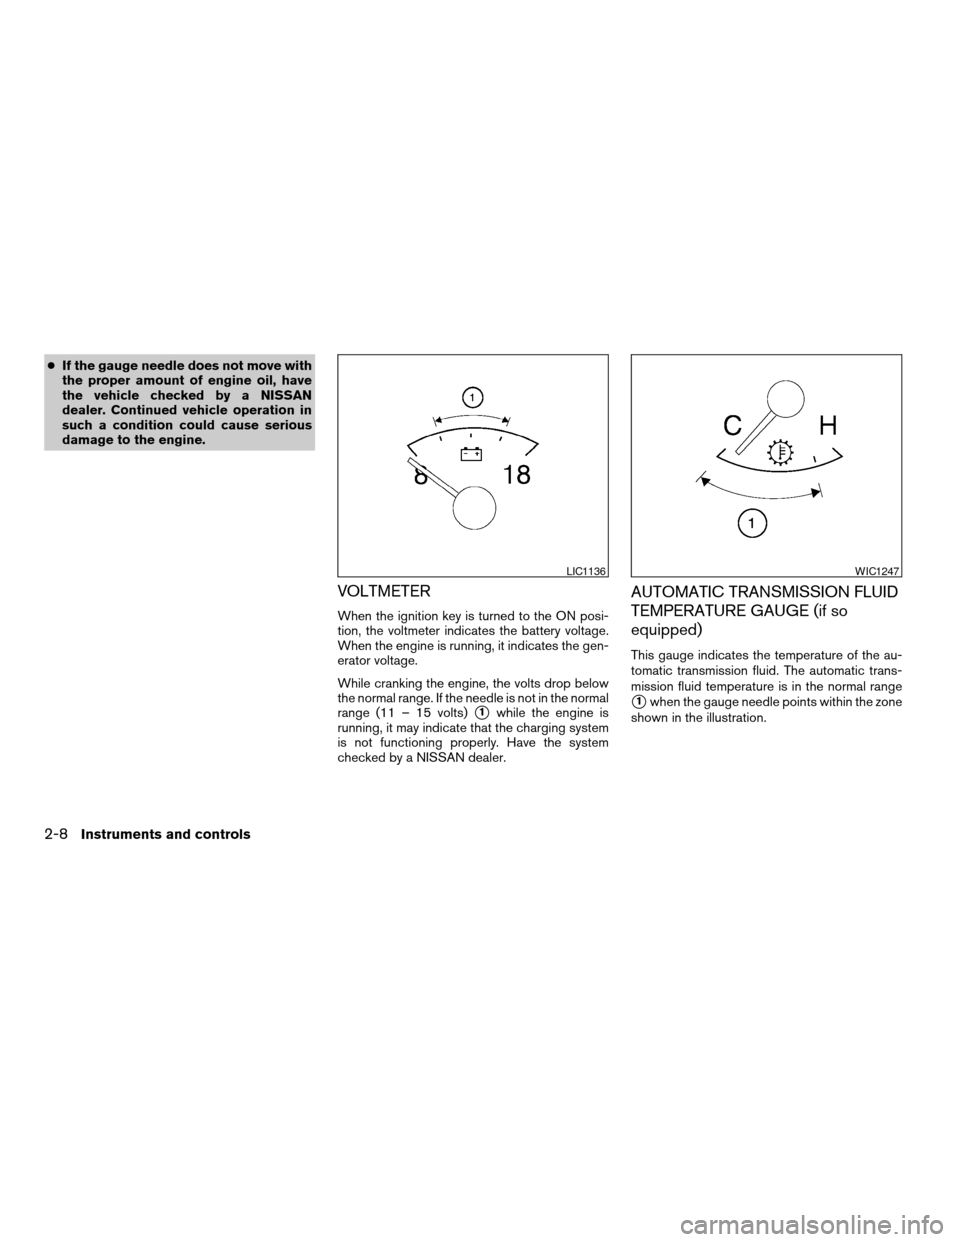
VOLTMETER
When the ignition key is turned to the ON posi-
tion, the voltmeter indicates the battery voltage.
When the engine is running, it indicates the gen-
erator voltage.
While cranking the engine, the volts drop below
the normal range. If the needle is not in the normal
range (11 – 15 volts)
s1while the engine is
running, it may indicate that the charging system
is not functioning properly. Have the system
checked by a NISSAN dealer.
AUTOMATIC TRANSMISSION FLUID
TEMPERATURE GAUGE (if so
equipped)
This gauge indicates the temperature of the au-
tomatic transmission fluid. The automatic trans-
mission fluid temperature is in the normal range
s1when the gauge needle points within the zone
shown in the illustration.
LIC1136WIC1247
2-8Instruments and controls
ZREVIEW COPYÐ2008 Armada(wzw)
Owners ManualÐUSA_English(nna)
03/05/07Ðarosenma
X
Page 91 of 456

CAUTION
cThis gauge is not designed to indicate
low automatic transmission fluid level.
Use the dipstick to check the fluid level.
(See “5-speed automatic transmission
fluid” in the “Maintenance and do-it-
yourself” section.)
cIf the gauge indicates automatic trans-
mission fluid temperature over the nor-
mal range, stop the vehicle as soon as
safely possible. Have the vehicle
checked by a NISSAN dealer. Contin-
ued operation of the vehicle may seri-
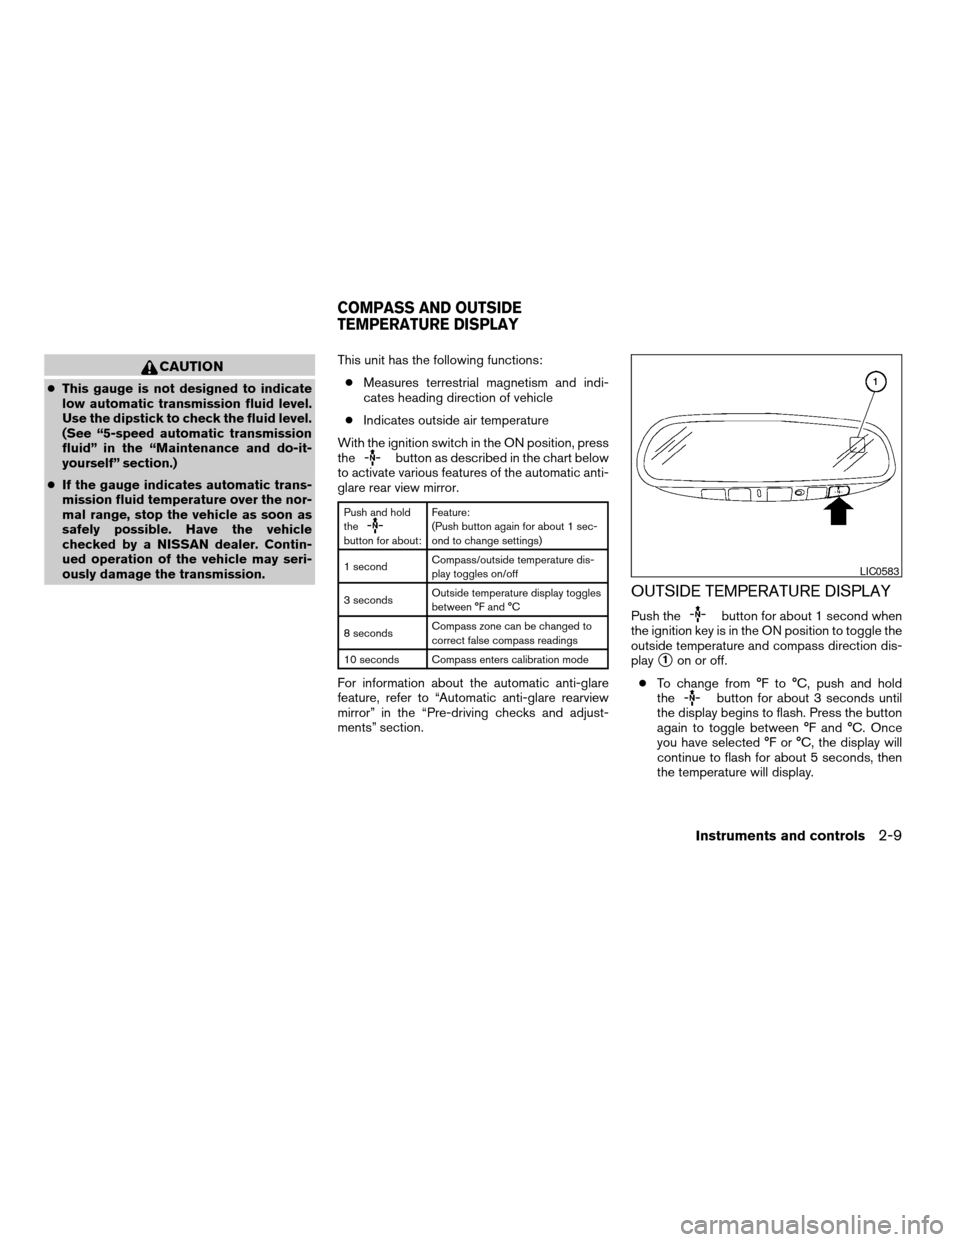
ously damage the transmission.This unit has the following functions:
cMeasures terrestrial magnetism and indi-
cates heading direction of vehicle
cIndicates outside air temperature
With the ignition switch in the ON position, press
the
button as described in the chart below
to activate various features of the automatic anti-
glare rear view mirror.
Push and hold
the
button for about:Feature:
(Push button again for about 1 sec-
ond to change settings)
1 secondCompass/outside temperature dis-
play toggles on/off
3 secondsOutside temperature display toggles
between °F and °C
8 secondsCompass zone can be changed to
correct false compass readings
10 seconds Compass enters calibration mode
For information about the automatic anti-glare
feature, refer to “Automatic anti-glare rearview
mirror” in the “Pre-driving checks and adjust-
ments” section.
OUTSIDE TEMPERATURE DISPLAY
Push thebutton for about 1 second when
the ignition key is in the ON position to toggle the
outside temperature and compass direction dis-
play
s1on or off.
cTo change from °F to °C, push and hold
the
button for about 3 seconds until
the display begins to flash. Press the button
again to toggle between °F and °C. Once
you have selected °F or °C, the display will
continue to flash for about 5 seconds, then
the temperature will display.
LIC0583
COMPASS AND OUTSIDE
TEMPERATURE DISPLAY
Instruments and controls2-9
ZREVIEW COPYÐ2008 Armada(wzw)
Owners ManualÐUSA_English(nna)
03/05/07Ðarosenma
X
Page 96 of 456

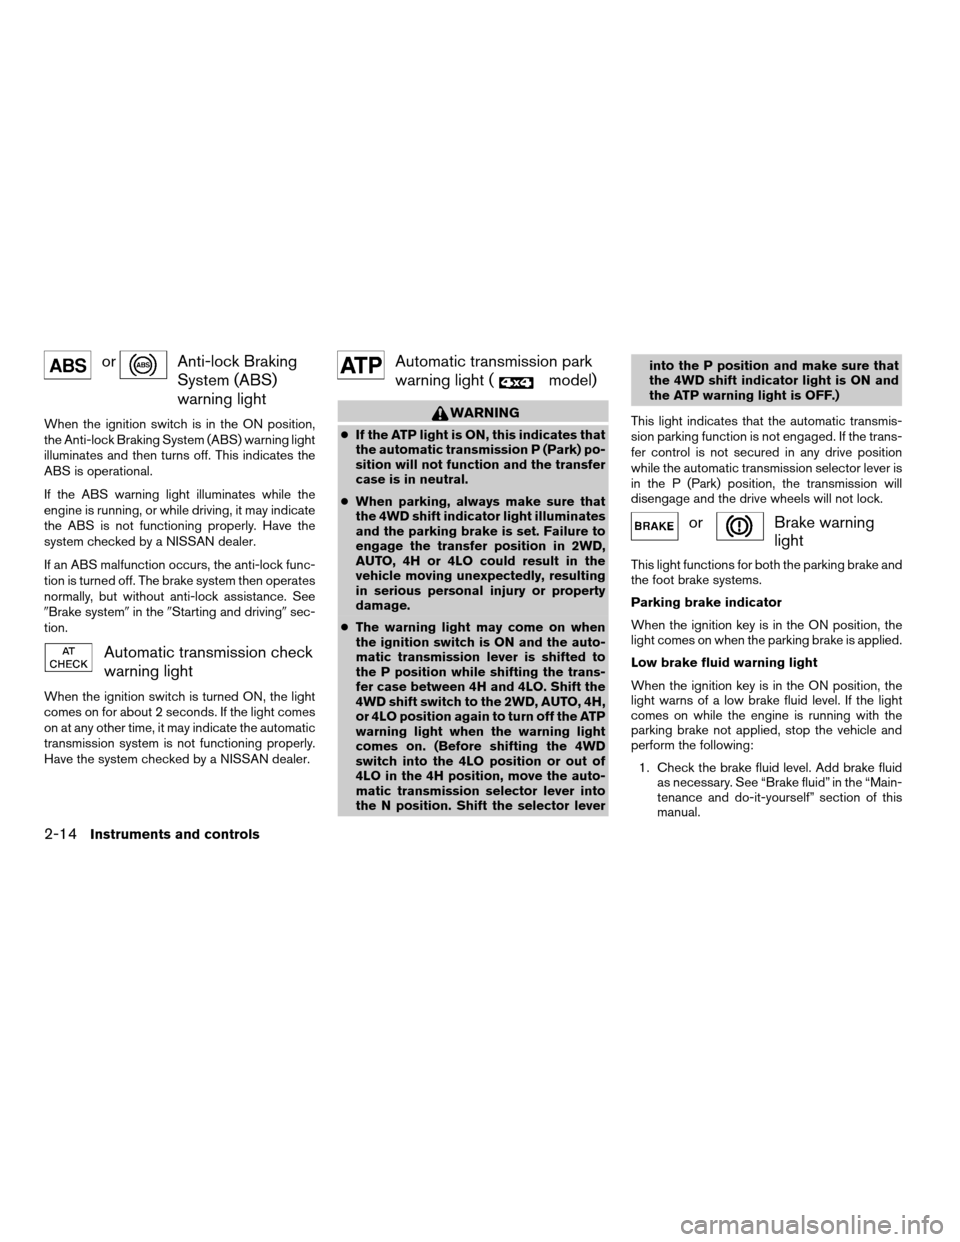
orAnti-lock Braking
System (ABS)
warning light
When the ignition switch is in the ON position,
the Anti-lock Braking System (ABS) warning light
illuminates and then turns off. This indicates the
ABS is operational.
If the ABS warning light illuminates while the
engine is running, or while driving, it may indicate
the ABS is not functioning properly. Have the
system checked by a NISSAN dealer.
If an ABS malfunction occurs, the anti-lock func-
tion is turned off. The brake system then operates
normally, but without anti-lock assistance. See
9Brake system9in the9Starting and driving9sec-
tion.
Automatic transmission check
warning light
When the ignition switch is turned ON, the light
comes on for about 2 seconds. If the light comes
on at any other time, it may indicate the automatic
transmission system is not functioning properly.
Have the system checked by a NISSAN dealer.
Automatic transmission park
warning light (
model)
WARNING
cIf the ATP light is ON, this indicates that
the automatic transmission P (Park) po-
sition will not function and the transfer
case is in neutral.
cWhen parking, always make sure that
the 4WD shift indicator light illuminates
and the parking brake is set. Failure to
engage the transfer position in 2WD,
AUTO, 4H or 4LO could result in the
vehicle moving unexpectedly, resulting
in serious personal injury or property
damage.
cThe warning light may come on when
the ignition switch is ON and the auto-
matic transmission lever is shifted to
the P position while shifting the trans-
fer case between 4H and 4LO. Shift the
4WD shift switch to the 2WD, AUTO, 4H,
or 4LO position again to turn off the ATP
warning light when the warning light
comes on. (Before shifting the 4WD
switch into the 4LO position or out of
4LO in the 4H position, move the auto-
matic transmission selector lever into
the N position. Shift the selector leverinto the P position and make sure that
the 4WD shift indicator light is ON and
the ATP warning light is OFF.)
This light indicates that the automatic transmis-
sion parking function is not engaged. If the trans-
fer control is not secured in any drive position
while the automatic transmission selector lever is
in the P (Park) position, the transmission will
disengage and the drive wheels will not lock.
orBrake warning
light
This light functions for both the parking brake and
the foot brake systems.
Parking brake indicator
When the ignition key is in the ON position, the
light comes on when the parking brake is applied.
Low brake fluid warning light
When the ignition key is in the ON position, the
light warns of a low brake fluid level. If the light
comes on while the engine is running with the
parking brake not applied, stop the vehicle and
perform the following:
1. Check the brake fluid level. Add brake fluid
as necessary. See “Brake fluid” in the “Main-
tenance and do-it-yourself” section of this
manual.
2-14Instruments and controls
ZREVIEW COPYÐ2008 Armada(wzw)
Owners ManualÐUSA_English(nna)
03/05/07Ðarosenma
X
Page 369 of 456

8 Maintenance and do-it-yourself
Maintenance requirements..........................8-2
General maintenance..............................8-2
Explanation of general maintenance items.........8-2
Maintenance precautions...........................8-5
Engine compartment check locations................8-6
Engine cooling system.............................8-7
Checking engine coolant level...................8-7
Changing engine coolant........................8-8
Engine oil.........................................8-8
Checking engine oil level........................8-8
Changing engine oil............................8-9
Changing engine oil filter.......................8-10
5-speed automatic transmission fluid...............8-11
Power steering fluid...............................8-11
Brake fluid.......................................8-12
Brake fluid....................................8-12
Window washer fluid.............................8-12
Window washer fluid reservoir..................8-12
Battery..........................................8-13
Jump starting.................................8-14
Variable Voltage Control System...................8-15
Drive belt........................................8-15
Spark plugs......................................8-16Replacing spark plugs.........................8-16
Air cleaner.......................................8-17
In-cabin microfilter.............................8-17
Windshield wiper blades..........................8-19
Cleaning.....................................8-19
Replacing....................................8-19
Brakes..........................................8-22
Fuses...........................................8-22
Engine compartment...........................8-23
Passenger compartment.......................8-24
Battery replacement..............................8-26
Keyfob.......................................8-26
Intelligent Key battery..........................8-27
Lights...........................................8-28
Headlights....................................8-28
Fog lights (if so equipped)......................8-29
Exterior and interior lights.......................8-30
Wheels and tires.................................8-34
Tire pressure..................................8-34
Tire labeling...................................8-38
Types of tires..................................8-40
Tire chains....................................8-40
Changing wheels and tires.....................8-41
ZREVIEW COPYÐ2008 Armada(wzw)
Owners ManualÐUSA_English(nna)
03/05/07Ðarosenma
X
Page 374 of 456

1. Battery
2. Fuse/fusible link box
3. Transmission dipstick
4. Engine oil filler cap
5. Brake fluid reservoir
6. Windshield washer fluid reservoir
7. Air cleaner
8. Drive belt location
9. Radiator cap
10. Power steering fluid reservoir
11. Engine oil dipstick
12. Engine coolant reservoir
NOTE:
Engine cover removed for clarity.
WDI0630
ENGINE COMPARTMENT CHECK
LOCATIONS
8-6Maintenance and do-it-yourself
ZREVIEW COPYÐ2008 Armada(wzw)
Owners ManualÐUSA_English(nna)
03/05/07Ðarosenma
X
Page 379 of 456

5. Wipe the engine oil filter sealing surface with
a clean rag.
Be sure to remove any old gasket material
remaining on the sealing surface of the en-
gine.
6. Coat the gasket on the new filter with clean
engine oil.
7. Screw on the oil filter until a slight resistance
is felt, then tighten an additional 2/3 turn.
8. Start the engine and check for leakage
around the oil filter. Correct as required.
9. Turn the engine off and wait more than 10
minutes. Check the oil level. Add engine oil if
necessary.When checking or replacement is required, we
recommend your NISSAN dealer for servicing.
CAUTION
cUse only Genuine NISSAN Matic J ATF.
Do not mix with other fluids.
cUsing automatic transmission fluid
other than Genuine NISSAN Matic J ATF
will cause deterioration in driveability
and automatic transmission durability,
and may damage the automatic trans-
mission, which is not covered by the
NISSAN new vehicle limited warranty.
The specified automatic transmission fluid is also
described on caution labels located in the engine
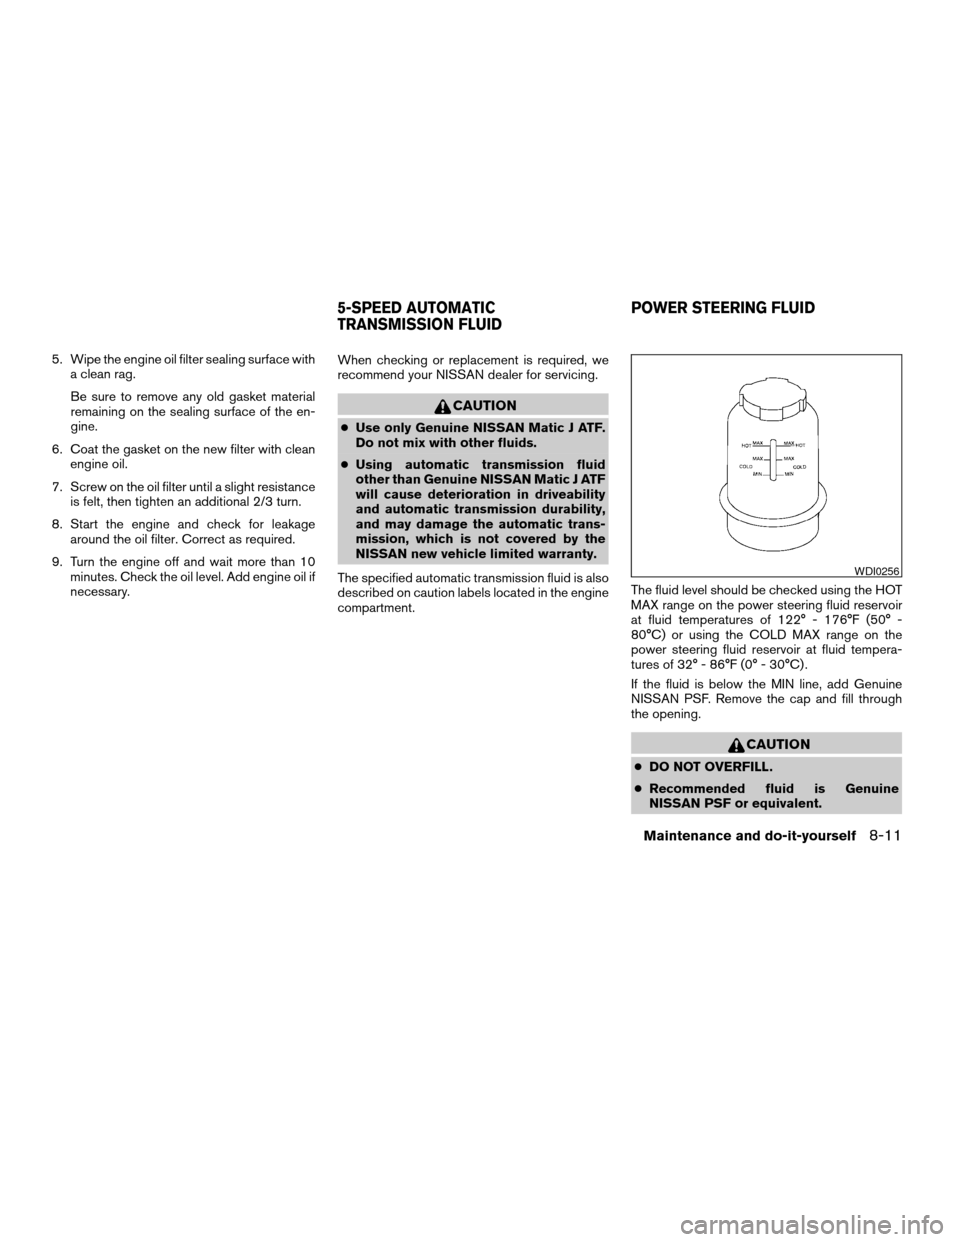
compartment.The fluid level should be checked using the HOT
MAX range on the power steering fluid reservoir
at fluid temperatures of 122° - 176°F (50° -
80°C) or using the COLD MAX range on the
power steering fluid reservoir at fluid tempera-
tures of 32° - 86°F (0° - 30°C) .
If the fluid is below the MIN line, add Genuine
NISSAN PSF. Remove the cap and fill through
the opening.
CAUTION
cDO NOT OVERFILL.
cRecommended fluid is Genuine
NISSAN PSF or equivalent.
WDI0256
5-SPEED AUTOMATIC
TRANSMISSION FLUIDPOWER STEERING FLUID
Maintenance and do-it-yourself8-11
ZREVIEW COPYÐ2008 Armada(wzw)
Owners ManualÐUSA_English(nna)
03/05/07Ðarosenma
X