2008 NISSAN ARMADA engine
[x] Cancel search: enginePage 140 of 456

The interior light has a three-position switch and
operates regardless of ignition switch position.
When the switch is in the ON position
s1, the
interior lights illuminate, regardless of door posi-
tion. The lights will go off after about 30 minutes
unless the ignition key is in the ACC or ON
position.
When the switch is in the DOOR position
s2, the
interior lights and puddle lamps (if so equipped)
will stay on for about 30 seconds when:
cThe doors are unlocked by the keyfob, a key
or the power door lock switch while all doorsare closed and the ignition switch is in the
OFF position.
cThe driver’s door is opened and then closed
while the key is removed from the ignition
switch.
cThe key is removed from the ignition switch
while all doors are closed.
The lights will turn off while the 30 second timer is
activated when:
cThe driver’s door is locked by the keyfob, a
key, or the power door lock switch.
cThe ignition switch is turned ON.
When the switch is in the OFF position
s3, the
interior lights do not illuminate, regardless of door
position. The puddle lamps (if so equipped) come
on when any front or rear passenger door is
opened.
The lights will turn off automatically after 30 min-
utes while doors are open to prevent the battery
from becoming discharged.NOTE:
The footwell lights (if so equipped) and
door step lights illuminate when the driver
and passenger doors are open regardless
of the interior light switch position. These
lights will turn off automatically after about
30 minutes while doors are open to prevent
the battery from becoming discharged.
CAUTION
Do not use for extended periods of time
with the engine stopped. This could result
in a discharged battery.
LIC0585
INTERIOR LIGHT
2-58Instruments and controls
ZREVIEW COPYÐ2008 Armada(wzw)
Owners ManualÐUSA_English(nna)
03/05/07Ðarosenma
X
Page 141 of 456

CONSOLE LIGHT
The console lights1will turn on whenever the
parking lights or headlights are illuminated.
The console light brightness can be adjusted
with the illumination brightness control.The personal lights on the overhead console can
be swiveled 360 degrees. To turn on the light,
press the button. Press the button again to turn
off the light.To turn the map lights on, press the switches. To
turn them off, press the switches again.
CAUTION
Do not use for extended periods of time
with the engine stopped. This could result
in a discharged battery.
LIC0587LIC0588LIC0586
PERSONAL LIGHTS MAP LIGHTS
Instruments and controls2-59
ZREVIEW COPYÐ2008 Armada(wzw)
Owners ManualÐUSA_English(nna)
03/05/07Ðarosenma
X
Page 142 of 456

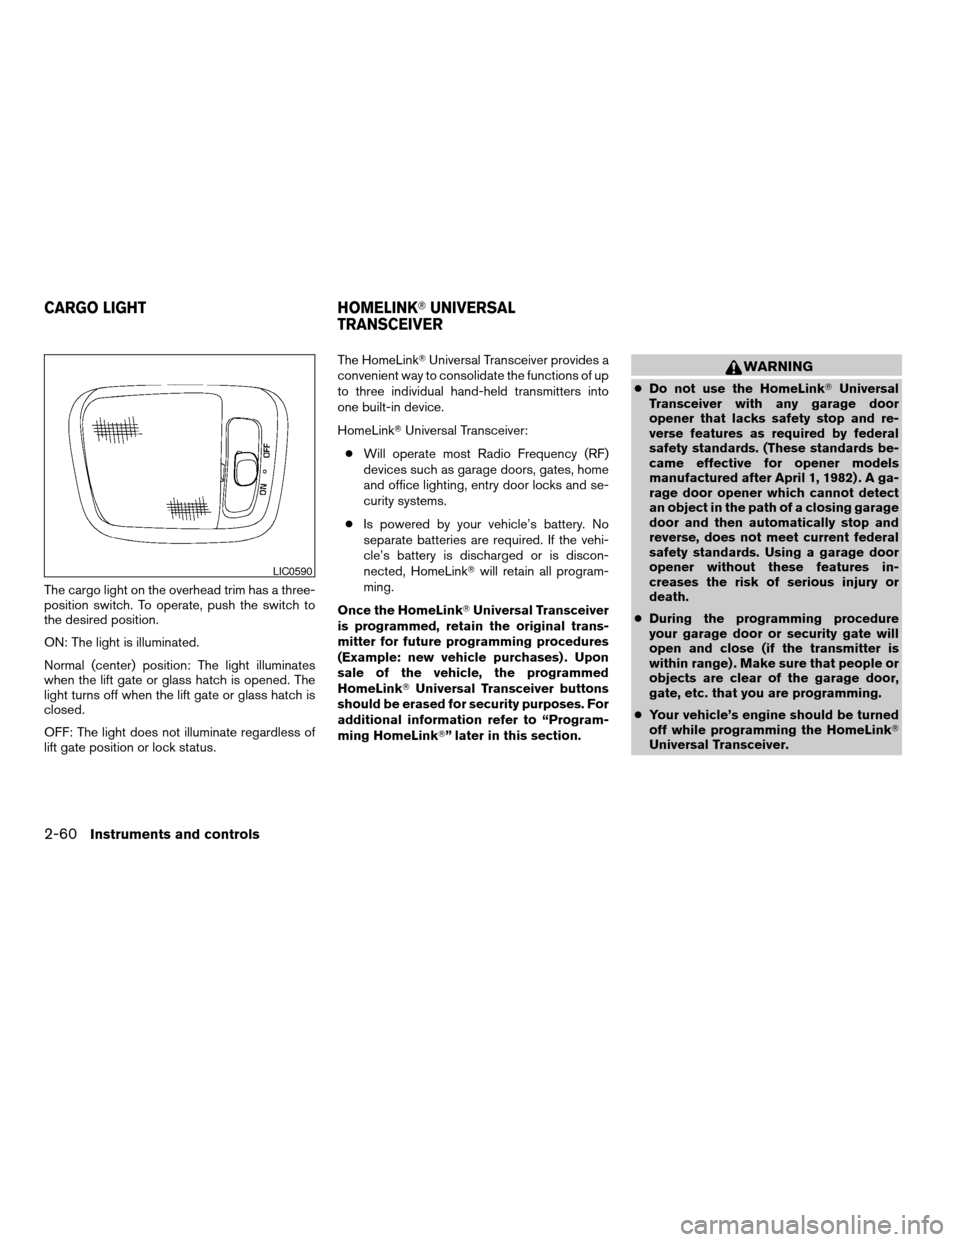
The cargo light on the overhead trim has a three-
position switch. To operate, push the switch to
the desired position.
ON: The light is illuminated.
Normal (center) position: The light illuminates
when the lift gate or glass hatch is opened. The
light turns off when the lift gate or glass hatch is
closed.
OFF: The light does not illuminate regardless of
lift gate position or lock status.The HomeLinkTUniversal Transceiver provides a
convenient way to consolidate the functions of up
to three individual hand-held transmitters into
one built-in device.
HomeLinkTUniversal Transceiver:
cWill operate most Radio Frequency (RF)
devices such as garage doors, gates, home
and office lighting, entry door locks and se-
curity systems.
cIs powered by your vehicle’s battery. No
separate batteries are required. If the vehi-
cle’s battery is discharged or is discon-
nected, HomeLinkTwill retain all program-
ming.
Once the HomeLinkTUniversal Transceiver
is programmed, retain the original trans-
mitter for future programming procedures
(Example: new vehicle purchases) . Upon
sale of the vehicle, the programmed
HomeLinkTUniversal Transceiver buttons
should be erased for security purposes. For
additional information refer to “Program-
ming HomeLinkT” later in this section.
WARNING
cDo not use the HomeLinkTUniversal
Transceiver with any garage door
opener that lacks safety stop and re-
verse features as required by federal
safety standards. (These standards be-
came effective for opener models
manufactured after April 1, 1982) . A ga-
rage door opener which cannot detect
an object in the path of a closing garage
door and then automatically stop and
reverse, does not meet current federal
safety standards. Using a garage door
opener without these features in-
creases the risk of serious injury or
death.
cDuring the programming procedure
your garage door or security gate will
open and close (if the transmitter is
within range) . Make sure that people or
objects are clear of the garage door,
gate, etc. that you are programming.
cYour vehicle’s engine should be turned
off while programming the HomeLinkT
Universal Transceiver.
LIC0590
CARGO LIGHT HOMELINKTUNIVERSAL
TRANSCEIVER
2-60Instruments and controls
ZREVIEW COPYÐ2008 Armada(wzw)
Owners ManualÐUSA_English(nna)
03/05/07Ðarosenma
X
Page 165 of 456

Symptom Possible Cause Remedy
When pushing the ignition switch to stop
the engineThe SHIFT P warning appears on the dis-
play and the inside warning chime sounds
continuously.The selector lever is not in the P (Park)
position.Shift the selector lever to the P (Park)
position.
When opening the driver’s door to get out
of the vehicleThe inside warning chime sounds
continuously.The ignition switch is in the ACC position.Push the ignition switch to the OFF
position.
When closing the door after getting out of
the vehicleThe NO KEY warning appears on the
display, the outside chime sounds 3 times
and the inside warning chime sounds for
approximately 3 seconds.The ignition switch is in the ACC or ON
position.Push the ignition switch to the OFF
position.
The NO KEY warning appears on the dis-
play and the outside chime sounds
continuously.The ignition switch is in the ACC position
and the selector lever is not in the P (Park)
position.Move the selector lever to the P (Park) po-
sition and push the ignition switch to the
OFF position.
When closing the door with the inside lock
knob turned to LOCKThe outside chime sounds for approximately
3 seconds and all the doors unlock.The Intelligent Key is inside the vehicle.Carry the Intelligent Key with you.
When pushing the door handle request
switch to lock the doorThe outside chime sounds for approximately
2 seconds.The Intelligent Key is inside the vehicle. Carry the Intelligent Key with you.
A door is not closed securely. Close the door securely.
The door handle request switch is pushed
before the door is closed.Push the door handle request switch after
the door is closed.
Pre-driving checks and adjustments3-19
ZREVIEW COPYÐ2008 Armada(wzw)
Owners ManualÐUSA_English(nna)
03/05/07Ðarosenma
X
Page 166 of 456

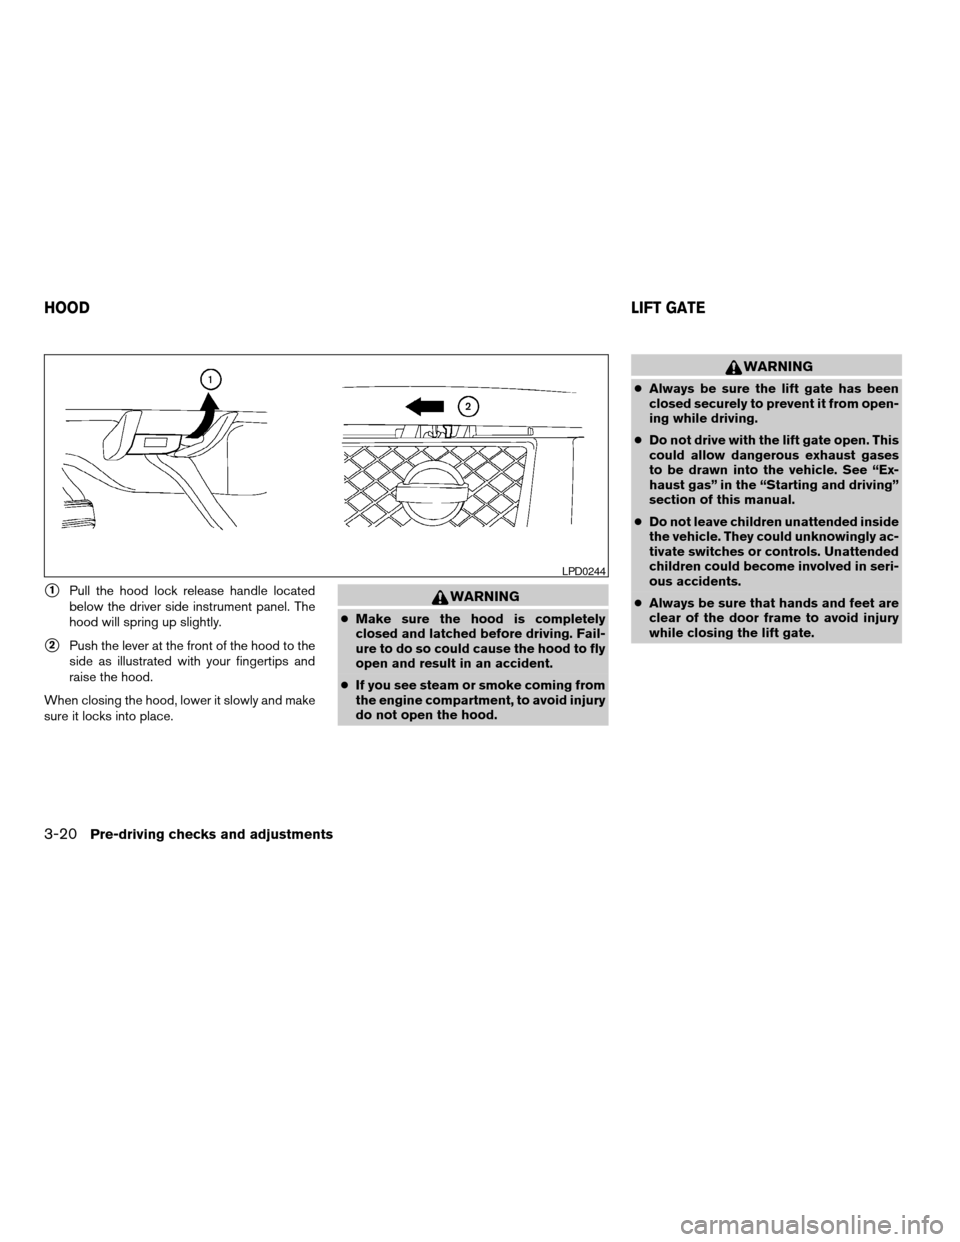
s1Pull the hood lock release handle located
below the driver side instrument panel. The
hood will spring up slightly.
s2Push the lever at the front of the hood to the
side as illustrated with your fingertips and
raise the hood.
When closing the hood, lower it slowly and make
sure it locks into place.
WARNING
cMake sure the hood is completely
closed and latched before driving. Fail-
ure to do so could cause the hood to fly
open and result in an accident.
cIf you see steam or smoke coming from
the engine compartment, to avoid injury
do not open the hood.
WARNING
cAlways be sure the lift gate has been
closed securely to prevent it from open-
ing while driving.
cDo not drive with the lift gate open. This
could allow dangerous exhaust gases
to be drawn into the vehicle. See “Ex-
haust gas” in the “Starting and driving”
section of this manual.
cDo not leave children unattended inside
the vehicle. They could unknowingly ac-
tivate switches or controls. Unattended
children could become involved in seri-
ous accidents.
cAlways be sure that hands and feet are
clear of the door frame to avoid injury
while closing the lift gate.
LPD0244
HOODLIFT GATE
3-20Pre-driving checks and adjustments
ZREVIEW COPYÐ2008 Armada(wzw)
Owners ManualÐUSA_English(nna)
03/05/07Ðarosenma
X
Page 172 of 456

WARNING
cGasoline is extremely flammable and
highly explosive under certain condi-
tions. You could be burned or seriously
injured if it is misused or mishandled.
Always stop the engine and do not
smoke or allow open flames or sparks
near the vehicle when refueling.
cDo not attempt to top off the fuel tank
after the fuel pump nozzle shuts off
automatically. Continued refueling may
cause fuel overflow, resulting in fuel
spray and possibly a fire.
cUse only an original equipment type
fuel-filler cap as a replacement. It has a
built-in safety valve needed for proper
operation of the fuel system and emis-
sion control system. An incorrect cap
can result in a serious malfunction and
possible injury. It could also cause the
malfunction indicator light to come on.
cNever pour fuel into the throttle body to
attempt to start your vehicle.cDo not fill a portable fuel container in
the vehicle or trailer. Static electricity
can cause an explosion of flammable
liquid, vapor or gas in any vehicle or
trailer. To reduce the risk of serious
injury or death when filling portable fuel
containers:
– Always place the container on the
ground when filling.
– Do not use electronic devices when
filling.
– Keep the pump nozzle in contact
with the container while you are fill-
ing it.
– Use only approved portable fuel con-
tainers for flammable liquid.
CAUTION
cOnly vehicles with the E-85 filler door
label can operate on E-85. Fuel system
or other damage can occur if E-85 is
used in vehicles that are not designed
to run on E-85.
cIf fuel is spilled on the vehicle body,
flush it away with water to avoid paint
damage.cTighten until the fuel-filler cap clicks.
Failure to tighten the fuel-filler cap
properly may cause the
mal-
function indicator light (MIL) to illumi-
nate. If the
light illuminates be-
cause the fuel-filler cap is loose or
missing, tighten or install the cap and
continue to drive the vehicle.
The
light should turn off after a
few driving trips. If the
light
does not turn off after a few driving
trips, have the vehicle inspected by a
NISSAN dealer.
cFor additional information, see the
“Malfunction indicator light (MIL)” in
the “Instruments and Controls” section
earlier in this manual.
3-26Pre-driving checks and adjustments
ZREVIEW COPYÐ2008 Armada(wzw)
Owners ManualÐUSA_English(nna)
03/05/07Ðarosenma
X
Page 183 of 456

When you use this system, make sure the engine
is running.
If you use the system with the engine not
running (ignition ON or ACC) for a long
time, it will use up all the battery power,
and the engine will not start.
Reference symbols:
ENTER button — This is a button on the control
panel.
“Display” key — This is a select key on the screen.
By selecting this key you can proceed to the next
function.
HOW TO USE THE NISSAN
CONTROLLER
Use the NISSAN controller to choose an item on
the display screen. Select an item on the display
using the main directional buttons
s2or the
center dial
s3. Then press the ENTER buttons1
to select the item or perform the action.
The BACK button
s4button has two functions:
cGo back to the previous display (cancel) .
If you press the BACK button
s4during setup,
the setup will be canceled and/or the display will
return to the previous screen.cFinish setup.
In some screens pressing the BACK button
s4
accepts the changes made during setup.
WHA0883
Monitor, climate, audio, phone and voice recognition systems4-3
ZREVIEW COPYÐ2008 Armada(wzw)
Owners ManualÐUSA_English(nna)
03/05/07Ðarosenma
X
Page 197 of 456

1. STATUS button (P. 4-21)
2. DEST button*
3. NISSAN Controller (P. 4-18)
4. PHONE button**5.OFF brightness control button
(P. 4-34)
6. INFO button (P. 4-21)
7. SETTING button (P. 4-26)
8. VOICE button*9. BACK (previous) button (P. 4-18)
10. ROUTE button*
11. ZOOM IN button*
12. MAP button*
13. ZOOM OUT button*
*For Navigation system control buttons, refer to
the separate Navigation System Owner’s
Manual.
**For information on the PHONE button, see
“BluetoothTHands-Free Phone System with
Navigation System” later in this section.
When you use this system, make sure the engine
is running.
If you use the system with the engine not
running (ignition ON or ACC) for a long
time, it will use up all the battery power,
and the engine will not start.
Reference symbols:
ENTER button — This is a button on the control
panel.
“Display” key — This is a select key on the screen.
By selecting this key you can proceed to the next
function.
LHA0880
CONTROL PANEL BUTTONS —
COLOR SCREEN WITH NAVIGATION
SYSTEM (if so equipped)
Monitor, climate, audio, phone and voice recognition systems4-17
ZREVIEW COPYÐ2008 Armada(wzw)
Owners ManualÐUSA_English(nna)
03/05/07Ðarosenma
X