2008 NISSAN ARMADA change wheel
[x] Cancel search: change wheelPage 297 of 456

cBluetooth:
If this item is turned off, the connection be-
tween the cellular phone and the in-vehicle
phone module will be canceled.
cBluetooth Info:
Check information about the device name,
vehicle name, device address device PIN
and connection status.
cPair Phone:
See “Pairing Procedure” in this section.
cPriority Change
If multiple phones are registered to the sys-
tem, you can change the priority of the
phones on the shown list.cRemove Paired Phone:
Delete a registered cellular phone from the
paired list.
cPaired Phone List:
Up to 5 registered cellular phones are
shown on the list.
cEdit Phone Name:
If you would like to change the way your
phone’s name is displayed, select this key; a
character input screen will be displayed.The NISSAN Voice Recognition system allows
hands-free operation of the systems equipped on
this vehicle, such as the display, audio, climate
control, DVD, phone and navigation systems.
To operate NISSAN Voice Recognition, press
the
button located on the steering wheel.
Then speak the command for the system you
wish to activate. The command given is picked up
by the microphone, and it is performed when it is
properly recognized. At this time NISSAN Voice
Recognition will provide a voice and message (in
the center display) to inform you of the command
results.
COMMAND LIST
Displaying command list
If you are controlling the system by voice com-
mands for the first time or do not know the
appropriate voice command, perform the follow-
ing procedure for displaying the voice command
list and help list.
LHA0980LHA0989
NISSAN VOICE RECOGNITION
SYSTEM (if so equipped)
Monitor, climate, audio, phone and voice recognition systems4-117
ZREVIEW COPYÐ2008 Armada(wzw)
Owners ManualÐUSA_English(nna)
03/05/07Ðarosenma
X
Page 319 of 456
cWhen a spare tire is mounted or a wheel
is replaced, tire pressure will not be
indicated, the TPMS will not function
and the low tire pressure warning light
will flash for approximately 1 minute.
The light will remain on after 1 minute.
Contact your NISSAN dealer as soon as
possible for tire replacement and/or
system resetting.
cReplacing tires with those not originally
specified by NISSAN could affect the
proper operation of the TPMS.
cDo not inject any tire liquid or aerosol
tire sealant into the tires, as this may
cause a malfunction of the tire pressure
sensors.
CAUTION
Do not place metalized film or any metal
parts (antenna, etc.) on the windows. This
may cause poor reception of the signals
from the tire pressure sensors, and the
TPMS will not function properly.
Some devices and transmitters may temporarily
interfere with the operation of the TPMS and
cause the low tire pressure warning light to illu-
minate.Some examples are:
– Facilities or electric devices using similar radio
frequencies are near the vehicle.
– If a transmitter set to similar frequencies is
being used in or near the vehicle.
– If a computer (or similar equipment) or a
DC/AC converter is being used in or near the
vehicle.
FCC Notice:
Changes or modifications not expressly ap-
proved by the party responsible for compli-
ance could void the user’s authority to op-
erate the equipment.
This device complies with Part 15 of the
FCC Rules and RSS-210 of Industry
Canada.
Operation is subject to the following two
conditions: (1) This device may not cause
harmful interference, and (2) this device
must accept any interference received, in-
cluding interference that may cause undes-
ired operation of the device.
AVOIDING COLLISION AND
ROLLOVER
WARNING
Failure to operate this vehicle in a safe
and prudent manner may result in loss of
control or an accident.
Be alert and drive defensively at all times. Obey
all traffic regulations. Avoid excessive speed,
high speed cornering, or sudden steering ma-
neuvers, because these driving practices could
cause you to lose control of your vehicle.As with
any vehicle, loss of control could result in a
collision with other vehicles or objects, or
cause the vehicle to roll over, particularly if
the loss of control causes the vehicle to
slide sideways.
Be attentive at all times, and
avoid driving when tired. Never drive when under
the influence of alcohol or drugs (including pre-
scription or over-the-counter drugs which may
cause drowsiness) . Always wear your seat belt as
outlined in the “Safety – Seats, seat belts and
supplemental restraint system” section of this
manual, and also instruct your passengers to do so.
Seat belts help reduce the risk of injury in colli-
sions and rollovers.In a rollover crash, an
unbelted or improperly belted person is
Starting and driving5-5
ZREVIEW COPYÐ2008 Armada(wzw)
Owners ManualÐUSA_English(nna)
03/05/07Ðarosenma
X
Page 336 of 456
The transfer case 4WD shift switch is used to
select either 2WD or 4WD depending on the
driving conditions. There are four types of drive
modes available, AUTO, 2WD, 4H and 4LO.
The 4WD shift switch electronically controls the
transfer case operation. Rotate the switch to
move between each mode, 2WD, AUTO, 4H and
4LO.
You must push the switch in to select 4LO,
and the vehicle MUST be stationary and the
automatic transmission selector lever in
the N position when changing into or out of
4LO.
WARNING
When parking, apply the parking brake
before stopping the engine and make sure
that the 4WD shift indicator light is on and
the ATP warning light goes off. Otherwise,
the vehicle could unexpectedly move even
if the automatic transmission is in the P
position.
CAUTION
cNever shift the 4WD shift switch be-
tween 4LO and 4H while driving.cThe 4H position provides greater trac-
tion. Avoid excessive speed, as it will
cause increased fuel consumption and
higher oil temperatures, and could
damage drivetrain components.
Speeds over 62.5 MPH (100 km/h) in 4H
is not recommended.
cThe 4LO position provides maximum
power and traction. Avoid raising ve-
hicle speed excessively, as the maxi-
mum speed is approximately 31 MPH
(50 km/h) .
cWhen driving straight, shift the 4WD
shift switch to the 2WD, AUTO or 4H
position. Do not move the 4WD shift
switch when making a turn or reversing.
cDo not shift the 4WD shift switch (be-
tween 2WD, AUTO and 4H) while driving
on steep downhill grades. Use the en-
gine brake and low automatic transmis-
sion gears (D1 or D2) for engine
braking.
cDo not operate the 4WD shift switch
(between 2WD, AUTO and 4H) with the
rear wheels spinning.cDo not drive on dry hard surface roads
in the 4H or 4LO position. Driving on dry
hard surfaces in 4H or 4LO may cause
unnecessary noise and tire wear.
NISSAN recommends driving in the
2WD or AUTO position under these
conditions.
cThe 4WD transfer case may not be
shifted between 4H and 4LO at low am-
bient temperatures and the transfer
4LO position indicator light may blink
even when the 4WD shift switch is
shifted. After driving for a while you can
change the 4WD transfer case between
4H and 4LO.
When driving on rough roads,
cSet the 4WD shift switch to AUTO, 4H or
4LO.
cDrive carefully according to the road surface
conditions.
When the vehicle is stuck,
cSet the 4WD shift switch to 4H or 4LO.
cIf it is difficult to free the vehicle, repeat
forward and backward movement to in-
crease the movement.
5-22Starting and driving
ZREVIEW COPYÐ2008 Armada(wzw)
Owners ManualÐUSA_English(nna)
03/05/07Ðarosenma
X
Page 337 of 456
cIf the vehicle is stuck deep in mud, place
stones or wooden blocks under the tires.
Then try the recovery procedures above. Tire
chains may be effective.
CAUTION
cDo not spin the tires excessively. Tires
will sink deep into the mud, making it
difficult to free the vehicle.
cAvoid shifting gears with the engine
running at high speeds as this may
cause malfunction.
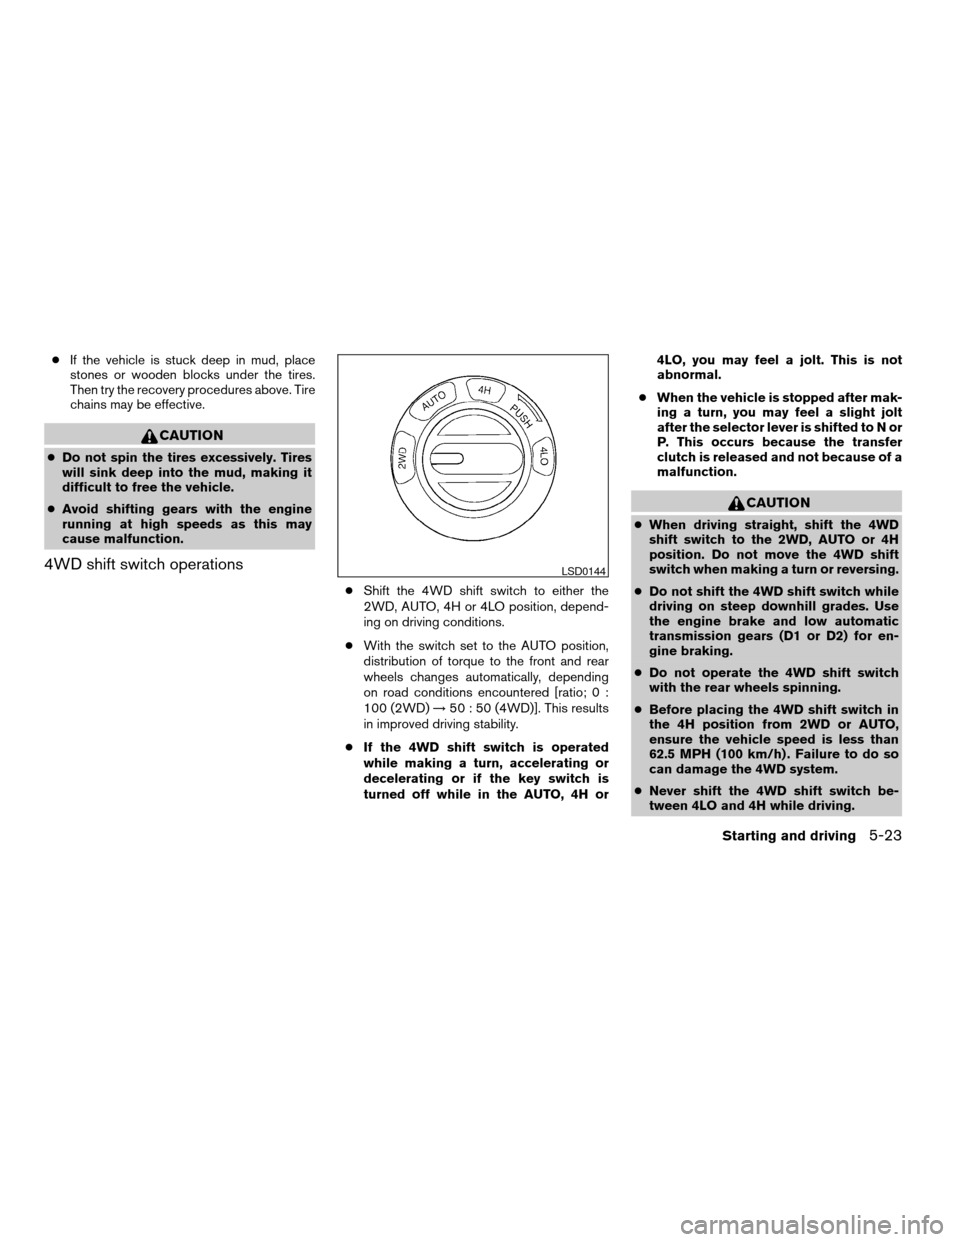
4WD shift switch operations
cShift the 4WD shift switch to either the
2WD, AUTO, 4H or 4LO position, depend-
ing on driving conditions.
cWith the switch set to the AUTO position,
distribution of torque to the front and rear
wheels changes automatically, depending
on road conditions encountered [ratio; 0 :
100 (2WD)!50 : 50 (4WD)]. This results
in improved driving stability.
cIf the 4WD shift switch is operated
while making a turn, accelerating or
decelerating or if the key switch is
turned off while in the AUTO, 4H or4LO, you may feel a jolt. This is not
abnormal.
cWhen the vehicle is stopped after mak-
ing a turn, you may feel a slight jolt
after the selector lever is shifted to N or
P. This occurs because the transfer
clutch is released and not because of a
malfunction.
CAUTION
cWhen driving straight, shift the 4WD
shift switch to the 2WD, AUTO or 4H
position. Do not move the 4WD shift
switch when making a turn or reversing.
cDo not shift the 4WD shift switch while
driving on steep downhill grades. Use
the engine brake and low automatic
transmission gears (D1 or D2) for en-
gine braking.
cDo not operate the 4WD shift switch
with the rear wheels spinning.
cBefore placing the 4WD shift switch in
the 4H position from 2WD or AUTO,
ensure the vehicle speed is less than
62.5 MPH (100 km/h) . Failure to do so
can damage the 4WD system.
cNever shift the 4WD shift switch be-
tween 4LO and 4H while driving.
LSD0144
Starting and driving5-23
ZREVIEW COPYÐ2008 Armada(wzw)
Owners ManualÐUSA_English(nna)
03/05/07Ðarosenma
X
Page 338 of 456
cEngine idling speed is high while warm-
ing up the engine. Be especially careful
when starting or driving on slippery sur-
faces with the 4WD shift switch set in
AUTO.
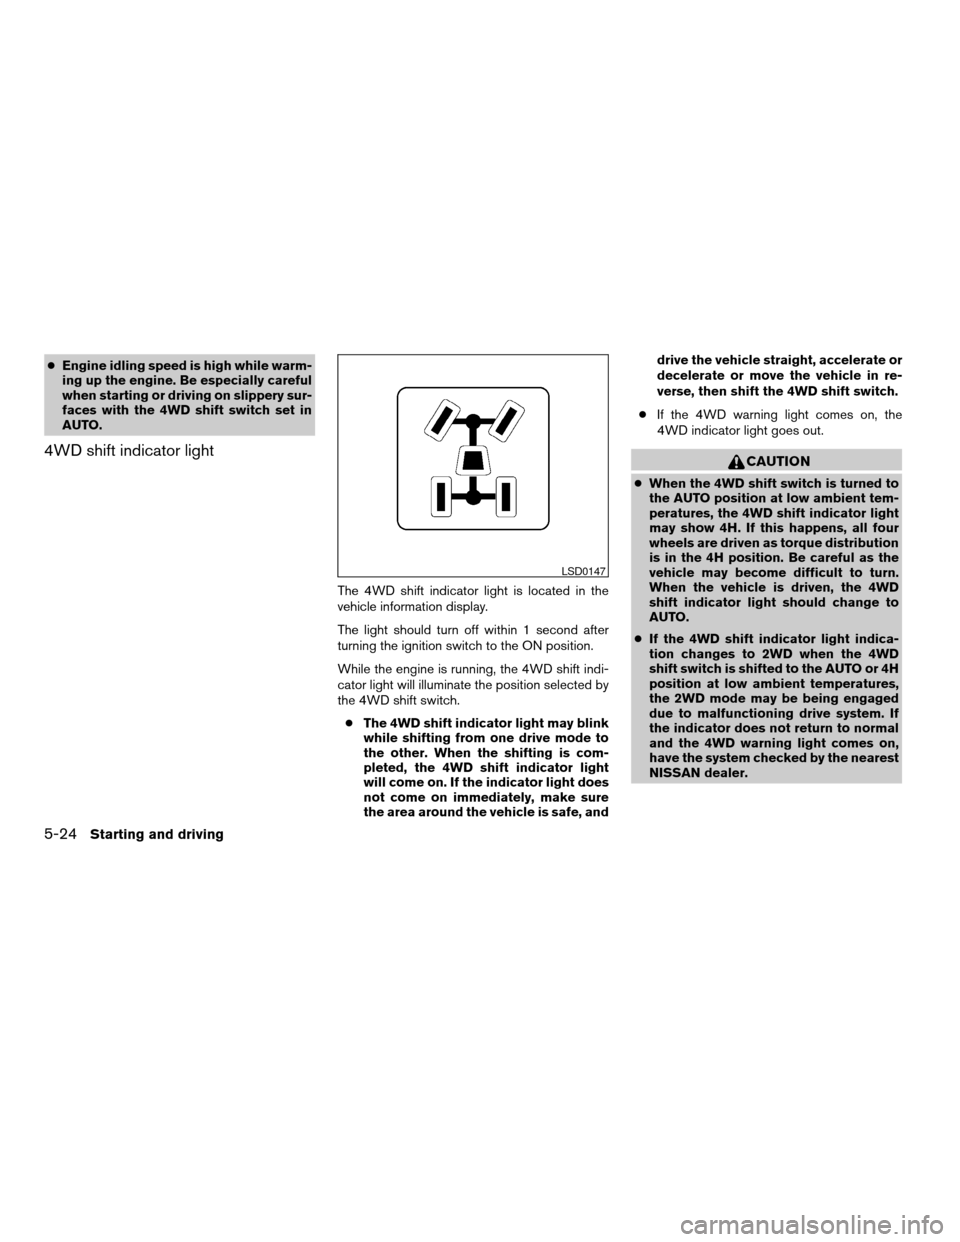
4WD shift indicator light
The 4WD shift indicator light is located in the
vehicle information display.
The light should turn off within 1 second after
turning the ignition switch to the ON position.
While the engine is running, the 4WD shift indi-
cator light will illuminate the position selected by
the 4WD shift switch.
cThe 4WD shift indicator light may blink
while shifting from one drive mode to
the other. When the shifting is com-
pleted, the 4WD shift indicator light
will come on. If the indicator light does
not come on immediately, make sure
the area around the vehicle is safe, anddrive the vehicle straight, accelerate or
decelerate or move the vehicle in re-
verse, then shift the 4WD shift switch.
cIf the 4WD warning light comes on, the
4WD indicator light goes out.
CAUTION
cWhen the 4WD shift switch is turned to
the AUTO position at low ambient tem-
peratures, the 4WD shift indicator light
may show 4H. If this happens, all four
wheels are driven as torque distribution
is in the 4H position. Be careful as the
vehicle may become difficult to turn.
When the vehicle is driven, the 4WD
shift indicator light should change to
AUTO.
cIf the 4WD shift indicator light indica-
tion changes to 2WD when the 4WD
shift switch is shifted to the AUTO or 4H
position at low ambient temperatures,
the 2WD mode may be being engaged
due to malfunctioning drive system. If
the indicator does not return to normal
and the 4WD warning light comes on,
have the system checked by the nearest
NISSAN dealer.
LSD0147
5-24Starting and driving
ZREVIEW COPYÐ2008 Armada(wzw)
Owners ManualÐUSA_English(nna)
03/05/07Ðarosenma
X
Page 339 of 456
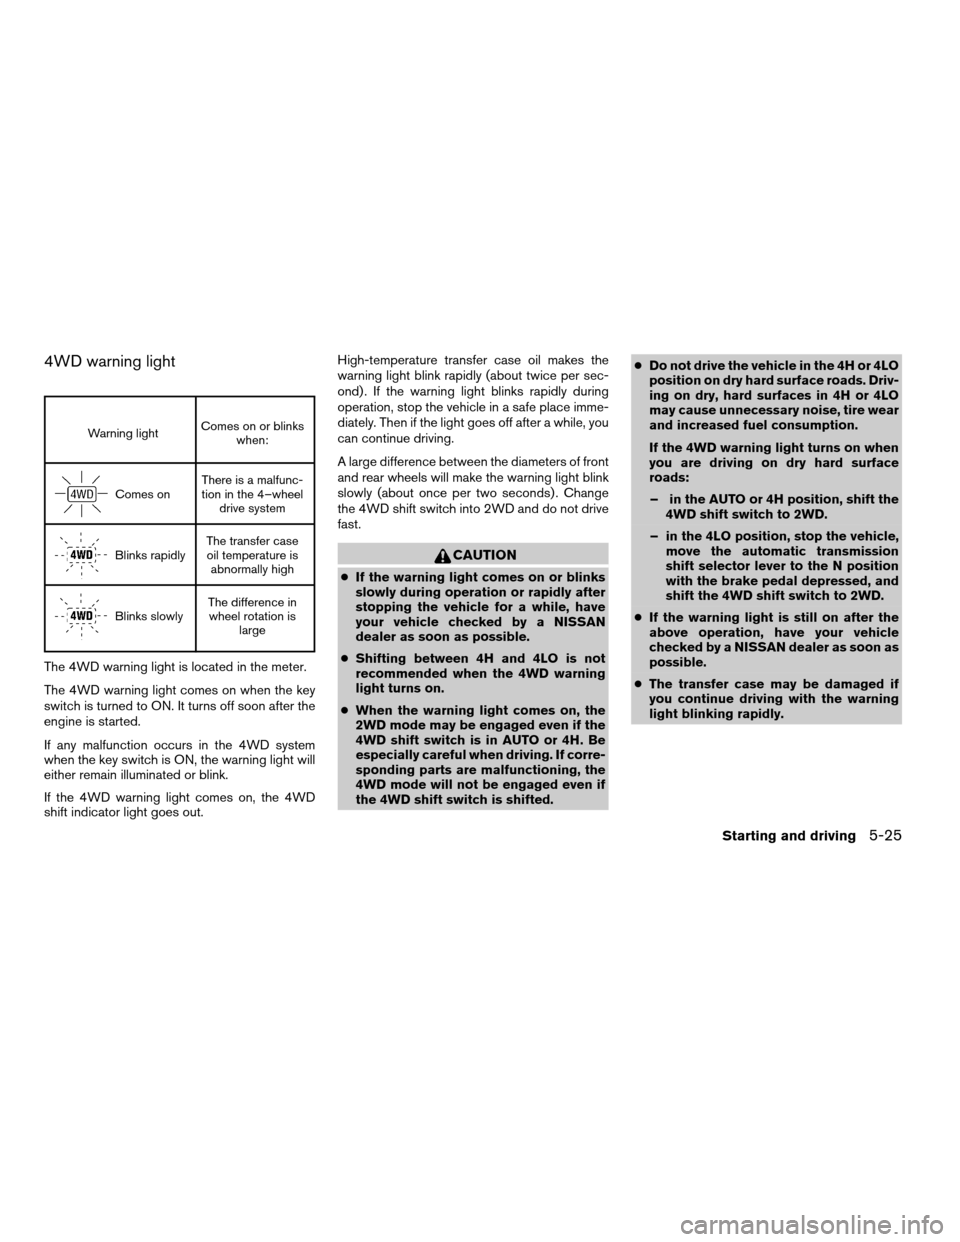
4WD warning light
Warning lightComes on or blinks
when:
Comes onThere is a malfunc-
tion in the 4–wheel
drive system
Blinks rapidlyThe transfer case
oil temperature is
abnormally high
Blinks slowlyThe difference in
wheel rotation is
large
The 4WD warning light is located in the meter.
The 4WD warning light comes on when the key
switch is turned to ON. It turns off soon after the
engine is started.
If any malfunction occurs in the 4WD system
when the key switch is ON, the warning light will
either remain illuminated or blink.
If the 4WD warning light comes on, the 4WD
shift indicator light goes out.High-temperature transfer case oil makes the
warning light blink rapidly (about twice per sec-
ond) . If the warning light blinks rapidly during
operation, stop the vehicle in a safe place imme-
diately. Then if the light goes off after a while, you
can continue driving.
A large difference between the diameters of front
and rear wheels will make the warning light blink
slowly (about once per two seconds) . Change
the 4WD shift switch into 2WD and do not drive
fast.
CAUTION
cIf the warning light comes on or blinks
slowly during operation or rapidly after
stopping the vehicle for a while, have
your vehicle checked by a NISSAN
dealer as soon as possible.
cShifting between 4H and 4LO is not
recommended when the 4WD warning
light turns on.
cWhen the warning light comes on, the
2WD mode may be engaged even if the
4WD shift switch is in AUTO or 4H. Be
especially careful when driving. If corre-
sponding parts are malfunctioning, the
4WD mode will not be engaged even if
the 4WD shift switch is shifted.cDo not drive the vehicle in the 4H or 4LO
position on dry hard surface roads. Driv-
ing on dry, hard surfaces in 4H or 4LO
may cause unnecessary noise, tire wear
and increased fuel consumption.
If the 4WD warning light turns on when
you are driving on dry hard surface
roads:
– in the AUTO or 4H position, shift the
4WD shift switch to 2WD.
– in the 4LO position, stop the vehicle,
move the automatic transmission
shift selector lever to the N position
with the brake pedal depressed, and
shift the 4WD shift switch to 2WD.
cIf the warning light is still on after the
above operation, have your vehicle
checked by a NISSAN dealer as soon as
possible.
cThe transfer case may be damaged if
you continue driving with the warning
light blinking rapidly.
Starting and driving5-25
ZREVIEW COPYÐ2008 Armada(wzw)
Owners ManualÐUSA_English(nna)
03/05/07Ðarosenma
X
Page 351 of 456
WARNING
cMake sure the parking brake is securely
applied and the automatic transmission
is shifted into P (Park) .
cNever change tires when the vehicle is
on a slope, ice or slippery areas. This is
hazardous.
cNever change tires if oncoming traffic is
close to your vehicle. Wait for profes-
sional road assistance.
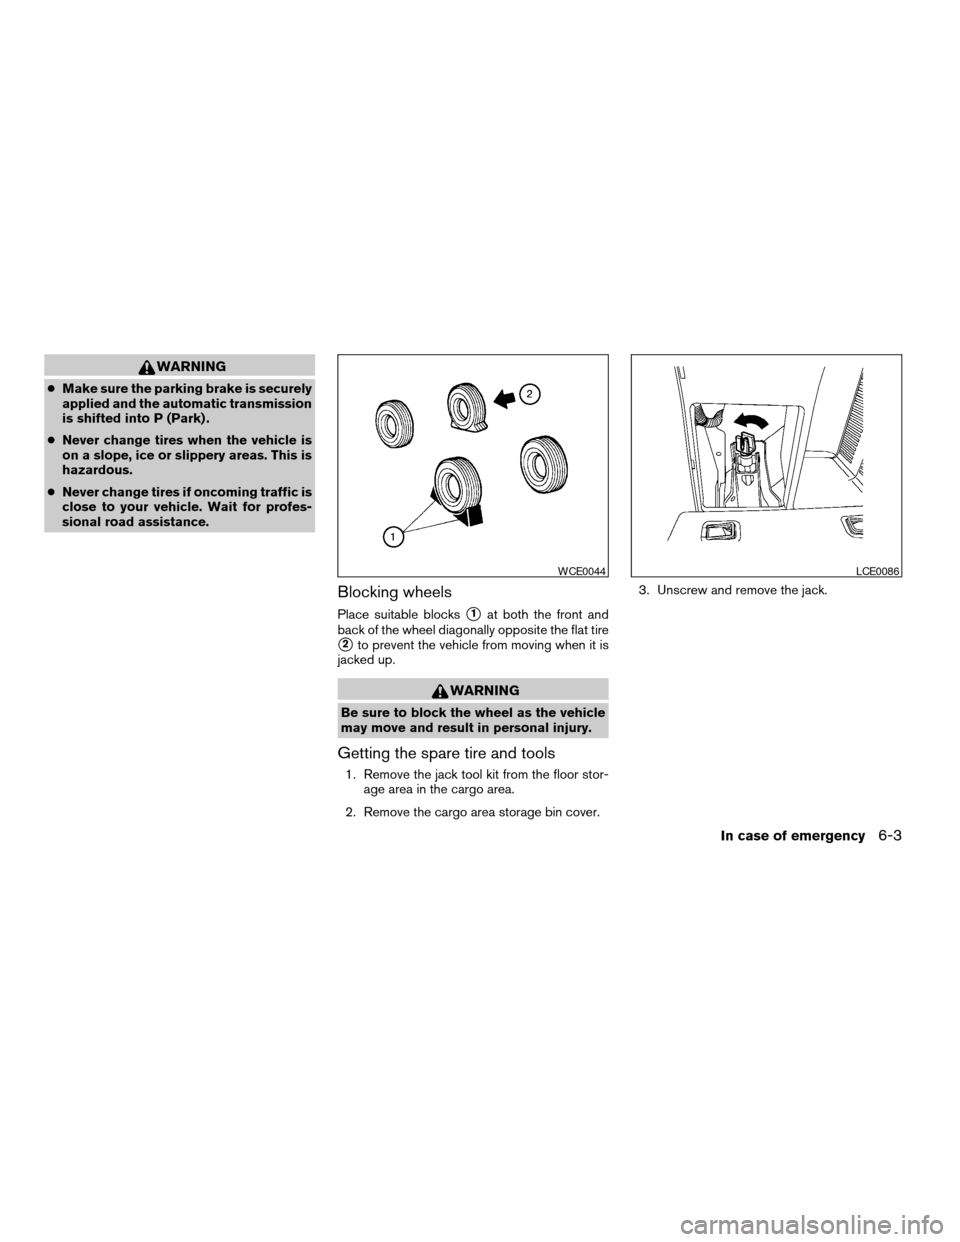
Blocking wheels
Place suitable blockss1at both the front and
back of the wheel diagonally opposite the flat tire
s2to prevent the vehicle from moving when it is
jacked up.
WARNING
Be sure to block the wheel as the vehicle
may move and result in personal injury.
Getting the spare tire and tools
1. Remove the jack tool kit from the floor stor-
age area in the cargo area.
2. Remove the cargo area storage bin cover.3. Unscrew and remove the jack.
WCE0044LCE0086
In case of emergency6-3
ZREVIEW COPYÐ2008 Armada(wzw)
Owners ManualÐUSA_English(nna)
03/05/07Ðarosenma
X
Page 352 of 456
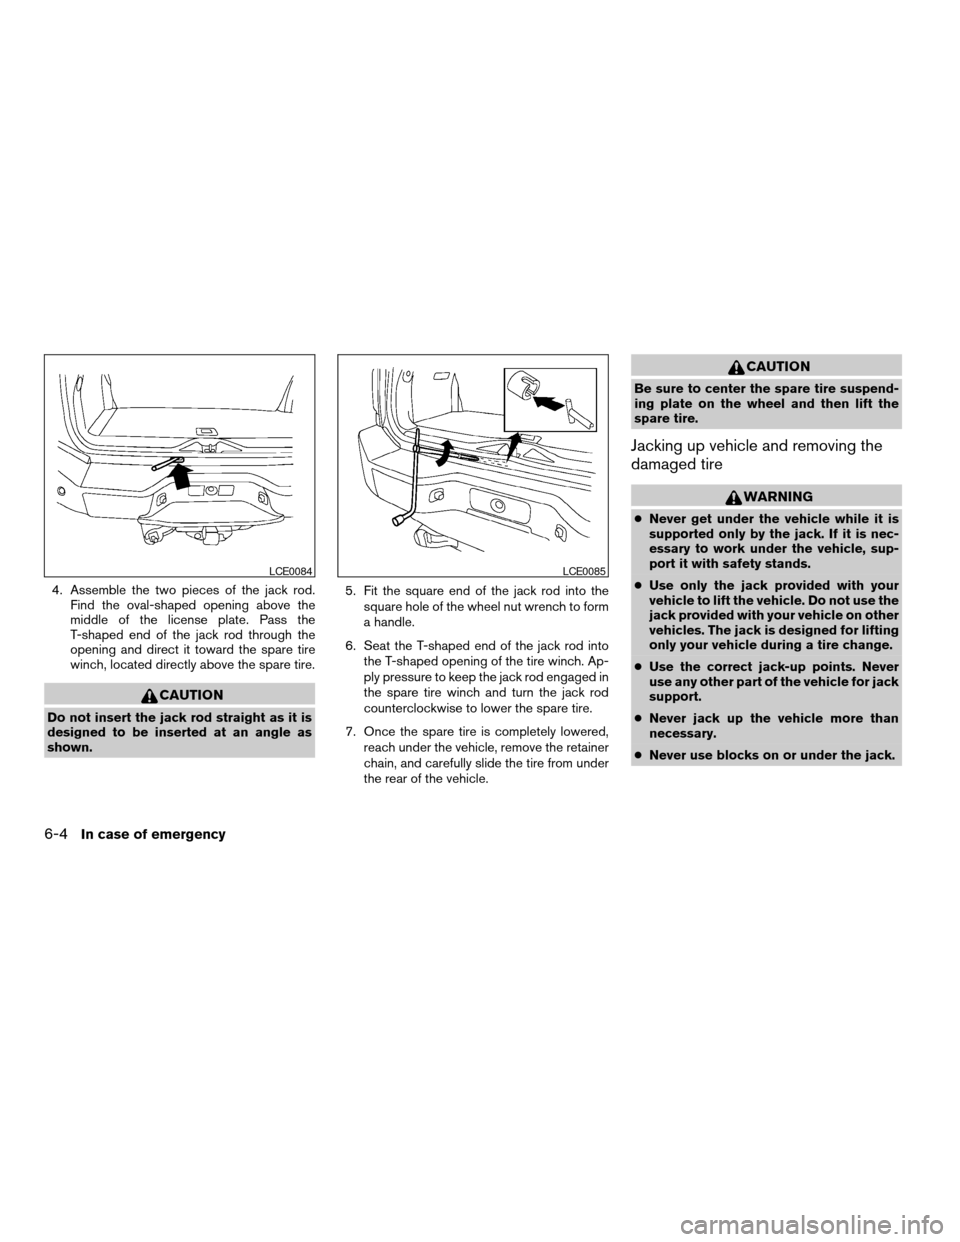
4. Assemble the two pieces of the jack rod.
Find the oval-shaped opening above the
middle of the license plate. Pass the
T-shaped end of the jack rod through the
opening and direct it toward the spare tire
winch, located directly above the spare tire.
CAUTION
Do not insert the jack rod straight as it is
designed to be inserted at an angle as
shown.5. Fit the square end of the jack rod into the
square hole of the wheel nut wrench to form
a handle.
6. Seat the T-shaped end of the jack rod into
the T-shaped opening of the tire winch. Ap-
ply pressure to keep the jack rod engaged in
the spare tire winch and turn the jack rod
counterclockwise to lower the spare tire.
7. Once the spare tire is completely lowered,
reach under the vehicle, remove the retainer
chain, and carefully slide the tire from under
the rear of the vehicle.
CAUTION
Be sure to center the spare tire suspend-
ing plate on the wheel and then lift the
spare tire.
Jacking up vehicle and removing the
damaged tire
WARNING
cNever get under the vehicle while it is
supported only by the jack. If it is nec-
essary to work under the vehicle, sup-
port it with safety stands.
cUse only the jack provided with your
vehicle to lift the vehicle. Do not use the
jack provided with your vehicle on other
vehicles. The jack is designed for lifting
only your vehicle during a tire change.
cUse the correct jack-up points. Never
use any other part of the vehicle for jack
support.
cNever jack up the vehicle more than
necessary.
cNever use blocks on or under the jack.
LCE0084LCE0085
6-4In case of emergency
ZREVIEW COPYÐ2008 Armada(wzw)
Owners ManualÐUSA_English(nna)
03/05/07Ðarosenma
X