2008 NISSAN ALTIMA lock
[x] Cancel search: lockPage 3 of 36
TAB LE O F C O NTE NTS
Intelligent Key System. . . . . . . . . . . . . . . . . . . . . . . 2
Windshield Wiper/Washer Switch . . . . . . . . . . . . . . . . 2
Headlight and Turn Signal Control . . . . . . . . . . . . . . . . 3
Steering Wheel Switches for Audio Control . . . . . . . . . . . 4
Cruise Control . . . . . . . . . . . . . . . . . . . . . . . . . . . 4
Fuel-Filler Cap . . . . . . . . . . . . . . . . . . . . . . . . . . . 4
Automatic Climate Control . . . . . . . . . . . . . . . . . . . . 5
FM/AM/XM® Radio with CD Changer . . . . . . . . . . . . . . 6
Clock/Set Adjustment . . . . . . . . . . . . . . . . . . . . . . . 7
Vehicle Information Display . . . . . . . . . . . . . . . . . . . . 8
Twin Trip Odometer . . . . . . . . . . . . . . . . . . . . . . . . 8
Xtronic Continuously Variable Transmission (CVT) . . . . . . . 8
6-Speed Manual Transmission . . . . . . . . . . . . . . . . . . 9
Front-Passenger Air Bag Status Light . . . . . . . . . . . . . . 9
Tire Pressure Monitoring System (TPMS) . . . . . . . . . . . . 10
Seat Belt Warning Light and Chime . . . . . . . . . . . . . . . 10
Vehicle Dynamic Control (VDC) System Off Switch . . . . . . . 10
Rearview Monitor (Navigation System Only) . . . . . . . . . . . 10
Child Safety Rear Door Lock (Sedan Only) . . . . . . . . . . . 10
Fuel-Filler Door Release . . . . . . . . . . . . . . . . . . . . . . 11
Trunk Lid Cancel Switch . . . . . . . . . . . . . . . . . . . . . 11
Sunroof Controls . . . . . . . . . . . . . . . . . . . . . . . . . 11
Front Seat Adjustments . . . . . . . . . . . . . . . . . . . . . . 11
Folding Down the Front Seats . . . . . . . . . . . . . . . . . . 12
Folding Down the Rear Seats . . . . . . . . . . . . . . . . . . . 12
Homelink® Universal Transceiver . . . . . . . . . . . . . . . . . 13
Bluetooth® Hands-Free Phone System . . . . . . . . . . . . . . 14
Nissan Voice Recognition System . . . . . . . . . . . . . . . . 19
Navigation System . . . . . . . . . . . . . . . . . . . . . . . . . 20
Page 4 of 36
INTELLIGENT K EY SYSTEM
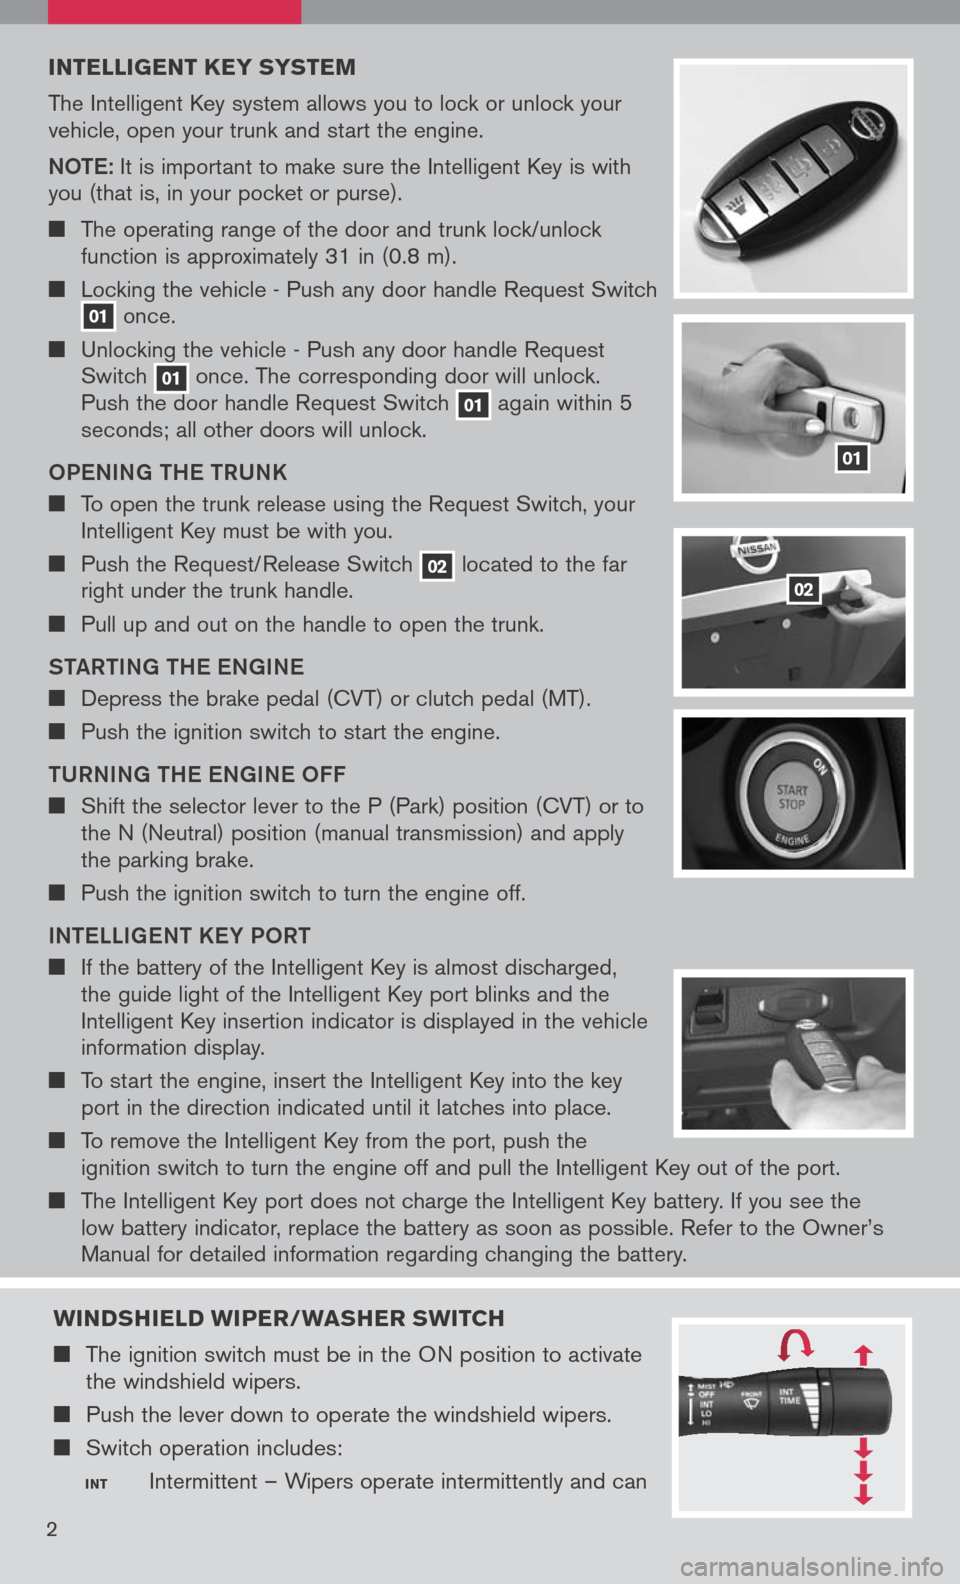
The Intelligent Key system allows you to lock or unlock your vehicle, open your trunk and start the engine.
Note: It is important to make sure the Intelligent Key is with you (that is, in your pocket or purse).
The operating range of the door and trunk lock/unlock function is approximately 31 in (0.8 m).
Locking the vehicle - Push any door handle Request Switch 01 once.
Unlocking the vehicle - Push any door handle Request Switch 01 once. The corresponding door will unlock. Push the door handle Request Switch 01 again within 5 seconds; all other doors will unlock.
o Pe NING tH e tRUNK
To open the trunk release using the Request Switch, your Intelligent Key must be with you.
Push the Request/Release Switch 02 located to the far right under the trunk handle.
Pull up and out on the handle to open the trunk.
S tAR tING tH e eNGIN e
Depress the brake pedal (CVT) or clutch pedal (MT).
Push the ignition switch to start the engine.
t URNING tH e eNGIN e oFF
Shift the selector lever to the P (Park) position (CVT) or to the N (Neutral) position (manual transmission) and apply the parking brake.
Push the ignition switch to turn the engine off.
IN te LLIG eN t K eY P oRt
If the battery of the Intelligent Key is almost discharged, the guide light of the Intelligent Key port blinks and the Intelligent Key insertion indicator is displayed in the vehicle information display.
To start the engine, insert the Intelligent Key into the key port in the direction indicated until it latches into place.
To remove the Intelligent Key from the port, push the ignition switch to turn the engine off and pull the Intelligent Key out of the port.
The Intelligent Key port does not charge the Intelligent Key battery. If you see the low battery indicator, replace the battery as soon as possible. Refer to the Owner’s
Manual for detailed information regarding changing the battery.
01
02
2
WINDSHIELD WIPER/WASHER SWITCH
The ignition switch must be in the ON position to activate the windshield wipers.
Push the lever down to operate the windshield wipers.
Switch operation includes:
INT Intermittent – Wipers operate intermittently and can
Page 6 of 36
CRUISE CONTROL
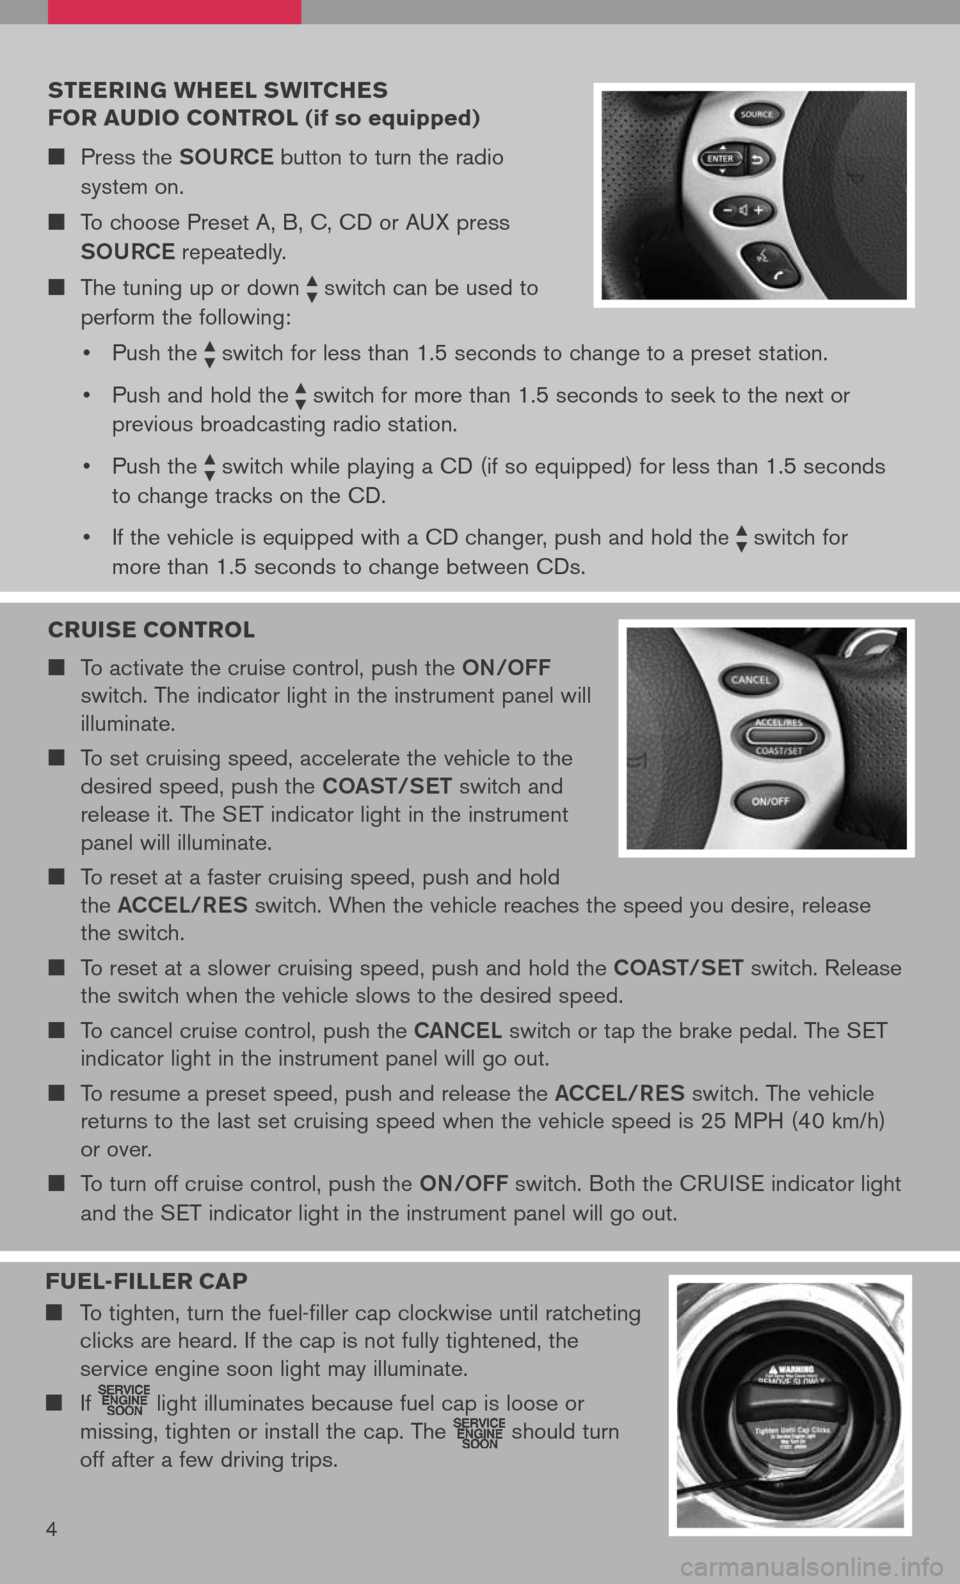
To activate the cruise control, push the oN/oFF
switch. The indicator light in the instrument panel will
illuminate.
To set cruising speed, accelerate the vehicle to the
desired speed, push the Co ASt/S et switch and
release it. The SET indicator light in the instrument
panel will illuminate.
To reset at a faster cruising speed, push and hold
the ACCe L/ReS switch. When the vehicle reaches the speed you desire, release
the switch.
To reset at a slower cruising speed, push and hold the Co ASt/S et switch. Release
the switch when the vehicle slows to the desired speed.
To cancel cruise control, push the CANCeL switch or tap the brake pedal. The SET
indicator light in the instrument panel will go out.
To resume a preset speed, push and release the ACCeL/ReS switch. The vehicle
returns to the last set cruising speed when the vehicle speed is 25 MPH (40 km/h)
or over.
To turn off cruise control, push the oN/oFF switch. Both the CRUISE indicator light
and the SET indicator light in the instrument panel will go out.
STEERING WHEEL SWITCHES
FOR AUDIO CONTROL (if so equipped)
Press the SoURCe button to turn the radio
system on.
To choose Preset A, B, C, CD or AUX press
SoURCe
repeatedly.
The tuning up or down switch can be used to
perform the following:
• Push the
switch for less than 1.5 seconds to change to a preset station.
• Push and hold the
switch for more than 1.5 seconds to seek to the next or
previous broadcasting radio station.
• Push the
switch while playing a CD (if so equipped) for less than 1.5 seconds
to change tracks on the CD.
• If the vehicle is equipped with a CD changer, push and hold the
switch for
more than 1.5 seconds to change between CDs.
4
FUEL -FILLER C AP
To tighten, turn the fuel-filler cap clockwise until ratcheting
clicks are heard. If the cap is not fully tightened, the
service engine soon light may illuminate.
If light illuminates because fuel cap is loose or
missing, tighten or install the cap. The should turn
off after a few driving trips.
Page 9 of 36
06
Refer to the Owner’s Manual for detailed information regarding the audio system.
XM® presets are only available on XM® Satellite Radio equipped vehicles.
CD/AUX BUttoN
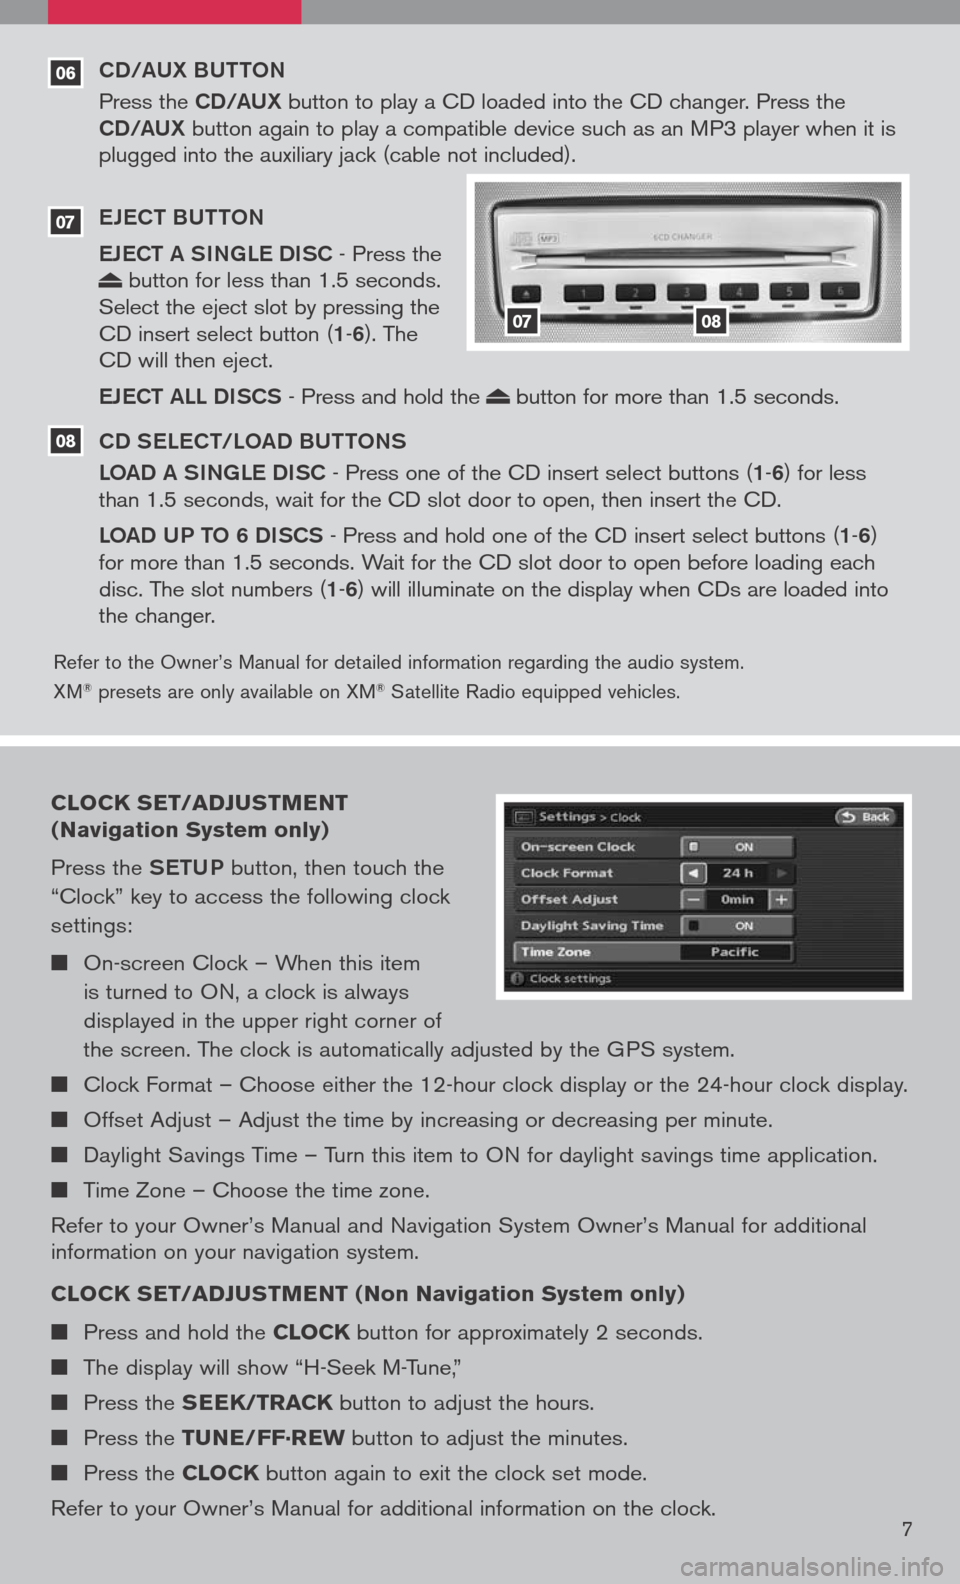
Press the CD/AUX button to play a CD loaded into the CD changer. Press the CD/AUX button again to play a compatible device such as an MP3 player when it is plugged into the auxiliary jack (cable not included).
e Je C t BU tto N
e Je C t A SINGL e DISC
- Press the button for less than 1.5 seconds. Select the eject slot by pressing the CD insert select button (1-6). The CD will then eject.
eJe C t ALL DISCS
- Press and hold the button for more than 1.5 seconds.
CD S eLe C t/L oAD BU ttoNS
L o AD A SINGL e DISC
- Press one of the CD insert select buttons (1-6) for less than 1.5 seconds, wait for the CD slot door to open, then insert the CD.
Lo AD UP to 6 DISCS
- Press and hold one of the CD insert select buttons (1-6) for more than 1.5 seconds. Wait for the CD slot door to open before loading each disc. The slot numbers (1-6) will illuminate on the display when CDs are loaded into the changer.
07
08
0708
CLOCK SET/ADJUSTMENT
(Navigation System only)
Press the SetUP button, then touch the
“Clock” key to access the following clock
settings:
On-screen Clock – When this item
is turned to ON, a clock is always
displayed in the upper right corner of
the screen. The clock is automatically adjusted by the GPS system.
Clock Format – Choose either the 12-hour clock display or the 24-hour clock display.
Offset Adjust – Adjust the time by increasing or decreasing per minute.
Daylight Savings Time – Turn this item to ON for daylight savings time application.
Time Zone – Choose the time zone.
Refer to your Owner’s Manual and Navigation System Owner’s Manual for additional information on your navigation system.
CLOCK SET/ADJUSTMENT (Non Navigation System only)
Press and hold the CLOCK button for approximately 2 seconds.
The display will show “H-Seek M-Tune,”
Press the SEEK/TRACK button to adjust the hours.
Press the TUNE/FF·REW button to adjust the minutes.
Press the CLOCK button again to exit the clock set mode.
Refer to your Owner’s Manual for additional information on the clock.7
Page 11 of 36
When shifting up, move the shift selector lever to the + (up) side. (Shifts to higher
range.)
When shifting down, move the shift selector lever to the - (down) side. (Shifts to
lower range.)
In manual shift mode, the transmission automatically shifts down to M1 (first) before
the vehicle comes to a stop. When accelerating again, it is necessary to shift to the
desired range.
When canceling the manual shift mode, return the shift selector lever to the D (Drive)
position. The transmission returns to the normal driving mode.
FRONT-PASSENGER AIR bAG STATUS LIGHT
This vehicle is equipped with the Nissan Advanced Air Bag
System. Under some conditions, depending on the type of
occupant or object detected in the front passenger seat by the
occupant classification sensor, the front-passenger air bag is
designed to automatically turn oFF. When the front-passenger air
bag is oFF, the front-passenger air bag status light will illuminate*.
For example:
When the system detects that the front-passenger’s seat is occupied by a small
adult, child or child restraint as outlined in the Owner’s Manual, the
will illuminate
to indicate that the front-passenger air bag is oFF and will not inflate in a crash.
When the front-passenger’s seat is occupied and the passenger meets the
conditions outlined in the Owner’s Manual, the will not illuminate to indicate that
the front-passenger air bag is operational.
*When the system detects that the front-passenger’s seat is unoccupied, the
passenger air bag status light will not illuminate even though the front-passenger
air bag is oFF.
Refer to the Owner’s Manual for detailed information regarding the Nissan Advanced Air
Bag System.
9
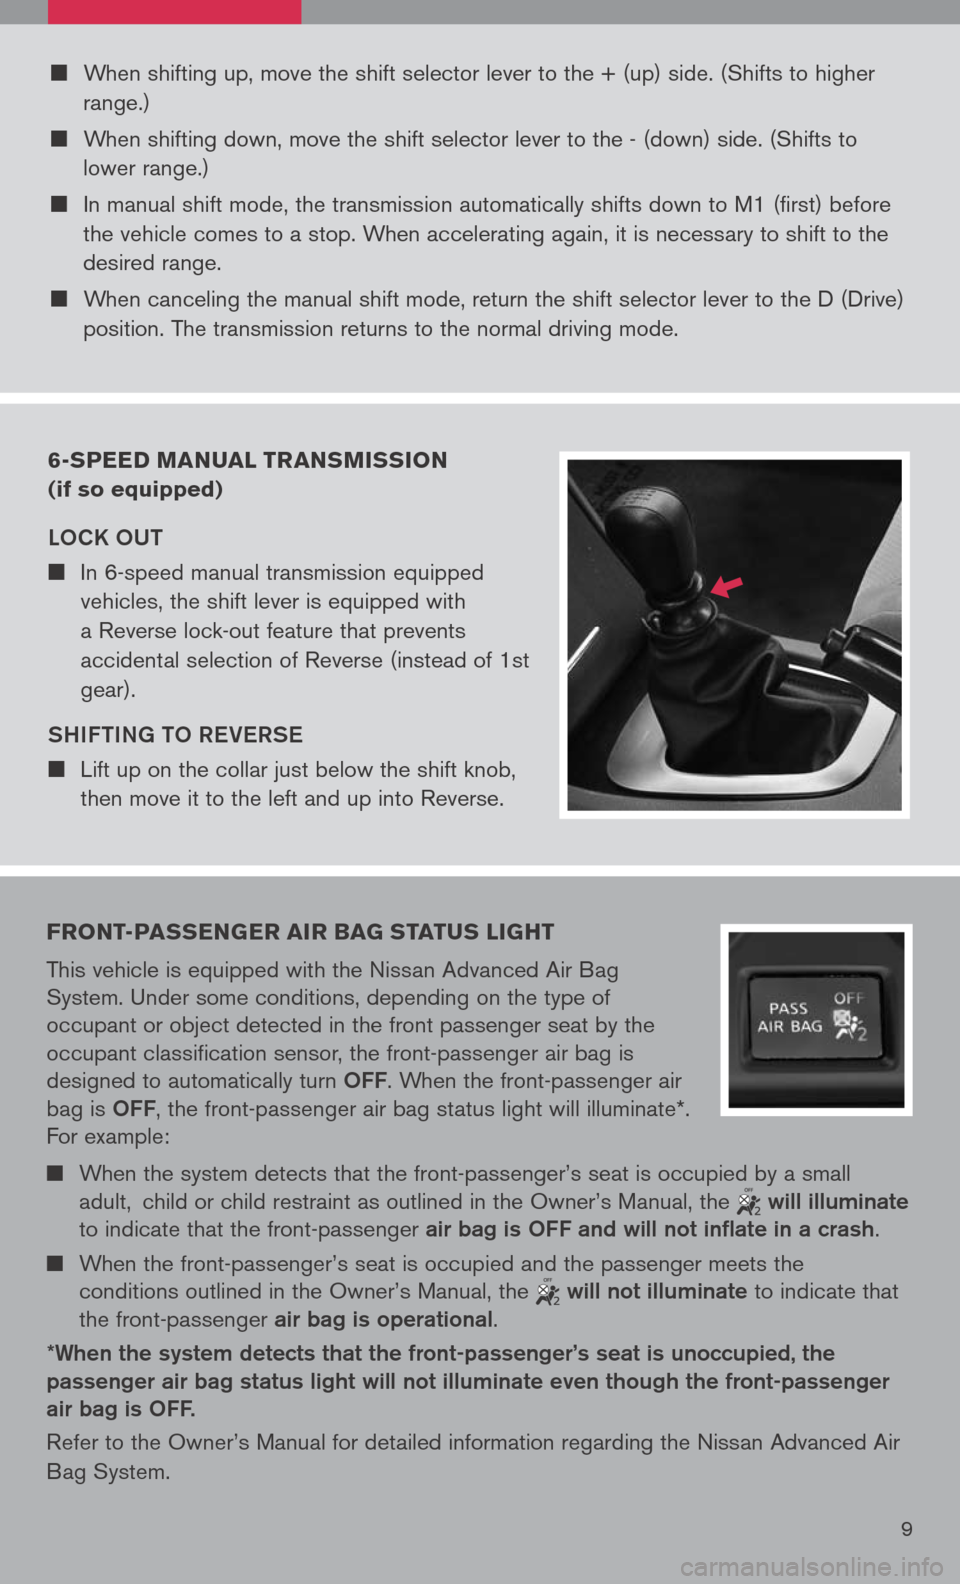
6-SPEED MANUAL TRANSMISSION
(if so equipped)
Lo CK oUt
In 6-speed manual transmission equipped
vehicles, the shift lever is equipped with
a Reverse lock-out feature that prevents
accidental selection of Reverse (instead of 1st
gear).
SHIF tING to R eVe RS e
Lift up on the collar just below the shift knob,
then move it to the left and up into Reverse.
Page 12 of 36
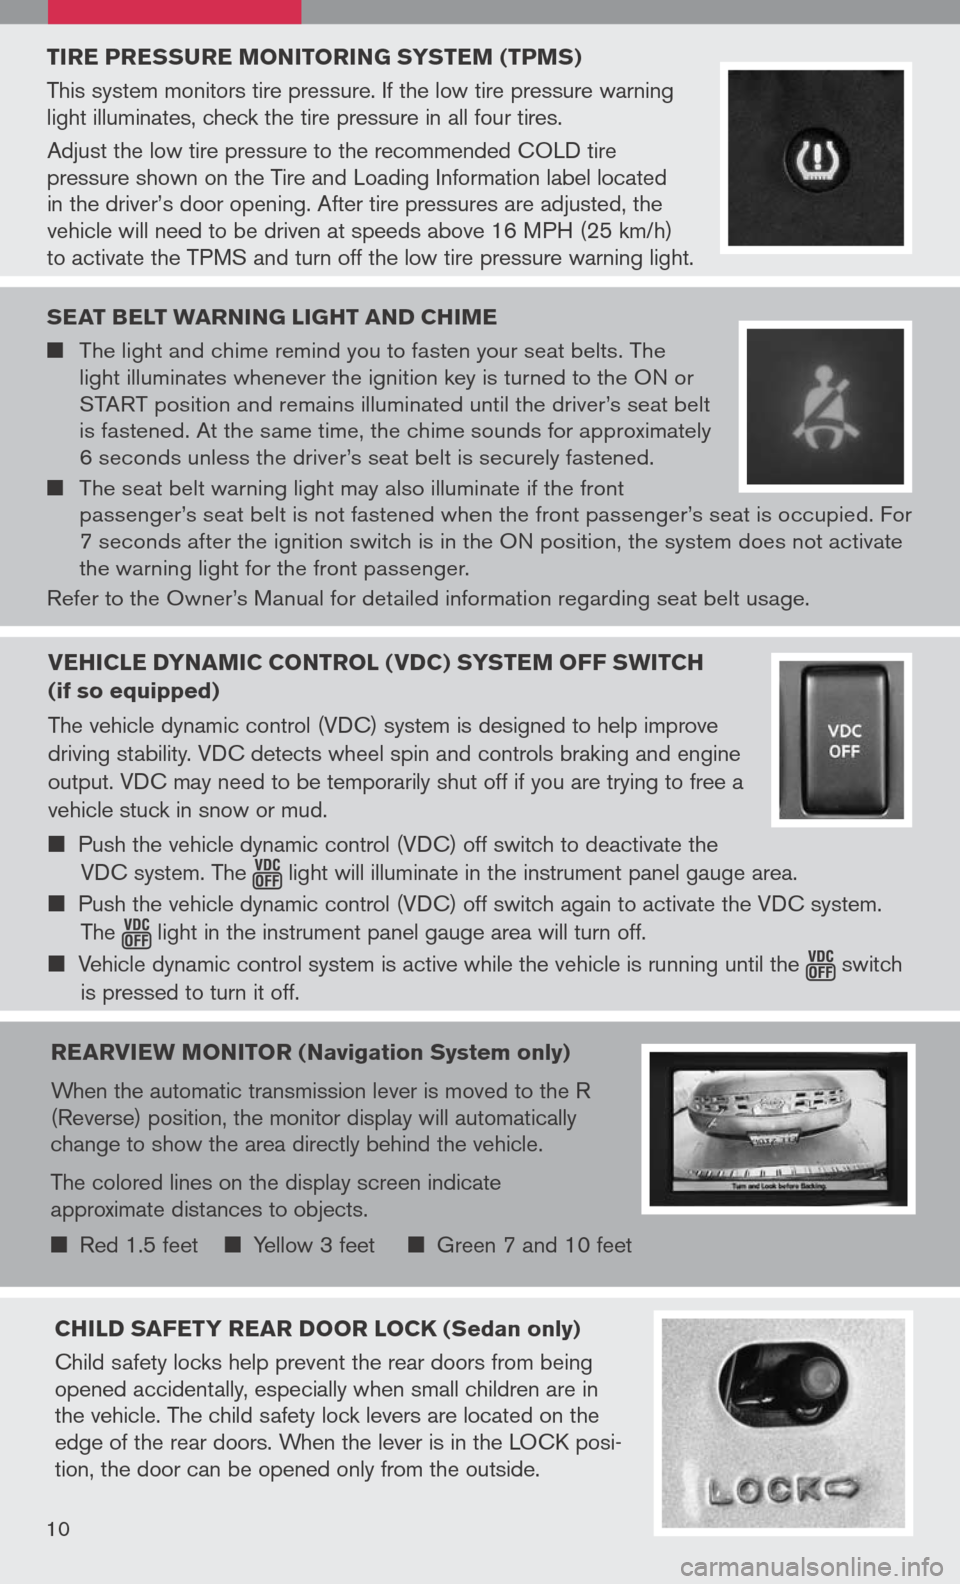
TIRE PRESSURE MONITORING SYSTEM (TPMS)
This system monitors tire pressure. If the low tire pressure warning light illuminates, check the tire pressure in all four tires.
Adjust the low tire pressure to the recommended COLD tire pressure shown on the Tire and Loading Information label located in the driver’s door opening. After tire pressures are adjusted, the vehicle will need to be driven at speeds above 16 MPH (25 km/h) to activate the TPMS and turn off the low tire pressure warning light.
SEAT bELT WARNING LIGHT AND CHIME
The light and chime remind you to fasten your seat belts. The light illuminates whenever the ignition key is turned to the ON or START position and remains illuminated until the driver’s seat belt is fastened. At the same time, the chime sounds for approximately 6 seconds unless the driver’s seat belt is securely fastened.
The seat belt warning light may also illuminate if the front passenger’s seat belt is not fastened when the front passenger’s seat is occupied. For 7 seconds after the ignition switch is in the ON position, the system does not activate the warning light for the front passenger.
Refer to the Owner’s Manual for detailed information regarding seat belt usage.
REARVIEW MONITOR (Navigation System only)
When the automatic transmission lever is moved to the R (Reverse) position, the monitor display will automatically change to show the area directly behind the vehicle.
The colored lines on the display screen indicate approximate distances to objects.
Red 1.5 feet Yellow 3 feet Green 7 and 10 feet
CHILD SAFETY REAR DOOR LOCK (Sedan only)
Child safety locks help prevent the rear doors from being opened accidentally, especially when small children are in the vehicle. The child safety lock levers are located on the edge of the rear doors. When the lever is in the LOCK posi-tion, the door can be opened only from the outside.
10
VEHICLE DYNAMIC CONTROL (VDC) SYSTEM OFF SWITCH
(if so equipped)
The vehicle dynamic control (VDC) system is designed to help improve
driving stability. VDC detects wheel spin and controls braking and engine
output. VDC may need to be temporarily shut off if you are trying to free a
vehicle stuck in snow or mud.
Push the vehicle dynamic control (VDC) off switch to deactivate the
VDC system. The light will illuminate in the instrument panel gauge area.
Push the vehicle dynamic control (VDC) off switch again to activate the VDC system.
The light in the instrument panel gauge area will turn off.
Vehicle dynamic control system is active while the vehicle is running until the switch
is pressed to turn it off.
Page 13 of 36
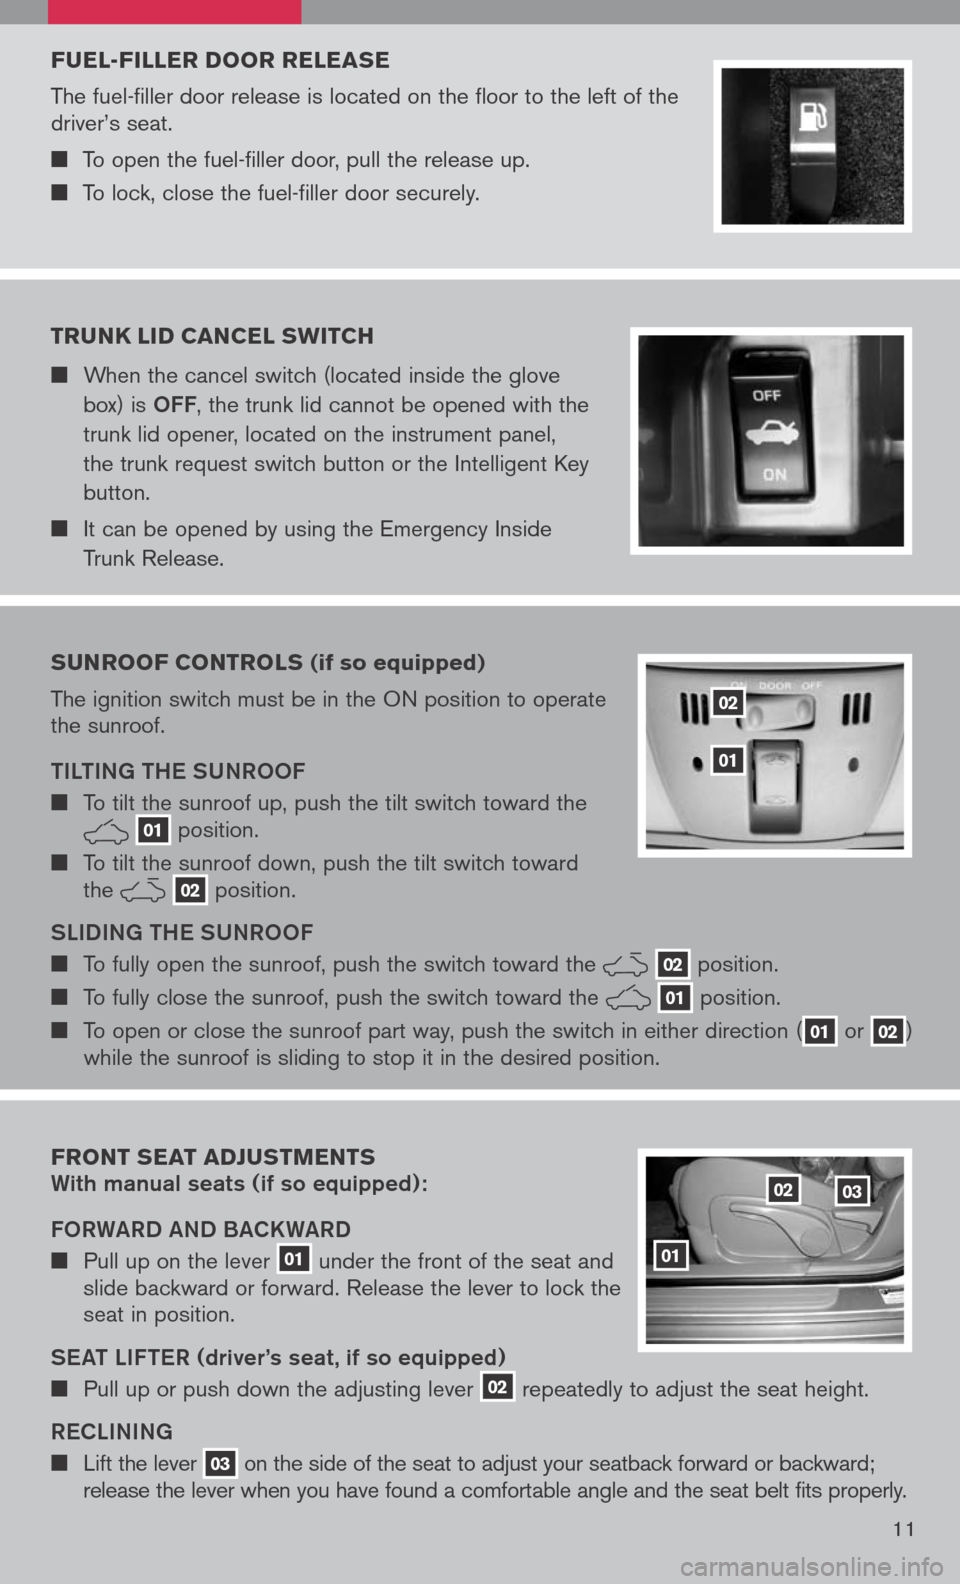
FUEL-FILLER DOOR RELEASE
The fuel-filler door release is located on the floor to the left of the driver’s seat.
To open the fuel-filler door, pull the release up.
To lock, close the fuel-filler door securely.
SUNROOF CONTROLS (if so equipped)
The ignition switch must be in the ON position to operate the sunroof.
tIL tING tH e SUNR ooF
To tilt the sunroof up, push the tilt switch toward the 01 position.
To tilt the sunroof down, push the tilt switch toward the 02 position.
SLIDING tH e SUNR ooF
To fully open the sunroof, push the switch toward the 02 position.
To fully close the sunroof, push the switch toward the 01 position.
To open or close the sunroof part way, push the switch in either direction (01 or 02) while the sunroof is sliding to stop it in the desired position.
02
01
TRUNK LID CANCEL SWITCH
When the cancel switch (located inside the glove
box) is oFF, the trunk lid cannot be opened with the
trunk lid opener, located on the instrument panel,
the trunk request switch button or the Intelligent Key
button.
It can be opened by using the Emergency Inside
Trunk Release.
11
FRONT SEAT ADJUSTMENTS With manual seats (if so equipped):
Fo RWARD AND BACKWARD
Pull up on the lever 01 under the front of the seat and slide backward or forward. Release the lever to lock the seat in position.
S eAt LIF teR
(driver’s seat , if so equipped)
Pull up or push down the adjusting lever 02 repeatedly to adjust the seat height.
Re CLINING
Lift the lever 03 on the side of the seat to adjust your seatback forward or backward; release the lever when you have found a comfortable angle and the seat belt fits properly.
01
0203