2008 NISSAN ALTIMA instrument panel
[x] Cancel search: instrument panelPage 66 of 352

cDo not place objects with sharp edges
on the seat. Also, do not place heavy
objects on the seat that will leave per-
manent impressions in the seat. Such
objects can damage the seat or occu-
pant classification sensor (pattern sen-
sor) . This can affect the operation of the
air bag system and result in serious
personal injury.
cDo not use water or acidic cleaners (hot
steam cleaners) on the seat. This can
damage the seat or occupant classifica-
tion sensor. This can also affect the
operation of the air bag system and
result in serious personal injury.
cImmediately after inflation, several
front air bag system components will be
hot. Do not touch them; you may se-
verely burn yourself.
cNo unauthorized changes should be
made to any components or wiring of
the supplemental air bag system. This is
to prevent accidental inflation of the
supplemental air bag or damage to the
supplemental air bag system.cDo not make unauthorized changes to
your vehicle’s electrical system, sus-
pension system or front end structure.
This could affect proper operation of
the supplemental front air bag system.
cTampering with the supplemental front
air bag system may result in serious
personal injury. Tampering includes
changes to the steering wheel and the
instrument panel assembly by placing
material over the steering wheel pad
and above the instrument panel or by
installing additional trim material
around the air bag system.
cModifying or tampering with the front
passenger seat may result in serious
personal injury. For example, do not
change the front seats by placing mate-
rial on the seat cushion or by installing
additional trim material, such as seat
covers, on the seat that are not specifi-
cally designed to assure proper air bag
operation. Additionally, do not stow any
objects under the front passenger seat
or the seat cushion and seatback. Such
objects may interfere with the proper
operation of the occupant classifica-
tion sensor.cNo unauthorized changes should be
made to any components or wiring of
the seat belt system. This may affect the
supplemental front air bag system.
Tampering with the seat belt system
may result in serious personal injury.
cWork on and around the supplemental
front air bag system should be done by
a NISSAN dealer. Installation of electri-
cal equipment should also be done by a
NISSAN dealer. The Supplemental Re-
straint System (SRS) wiring should not
be modified or disconnected. Unautho-
rized electrical test equipment and
probing devices should not be used on
the air bag system.
cA cracked windshield should be re-
placed immediately by a qualified re-
pair facility. A cracked windshield could
affect the function of the supplemental
air bag system.
cThe SRS wiring harness connectors are
yellow and orange for easy
identification.
When selling your vehicle, we request that you
inform the buyer about the supplemental front air
bag system and guide the buyer to the appropri-
ate sections in this Owner’s Manual.
1-50Safety—Seats, seat belts and supplemental restraint system
ZREVIEW COPYÐ2008 Altima(alt)
Owners ManualÐUSA_English(nna)
04/04/07Ðdebbie
X
Page 70 of 352

SUPPLEMENTAL AIR BAG
WARNING LIGHT
The supplemental air bag warning light,
displayingin the instrument panel, moni-
tors the circuits of the supplemental front air bag,
front seat-mounted side-impact supplemental air
bags and roof-mounted curtain side-impact and
rollover supplemental air bag and seatbelt with
pretensioners. The circuits monitored by the
supplemental air bag warning light are the Air bag
Control Unit, crash zone sensor, satellite sen-
sors, front air bag modules, side air bag modules,
curtain side-impact air bag modules, seatbelt
with pretensioners and all related wiring.When the ignition is in the ON position, the
supplemental air bag warning light illuminates for
about 7 seconds and then turns off. This means
the system is operational.
If any of the following conditions occur, the
supplemental front air bag, front seat-mounted
side-impact supplemental air bags and roof-
mounted curtain side-impact supplemental air
bag and seat belts with pretensioners need ser-
vicing:
cThe supplemental air bag warning light re-
mains on after approximately 7 seconds.
cThe supplemental air bag warning light
flashes intermittently.
cThe supplemental air bag warning light does
not come on at all.
Under these conditions, the supplemental front
air bag, front seat-mounted side-impact supple-
mental air bags and roof-mounted curtain side-
impact and rollover supplemental air bag or seat-
belt with pretensioners may not operate properly.
It must be checked and repaired. Take your ve-
hicle to the nearest NISSAN dealer.
WARNING
If the supplemental air bag warning light
is on, it could mean that the supplemental
front air bag, front seat-mounted side-
impact supplemental air bags, roof-
mounted curtain side-impact and rollover
supplemental air bag and/or seat belt
with pretensioners will not operate in an
accident. To help avoid injury to yourself
or others, have your vehicle checked by a
NISSAN dealer as soon as possible.
Repair and replacement procedure
The supplemental front air bags, front seat-
mounted side-impact supplemental air bags,
roof-mounted curtain side-impact supplemental
air bags and seat belts with pretensioners are
designed to inflate on a one-time-only basis. As a
reminder, unless it is damaged, the supplemental
air bag warning light remains illuminated after
inflation has occurred. Repair and replacement of
these supplemental air bag systems should be
done only by a NISSAN dealer.
When maintenance work is required on the ve-
hicle, the supplemental front air bags, supple-
mental side air bags, curtain side-impact air
bags, pretensioners and related parts should be
pointed out to the person performing the mainte-LRS0100
1-54Safety—Seats, seat belts and supplemental restraint system
ZREVIEW COPYÐ2008 Altima(alt)
Owners ManualÐUSA_English(nna)
04/04/07Ðdebbie
X
Page 72 of 352

2 Instruments and controls
Instrument panel...................................2-2
Meters and gauges................................2-3
Speedometer and odometer.....................2-4
Tachometer....................................2-5
Engine coolant temperature gauge...............2-5
Fuel gauge....................................2-6
Compass display (if so equipped)...................2-6
Compass display...............................2-7
Warning/indicator lights and audible reminders......2-10
Checking bulbs...............................2-10
Warning lights................................2-10
Indicator lights................................2-14
Audible reminders.............................2-16
Vehicle information display.........................2-16
How to use the Vehicle Information Display.......2-17
Security systems.................................2-24
Vehicle security system.........................2-24
NISSAN vehicle immobilizer system.............2-25
Windshield wiper and washer switch...............2-26
Switch operation..............................2-26
Rear window and outside mirror (if so equipped)
defroster switch..................................2-27
Headlight and turn signal switch....................2-27Xenon headlights (if so equipped)...............2-27
Headlight control switch........................2-28
Daytime running light system (Canada only)......2-30
Instrument brightness control...................2-31
Turn signal switch.............................2-31
Fog light switch (if so equipped)................2-32
Hazard warning flasher switch.....................2-32
Horn............................................2-33
Heated seat (if so equipped).......................2-33
Traction control system (TCS) off switch
(if so equipped)..................................2-34
Vehicle dynamic control (VDC) off switch
(if so equipped)..................................2-34
Power outlet.....................................2-35
Storage.........................................2-36
Map pockets..................................2-36
Seatback pockets.............................2-36
Storage pouch................................2-37
Sunglasses holder.............................2-37
Cup holders..................................2-38
Glove box....................................2-39
Console box..................................2-39
Covered storage box...........................2-40
ZREVIEW COPYÐ2008 Altima(alt)
Owners ManualÐUSA_English(nna)
03/12/07Ðdebbie
X
Page 74 of 352

1. Vents (P. 4-10)
2. Headlight/fog light (if so equipped)/turn
signal switch (P. 2-27)3. Steering wheel switch for audio control
(if so equipped)/BluetoothThands-free
phone system (if so equipped)
(P. 4-43, P. 4-46, P. 4-60)
4. Meters and gauges (P. 2-3)5. Driver supplemental air bag/horn
(P. 1-39, P. 2-33)
6. Cruise control main/set switch
(P. 5-17)
7. Windshield wiper/washer switch
(P. 2-26)
8. Push-button ignition switch (P. 5-6)
9. Hazard warning flasher switch (P. 2-32)
10. Front passenger air bag status light
(P. 1-48)
11. Front passenger supplemental air bag
(P. 1-39)
12. Glove box (P. 2-39)
13. Navigation system* (if so equipped)
(P. 4-2)
14. Heater and air conditioner (manual or
automatic) (P. 4-10, P. 4-18)
15. Shift selector lever (P. 5-10)
16. Audio system controls (P. 4-20)
17. Tilt/telescopic steering wheel controls
(P. 3-20)
18. Vehicle information display controls
(P. 2-16)
19. Hood release (P. 3-16)
WIC1258
INSTRUMENT PANEL
2-2Instruments and controls
ZREVIEW COPYÐ2008 Altima(alt)
Owners ManualÐUSA_English(nna)
03/12/07Ðdebbie
X
Page 89 of 352

HOW TO USE THE VEHICLE
INFORMATION DISPLAY
Press thebutton, located on the instru-
ment panel just behind the steering wheel, to
display the following modes:
Engine start operation indicator!MPG!
MPG/MPH!Time/Miles!Range!Exterior
Temperature!Setting!WarningFuel Economy mode
The fuel economy mode can be selected to dis-
play the instant fuel economy since the last reset.Average speed mode
The average speed mode can be selected to
display the average miles per gallon and miles per
hour since the last reset.
LIC1103LIC1093LIC1097
Instruments and controls2-17
ZREVIEW COPYÐ2008 Altima(alt)
Owners ManualÐUSA_English(nna)
03/12/07Ðdebbie
X
Page 100 of 352

When the xenon headlight is initially turned on, its
brightness or color varies slightly. However, the
color and brightness will soon stabilize.
cThe life of xenon headlights will be
shortened by frequent on-off opera-
tion. It is generally desirable not to turn
off the headlights for short intervals
(for example, when the vehicle stops at
a traffic signal) . Even when the daytime
running lights are active (Canada only) ,
the xenon headlights do not turn on.
This way the life of the xenon head-
lights is not reduced.
cIf the xenon headlight bulb is close to
burning out, the brightness will drasti-
cally decrease, the light will start blink-
ing, or the color of the light will be-
come reddish. If one or more of the
above signs appear, contact a NISSAN
dealer.
HEADLIGHT CONTROL SWITCH
Lighting
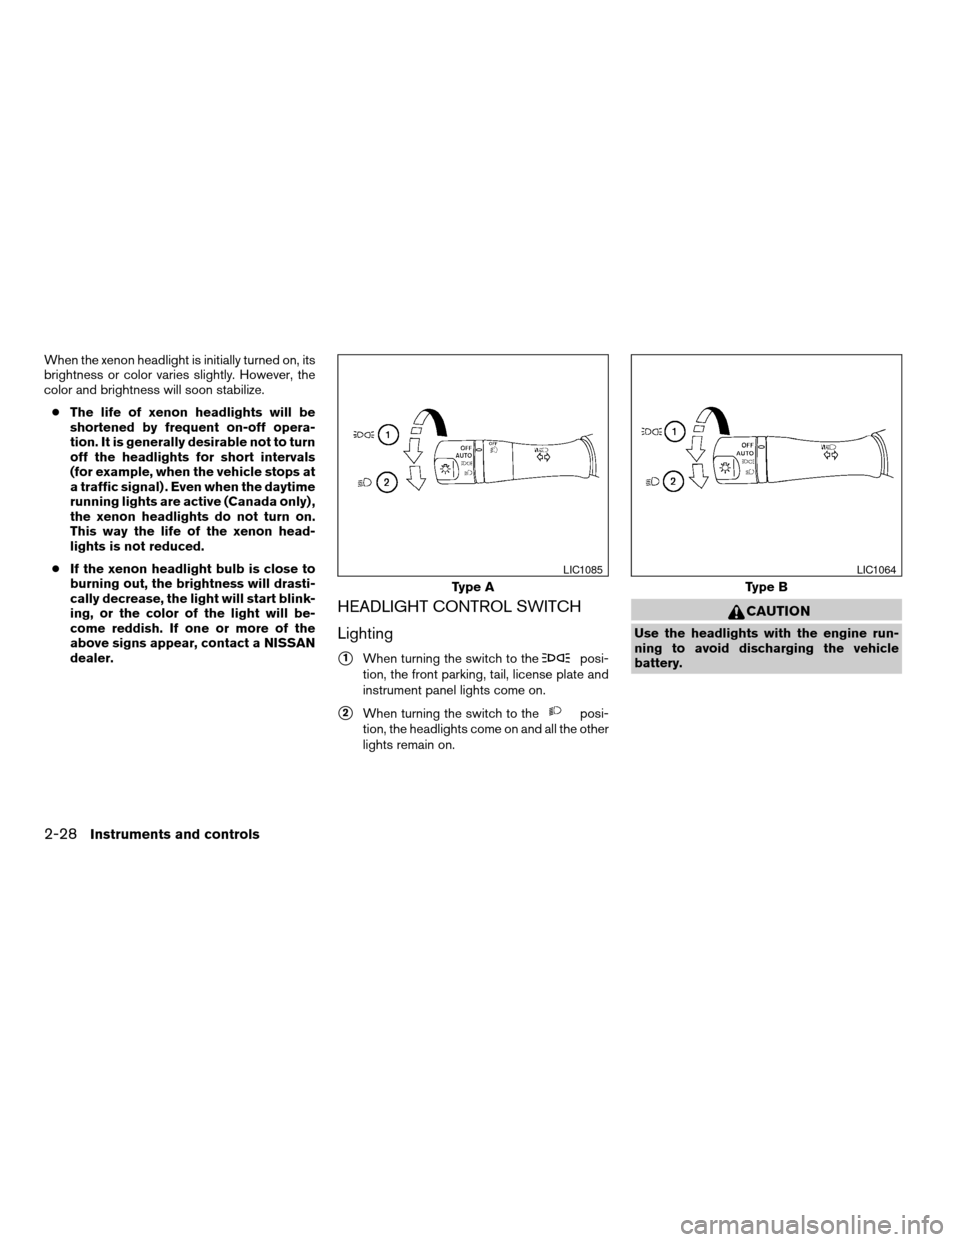
s1When turning the switch to theposi-
tion, the front parking, tail, license plate and
instrument panel lights come on.
s2When turning the switch to theposi-
tion, the headlights come on and all the other
lights remain on.
CAUTION
Use the headlights with the engine run-
ning to avoid discharging the vehicle
battery.
Type A
LIC1085
Type B
LIC1064
2-28Instruments and controls
ZREVIEW COPYÐ2008 Altima(alt)
Owners ManualÐUSA_English(nna)
03/12/07Ðdebbie
X
Page 101 of 352

Autolight system (if so equipped)
The autolight system allows the headlights to be
set so they turn on and off automatically. The
autolight system can:
cTurn on the headlights, front parking, tail,
license plate and instrument panel lights au-
tomatically when it is dark.
cTurn off all the lights when it is light.
cKeep all the lights on for 45 seconds after
you turn the key to OFF and all doors are
closed.To turn on the autolight system:
1. Turn the headlight switch to the AUTO posi-
tion
s1.
2. Push the push-button ignition switch to the
ON position.
3. The autolight system automatically turns the
headlights on and off.
Initially, if the push-button ignition switch is
pushed OFF and a door is opened and left open,
the headlights remain ON for 5 minutes. If an-
other door is opened during the 5 minutes, then
the 5 minute timer is reset.
To turn the autolight system off, turn the switch to
the OFF,
,orposition.Type C
LIC1063LIC1086
Instruments and controls2-29
ZREVIEW COPYÐ2008 Altima(alt)
Owners ManualÐUSA_English(nna)
03/12/07Ðdebbie
X
Page 102 of 352

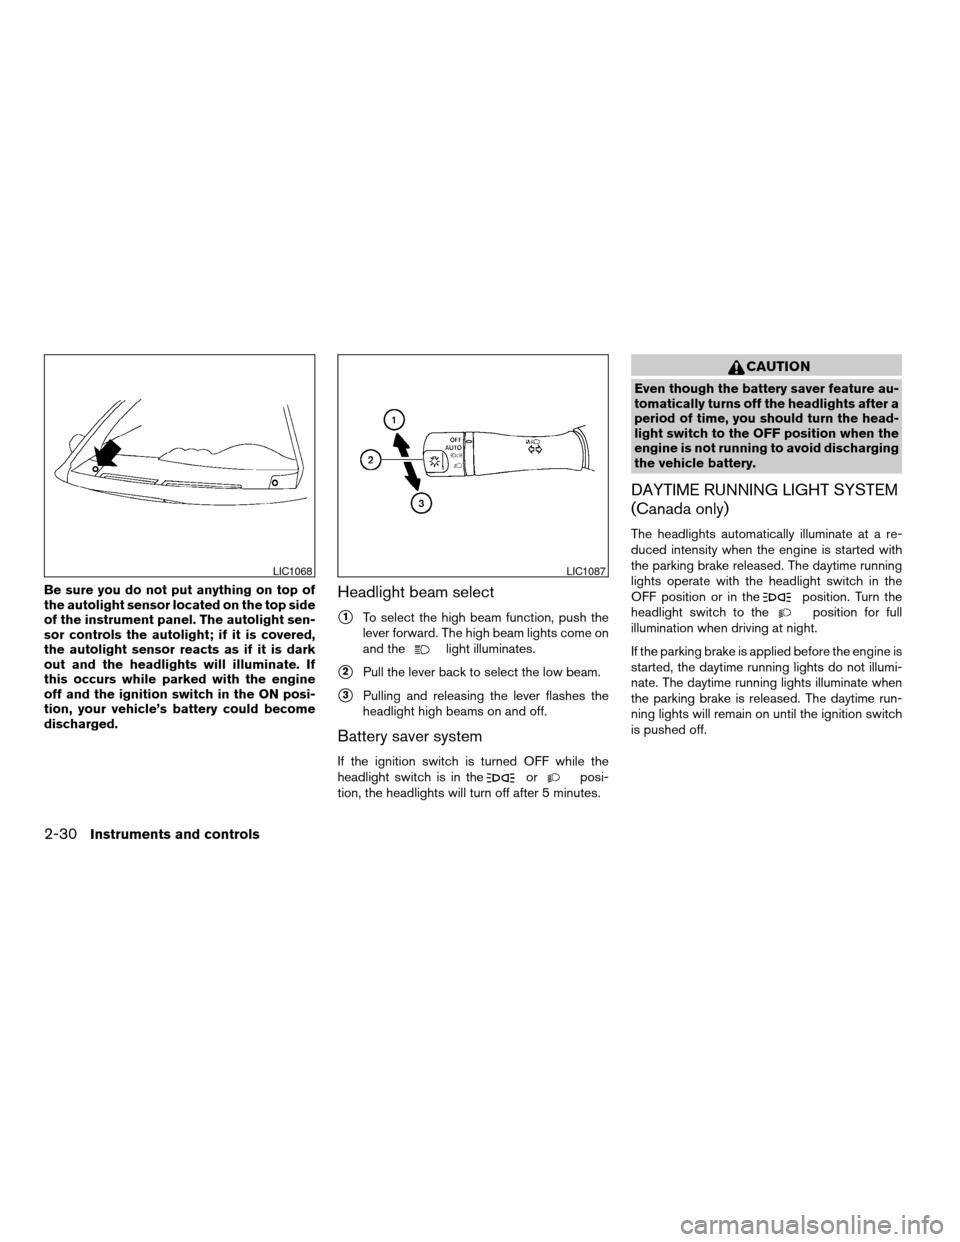
Be sure you do not put anything on top of
the autolight sensor located on the top side
of the instrument panel. The autolight sen-
sor controls the autolight; if it is covered,
the autolight sensor reacts as if it is dark
out and the headlights will illuminate. If
this occurs while parked with the engine
off and the ignition switch in the ON posi-
tion, your vehicle’s battery could become
discharged.Headlight beam select
s1To select the high beam function, push the
lever forward. The high beam lights come on
and the
light illuminates.
s2Pull the lever back to select the low beam.
s3Pulling and releasing the lever flashes the
headlight high beams on and off.
Battery saver system
If the ignition switch is turned OFF while the
headlight switch is in theorposi-
tion, the headlights will turn off after 5 minutes.
CAUTION
Even though the battery saver feature au-
tomatically turns off the headlights after a
period of time, you should turn the head-
light switch to the OFF position when the
engine is not running to avoid discharging
the vehicle battery.
DAYTIME RUNNING LIGHT SYSTEM
(Canada only)
The headlights automatically illuminate at a re-
duced intensity when the engine is started with
the parking brake released. The daytime running
lights operate with the headlight switch in the
OFF position or in the
position. Turn the
headlight switch to theposition for full
illumination when driving at night.
If the parking brake is applied before the engine is
started, the daytime running lights do not illumi-
nate. The daytime running lights illuminate when
the parking brake is released. The daytime run-
ning lights will remain on until the ignition switch
is pushed off.
LIC1068LIC1087
2-30Instruments and controls
ZREVIEW COPYÐ2008 Altima(alt)
Owners ManualÐUSA_English(nna)
03/12/07Ðdebbie
X