2008 MINI COOPER CONVERTIBLE spare tire
[x] Cancel search: spare tirePage 6 of 176

CONTENTS
4
In the engine compartment:
Bonnet 118
Engine compartment:
MINI COOPER and
MINI COOPER Convertible119
MINI COOPER S and
MINI COOPER S Convertible120
Engine oil 121
Coolant 122
Brake system 124
Maintenance and care:
MINI Maintenance System 125
Socket for Onboard Diagnostics
OBD 126
Caring for your vehicle 126
Vehicle storage 129
OWNER SERVICE PROCEDURESReplacement procedures:
Onboard tool kit 132
Wiper blades 132
Lamps and bulbs 133
Repairing a flat tire 137
Space-saver spare tire137
Changing tires 139
MINI Mobility System141
Vehicle battery144
Fuses 145
Giving and receiving assistance:
Jump-starting146
Towing and tow-starting 147
TECHNICAL DATAEngine data 152
Dimensions:
MINI153
MINI Convertible154
Weights:
MINI155
MINI Convertible156
Capacities 157
Page 76 of 176

74
FLAT TIRE MONITOR The conceptAs you drive, the Flat Tire Monitor keeps
track of the tire inflation pressure in all four
tires. The system alerts you when there is a
substantial pressure loss in one of the tires
relative to another.
In the event of tire pressure loss, the rolling
radius of the tire changes, thereby affect-
ing the rotational speed of the wheels. This
change is detected, and a flat tire warning
is issued to the driver.System requirementsTo ensure the reliability of flat tire warn-
ings, the system must be initialized with
the correct tire inflation pressures.
Each time you correct the pressure in
a tire, or change a wheel or tire, the
system must be reinitialized.<
System limitations
The Flat Tire Monitor cannot alert you
to severe and sudden tire damage
caused by external factors, nor does it
detect the gradual and minor loss of pres-
sure in all four tires.<
The system could issue a false warning or
function in a delayed manner in the follow-
ing situations:
>System was not initialized
>You are driving on a snow-covered or
slippery road surface
>Sporty driving style: slip at the drive
wheels, high lateral acceleration
>You are driving with snow chains.
When driving with a space-saver spare tire,
the Flat Tire Monitor cannot function.
Initializing the system
Initialization is completed while you
are driving, but you can stop the car
at any time. Initialization is automatically
continued when you continue driving. Do
not initialize the system if you are driving
with snow chains or a space-saver spare
tire.<
1. Before a journey, start the engine, but do
not start driving.
2. Press the button until the indicator lamp
in the display elements lights up in yel-
low for several seconds.
3. Drive off.
Initialization is completed during the
drive, without any feedback issued.
Page 78 of 176

76
TIRE PRESSURE MONITOR
*
The concept
TPM checks the inflation pressures of the
four mounted tires. The system notifies you
if there is a significant loss of pressure in
one or more tires.System requirementsIn order to assure the reliable reporting of a
flat tire, the system must be reset while all
tire inflation pressures are correct.
Always use wheels with TPM electronics
and a metal valve. Otherwise, the system
may malfunction.
Each time a tire inflation pressure has
been corrected or a wheel or tire has
been changed, reset the system.<
System limitations
TPM cannot warn you in advance of
sudden severe tire damage caused by
outside influences.<
The system does not work correctly if it has
not been reset; for example, a flat tire may
be indicated even though the tire inflation
pressures are correct.
The system is inactive and cannot indicate
a flat tire if a wheel without TPM electron-
ics, such as a compact spare wheel, has
been mounted, or if TPM is temporarily
malfunctioning due to other systems or de-
vices using the same radio frequency.
Resetting the system
Each time a tire inflation pressure has
been corrected or a wheel or tire has
been changed, reset the system.<
1. Start the engine, but do not start driving.
2. Press the button until the yellow warn-
ing lamp in the display elements lights
up yellow for several seconds.
3. Drive off.
After driving a few minutes, the set
inflation pressures in the tires are
accepted as the target values to be mon-
itored. The system reset is completed
without notification during your drive,
which can be interrupted at any time.
When driving resumes, the reset is con-
tinued automatically.
Page 110 of 176

108
TIRE INFLATION PRESSURE Information for your safetyIt is not merely the tire's service life, but
also driving safety and driving comfort that
depend on the condition of the tires and
the maintenance of the specified tire pres-
sure.Checking tire inflation pressuresCheck the tire inflation pressures only on
cold tires. This means after driving a maxi-
mum of 1.25 miles/2 km or when the vehi-
cle has been parked for at least 2 hours.
Warm tires have higher pressures.
Check the tire inflation pressures reg-
ularly and correct them, if necessary,
including the space-saver spare tire: at
least twice a month and before an
extended trip. Otherwise, incorrect tire
pressures can cause driving instability or
tire damage, ultimately resulting in acci-
dents. Do not drive with deflated, i.e. flat,
tires except if Run-Flat Tires are fitted. A
flat tire greatly impairs steering and brak-
ing response, and can lead to complete loss
of control over the vehicle.<
After correcting the tire inflation
pressure, reinitialize the Flat Tire
Monitor
*, refer to page74 or reset the Tire
Pressure Monitor
*, page 76.<
Tire inflation pressures for original
tiresThe tire inflation pressures for your stan-
dard tires are shown on the driver's-side
door post, visible when the door is open.Tire inflation pressures for other tire
sizesIn the following tire pressure table, all pres-
sures are given for the specified tire sizes at
ambient temperature.
In order to determine the correct
inflation pressures for your tires,
refer to the values for the tire size in ques-
tion.<
Checking the inflation pressure on the
space-saver spare tireBehind the bumper there is a valve exten-
sion accessible from the outside for check-
ing the inflation pressure.Tire sizeThe tire inflation pressures apply to the tire
sizes approved and the tire brands recom-
mended by the manufacturer of your MINI.
Your MINI Dealer will be glad to advise you.
Page 111 of 176

109
OVERVIEW REPAIRSOPERATIONCONTROLS DATA INDEX
TIRE INFLATION PRESSUREModel Tire size Pressures specified in psi/kPa
All pressure specifications in the table are
indicated in psi/kilopascal with cold tires.
Cold = ambient temperature
Traveling speeds up to 100 mph/
160 km/habove 100 mph/
160 km/h
MINI COOPER/
MINI COOPER
Convertible175/65 R 15 84 H M+S A/S
175/65 R 15 84 H
195/55 R 16 87 V M+S A/S
195/55 R 16 87 H M+S A/S, Convertible only
195/55 R 16 87 H
205/45 R 17 84 V M+S A/S
205/45 R 17 84 V30/210 30/210 30/210 30/210 35/240 35/240
175/60 R 15 84 H M+S
175/60 R 16 82 H M+S
195/55 R 16 87 H M+S
205/45 R 17 84 V M+S
205/40 R 18 82 W33/230 33/230 33/230 33/230 38/260 38/260
Space-saver spare tire: T 115/70 R 15 90 M 61/420 61/420 61/420 61/420 - -
Page 118 of 176

116
NEW WHEELS AND TIRESThe correct wheels and tires
The manufacturer of your MINI rec-
ommends mounting only wheels and
tires that it has specifically approved for
use on your particular model. Although
other wheels and tires may theoretically
have the same dimensions, variations in
factors such as manufacturing tolerances
can result in contact between tire and
bodywork, ultimately leading to serious
accidents. The manufacturer of your MINI
cannot evaluate non-approved wheels and
tires to determine if they are suited for use,
and therefore cannot ensure the operating
safety of the vehicle if they are mounted.<
Your MINI Dealer will be glad to inform you
about the correct wheel and tire combina-
tion for your vehicle.
The correct wheel and tire combination is
also important for various systems that
would otherwise be impaired, e.g. ABS or
DSC.
To maintain good handling and vehicle
response, use only tires of a single brand
and tread configuration. In the event of tire
damage, remount the previous wheel and
tire combination as soon as possible.
Wheels with Tire Pressure Monitor
TPM electronicsWhen mounting new tires or changing over
from summer to winter tires, or vice versa,
only use wheels with TPM electronics; oth-
erwise the Tire Pressure Monitor may not
be able to detect a puncture, refer to
page76. Your MINI Dealer will be glad to
advise you.Run-Flat TiresFor your own safety, use Run-Flat Tires
when mounting new tires or replacing
summer tires with winter tires or vice
versa. Keep in mind that no spare wheel is
available in the event of a flat. Your MINI
Dealer will be glad to advise you.
For safety reasons, the manufacturer
of your MINI recommends having
Run-Flat Tires replaced, not repaired, if they
are damaged.<
Tire designationFor each tire size, the manufacturer of your
MINI recommends certain tire brands. You
can recognize these by the clearly visible
designation on the tire's sidewall.
When used properly these tires meet the
highest standards regarding safety and
handling characteristics.
Page 134 of 176

132
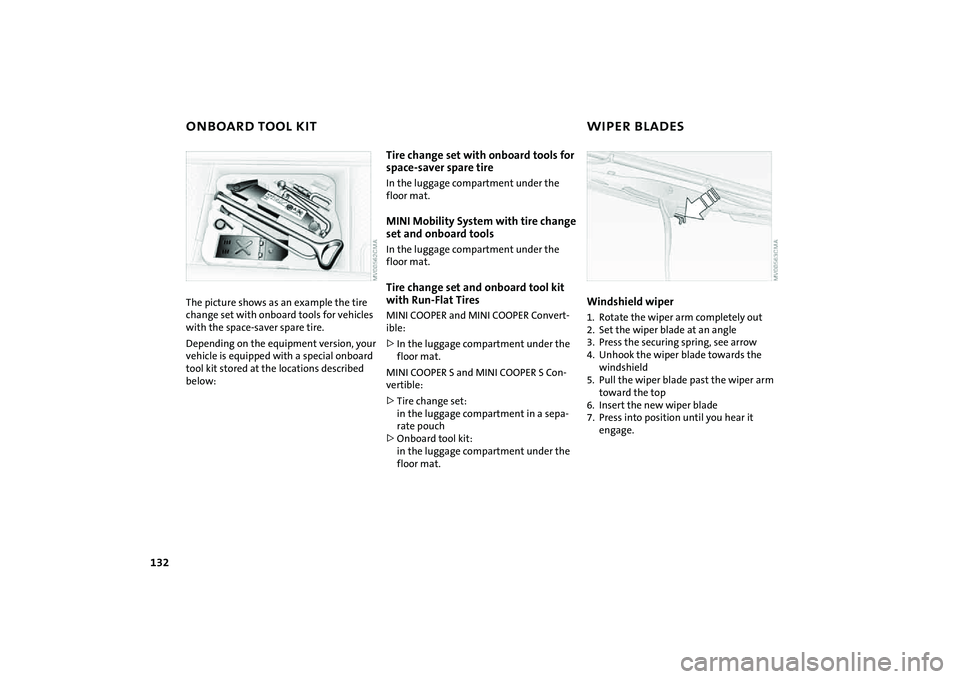
ONBOARD TOOL KIT WIPER BLADESThe picture shows as an example the tire
change set with onboard tools for vehicles
with the space-saver spare tire.
Depending on the equipment version, your
vehicle is equipped with a special onboard
tool kit stored at the locations described
below:
Tire change set with onboard tools for
space-saver spare tireIn the luggage compartment under the
floor mat.MINI Mobility System with tire change
set and onboard toolsIn the luggage compartment under the
floor mat.Tire change set and onboard tool kit
with Run-Flat TiresMINI COOPER and MINI COOPER Convert-
ible:
>In the luggage compartment under the
floor mat.
MINI COOPER S and MINI COOPER S Con-
vertible:
>Tire change set:
in the luggage compartment in a sepa-
rate pouch
>Onboard tool kit:
in the luggage compartment under the
floor mat.
Windshield wiper1. Rotate the wiper arm completely out
2. Set the wiper blade at an angle
3. Press the securing spring, see arrow
4. Unhook the wiper blade towards the
windshield
5. Pull the wiper blade past the wiper arm
toward the top
6. Insert the new wiper blade
7. Press into position until you hear it
engage.
Page 138 of 176

136
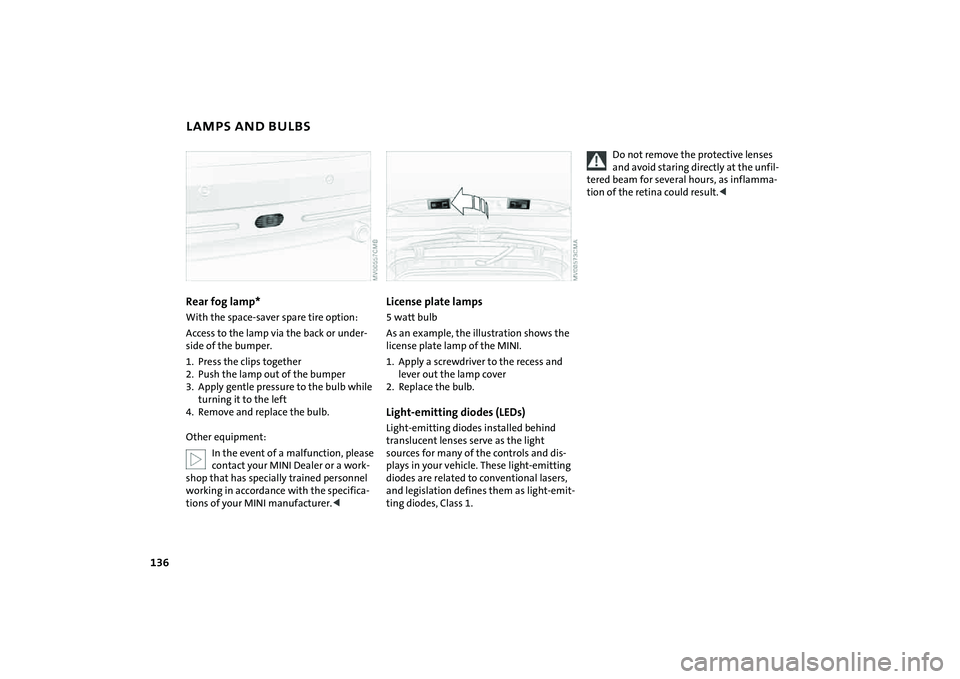
LAMPS AND BULBSRear fog lamp*With the space-saver spare tire option:
Access to the lamp via the back or under-
side of the bumper.
1. Press the clips together
2. Push the lamp out of the bumper
3. Apply gentle pressure to the bulb while
turning it to the left
4. Remove and replace the bulb.
Other equipment:
In the event of a malfunction, please
contact your MINI Dealer or a work-
shop that has specially trained personnel
working in accordance with the specifica-
tions of your MINI manufacturer.<
License plate lamps 5 watt bulb
As an example, the illustration shows the
license plate lamp of the MINI.
1. Apply a screwdriver to the recess and
lever out the lamp cover
2. Replace the bulb.Light-emitting diodes (LEDs)Light-emitting diodes installed behind
translucent lenses serve as the light
sources for many of the controls and dis-
plays in your vehicle. These light-emitting
diodes are related to conventional lasers,
and legislation defines them as light-emit-
ting diodes, Class 1.
Do not remove the protective lenses
and avoid staring directly at the unfil-
tered beam for several hours, as inflamma-
tion of the retina could result.<