Page 103 of 474

102 Controls in detail
Locking and unlocking
Trunk lid emergency release
With the emergency release button, the
trunk can be opened from inside the trunk.
1Emergency release button
�Briefly press emergency release
button1.
The trunk lid unlocks and opens
slightly.
�Push up the trunk lid to fully open.Illumination of the emergency release
button:
�The button flashes for 30 minutes after
opening the trunk.
�The button flashes for 60 minutes after
closing the trunk.
Automatic central locking
The doors and the trunk automatically lock
when the vehicle is set into motion.
You can deactivate the automatic locking
using the control system, see “Setting
automatic locking” (
�page 146).
iThe emergency release button unlocks
the trunk while the vehicle is standing still or
in motion.
iThe emergency release button does not un-
lock the trunk if the vehicle battery is discharged
or disconnected.
iIf the vehicle has previously been centrally
locked with the SmartKey, opening the trunk
from the inside will trigger the anti-theft alarm
system.
To cancel the alarm, do one of the following:
�Press buttonŒor‹on the
SmartKey.
�Insert the SmartKey in the starter switch.
iYou can open a locked door from the inside.
Open door only when conditions are safe to do
so.
iThe doors unlock automatically after an
accident if the force of the impact exceeds a
preset threshold.
The vehicle locks automatically when the ignition
is switched on and the wheels are turning at a
vehicle speed of approximately 9 mph (15 km/h)
or more. You could therefore lock yourself out
when the vehicle
�is pushed or towed
�is on a test stand
Page 106 of 474
105 Controls in detail
Seats
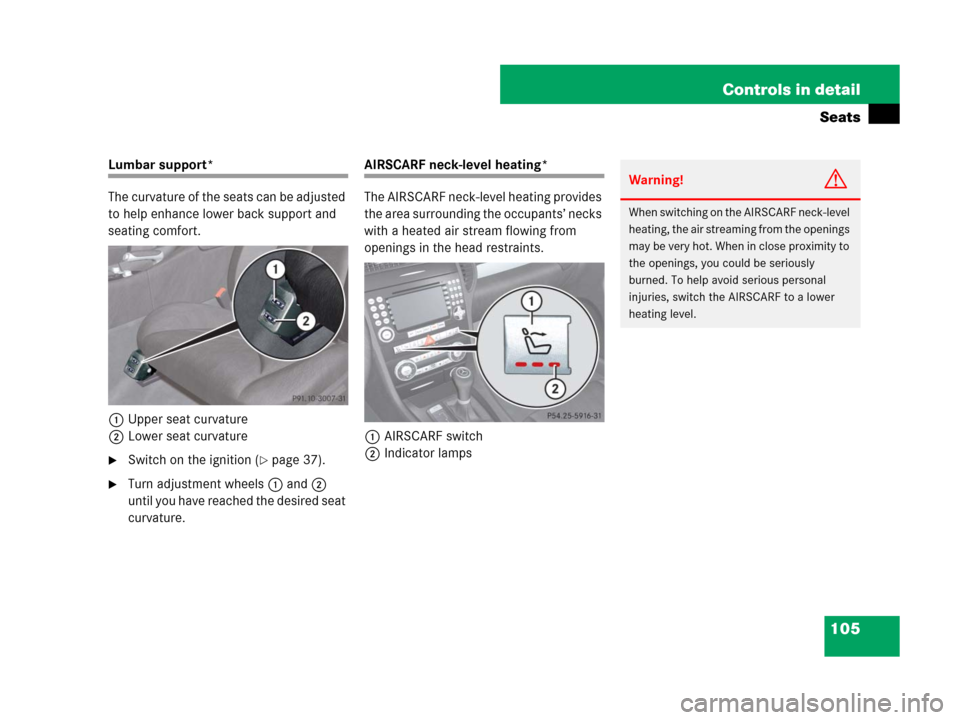
Lumbar support*
The curvature of the seats can be adjusted
to help enhance lower back support and
seating comfort.
1Upper seat curvature
2Lower seat curvature
�Switch on the ignition (�page 37).
�Turn adjustment wheels 1 and 2
until you have reached the desired seat
curvature.
AIRSCARF neck-level heating*
The AIRSCARF neck-level heating provides
the area surrounding the occupants’ necks
with a heated air stream flowing from
openings in the head restraints.
1AIRSCARF switch
2Indicator lamps
Warning!G
When switching on the AIRSCARF neck-level
heating, the air streaming from the openings
may be very hot. When in close proximity to
the openings, you could be seriously
burned. To help avoid serious personal
injuries, switch the AIRSCARF to a lower
heating level.
Page 108 of 474

107 Controls in detail
Memory function*
�Memory function*
Prior to operating the vehicle, the driver
should check and adjust the seat height,
seat position fore and aft, and seat back-
rest angle if necessary, to ensure adequate
control, reach and comfort. The head re-
straint should also be adjusted for proper
height. See also the section on air bags
(
�page 66) for proper seat positioning.
In addition, adjust the steering wheel to
ensure adequate control, reach, operation
and comfort. Both the interior and exterior
rear view mirrors should be adjusted for
adequate rear vision.
Fasten seat belts. Infants and small
children should be seated in an appropri-
ate infant or child restraint system which is
properly secured by a lap-shoulder belt
and that complies with U.S. Federal Motor
Vehicle Safety Standards 213 and 255
and Canadian Motor Vehicle Safety
Standards 213 and 210.2.With the memory function you can store up
to three different configurations.
Each store position on the driver’s side
includes the following settings:
�Seat position
�Steering wheel position
�Exterior rear view mirrors’ position
Each store position on the passenger side
includes the following setting:
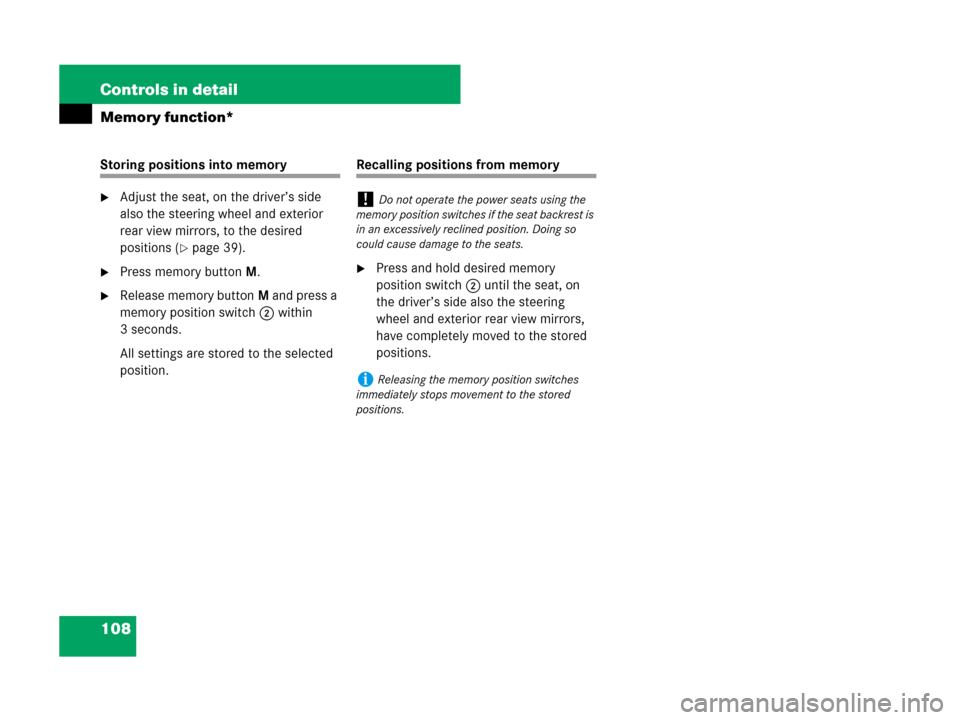
�Seat positionThe memory button and memory position
switch are located on the outer side of
each seat.
1Memory buttonM
2Memory position switch
�Switch on the ignition (�page 37).
or
�Open the respective door.
Warning!G
Do not activate the memory function while
driving. Activating the memory function
while driving could cause the driver to lose
control of the vehicle.
Page 109 of 474
108 Controls in detail
Memory function*
Storing positions into memory
�Adjust the seat, on the driver’s side
also the steering wheel and exterior
rear view mirrors, to the desired
positions (
�page 39).
�Press memory buttonM.
�Release memory buttonM and press a
memory position switch 2 within
3 seconds.
All settings are stored to the selected
position.
Recalling positions from memory
�Press and hold desired memory
position switch2 until the seat, on
the driver’s side also the steering
wheel and exterior rear view mirrors,
have completely moved to the stored
positions.
!Do not operate the power seats using the
memory position switches if the seat backrest is
in an excessively reclined position. Doing so
could cause damage to the seats.
iReleasing the memory position switches
immediately stops movement to the stored
positions.
Page 115 of 474

114 Controls in detail
Lighting
Corner-illuminating front fog lamps*
The corner-illuminating front fog lamps
improve illumination of the area in the
direction into which you are turning.
The corner-illuminating front fog lamps will
operate with the engine running and with
�the exterior lamp switch in
positionB (
�page 109)
or
�the exterior lamp switch in
positionU (
�page 109)
or
�the daytime running lamp mode
activated (
�page 111)Driving forward
Switching on corner-illuminating front
fog lamps
�Switch on the left or right turn signal
(
�page 55), depending on whether
you are turning left or right.
The respective front fog lamp comes on
and illuminates the area in the
direction into which you are turning.
or
�Turn the steering wheel in the desired
direction.
The front fog lamp on the side of your
steering direction comes on.
iCorner-illuminating front fog lamps are not
available for the following models:
�SLK 280 and SLK 350 without Bi-Xenon*
headlamps
�SLK 280 and SLK 350 with Sport Package*
�SLK 55 AMG
iWith automatic headlamp mode activated:
Corner-illuminating front fog lamps will only
come on in low ambient lighting conditions.
iIf you are driving faster than
25 mph (40 km/h) or have the front fog lamps
switched on, the corner-illuminating front fog
lamps function is not available.
iIf you have switched on the turn signal for
one side but turn the steering wheel in the
opposite direction, the corner-illuminating front
fog lamp the corner-illuminating lamp comes on
for the side indicated by the turn signal.
The corner-illuminating front fog lamp remains lit
for a maximum of 3 minutes. Afterwards, it goes
out even if the turn signal is still switched on.
iThe corner-illuminating front fog lamps
temporarily come on on both sides of the vehicle
if you turn the steering wheel in one direction
and then again in the other direction shortly
thereafter.
iThe corner-illuminating front fog lamps
will come on automatically depending on the
steering angle, even if you did not switch on
either turn signal.
If the corner-illuminating front fog lamps came
on automatically, they will also go out automati-
cally depending on the steering angle.
Page 116 of 474

115 Controls in detail
Lighting
Switching off corner-illuminating front
fog lamps
The combination switch for the turn signal
resets automatically after major steering
wheel movements. This will switch off the
corner-illuminating front fog lamps if they
where activated by switching on the left or
right turn signal.
If the turn signal should stay on after
making the turn, the turn signal and
corner-illuminating front fog lamp can be
switched off by returning the combination
switch to its original position.Driving in reverse
Switching on corner-illuminating front
fog lamps
�Place the gearshift lever (automatic
transmission*: gear selector lever) in
positionR.
The front fog lamp opposite to your
steering direction comes on.
Switching off corner-illuminating front
fog lamps
�Place the gearshift lever (automatic
transmission*: gear selector lever) out
of positionR.
The respective front fog lamp goes out.
Hazard warning flasher
The hazard warning flasher can be
switched on at all times, even with the
SmartKey removed from the starter
switch.
The hazard warning flasher switches on
automatically when an air bag deploys.
The hazard warning flasher switch is
located on the upper part of the center
console.
1Hazard warning flasher switch
iThere may be a brief delay before the
corner-illuminating front fog lamps switch off.
Page 122 of 474

121 Controls in detail
Control system
�Control system
The control system is activated as soon as
the SmartKey in the starter switch is
turned to position1. The control system
enables you to
�call up information about your vehicle
�change vehicle settings
For example, you can use the control
system to find out when your vehicle is
next due for service, to set the language
for messages in the instrument cluster
display, and much more.
The control system relays information to
the multifunction display.
Multifunction display
1Main odometer
2Trip odometer
3Current program mode
(automatic transmission* only)
4Status indicator (outside
temperature/digital speedometer)
5Current gear selector lever posi-
tion/gear range
(automatic transmission* only)
iThe displays for the audio systems (radio,
CD player) will appear in English, regardless of
the language selected.
Warning!G
A driver’s attention to the road and traffic
conditions must always be his/her primary
focus when driving.
For your safety and the safety of others, se-
lecting features through the multifunction
steering wheel should only be done by the
driver when traffic and road conditions
permit it to be done safely.
Bear in mind that at a speed of just
30 mph (approximately 50 km/h), your
vehicle is covering a distance of
44 feet (approximately 14 m) every second.
Page 123 of 474

122 Controls in detail
Control system
Multifunction steering wheel
The displays in the multifunction display
and the settings in the control system are
controlled by the buttons on the multifunc-
tion steering wheel.
Depending on the selected menu, pressing
the buttons on the multifunction steering
wheel will alter what appears in the multi-
function display.
The information available in the multifunc-
tion display are arranged in menus and
accompanying functions or submenus.
The individual functions are then found
within the relevant menu (radio or CD
operations under
AUDIO, for example).
These functions serve to call up relevant
information or to customize the settings
for your vehicle.
1Multifunction display
Operating the control system
2Selecting the submenu or setting the
volume:
Press button
æup/to increase
çdown/to decrease
3Telephone*:
Press button
sto take a call
to dial
to redial
tto end a call
to reject an incoming call
4Moving within a menu:
Press button
jfor next display
kfor previous display
5Menu systems:
Press button
èfor next menu
ÿfor previous menu