Page 374 of 474

373 Practical hints
What to do if …
Display symbolDisplay messagePossible cause/consequencePossible solution
USA only:
;
Canada only:
3
Check
Brake Fluid LevelThere is insufficient brake fluid in
the reservoir.�Risk of accident!
�Stop the vehicle in a safe location or as soon as
it is safe to do so.
�Turn off the engine.
�Apply the parking brake (�page 59).
�Do not drive any further.
�Contact an authorized Mercedes-Benz Center.
Do not add brake fluid! This will not solve the
problem.
2Brake WearThe brake pads have reached their
wear limit.�Have the brake pads replaced as soon as
possible.
Warning!G
Driving with the message Check Brake
Fluid Level
displayed can result in an
accident. Have your brake system checked
immediately. Do not add brake fluid before
checking the brake system.
Overfilling the brake fluid reservoir can
result in spilling brake fluid on hot engine
parts and the brake fluid catching fire. You
can be seriously burned.!If you find that the brake fluid in the brake
fluid reservoir has fallen to the minimum mark or
below, have the brake system checked for brake
pad thickness and leaks.
!Brake pad thickness must be visually
checked by a qualified technician at the intervals
specified in the Maintenance Booklet.
Page 375 of 474
374 Practical hints
What to do if …
Display symbolDisplay messagePossible cause/consequencePossible solution
•Coolant
Stop, turn engine
off
.
The coolant is too hot.
Among other possible causes,
the poly-V-belt could be broken.�Stop the vehicle in a safe location or as soon as it is
safe to do so.
�Turn off the engine.
�Apply the parking brake (�page 59).
�Check the poly-V-belt.
If it is broken:
�Do not continue to drive. Otherwise, the engine will
overheat due to an inoperative water pump which
may result in damage to the engine. Contact an
authorized Mercedes-Benz Center.
If it is intact:
�Wait for the message to disappear before restarting
the engine.
Doing otherwise could result in serious engine
damage that is not covered by the Mercedes-Benz
Limited Warranty.
(Continued on next page)
Page 380 of 474

379 Practical hints
What to do if …
Display symbolDisplay messagePossible cause/consequencePossible solution
NEngine Oil Level
Reduce Oil LevelSLK 55 AMG only:
You have added too much engine
oil. There is a risk of damaging the
engine or the catalytic converter.�Have oil siphoned or drained off.
Observe all legal requirements with respect
to its disposal.
Engine Oil Level
Stop, turn engine off.There is no oil in the engine. There
is a danger of engine damage.�Stop the vehicle in a safe location or as soon
as it is safe to do so.
�Turn off the engine.
�Apply the parking brake (�page 59).
�Add engine oil (�page 299) and check the
engine oil level (
�page 296).
AReserve FuelThe fuel level has dropped below
the reserve mark.�Refuel at the next gas station (�page 291).
4Gas Cap
Is OpenA loss of pressure has been detect-
ed in the fuel system. The fuel cap
may not be closed properly or the
fuel system may be leaky.�Check the fuel cap (�page 291).
If it is not closed properly:
�Close the fuel cap.
If it is closed properly:
�Have the fuel system checked by an autho-
rized Mercedes-Benz Center.
Page 382 of 474
381 Practical hints
What to do if …
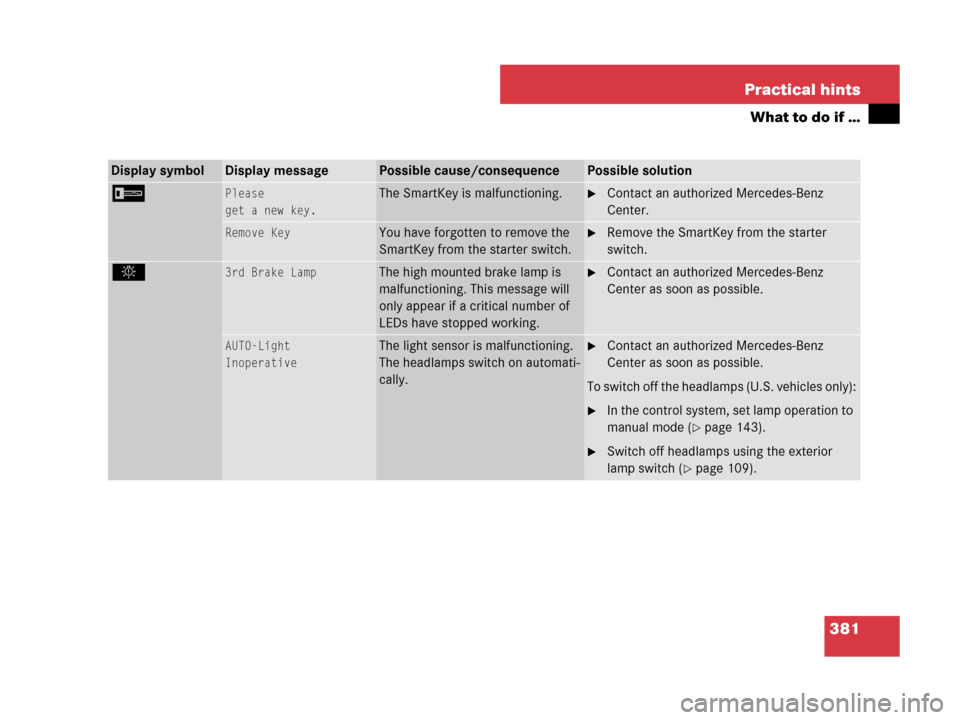
Display symbolDisplay messagePossible cause/consequencePossible solution
IPlease
get a new key.The SmartKey is malfunctioning.�Contact an authorized Mercedes-Benz
Center.
Remove KeyYou have forgotten to remove the
SmartKey from the starter switch.�Remove the SmartKey from the starter
switch.
.3rd Brake LampThe high mounted brake lamp is
malfunctioning. This message will
only appear if a critical number of
LEDs have stopped working.�Contact an authorized Mercedes-Benz
Center as soon as possible.
AUTO-Light
InoperativeThe light sensor is malfunctioning.
The headlamps switch on automati-
cally.�Contact an authorized Mercedes-Benz
Center as soon as possible.
To switch off the headlamps (U.S. vehicles only):
�In the control system, set lamp operation to
manual mode (
�page 143).
�Switch off headlamps using the exterior
lamp switch (
�page 109).
Page 383 of 474

382 Practical hints
What to do if …
Display symbolDisplay messagePossible cause/consequencePossible solution
.Brake-/Tail Lamp
LeftThe left brake lamp is malfunction-
ing. This message will only appear if
a critical number of LEDs have
stopped working.�Contact an authorized Mercedes-Benz
Center as soon as possible.
Brake-/Tail Lamp
RightThe right brake lamp is malfunction-
ing. This message will only appear if
a critical number of LEDs have
stopped working.�Contact an authorized Mercedes-Benz
Center as soon as possible.
Front Foglamp
LeftThe left front fog lamp is malfunc-
tioning.�Contact an authorized Mercedes-Benz
Center as soon as possible.
Front Foglamp
RightThe right front foglamp is malfunc-
tioning.�Contact an authorized Mercedes-Benz
Center as soon as possible.
Rear Foglamp
Auxiliary Bulb OnThe rear fog lamp on the driver’s
side is malfunctioning. A backup
bulb has been brought into use.�Replace the bulb as soon as
possible (
�page 400).
High Beam
LeftThe left high beam lamp (halogen
headlamps)/high beam flasher
lamp (Bi-Xenon* headlamps) is
malfunctioning.�Replace the bulb as soon as
possible (
�page 400).
Page 388 of 474

387 Practical hints
What to do if …
Display symbolDisplay messagesPossible cause/consequencePossible solution
HPlease correct the
tire pressure.
The tire pressure is too low in one
or more tires.�Check and correct tire inflation pressure as
required (
�page 313).
Tire Pressure
Caution - Tire DefectOne or more tires are deflating.�Carefully bring the vehicle to a halt, avoiding
abrupt steering and braking maneuvers.
�If necessary, change the wheel (�page 408).
Tire Pressure
Check TiresThe tire pressure in one or more
tires is already below the mini-
mum value.�Carefully bring the vehicle to a halt, avoiding
abrupt steering and braking maneuvers.
�Check and adjust tire pressure as required
(
�page 313).
�If necessary, change the wheel (�page 408).
Warning!G
Do not drive with a flat tire. A flat tire affects
the ability to steer or brake the vehicle. You
may lose control of the vehicle. Continued
driving with a flat tire will cause excessive
heat build-up and possibly a fire.
Warning!G
Follow recommend tire inflation pressures.
Do not underinflate tires. Underinflated tires
wear excessively and/or unevenly,
adversely affect handling and fuel economy,
and are more likely to fail from being over-
heated.
Do not overinflate tires. Overinflated tires
can adversely affect handling and ride
comfort, wear unevenly, increase stopping
distance, and result in sudden deflation
(blowout) because they are more likely to
become punctured or damaged by road
debris, potholes etc.
Page 391 of 474

390 Practical hints
Where will I find...?
1Collapsible wheel chock
2Vehicle jack
3Protective wrap
4Alignment bolt
5Towing eye bolt
6Wheel wrench
7Valve extractor
8Electric air pumpVehicles with TIREFIT*
1TIREFIT kit
2Vehicle jack
3Collapsible wheel chock
4Towing eye bolt
5Alignment bolt
6Wheel wrench
7Valve extractor
8Electric air pump
�Open the trunk (�page 99).
�Lift up trunk floor.Vehicle jack
Warning!G
The jack is designed exclusively for jacking
up the vehicle at the jack take-up brackets
built into both sides of the vehicle. To help
avoid personal injury, use the jack only to lift
the vehicle during a wheel change. Never
get beneath the vehicle while it is supported
by the jack. Keep hands and feet away from
the area under the lifted vehicle. Always
firmly set parking brake and block wheels
before raising vehicle with jack.
Do not disengage parking brake while the
vehicle is raised. Be certain that the jack is
always vertical (plumb line) when in use,
especially on hills. Always try to use the jack
on level surface. Make sure the jack arm is
fully seated in the jack take-up bracket. Al-
ways lower the vehicle onto sufficient
capacity jackstands before working under
the vehicle.
��
Page 394 of 474

393 Practical hints
Where will I find...?
�Unscrew the valve insert from the valve
and allow the air to escape.
�Screw the valve insert back into the
valve.
�Screw the valve cap back on the valve.
�Pull the protective wrap provided with
the vehicle tool kit over the spare
wheel.
�Store the spare wheel and the valve
extractor in the storage compartment
underneath the trunk floor.
�Pierce the protective wrap with retain-
ing screw3.
�Secure the spare wheel by turning
retaining screw3 clockwise.
For information on mounting the spare
wheel, see “Flat tire” (
�page 408).
Spare wheel bolts
1Wheel bolt for light alloy rims
2Wheel bolt for spare wheel with
collapsible tire (located under plastic
cover on the outside of spare wheel
rim)
iIt may take a few minutes for the collapsible
tire to deflate completely.
!Wheel bolts2 must be used when mount-
ing the spare wheel with collapsible tire. The use
of any wheel bolts other than wheel bolts2 for
the spare wheel with collapsible tire will physi-
cally damage the vehicle’s brakes.