Page 261 of 761

260 Control systems
COMAND seats
�Select another main function from the
main menu line.
Lumbar support
To support the spine, you can adjust the
curvature of the front seat backrests.
�Press O.
The main area of the COMAND display
is active. A scale appears.
1Scale
2Cursor
3Current seat
4Current setting
�Select seat (�page 259).
�Adjusting lumbar support:
Slideomp or rotate ymz until desired
setting is reached.
�Confirming selection: Press n.
�Switching to the bottom menu line:
Slide omp.
�Confirming selection: Press n.
Multicontour seats*, front
To support the spine, you can individually
adjust the backrest contour of the front
seats by regulating the air pressure in the
air chambers of the multicontour seat.
The settings are made on the COMAND
display.You can adjust the following air chambers:
�sides of seat cushion
�sides of backrest
�backrest curvature in lumbar area
�backrest curvature in shoulder areaiAfter you have pressedO, the seat last
adjusted is active.
iIf PRE-SAFE® has been activated, the air
pressure in the air chambers (on the sides of the
seat cushion and backrest) of the front multicon-
tour seats is increased.
iWhen you adjust the multicontour seat,
noises may result from pumping air into or re-
leasing air out of the air chambers.��
Page 507 of 761

506 Controls in detail
Useful features
Power outlet
The power outlet is located in the rear cen-
ter console.
�Switch on the ignition (�page 344).
�Flip up cover1 and insert electrical
plug (cigarette lighter type).
Floormats*
1Retainer pin
2Eyelet
Removing
�Pull floormat off of retainer pins1.
�Remove the floormat.
Installing
�Lay down the floormat in the respective
footwell.
�Press the floormat eyelets2 onto re-
tainer pins1.
iThe power outlet can be used to
accommodate 12V DC electrical accessories
(e.g. air pump, auxiliary lamps) up to a maximum
of 180 W.
If the engine is off and the outlet is being used
extensively, the vehicle battery may become dis-
charged.
Warning!G
Whenever you are using floormats, make
sure there is enough clearance and that the
floormats are securely fastened.
Floormats should always be securely fas-
tened using the eyelets and the retainer
pins.
Before driving off, check that the floormats
are securely in place and adjust them if nec-
essary. A loose floormat could slip and
hinder proper functioning of the pedals.
Do not place several floormats on top of
each other as this may impair pedal move-
ment.
iTo install or remove the floormat more easi-
ly, move the driver’s seat or front passenger seat
as far to the rear as possible (
�page 347).
Page 540 of 761

539 Operation
At the gas station
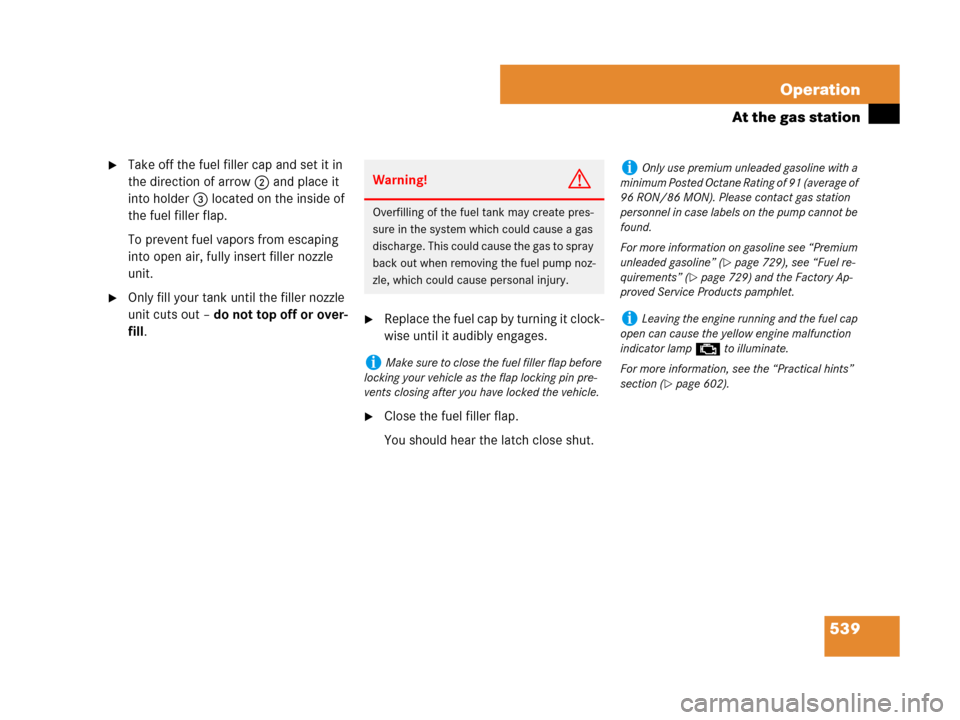
�Take off the fuel filler cap and set it in
the direction of arrow 2 and place it
into holder 3 located on the inside of
the fuel filler flap.
To prevent fuel vapors from escaping
into open air, fully insert filler nozzle
unit.
�Only fill your tank until the filler nozzle
unit cuts out – do not top off or over-
fill.
�Replace the fuel cap by turning it clock-
wise until it audibly engages.
�Close the fuel filler flap.
You should hear the latch close shut.
Warning!G
Overfilling of the fuel tank may create pres-
sure in the system which could cause a gas
discharge. This could cause the gas to spray
back out when removing the fuel pump noz-
zle, which could cause personal injury.
iMake sure to close the fuel filler flap before
locking your vehicle as the flap locking pin pre-
vents closing after you have locked the vehicle.
iOnly use premium unleaded gasoline with a
minimum Posted Octane Rating of 91 (average of
96 RON/86 MON). Please contact gas station
personnel in case labels on the pump cannot be
found.
For more information on gasoline see “Premium
unleaded gasoline” (
�page 729), see “Fuel re-
quirements” (
�page 729) and the Factory Ap-
proved Service Products pamphlet.
iLeaving the engine running and the fuel cap
open can cause the yellow engine malfunction
indicator lamp ± to illuminate.
For more information, see the “Practical hints”
section (
�page 602).
Page 715 of 761
714 Technical data
Layout of poly-V-belt drive
S 550
1Idler pulley
2Idler pulley
3Automatic belt tensioner
4ABC* tandem pump (pump for
power-steering assistance and ABC*
chassis)
5Air conditioning compressor
6Crankshaft
7Coolant pump
8Generator (alternator)S 63 AMG
1Idler pulley
2Idler pulley
3Idler pulley
4Automatic belt tensioner
5Power steering pump
6Air conditioning compressor
7Crankshaft
8Coolant pump
9Generator (alternator)S 600 and S 65 AMG
1Automatic belt tensioner
2ABC tandem pump (pump for
power-steering assistance and ABC
chassis)
3Air conditioning compressor
4Crankshaft
5Coolant pump
6Generator (alternator)
7Idler pulley
8Idler pulley
9Idler pulley