Page 658 of 761

657 Practical hints
What to do if …?
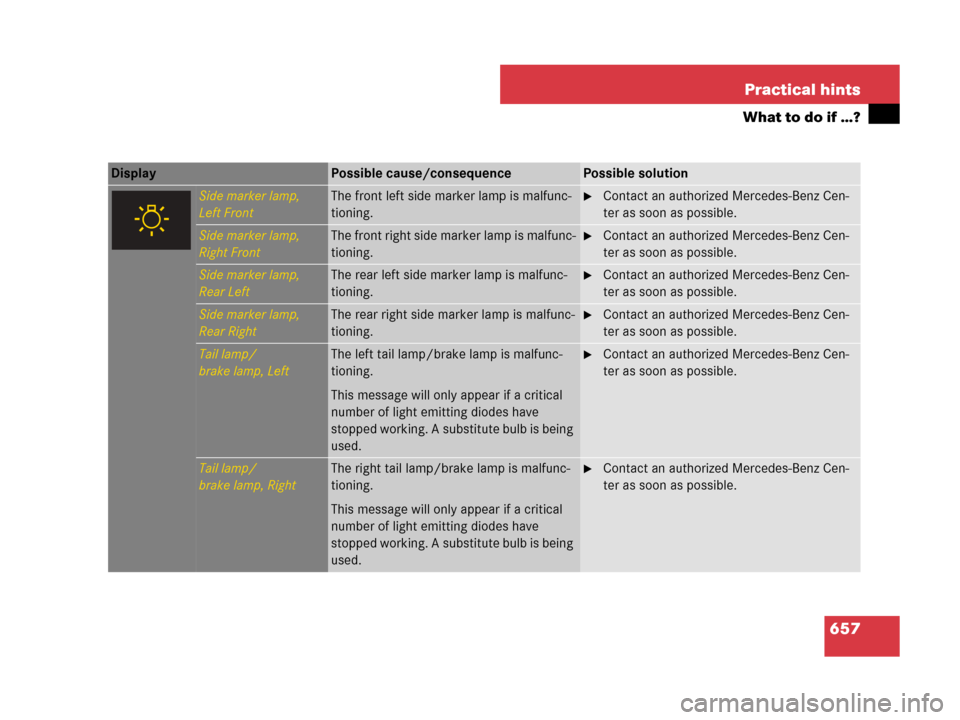
Display Possible cause/consequencePossible solution
Side marker lamp,
Left FrontThe front left side marker lamp is malfunc-
tioning.�Contact an authorized Mercedes-Benz Cen-
ter as soon as possible.
Side marker lamp,
Right FrontThe front right side marker lamp is malfunc-
tioning.�Contact an authorized Mercedes-Benz Cen-
ter as soon as possible.
Side marker lamp,
Rear LeftThe rear left side marker lamp is malfunc-
tioning.�Contact an authorized Mercedes-Benz Cen-
ter as soon as possible.
Side marker lamp,
Rear RightThe rear right side marker lamp is malfunc-
tioning.�Contact an authorized Mercedes-Benz Cen-
ter as soon as possible.
Tail lamp/
brake lamp, LeftThe left tail lamp/brake lamp is malfunc-
tioning.
This message will only appear if a critical
number of light emitting diodes have
stopped working. A substitute bulb is being
used.�Contact an authorized Mercedes-Benz Cen-
ter as soon as possible.
Tail lamp/
brake lamp, RightThe right tail lamp/brake lamp is malfunc-
tioning.
This message will only appear if a critical
number of light emitting diodes have
stopped working. A substitute bulb is being
used.�Contact an authorized Mercedes-Benz Cen-
ter as soon as possible.
Page 679 of 761
678 Practical hints
Replacing bulbs
Safe vehicle operation depends on proper
exterior lighting and signaling. It is there-
fore essential that all bulbs and lamp as-
semblies are in good working order at all
times.
Correct headlamp adjustment is extremely
important. Have headlamps checked and
readjusted at regular intervals and when a
bulb has been replaced. Contact an autho-
rized Mercedes-Benz Center for headlamp
adjustment.iIf the headlamps or front fog lamps are
fogged up on the inside as a result of high humid-
ity, driving the vehicle a distance with the lights
on should clear up the fogging.iSubstitute bulbs will be brought into use
when the following lamps malfunction:
�Brake lamps
�Rear fog lamps
�Front parking lamps
�Tail lamps
�Turn signal lamps
Read and observe messages in the multifunction
display (
�page 612).
Page 680 of 761
679 Practical hints
Replacing bulbs
Bulbs Front lamps Rear lamps
LampType
1Bi-Xenon headlamp:
Low and high beam
lamp
1
1Bi-Xenon headlamps: Low beam and high beam
use the same D1S-35W lamp. Do not replace the
Bi-Xenon bulbs yourself. Contact an authorized
Mercedes-Benz Center.
D1S-35 W
2Additional turn signal
lampLED
3Parking and standing
lampW5W
4Side marker lampW5W
5Bi-Xenon headlamp:
High beam flasher lampH7-55 W
IR emitter* (for Night
View Assist*)H11-55 W
6Corner-illuminating
lampH7-55 W
7Fog lampH11-55 W
8Turn signal lampPY 24 W
LampType
9High mounted brake
lampLED
aTurn signal lampHiP 16 W
bBrake lamp/tail lamp
and standing lampLED
cLicense plate lampW5W
dBackup lampHiP 16 W
eSide marker lampLED
fRear fog lamp (driver’s
side only)HiP 19 W
Page 681 of 761

680 Practical hints
Replacing bulbs
Notes on bulb replacement�Only use 12-volt-bulbs of the same
type and with the specified watt rating.
�Switch lights off before changing a bulb
to prevent short circuits.
�Always use a clean lint-free cloth when
handling bulbs.
�Your hands should be dry and free of oil
and grease.
�If the newly installed bulb does not
come on, contact an authorized
Mercedes-Benz Center.
Have the LEDs and bulbs for the following
lamps replaced by an authorized
Mercedes-Benz Center:
�the Bi-Xenon lamps
�the front turn signal lamps
�the front fog lamps
�the additional turn signal lamps in the
exterior rear view mirrors
�the parking and standing lamps
�the front side marker lamps
�the high mounted brake lamps
�the brake, tail and rear standing lamps
�the rear side marker lamps
�the rear fog lamp
�the rear turn signal lamps
�the rear side marker lamps
�the license plate lamps
Replacing bulbs for front lamps
Before you start to replace a bulb for a
front lamp, do the following first:
�Turn the exterior lamp switch to M
(
�page 371).
�Open the hood (�page 541).
Warning!G
Bulbs and bulb sockets can be very hot. Al-
low the lamp to cool down before changing
a bulb.
Keep bulbs out of reach of children.
Halogen lamps contain pressurized gas. A
bulb can explode if you:
�touch or move it when hot
�drop the bulb
�scratch the bulb
Wear eye and hand protection.
Because of high voltage in Xenon lamps, it is
dangerous to replace the bulb or repair the
lamp and its components. We recommend
that you have such work done by a qualified
technician.
!Do not replace the LEDs yourself. You could
otherwise damage the LEDs or parts of the vehi-
cle. Only have the LEDs replaced by an autho-
rized Mercedes-Benz Center.
iHave the headlamp adjustment checked
regularly.
Page 682 of 761

681 Practical hints
Replacing bulbs
1Cover 1
2Cover 2
3Cover 3
Removing and installing washer fluid
reservoir on left-hand side
Vehicles with Airmatic*
You must remove the washer fluid reser-
voir in order to change the bulbs of the
front headlamp on the left-hand side. The
washer fluid reservoir is on the front
left-hand side of the engine compartment.Washer fluid reservoir (example illustration
from S 550)
1Retaining screw
Removing
�Turn retaining screw1 counterclock-
wise.
�Take washer fluid reservoir out of
mounting.
�Place washer fluid reservoir to the side
and do not disconnect any wires or ca-
bles.Installing
�Guide washer fluid reservoir into
mounting so that the bottom retaining
lug slides into the rubber sleeve on the
longitudinal member.
�Turn retaining screw1 clockwise.
Bi-Xenon headlamps
Warning!G
Do not remove the cover for the Bi-Xenon
headlamp. Because of high voltage in Xenon
lamps, it is dangerous to replace the bulb or
repair the lamp and its components. We rec-
o mm e nd that y ou ha ve s uc h wo rk do ne b y a
qualified technician.
Page 683 of 761

682 Practical hints
Replacing bulbs
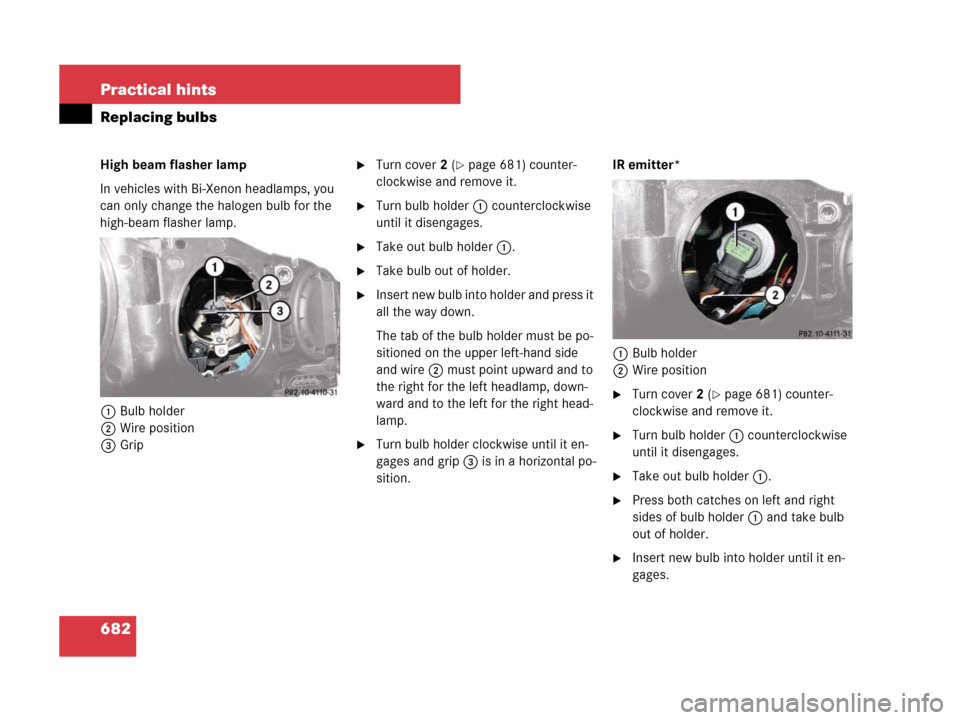
High beam flasher lamp
In vehicles with Bi-Xenon headlamps, you
can only change the halogen bulb for the
high-beam flasher lamp.
1Bulb holder
2Wire position
3Grip�Turn cover2 (�page 681) counter-
clockwise and remove it.
�Turn bulb holder1 counterclockwise
until it disengages.
�Take out bulb holder1.
�Take bulb out of holder.
�Insert new bulb into holder and press it
all the way down.
The tab of the bulb holder must be po-
sitioned on the upper left-hand side
and wire2 must point upward and to
the right for the left headlamp, down-
ward and to the left for the right head-
lamp.
�Turn bulb holder clockwise until it en-
gages and grip3 is in a horizontal po-
sition.IR emitter*
1Bulb holder
2Wire position
�Turn cover2 (�page 681) counter-
clockwise and remove it.
�Turn bulb holder1 counterclockwise
until it disengages.
�Take out bulb holder1.
�Press both catches on left and right
sides of bulb holder1 and take bulb
out of holder.
�Insert new bulb into holder until it en-
gages.
Page 684 of 761

683 Practical hints
Replacing bulbs
�Insert bulb holder1 into guide in
headlamp. Wire2 must point down-
ward and to the right.
�Turn bulb holder1 clockwise until it
engages and wire2 points downward
and to the left.
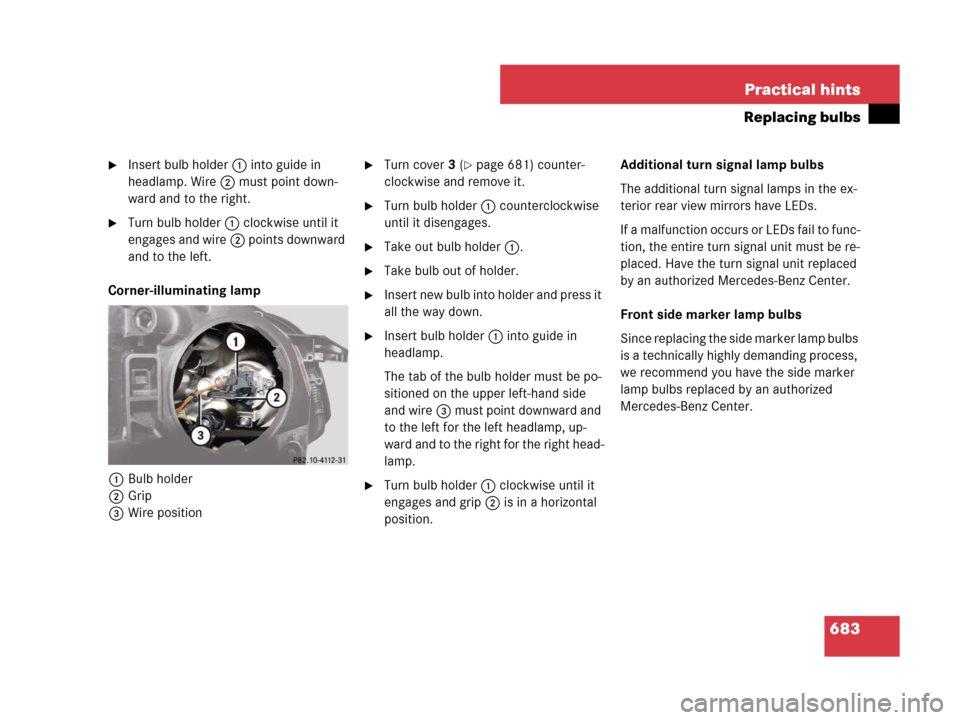
Corner-illuminating lamp
1Bulb holder
2Grip
3Wire position
�Turn cover3 (�page 681) counter-
clockwise and remove it.
�Turn bulb holder1 counterclockwise
until it disengages.
�Take out bulb holder1.
�Take bulb out of holder.
�Insert new bulb into holder and press it
all the way down.
�Insert bulb holder1 into guide in
headlamp.
The tab of the bulb holder must be po-
sitioned on the upper left-hand side
and wire3 must point downward and
to the left for the left headlamp, up-
ward and to the right for the right head-
lamp.
�Turn bulb holder1 clockwise until it
engages and grip2 is in a horizontal
position.Additional turn signal lamp bulbs
The additional turn signal lamps in the ex-
terior rear view mirrors have LEDs.
If a malfunction occurs or LEDs fail to func-
tion, the entire turn signal unit must be re-
placed. Have the turn signal unit replaced
by an authorized Mercedes-Benz Center.
Front side marker lamp bulbs
Since replacing the side marker lamp bulbs
is a technically highly demanding process,
we recommend you have the side marker
lamp bulbs replaced by an authorized
Mercedes-Benz Center.
Page 738 of 761

737 Index
B
Backup lamps
Replacing bulbs 679
Bar 576
BAS 68
Batteries, SmartKey
Checking battery condition 340
Replacing 676
Batteries, SmartKey with KEYLESS-GO*
Checking battery condition 340
Replacing 676
Batteries, vehicle 692
Charging 695
Discharged, Jump starting 697
Disconnecting 694
For electrical consumers 692
For starter 692
Message in display 644
Reconnecting 696
Removing 695
Bead 576
Beverage holder see Cup holder
Bluetooth
®
Settings (COMAND) 239Brake assist system (BAS Plus) 69
Brake assist system (BAS) 68
Brake fluid 540, 725, 728
Brake lamp bulbs 679
Brake lamp, high mounted 679
Brake pads
Message in display 632
Brake warning lamp 29
Brakes 528
High-performance brake system
(AMG vehicles only) 529
Warning lamp 29, 599
Break-in period 526
Bulbs, replacing 678
Additional turn signals 679
Brake lamps 679
Fog lamps 679
Front lamps 679
High beam 679
High mounted brake lamp 679
License plate lamps 679
Low beam 679
Parking and standing lamps 679
Rear fog lamp 679
Turn signal lamps 679C
California retail buyers and lessees,
important notice for 15
Can holder see Cup holder
Capacities and recommended
fuel/lubricants 724
Cargo area see Trunk
Cargo tie-down hooks 500
Carpets, Cleaning and care of 594
Catalytic converter 536
CD
Ejecting (COMAND) 117
Loading (COMAND) 115
Menu overview (COMAND) 119
Playback options (COMAND) 123
Selecting a medium (COMAND) 121
Selecting a track (COMAND) 122
CD (COMAND) 112
Central locking
Automatic 342
Locking/unlocking from inside 343
Central locking/unlocking switches 343
Certification label 712
Change of address or ownership 16