Page 454 of 569
453 Practical hints
What to do if …
Display symbolDisplay messagePossible cause/consequencePossible solution
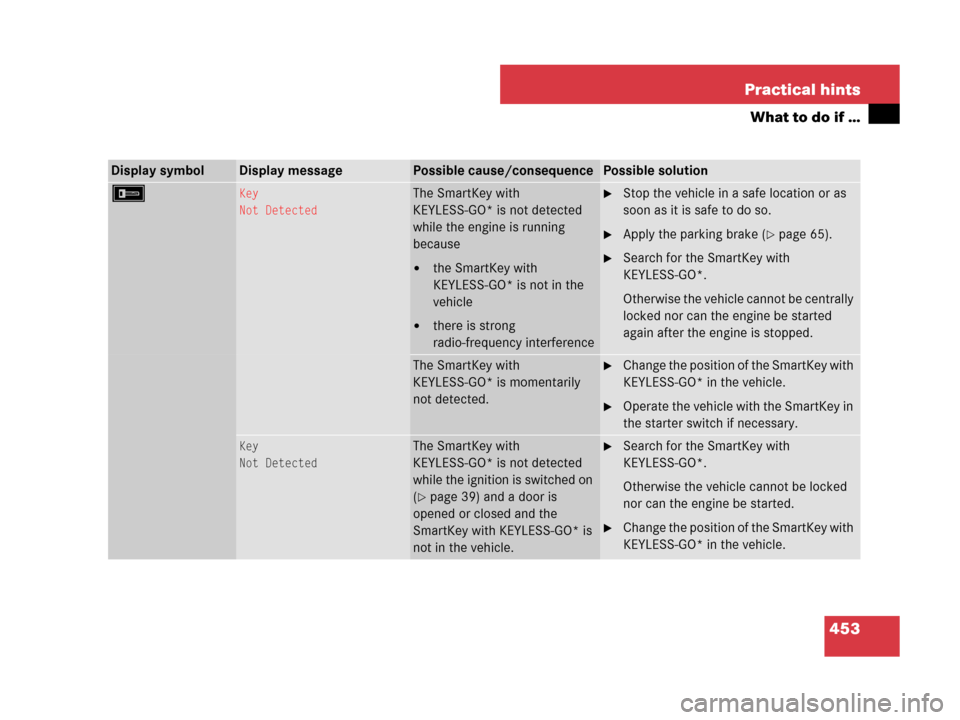
FKey
Not DetectedThe SmartKey with
KEYLESS-GO* is not detected
while the engine is running
because
�the SmartKey with
KEYLESS-GO* is not in the
vehicle
�there is strong
radio-frequency interference
�Stop the vehicle in a safe location or as
soon as it is safe to do so.
�Apply the parking brake (�page 65).
�Search for the SmartKey with
KEYLESS-GO*.
Otherwise the vehicle cannot be centrally
locked nor can the engine be started
again after the engine is stopped.
The SmartKey with
KEYLESS-GO* is momentarily
not detected.�Change the position of the SmartKey with
KEYLESS-GO* in the vehicle.
�Operate the vehicle with the SmartKey in
the starter switch if necessary.
Key
Not DetectedThe SmartKey with
KEYLESS-GO* is not detected
while the ignition is switched on
(
�page 39) and a door is
opened or closed and the
SmartKey with KEYLESS-GO* is
not in the vehicle.
�Search for the SmartKey with
KEYLESS-GO*.
Otherwise the vehicle cannot be locked
nor can the engine be started.
�Change the position of the SmartKey with
KEYLESS-GO* in the vehicle.
Page 456 of 569

455 Practical hints
What to do if …
Display symbolDisplay messagePossible cause/consequencePossible solution
.3rd Brake LampThe high mounted brake lamp is
malfunctioning. This message
will only appear if a critical
number of LEDs have stopped
working.�Contact an authorized Mercedes-Benz
Light Truck Center as soon as possible.
Active Headlamps
InoperativeThe active Bi-Xenon* headlamp
system is malfunctioning.�Contact an authorized Mercedes-Benz
Light Truck Center as soon as possible.
AUTO Light
InoperativeThe light sensor is malfunction-
ing. The headlamps switch on
automatically.�Contact an authorized Mercedes-Benz
Light Truck Center as soon as possible.
To switch off the headlamps
(U.S. vehicles only):
�In the control system, set lamp operation
to manual mode (
�page 144).
�Switch off the headlamps using the
exterior lamp switch (
�page 143).
Brake Lamp
LeftThe left brake lamp is malfunc-
tioning. A substitute bulb is
being used.�Replace the bulb as soon as possible
(
�page 480).
Brake Lamp
RightThe right brake lamp is malfunc-
tioning. A substitute bulb is
being used.�Replace the bulb as soon as possible
(
�page 480).
Page 463 of 569
462 Practical hints
What to do if …
Display symbolDisplay messagePossible cause/consequencePossible solution
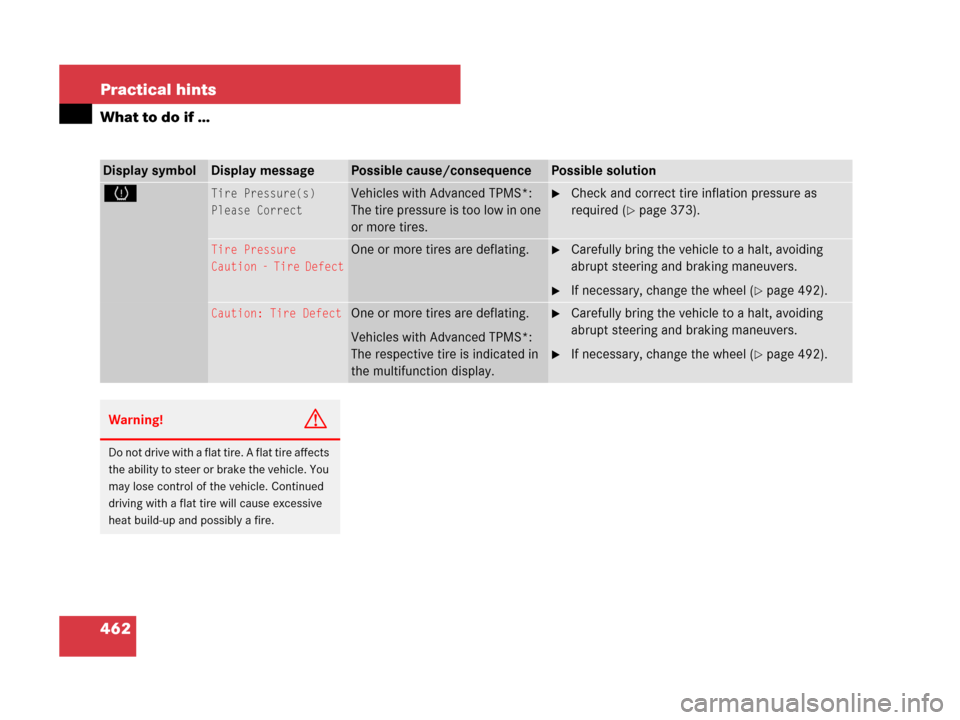
HTire Pressure(s)
Please CorrectVehicles with Advanced TPMS*:
The tire pressure is too low in one
or more tires.�Check and correct tire inflation pressure as
required (
�page 373).
Tire Pressure
Caution - Tire DefectOne or more tires are deflating.�Carefully bring the vehicle to a halt, avoiding
abrupt steering and braking maneuvers.
�If necessary, change the wheel (�page 492).
Caution: Tire DefectOne or more tires are deflating.
Vehicles with Advanced TPMS*:
The respective tire is indicated in
the multifunction display.�Carefully bring the vehicle to a halt, avoiding
abrupt steering and braking maneuvers.
�If necessary, change the wheel (�page 492).
Warning!G
Do not drive with a flat tire. A flat tire affects
the ability to steer or brake the vehicle. You
may lose control of the vehicle. Continued
driving with a flat tire will cause excessive
heat build-up and possibly a fire.
Page 464 of 569
463 Practical hints
What to do if …
Display symbolDisplay messagePossible cause/consequencePossible solution
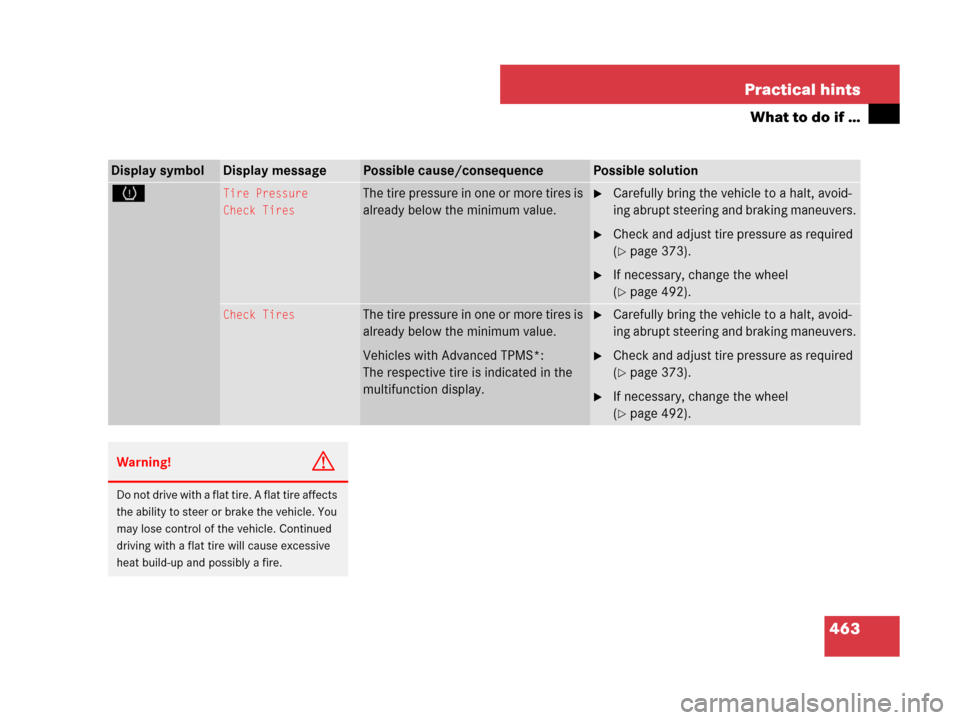
HTire Pressure
Check TiresThe tire pressure in one or more tires is
already below the minimum value.�Carefully bring the vehicle to a halt, avoid-
ing abrupt steering and braking maneuvers.
�Check and adjust tire pressure as required
(
�page 373).
�If necessary, change the wheel
(
�page 492).
Check TiresThe tire pressure in one or more tires is
already below the minimum value.
Vehicles with Advanced TPMS*:
The respective tire is indicated in the
multifunction display.�Carefully bring the vehicle to a halt, avoid-
ing abrupt steering and braking maneuvers.
�Check and adjust tire pressure as required
(
�page 373).
�If necessary, change the wheel
(
�page 492).
Warning!G
Do not drive with a flat tire. A flat tire affects
the ability to steer or brake the vehicle. You
may lose control of the vehicle. Continued
driving with a flat tire will cause excessive
heat build-up and possibly a fire.
Page 481 of 569
480 Practical hints
Replacing bulbs
Bulbs
Safe vehicle operation depends on proper
exterior lighting and signaling. It is there-
fore essential that all bulbs and lamp
assemblies are in good working order at
all times.
Correct headlamp adjustment is extremely
important. Have headlamps checked and
readjusted at regular intervals and when a
bulb has been replaced. Contact an autho-
rized Mercedes-Benz Light Truck Center
for headlamp adjustment.iIf the headlamps or front fog lamps are
fogged up on the inside as a result of high humid-
ity, driving the vehicle a distance with the lights
on should clear up the fogging.iSubstitute bulbs will be brought into use
when the following lamps malfunction:
�Turn signal lamps
�Brake lamps
�Parking lamps
�Tail lamps
Read and observe messages in the multifunction
display (
�page 455).
Page 482 of 569
481 Practical hints
Replacing bulbs
Front lampsRear lamps
LampType
1Parking/standing lampW 5 W
2Turn signal lampPY 21 W
3Additional turn signal
lamp
LED
4Headlamps:
Low beam
H7 (55 W)
Bi-Xenon headlamps*:
Low beam1D2S-35 W
5Headlamps:
High beam/high beam
flasher
H7 (55 W)
Bi-Xenon headlamps*:
High beam/high beam
flasher spot lamp
H7 (55 W)
6Side marker lampWY 5 W
7Front fog lampH7 (55 W)
Corner-illuminating
front fog lamp*
H7 (55 W)
1Vehicles with Bi-Xenon* headlamps: Do not
replace the Bi-Xenon bulbs yourself. Contact an
authorized Mercedes-Benz Light Truck Center.
LampType
LampType
8High-mounted brake
lamp
LED
9Tail, brake, and side
marker lamp
P 21 W
aTurn signal lampPY 21 W
bBackup lampP 21 W
cRear fog lamp (driver’s
side only)
P 21 W
dLicense plate lampsC 5 W
Page 483 of 569
482 Practical hints
Replacing bulbs
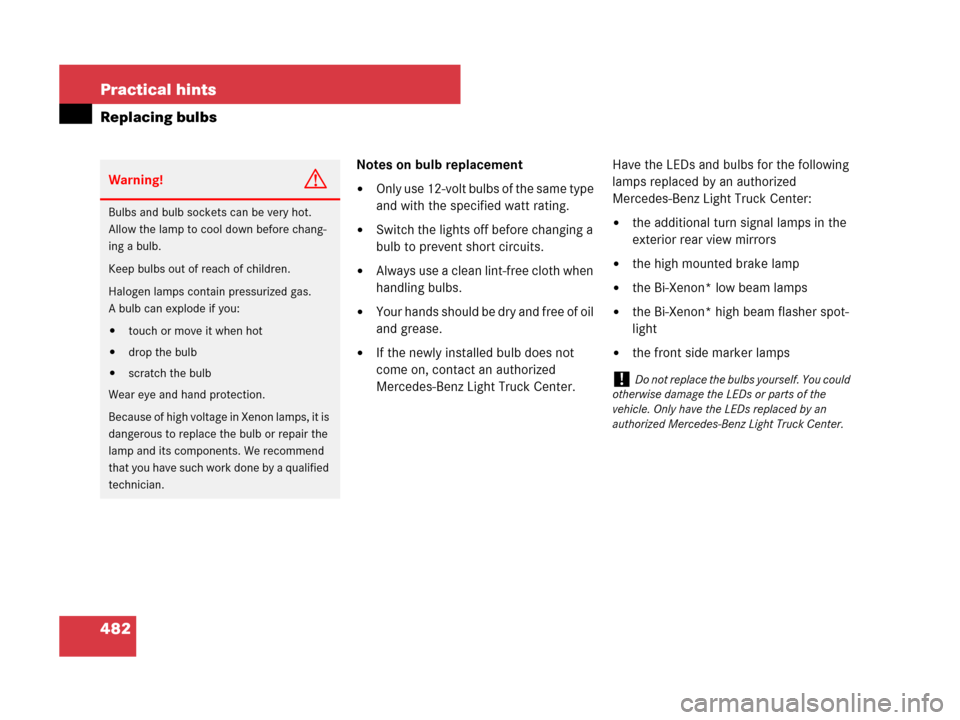
Notes on bulb replacement
�Only use 12-volt bulbs of the same type
and with the specified watt rating.
�Switch the lights off before changing a
bulb to prevent short circuits.
�Always use a clean lint-free cloth when
handling bulbs.
�Your hands should be dry and free of oil
and grease.
�If the newly installed bulb does not
come on, contact an authorized
Mercedes-Benz Light Truck Center.Have the LEDs and bulbs for the following
lamps replaced by an authorized
Mercedes-Benz Light Truck Center:
�the additional turn signal lamps in the
exterior rear view mirrors
�the high mounted brake lamp
�the Bi-Xenon* low beam lamps
�the Bi-Xenon* high beam flasher spot-
light
�the front side marker lamps
Warning!G
Bulbs and bulb sockets can be very hot.
Allow the lamp to cool down before chang-
ing a bulb.
Keep bulbs out of reach of children.
Halogen lamps contain pressurized gas.
A bulb can explode if you:
�touch or move it when hot
�drop the bulb
�scratch the bulb
Wear eye and hand protection.
Because of high voltage in Xenon lamps, it is
dangerous to replace the bulb or repair the
lamp and its components. We recommend
that you have such work done by a qualified
technician.!Do not replace the bulbs yourself. You could
otherwise damage the LEDs or parts of the
vehicle. Only have the LEDs replaced by an
authorized Mercedes-Benz Light Truck Center.
Page 493 of 569
492 Practical hints
Flat tire
Preparing the vehicle
�Vehicles with AIRMATIC*:
Make sure the vehicle level is set to
highway level (
�page 276).
�Park the vehicle in a safe distance from
moving traffic on a hard, flat surface
when possible.
�Turn on the hazard warning flasher
(
�page 150).
�Turn the steering wheel so that the
front wheels are in a straight-ahead
position.
�Set the parking brake (�page 65).
�Set the automatic transmission to
position P (
�page 190).
�Turn off the engine (�page 66).
�Have any passenger exit the vehicle at
a safe distance from the roadway.
�Remove the SmartKey from the starter
switch.
Vehicles with KEYLESS-GO*:
�Turn off the engine by pressing the
KEYLESS-GO* button once
(
�page 66).
�Open the driver’s door (this puts
the starter switch in position 0,
same as with the SmartKey re-
moved from the starter switch). The
driver’s door then can be closed
again.
�Remove the KEYLESS-GO*
start/stop button from the starter
switch.
Warning!G
The dimensions of the spare wheel are
different from those of the road wheels. As
a result, the vehicle handling characteristics
change when driving with a spare wheel
mounted. Adapt your driving style accord-
ingly.
The spare wheel is for temporary use only.
When driving with spare wheel mounted,
ensure proper tire inflation pressure and do
not exceed a vehicle speed of
50 mph (80 km/ h).
Drive to the nearest Mercedes-Benz Light
Truck Center as soon as possible to have the
spare wheel replaced with a regular road
wheel.
Never operate the vehicle with more than
one spare wheel mounted.
Do not switch off the ESP
® with a spare
wheel mounted.
iOpen doors only when conditions are safe to
do so.