Page 449 of 561
448 Practical hints
Where will I find ...?
First aid kit
The first aid kit is located on the driver’s
side in the cargo compartment behind the
cover.
1Cover in left side trim panel
2Lock
�Turn lock1 90° in direction of arrow.
�Fold down cover2.
The first aid kit can be removed.
Vehicle tool kit
The vehicle tool kit is stored under the
cargo compartment floor.
The vehicle tool kit includes:
�Towing eye bolt
�Wheel wrench
�Alignment bolt
�Vehicle jack
�Fuse chart
�Collapsible wheel chock
�Wheel bolts for spare wheel1Cargo compartment floor, lowered
2Handle cover
�Open the tailgate (�page 119).
�Push in handle cover2 and pull han-
dle in direction of arrow.
�Lift cargo compartment floor1.
iCheck expiration dates and contents for
completeness at least once a year and replace
missing/expired items.
Page 451 of 561

450 Practical hints
Where will I find ...?
Example illustration1
6Wheel wrench
7Vehicle jack2
8Collapsible wheel chock
9Fuse chart
aTowing eye bolt
bAlignment bolt
cSpare wheel boltsVehicle jack
The vehicle jack is located underneath the
cargo compartment floor.
�Remove vehicle jack (�page 450).
1Depending on production date, your vehicle may
be equipped with a scissors-type vehicle jack.
Thus, appearance and alignment of the items may
vary.
2If your vehicle is equipped with a scissors-type
vehicle jack, a reversible ratchet is also included.
!Depending on vehicle production date your
vehicle may be equipped with a scissors-type
jack (located under the cargo compartment
floor). If so equipped, only use this jack when
jacking up the vehicle as otherwise the vehicle’s
underbody can be damaged. See separate
instructions for scissors-type jack.
!To prevent damage, always disengage the
strap of the securing hook and lower the cargo
compartment floor (
�page 448) before closing
the tailgate.
Warning!G
Only use the jack supplied with your vehicle
to lift the vehicle briefly for wheel changes.
If you use the jack for any other purpose,
you or others could be inj ure d, as the ja ck is
designed only for the purpose of changing a
wheel.
When using the jack, observe the safety
notes in the “Mounting the spare wheel”
section (
�page 479) and the notes on the
jack.
Page 455 of 561
454 Practical hints
Where will I find ...?
The collapsible tire is located underneath
the cargo compartment floor
(
�page 448).
Removing the collapsible tire
1Electric air pump
2Collapsible tire
3Vehicle tool kit storage well casing
4Alignment bolt
5Towing eye bolt
6Wheel wrenchFor access the collapsible tire, see “Vehi-
cle tool kit” (
�page 448).
�Remove the vehicle tool kit storage
well casing3.
7Retaining screw
�Loosen retaining screw7 by turning it
counterclockwise.
�Remove collapsible tire2.
iFor information on how to mount the
collapsible tire, see “Mounting the spare wheel”
(
�page 479).
iRemove collapsible tire to gain access to
remaining tools in the vehicle tool kit
(
�page 448).
Page 484 of 561
483 Practical hints
Flat tire
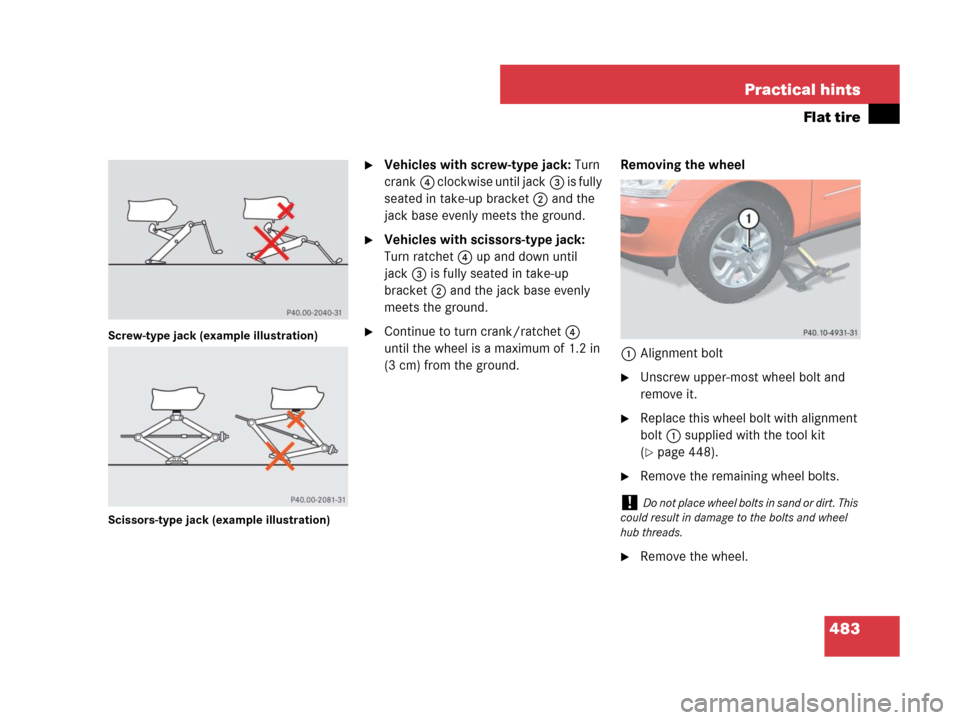
Screw-type jack (example illustration)
Scissors-type jack (example illustration)
�Vehicles with screw-type jack: Turn
crank4 clockwise until jack3 is fully
seated in take-up bracket2 and the
jack base evenly meets the ground.
�Vehicles with scissors-type jack:
Turn ratchet4 up and down until
jack3 is fully seated in take-up
bracket2 and the jack base evenly
meets the ground.
�Continue to turn crank/ratchet4
until the wheel is a maximum of 1.2 in
(3 cm) from the ground.Removing the wheel
1Alignment bolt
�Unscrew upper-most wheel bolt and
remove it.
�Replace this wheel bolt with alignment
bolt1 supplied with the tool kit
(
�page 448).
�Remove the remaining wheel bolts.
�Remove the wheel.
!Do not place wheel bolts in sand or dirt. This
could result in damage to the bolts and wheel
hub threads.
Page 485 of 561

2Wheel bolt for 17\" light alloy wheels or
Minispare whee")
484 Practical hints
Flat tire
Mounting the new wheel
1Wheel bolt for 18", 19" and 20" light
alloy wheels and collapsible tire (AMG
vehicles)
2Wheel bolt for 17" light alloy wheels or
Minispare wheel (located in vehicle tool
kit (
�page 448))
�Clean contact surfaces of wheel and
wheel hub.
�Guide spare wheel onto the alignment
bolt and push it on the wheel hub.
�Insert wheel bolts and tighten them
slightly.
�Unscrew the alignment bolt, install last
wheel bolt and tighten slightly.
!Wheel bolts2 must be used when mount-
ing 17" light alloy rims or the Minispare wheel.
The use of any wheel bolts other than wheel
bolts2 for 17" light alloy rims or the Minispare
wheel will damage the vehicle’s brakes.
!To avoid paint damage, place wheel flat
against hub and hold it there while installing first
wheel bolt.
Warning!G
Always replace wheel bolts that are
damaged or rusted.
Never apply oil or grease to wheel bolts.
Damaged wheel hub threads should be
repaired immediately. Do not continue to
drive under these circumstances! Contact
an authorized Mercedes-Benz Light Truck
Center or call Roadside Assistance.
Incorrect wheel bolts or improperly tight-
ened wheel bolts can cause the wheel to
come off. This could cause an accident.
Make sure to use the correct wheel bolts.
Warning!G
Only use genuine Mercedes-Benz wheel
bolts. Other wheel bolts may come loose.
Do not tighten the wheel bolts when the
vehicle is raised. Otherwise the vehicle
could fall off the jack.
Page 504 of 561
503 Practical hints
Towing the vehicle
Removing towing eye bolt
�Loosen towing eye bolt2 counter-
clockwise with wheel wrench.
�Unscrew towing eye bolt2.
�Store the towing eye bolt and wheel
wrench back into the vehicle tool kit
(
�page 448).
Installing cover
�Engage cover1 at top and press at
bottom.
Stranded vehicle
Freeing a stranded vehicle, on which the
wheels are dug into sand or mud, should
be done with the greatest of care, especial-
ly if the vehicle is heavily loaded.
Avoid pulling the vehicle abruptly or diago-
nally, since it could result in damage to the
chassis alignment.
Never try to free a vehicle that is still cou-
pled to a trailer.
If possible, a vehicle equipped with trailer
hitch receiver should be pulled backward
in its own previously made tracks.