2008 MERCEDES-BENZ E-CLASS SALOON warning
[x] Cancel search: warningPage 105 of 401

Lights
102 Hazard warning lamps
Centre console
1
Hazard warning lamp button
X To activate: press hazard warning lamp
button 1.
All turn signals flash. If you now activate a
turn signal, only those turn signal lamps on
the corresponding side of the vehicle will
flash.
X To deactivate: press hazard warning lamp
button 1. Adjusting the headlamp range (vehi-
cles with halogen headlamps)
The headlamp range control allows you to
adjust the cone of light from the headlamps
according to how your vehicle is laden.
You can only adjust the headlamp range while
the engine is running. Saloon
1
Thumbwheel for headlamp range Position Load
0 Front seats occupied
1 Front and rear seats occupied Position Load
2 Front and rear seats occu-
pied, boot laden
3 Driver's seat or both front
seats occupied, boot laden
Estate
1
Thumbwheel for headlamp range Controls
211_AKB; 2; 5, en-GB
mkalafa,
Version: 2.9.4
2008-02-29T16:57:07+01:00 - Seite 102 Dateiname: 6515_3416_02_buchblock.pdf; preflight
Page 123 of 401
Instrument cluster
120 Instrument cluster
Points to remember
You will find a full overview of the instrument
cluster in the "At a glance" section
(Y page 26). G
Risk of accident
No further messages can be displayed if the
instrument cluster and/or the multi-func-
tion display fails.
This means that you will not see information
about the driving situation, such as the
speed, outside temperature, warning/indi-
cator lamps, display messages or system
failures. The vehicle's handling character-
istics may be affected. Adjust your driving
style and speed accordingly.
Immediately consult a qualified specialist
workshop which has the necessary special-
ist knowledge and tools to carry out the
work required. Mercedes-Benz recom-
mends that you use a Mercedes-Benz
Service Centre for this purpose. In particu-
lar, work relevant to safety or on safety-
related systems must be carried out at a
qualified specialist workshop. Activating the multi-function display
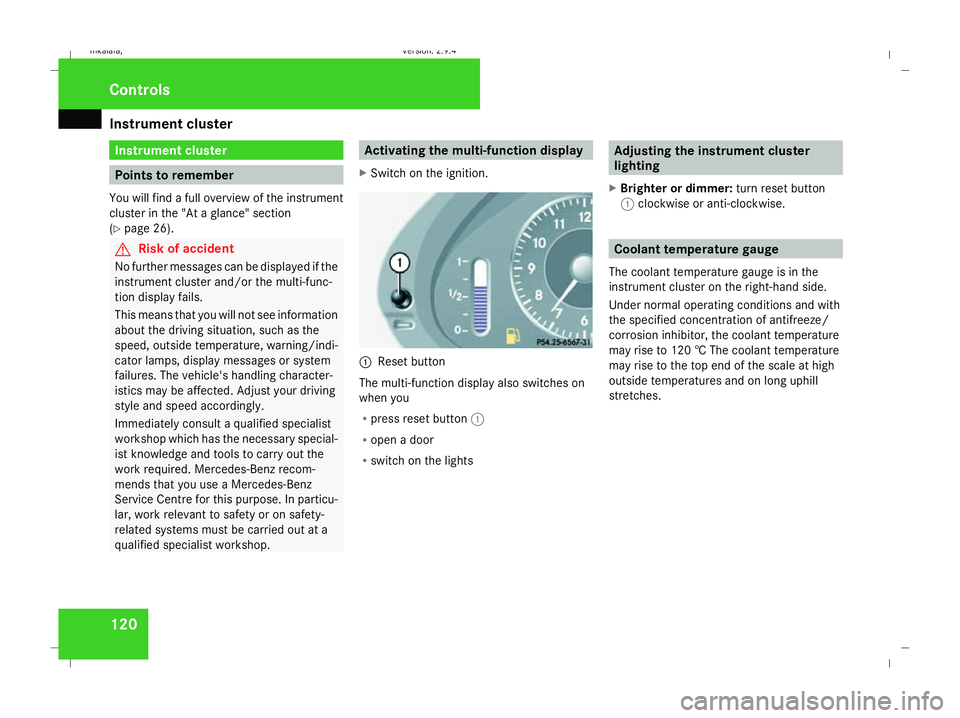
X Switch on the ignition. 1
Reset button
The multi-function display also switches on
when you
R press reset button 1
R open a door
R switch on the lights Adjusting the instrument cluster
lighting
X Brighter or dimmer: turn reset button
1 clockwise or anti-clockwise. Coolant temperature gauge
The coolant temperature gauge is in the
instrument cluster on the right-hand side.
Under normal operating conditions and with
the specified concentration of antifreeze/
corrosion inhibitor, the coolant temperature
may rise to 120 † The coolant temperature
may rise to the top end of the scale at high
outside temperatures and on long uphill
stretches. Controls
211_AKB; 2; 5, en-GB
mkalafa
, Version: 2.9.4 2008-02-29T16:57:07+01:00 - Seite 120Dateiname: 6515_3416_02_buchblock.pdf; preflight
Page 128 of 401

On-board computer
125Function
1 Basic display
menu (Ypage 125)
R Digital speedometer 17
(Y page 126)
R Outside tempera-
ture 17
(Y page 126)
R ASSYST PLUS service display
(Y page 243)
R Engine oil level* (Y page 223)
R Tyre pressure loss warning system
(Y page 230) or tyre pressure mon-
itor* (Y page 232) 2
AMG* menu (Y
page 126) 3
Audio/TV*/DVD*
(Ypage 129)
menu
R Radio station ( Ypage 129)
R Audio drive or media (Y page 129)
R TV* (Y page 130)
R DVD video* (Y page 130) Function
4
Navigation* menu (Y
page 130) 5
Distronic
* menu (distance display)
(Y page 145) 6
Message memory
menu18
(fault and
warning messages) (Y page 131) 7 Settings
menu (Ypage 131)
R Resetting to factory settings
(Y page 132)
R Selecting a submenu (Y page 132) 8 Trip computer
menu
R Consumption statistics
(Y page 140)
R Range (Y page 140) 9
Telephone*
menu (Ypage 141) This is what the displays look like when you
scroll through the menus.
The generic terms in the table overview are
intended to help you navigate through themenus. The terms themselves are not always
displayed in the multi-function display.
The Audio, Navi* and Tel* menus are dis-
played slightly differently in vehicles with
audio equipment and vehicles with COMAND
APS*. The examples given in this Owner's
Manual apply to vehicles equipped with
COMAND APS*. Standard display menu
i Menu overview: (Y page 124).
Use the buttons on the multi-function steer-
ing wheel.
X Press the èor· button to select the
basic display.
17 The sequence of the digital speedometer and the outside temperature display depends on the settings in the "Basic display" submenu.
18 This menu is only visible if there is a display message available. Controls
* optional
211_AKB; 2; 5, en-GB
mkalafa,
Version: 2.9.4
2008-02-29T16:57:07+01:00 - Seite 125 ZDateiname: 6515_3416_02_buchblock.pdf; preflight
Page 129 of 401
On-board computer
126Basic display
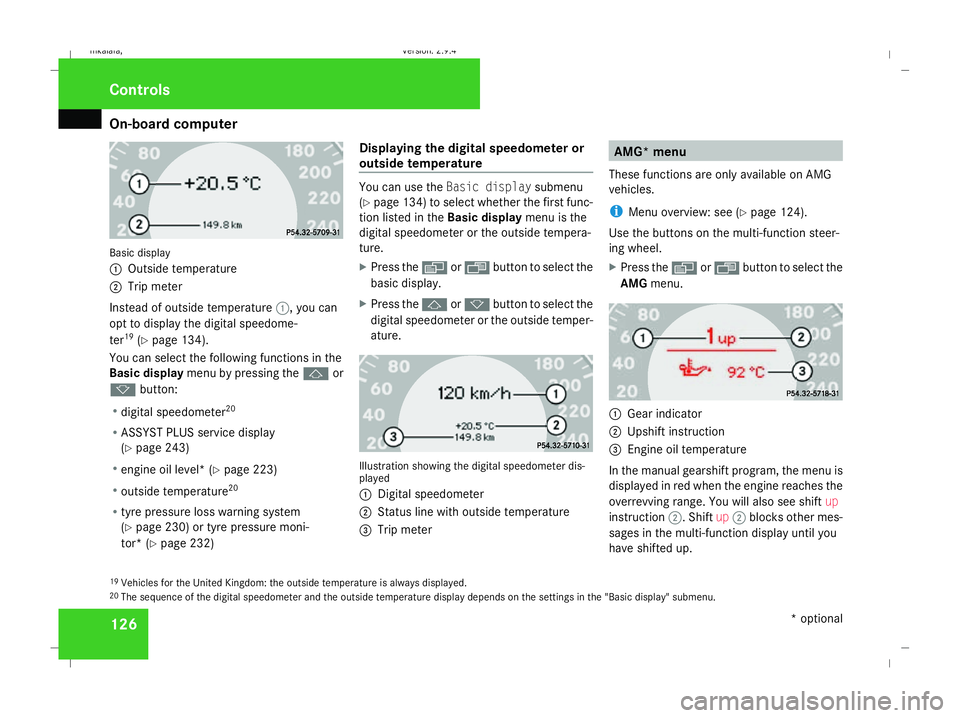
1
Outside temperature
2 Trip meter
Instead of outside temperature 1, you can
opt to display the digital speedome-
ter 19
(Y page 134).
You can select the following functions in the
Basic display menu by pressing the jor
k button:
R digital speedometer 20
R ASSYST PLUS service display
(Y page 243)
R engine oil level* (Y page 223)
R outside temperature 20
R tyre pressure loss warning system
(Y page 230) or tyre pressure moni-
tor* (Y page 232) Displaying the digital speedometer or
outside temperature You can use the
Basic display submenu
(Y page 134) to select whether the first func-
tion listed in the Basic displaymenu is the
digital speedometer or the outside tempera-
ture.
X Press the èor· button to select the
basic display.
X Press the jork button to select the
digital speedometer or the outside temper-
ature. Illustration showing the digital speedometer dis-
played
1
Digital speedometer
2 Status line with outside temperature
3 Trip meter AMG* menu
These functions are only available on AMG
vehicles.
i Menu overview: see (Y page 124).
Use the buttons on the multi-function steer-
ing wheel.
X Press the èor· button to select the
AMG menu. 1
Gear indicator
2 Upshift instruction
3 Engine oil temperature
In the manual gearshift program, the menu is
displayed in red when the engine reaches the
overrevving range. You will also see shift up
instruction 2. Shiftup2 blocks other mes-
sages in the multi-function display until you
have shifted up.
19 Vehicles for the United Kingdom: the outside temperature is always displayed.
20 The sequence of the digital speedometer and the outside temperature display depends on the settings in the "Basic display" submenu. Controls
* optional
211_AKB; 2; 5, en-GB
mkalafa,
Version: 2.9.4 2008-02-29T16:57:07+01:00 - Seite 126Dateiname: 6515_3416_02_buchblock.pdf; preflight
Page 134 of 401
On-board computer
131
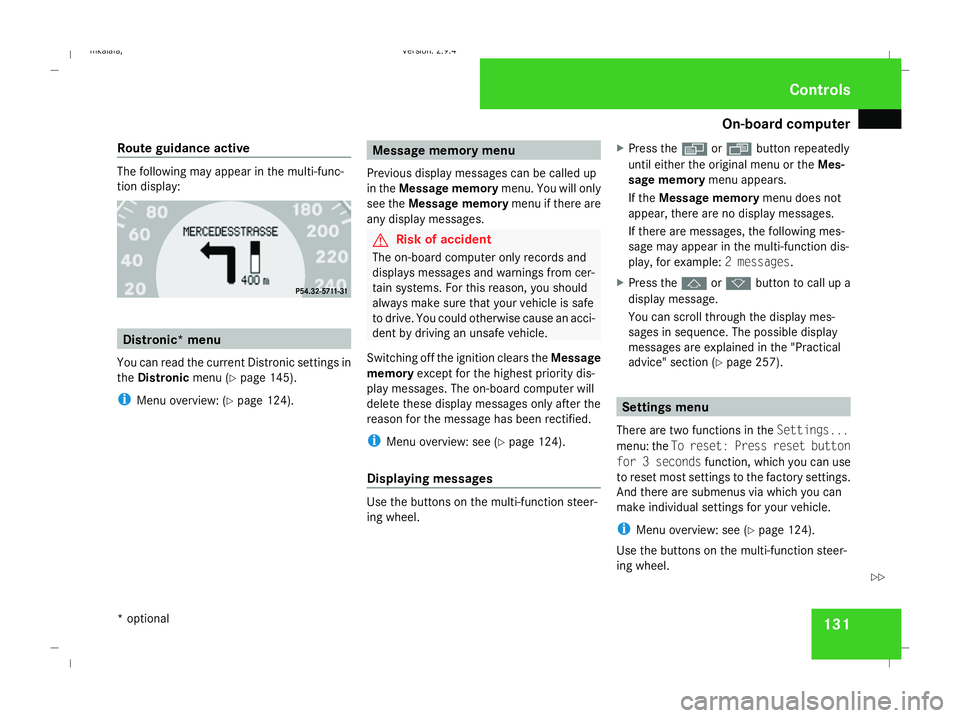
Route guidance active The following may appear in the multi-func-
tion display:
Distronic* menu
You can read the current Distronic settings in
the Distronic menu (Ypage 145).
i Menu overview: (Y page 124). Message memory menu
Previous display messages can be called up
in the Message memory menu. You will only
see the Message memory menu if there are
any display messages. G
Risk of accident
The on-board computer only records and
displays messages and warnings from cer-
tain systems. For this reason, you should
always make sure that your vehicle is safe
to drive. You could otherwise cause an acci-
dent by driving an unsafe vehicle.
Switching off the ignition clears the Message
memory except for the highest priority dis-
play messages. The on-board computer will
delete these display messages only after the
reason for the message has been rectified.
i Menu overview: see (Y page 124).
Displaying messages Use the buttons on the multi-function steer-
ing wheel. X
Press the èor· button repeatedly
until either the original menu or the Mes-
sage memory menu appears.
If the Message memory menu does not
appear, there are no display messages.
If there are messages, the following mes-
sage may appear in the multi-function dis-
play, for example: 2 messages.
X Press the jork button to call up a
display message.
You can scroll through the display mes-
sages in sequence. The possible display
messages are explained in the "Practical
advice" section (Y page 257). Settings menu
There are two functions in the Settings...
menu: the To reset: Press reset button
for 3 seconds function, which you can use
to reset most settings to the factory settings.
And there are submenus via which you can
make individual settings for your vehicle.
i Menu overview: see (Y page 124).
Use the buttons on the multi-function steer-
ing wheel. Controls
* optional
211_AKB; 2; 5, en-GB
mkalafa,
Version: 2.9.4 2008-02-29T16:57:07+01:00 - Seite 131 ZDateiname: 6515_3416_02_buchblock.pdf; preflight
Page 148 of 401
Driving sys
tems 145
i
Cruise control is not deactivated if you
depress the accelerator pedal. For exam-
ple, if you accelerate briefly to overtake,
cruise control adjusts the vehicle's speed
to the last speed stored after you have fin-
ished overtaking.
i Deceleration of the vehicle by means of
the cruise control lever is assisted by auto-
matic application of the brakes.
Vehicles with automatic transmission*:
On long downhill gradients, the automatic
transmission shifts down as a further meas-
ure.
Making fine adjustments in 1 km/h
increments X
Briefly press the cruise control lever up
1 for a higher speed or down 4for a
lower speed.
The last speed stored is increased or
reduced.
Deactivating cruise control There are several ways to deactivate cruise
control: X
Briefly press the cruise control lever for-
wards 6.
or
X Brake.
or
X Briefly press the cruise control lever in the
direction of arrow 5.
Variable Speedtronic is selected. LIM indi-
cator lamp 2in the cruise control lever
lights up.
Cruise control is automatically deactivated if,
for example:
R you depress the parking brake
R you are driving at less than 30 km/h
R ESP ®
is intervening or you deactivate
ESP ®
R you move the selector lever to Nin vehicles
with automatic transmission* while driving
If cruise control is deactivated, you will hear
a warning tone. You will see the Cruise con-
trol off message in the multi-function dis-
play for approximately five seconds.
i The last speed stored is cleared when you
switch off the engine. Distronic*
Distronic regulates the speed and automati-
cally maintains the distance to the vehicle in
front. It brakes automatically in order to avoid
exceeding the set speed. On long and steep
downhill gradients, especially if the vehicle is
laden or towing a trailer, you must select shift
range 1,2or 3. By doing so,you will make use
of the braking effect of the engine, which
relieves the load on the brake system and
prevents the brakes from overheating and
wearing too quickly. G
Risk of accident
Do not change down for additional engine
braking on a slippery road surface. This
could cause the drive wheels to lose their
grip and the vehicle could skid. G
Risk of accident
Distronic is only an aid designed to assist
driving. The driver remains fully responsible
for the vehicle's distance from other vehi-
cles, the vehicle's speed and braking in
good time. Controls
* optional
211_AKB; 2; 5, en-GB
mkalafa
,V ersion: 2.9.4
2008-02-29T16:57:07+01:00 - Seite 145 ZDateiname: 6515_3416_02_buchblock.pdf; preflight
Page 149 of 401

Driving sys
tems 146 Distronic does not react to:
R
pedestrians
R stationary obstacles on the road, e.g. sta-
tionary or parked vehicles
R oncoming and crossing traffic
Distronic may not detect narrow vehicles
driving in front, e.g. motorcycles, or vehi-
cles driving on a different line. Therefore,
always pay attention to traffic conditions
even when Distronic is activated. Other-
wise, you may fail to recognise dangers in
time, could cause an accident and injure
yourself and others.
If a slower-moving vehicle is detected in front,
Distronic causes your vehicle to brake and
maintain a preset distance to the vehicle in
front. G
Risk of accident
Distronic cannot take account of road and
traffic conditions. Deactivate, or do not
activate, Distronic if it does not detect the
vehicle in front, or if it no longer detects it.
This is especially the case:
R before corners
R on filter lanes R
when changing to a lane with faster mov-
ing traffic
R in complex driving situations or where
the lanes are diverted, e.g. at motorway/
roadway construction sites
Otherwise, Distronic maintains the current
speed or accelerates to the set speed.
Distronic cannot take account of weather
conditions. Deactivate, or do not activate,
Distronic:
R if the roads are slippery, snow-covered or
icy. The wheels could lose their grip
under braking or acceleration. The vehi-
cle could start to skid.
R if the sensors are dirty or there is poor
visibility, e.g. due to snow, rain or fog.
Distance control may be impaired.
Always pay attention to traffic conditions
even when Distronic is activated. Other-
wise, you may fail to recognise dangers in
time, could cause an accident and injure
yourself and others.
If there is no vehicle in front, Distronic oper-
ates in the same way as cruise control. Dis-
tronic functions in the 30 km/h to
180 km/h range. G
Risk of accident
Distronic brakes your vehicle at a maximum
of 2 m/s 2
, depending on its speed. This
corresponds to approximately 20% of your
vehicle's maximum braking power. You
must also apply the brakes yourself if this
braking power is not sufficient.
If Distronic detects a risk of collision with a
vehicle in front, an intermittent warning
tone sounds. In addition, the ldistance
warning lamp in the instrument cluster
lights up. Brake to avoid a collision.
Cruise control lever With the cruise control lever you can operate
Distronic and variable Speedtronic.
The LIM indicator lamp on the cruise control
lever indicates which system you have selec-
ted:
R
LIM indicator lamp off:
Distronic is selected
R LIM indicator lamp lit:
variable Speedtronic is selected Controls
211_AKB; 2; 5, en-GB
mkalafa
,V ersion: 2.9.4
2008-02-29T16:57:07+01:00 - Seite 146 Dateiname: 6515_3416_02_buchblock.pdf; preflight
Page 152 of 401
Driving sys
tems 149
i
Make sure that you maintain the mini-
mum distance to the vehicle in front
required by law. Adjust the distance to the
vehicle in front if necessary.
Distance warning function Even if Distronic is deactivated, this function
warns you at speeds above 30 km/h if:
R
the distance to the vehicle in front is too
short for the speed you are driving at for
several seconds. The ldistance warn-
ing lamp in the instrument cluster then
lights up.
R you are approaching a vehicle in front at too
great a speed. You then hear an intermit-
tent warning tone, and the ldistance
warning lamp in the instrument cluster
lights up.
You must apply the brakes yourself in order
to maintain the correct distance to the vehicle
and to avoid a collision. G
Risk of accident
Be especially observant of traffic condi-
tions when the ldistance warning lamp
in the instrument cluster lights up or an
intermittent warning tone sounds. Brake or take evasive action as necessary.
i Distronic does not always clearly recog-
nise complex road and traffic conditions.
You may then receive a false distance warn-
ing tone or none at all.
X To activate/deactivate: press button1.
When the function is activated, indicator
lamp 2in the button lights up and a loud-
speaker symbol appears in the display.
When the function is deactivated, indicator
lamp 2in the button goes out and the
loudspeaker symbol disappears from the
multi-function display.
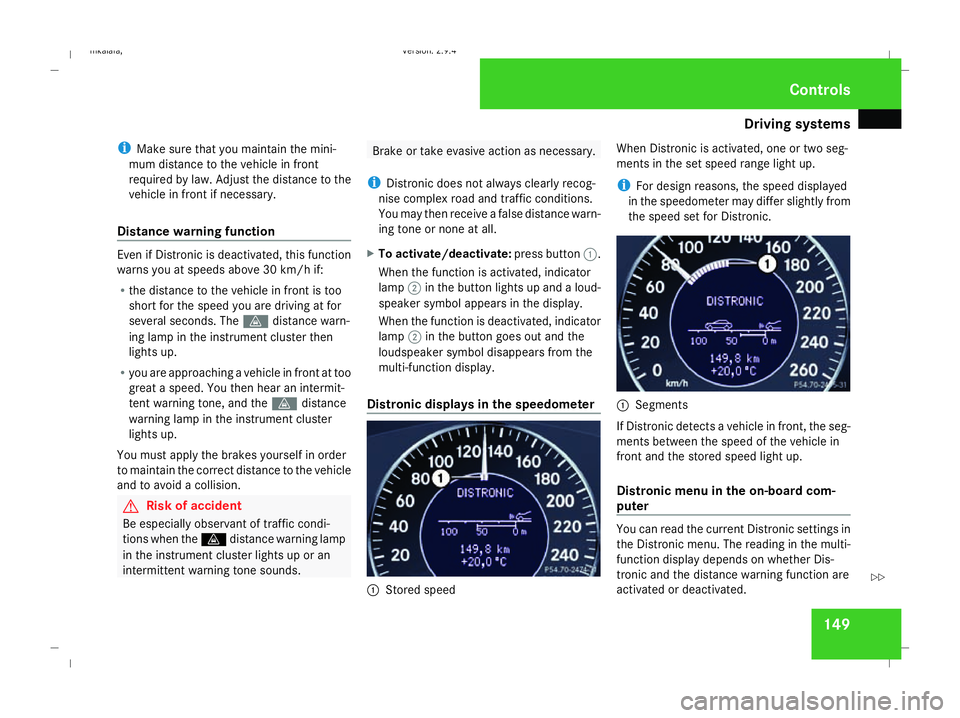
Distronic displays in the speedometer 1
Stored speed When Distronic is activated, one or two seg-
ments in the set speed range light up.
i For design reasons, the speed displayed
in the speedometer may differ slightly from
the speed set for Distronic. 1
Segments
If Distronic detects a vehicle in front, the seg-
ments between the speed of the vehicle in
front and the stored speed light up.
Distronic menu in the on-board com-
puter You can read the current Distronic settings in
the Distronic menu. The reading in the multi-
function display depends on whether Dis-
tronic and the distance warning function are
activated or deactivated. Controls
211_AKB; 2; 5, en-GB
mkalafa
,V ersion: 2.9.4
2008-02-29T16:57:07+01:00 - Seite 149 ZDateiname: 6515_3416_02_buchblock.pdf; preflight