2008 MERCEDES-BENZ E-CLASS SALOON display
[x] Cancel search: displayPage 71 of 401
Opening and closing
68(Y
page 109). You can close them using
the convenience closing feature
(Y page 109).
i If the vehicle has been parked for a long
time, you must pull the door handle to acti-
vate the KEYLESS GO functions.
Important notes R
If the KEYLESS GO key is removed from the
vehicle (e.g. in luggage or an article of
clothing), it will no longer be possible to
lock or start the vehicle.
R If the KEYLESS GO key is removed from the
vehicle while the engine is running, e.g. if
the front passenger leaves the vehicle with
the KEYLESS GO key, the following mes-
sage will appear in the multi-function dis-
play as you pull away: Key not detec-
ted.
R If the KEYLESS GO key is in the vehicle, the
vehicle can be started at any time. If you
have left the KEYLESS GO key in the vehi-
cle, the following message will appear in
the multi-function display when you lock
the vehicle: Key still in vehicle .Factory settings X
To unlock centrally: pull the door handle.
The turn signals flash once. The locking
knobs in the doors pop up. The anti-theft
alarm system* is deactivated.
When it is dark, the surround lighting also
comes on if it is activated in the on-board
computer.
i If you do not open either a door or the
boot lid/tailgate after you have unlocked
the vehicle, it will automatically relock after
approximately 40 seconds.
i There is a danger of the vehicle being
unlocked unintentionally. This could occur
if the KEYLESS GO key is within one metre
of the vehicle and the door handle is
splashed with water. This could also occur
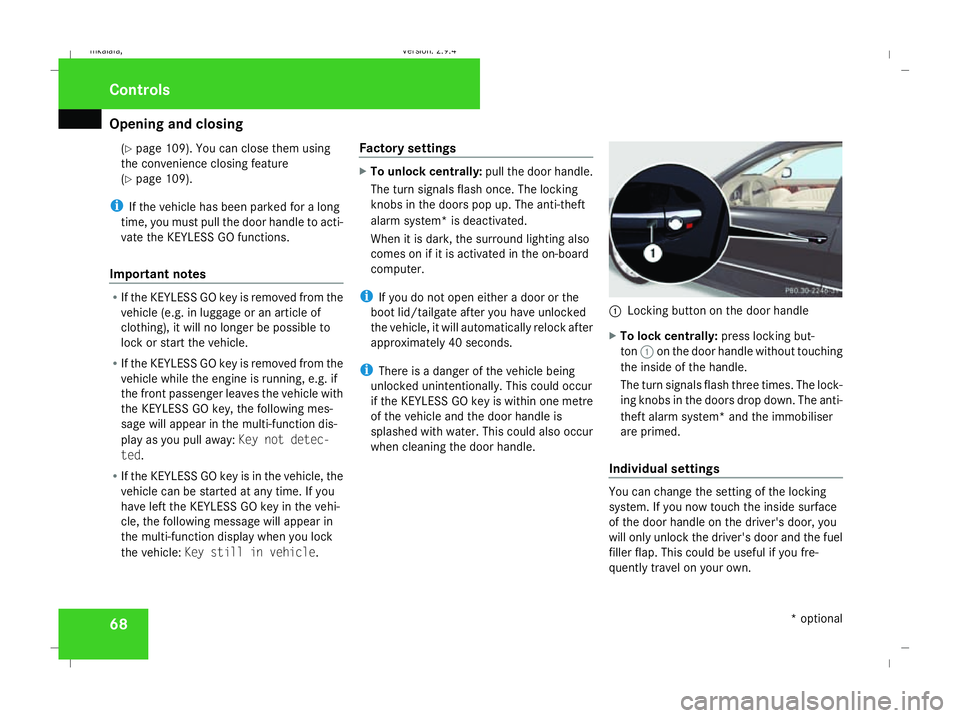
when cleaning the door handle. 1
Locking button on the door handle
X To lock centrally: press locking but-
ton 1on the door handle without touching
the inside of the handle.
The turn signals flash three times. The lock-
ing knobs in the doors drop down. The anti-
theft alarm system* and the immobiliser
are primed.
Individual settings You can change the setting of the locking
system. If you now touch the inside surface
of the door handle on the driver's door, you
will only unlock the driver's door and the fuel
filler flap. This could be useful if you fre-
quently travel on your own. Controls
* optional
211_AKB; 2; 5, en-GB
mkalafa,
Version: 2.9.4 2008-02-29T16:57:07+01:00 - Seite 68Dateiname: 6515_3416_02_buchblock.pdf; preflight
Page 88 of 401
Seats
85
5
Lumbar region support
6 Seat cushion length
X To activate/deactivate: press button1.
The indicator lamp in the button lights up/
goes out.
When switched on, the message Driving
dynamics seat adjustment appears in
the multi-function display for five seconds.
Massage function (PULSE) The massage function helps you to prevent
muscle tension on long journeys.
X Press button 3.
The indicator lamp in the button lights up.
The air cushions in the lumbar region
vibrate for approximately five minutes. Seat ventilation*
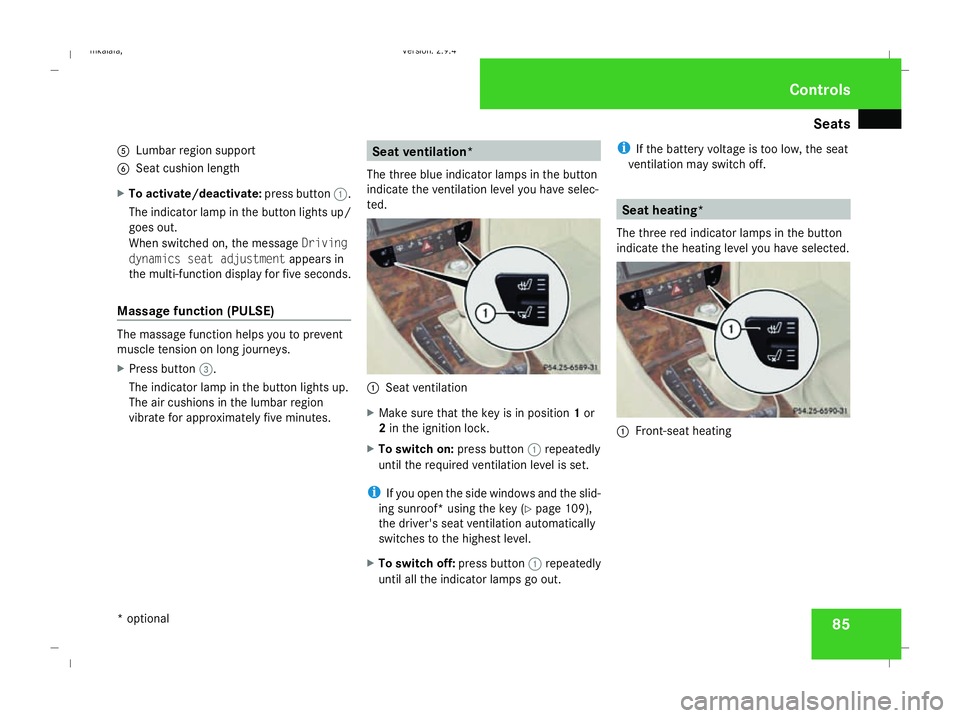
The three blue indicator lamps in the button
indicate the ventilation level you have selec-
ted. 1
Seat ventilation
X Make sure that the key is in position 1or
2 in the ignition lock.
X To switch on: press button1repeatedly
until the required ventilation level is set.
i If you open the side windows and the slid-
ing sunroof* using the key (Y page 109),
the driver's seat ventilation automatically
switches to the highest level.
X To switch off: press button1repeatedly
until all the indicator lamps go out. i
If the battery voltage is too low, the seat
ventilation may switch off. Seat heating*
The three red indicator lamps in the button
indicate the heating level you have selected. 1
Front-seat heating Controls
* optional
211_AKB; 2; 5, en-GB
mkalafa,
Version: 2.9.4 2008-02-29T16:57:07+01:00 - Seite 85 ZDateiname: 6515_3416_02_buchblock.pdf; preflight
Page 92 of 401
Steering wheel
89Steering wheel
Points to remember
Depending on the vehicle equipment, you can
adjust the steering wheel either manually or
electrically*. G
Risk of injury
The electrically adjustable steering
wheel* can be adjusted when the key is
removed from the ignition lock. Therefore,
do not leave children unsupervised in the
vehicle as they could become trapped as
the steering wheel is adjusted. G
Risk of accident
Only adjust the steering wheel when the
vehicle is stationary and do not pull away
until the steering wheel adjustment mech-
anism is locked in position. You might oth-
erwise drive without the steering wheel
adjustment mechanism being locked in
position. As a result you could be distracted
from road and traffic conditions by an unex-
pected movement of the steering wheel
and thereby cause an accident.
The steerability of the vehicle is however
not affected. When you adjust the steering wheel, make
sure that:
R
the steering wheel can be reached with
your arms slightly bent
R you can move your legs freely
R you can see all the displays in the instru-
ment cluster clearly Adjusting the steering wheel man-
ually
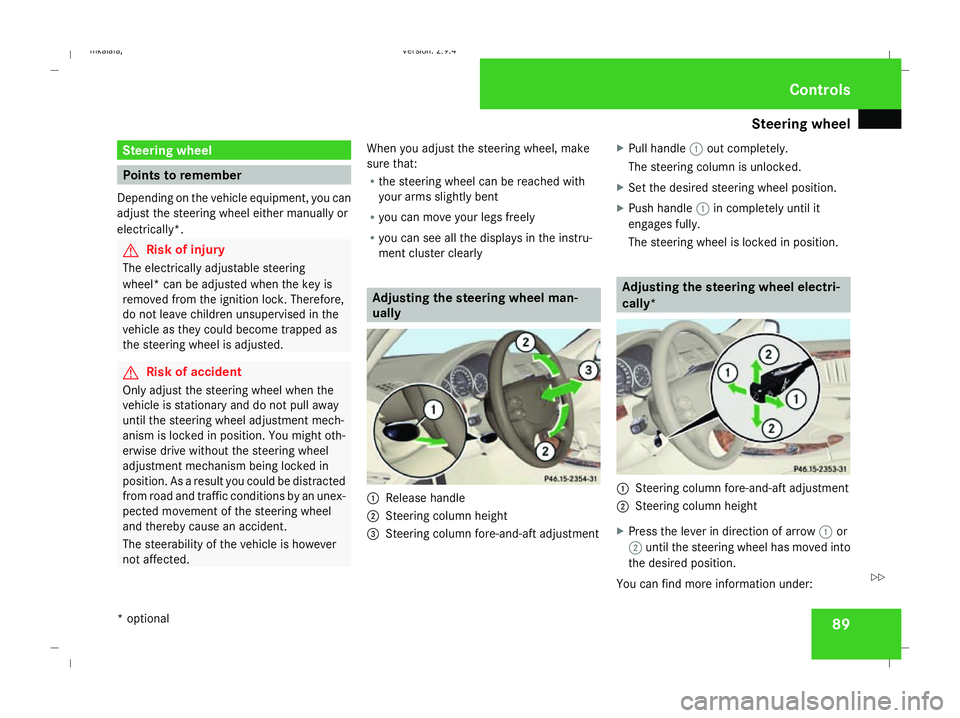
1
Release handle
2 Steering column height
3 Steering column fore-and-aft adjustment X
Pull handle 1out completely.
The steering column is unlocked.
X Set the desired steering wheel position.
X Push handle 1in completely until it
engages fully.
The steering wheel is locked in position. Adjusting the steering wheel electri-
cally*
1
Steering column fore-and-aft adjustment
2 Steering column height
X Press the lever in direction of arrow 1or
2 until the steering wheel has moved into
the desired position.
You can find more information under: Controls
* optional
211_AKB; 2; 5, en-GB
mkalafa,
Version: 2.9.4 2008-02-29T16:57:07+01:00 - Seite 89 ZDateiname: 6515_3416_02_buchblock.pdf; preflight
Page 101 of 401
Seat belts
98 G
Risk of accident
Only adjust the driver's seat when the vehi-
cle is stationary. You will otherwise be dis-
tracted from the road and traffic conditions
and you could lose control of the vehicle as
a result of the seat moving. This could
cause an accident. G
Risk of accident
Only adjust the steering wheel when the
vehicle is stationary and do not pull away
until the steering wheel adjustment mech-
anism is locked in position. You might oth-
erwise drive without the steering wheel
adjustment mechanism being locked in
position. As a result you could be distracted
from road and traffic conditions by an unex-
pected movement of the steering wheel
and thereby cause an accident.
The steerability of the vehicle is however
not affected.
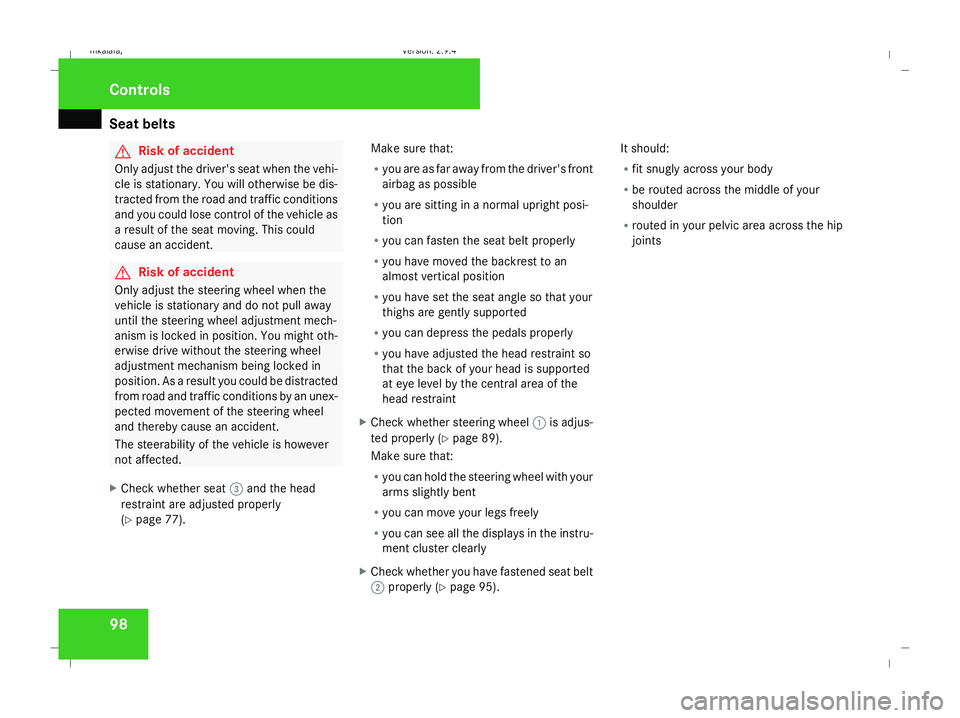
X Check whether seat 3and the head
restraint are adjusted properly
(Y page 77). Make sure that:
R
you are as far away from the driver's front
airbag as possible
R you are sitting in a normal upright posi-
tion
R you can fasten the seat belt properly
R you have moved the backrest to an
almost vertical position
R you have set the seat angle so that your
thighs are gently supported
R you can depress the pedals properly
R you have adjusted the head restraint so
that the back of your head is supported
at eye level by the central area of the
head restraint
X Check whether steering wheel 1is adjus-
ted properly (Y page 89).
Make sure that:
R you can hold the steering wheel with your
arms slightly bent
R you can move your legs freely
R you can see all the displays in the instru-
ment cluster clearly
X Check whether you have fastened seat belt
2 properly (Y page 95). It should:
R
fit snugly across your body
R be routed across the middle of your
shoulder
R routed in your pelvic area across the hip
joints Controls
211_AKB; 2; 5, en-GB
mkalafa,
Version: 2.9.4 2008-02-29T16:57:07+01:00 - Seite 98Dateiname: 6515_3416_02_buchblock.pdf; preflight
Page 118 of 401
Transmission
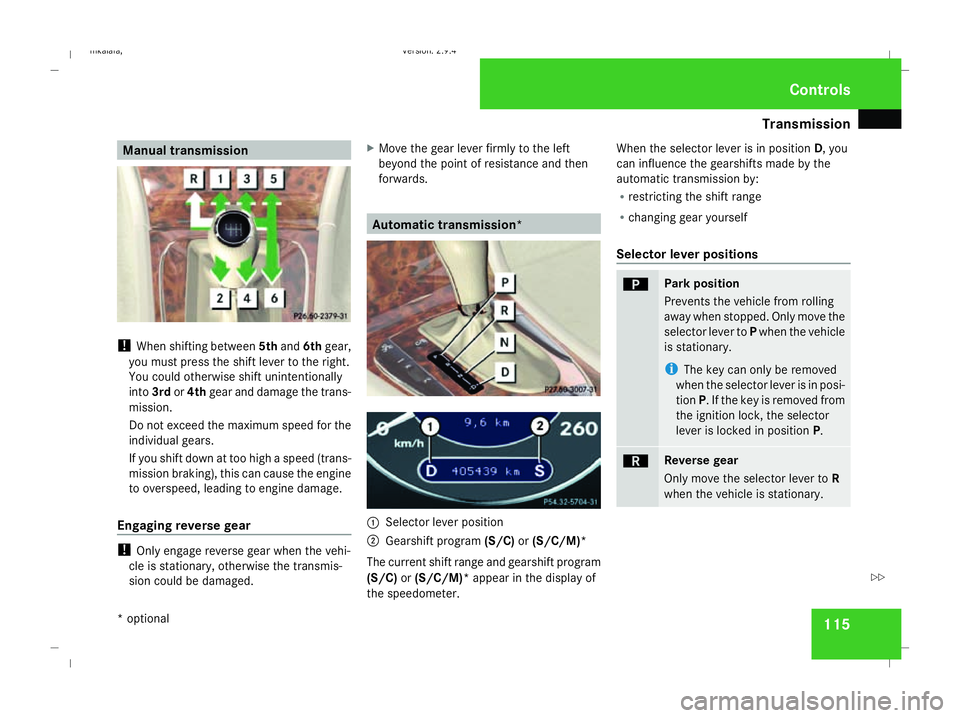
115Manual transmission
!
When shifting between 5thand 6thgear,
you must press the shift lever to the right.
You could otherwise shift unintentionally
into 3rdor4th gear and damage the trans-
mission.
Do not exceed the maximum speed for the
individual gears.
If you shift down at too high a speed (trans-
mission braking), this can cause the engine
to overspeed, leading to engine damage.
Engaging reverse gear !
Only engage reverse gear when the vehi-
cle is stationary, otherwise the transmis-
sion could be damaged. X
Move the gear lever firmly to the left
beyond the point of resistance and then
forwards. Automatic transmission*
1
Selector lever position
2 Gearshift program (S/C)or(S/C/M)*
The current shift range and gearshift program
(S/C) or(S/C/M)* appear in the display of
the speedometer. When the selector lever is in position
D, you
can influence the gearshifts made by the
automatic transmission by:
R restricting the shift range
R changing gear yourself
Selector lever positions ì Park position
Prevents the vehicle from rolling
away when stopped. Only move the
selector lever to
Pwhen the vehicle
is stationary.
i The key can only be removed
when the selector lever is in posi-
tion P. If the key is removed from
the ignition lock, the selector
lever is locked in position P. í Reverse gear
Only move the selector lever to
R
when the vehicle is stationary. Controls
* optional
211_AKB; 2; 5, en-GB
mkalafa
, Version: 2.9.4 2008-02-29T16:57:07+01:00 - Seite 115 ZDateiname: 6515_3416_02_buchblock.pdf; preflight
Page 119 of 401
Transmission
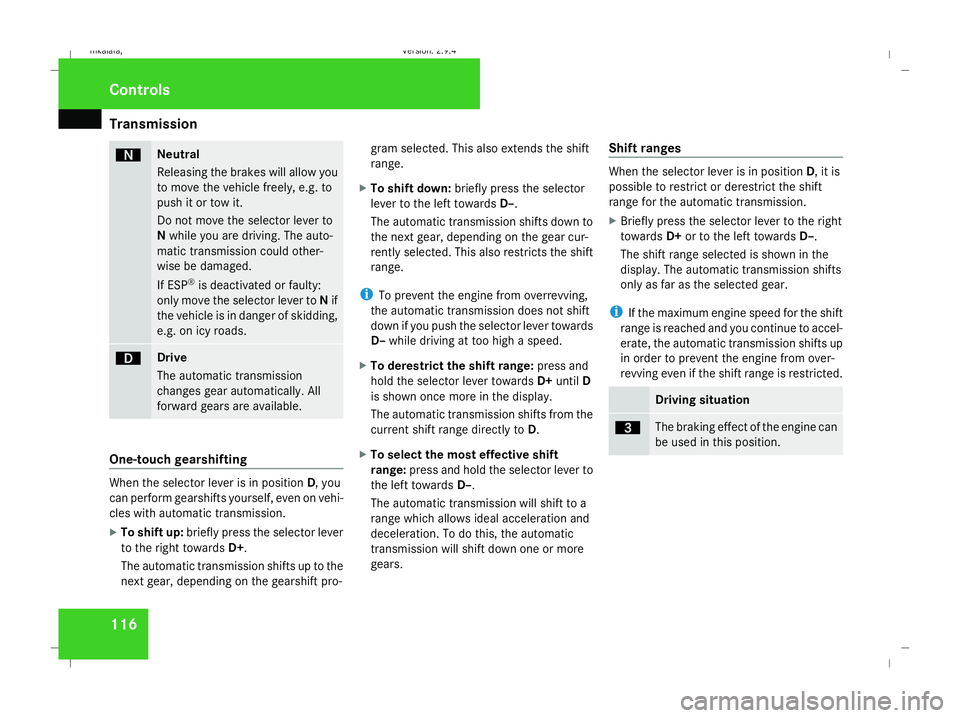
116 ë Neutral
Releasing the brakes will allow you
to move the vehicle freely, e.g. to
push it or tow it.
Do not move the selector lever to
N while you are driving. The auto-
matic transmission could other-
wise be damaged.
If ESP ®
is deactivated or faulty:
only move the selector lever to Nif
the vehicle is in danger of skidding,
e.g. on icy roads. ê Drive
The automatic transmission
changes gear automatically. All
forward gears are available.
One-touch gearshifting
When the selector lever is in position
D, you
can perform gearshifts yourself, even on vehi-
cles with automatic transmission.
X To shift up: briefly press the selector lever
to the right towards D+.
The automatic transmission shifts up to the
next gear, depending on the gearshift pro- gram selected. This also extends the shift
range.
X To shift down: briefly press the selector
lever to the left towards D–.
The automatic transmission shifts down to
the next gear, depending on the gear cur-
rently selected. This also restricts the shift
range.
i To prevent the engine from overrevving,
the automatic transmission does not shift
down if you push the selector lever towards
D– while driving at too high a speed.
X To derestrict the shift range: press and
hold the selector lever towards D+until D
is shown once more in the display.
The automatic transmission shifts from the
current shift range directly to D.
X To select the most effective shift
range: press and hold the selector lever to
the left towards D–.
The automatic transmission will shift to a
range which allows ideal acceleration and
deceleration. To do this, the automatic
transmission will shift down one or more
gears. Shift ranges When the selector lever is in position
D, it is
possible to restrict or derestrict the shift
range for the automatic transmission.
X Briefly press the selector lever to the right
towards D+or to the left towards D–.
The shift range selected is shown in the
display. The automatic transmission shifts
only as far as the selected gear.
i If the maximum engine speed for the shift
range is reached and you continue to accel-
erate, the automatic transmission shifts up
in order to prevent the engine from over-
revving even if the shift range is restricted. Driving situation
è The braking effect of the engine can
be used in this position.Controls
211_AKB; 2; 5, en-GB
mkalafa
,V ersion: 2.9.4
2008-02-29T16:57:07+01:00 - Seite 116 Dateiname: 6515_3416_02_buchblock.pdf; preflight
Page 120 of 401
Transmission
117ç To use the braking effect of the
engine on downhill gradients and
for driving:
R
on steep mountain roads
R in mountainous terrain
R in arduous conditions æ To use the braking effect of the
engine on extremely steep downhill
gradients and long downhill
stretches.
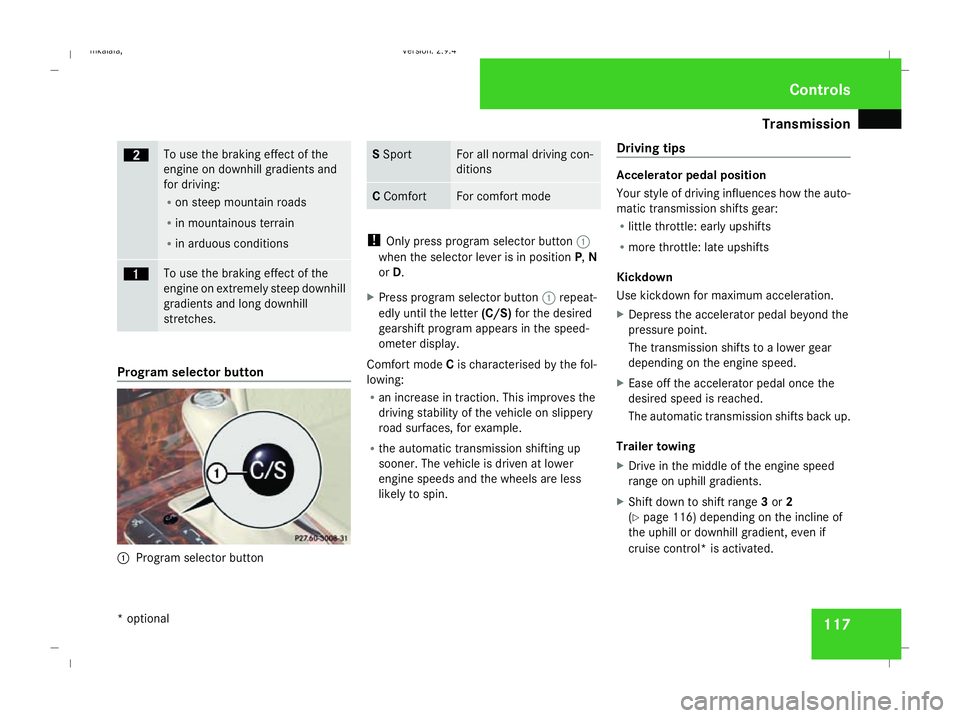
Program selector button
1
Program selector button S
Sport For all normal driving con-
ditions
C
Comfort For comfort mode
!
Only press program selector button 1
when the selector lever is in position P,N
or D.
X Press program selector button 1repeat-
edly until the letter (C/S)for the desired
gearshift program appears in the speed-
ometer display.
Comfort mode Cis characterised by the fol-
lowing:
R an increase in traction. This improves the
driving stability of the vehicle on slippery
road surfaces, for example.
R the automatic transmission shifting up
sooner. The vehicle is driven at lower
engine speeds and the wheels are less
likely to spin. Driving tips Accelerator pedal position
Your style of driving influences how the auto-
matic transmission shifts gear:
R little throttle: early upshifts
R more throttle: late upshifts
Kickdown
Use kickdown for maximum acceleration.
X Depress the accelerator pedal beyond the
pressure point.
The transmission shifts to a lower gear
depending on the engine speed.
X Ease off the accelerator pedal once the
desired speed is reached.
The automatic transmission shifts back up.
Trailer towing
X Drive in the middle of the engine speed
range on uphill gradients.
X Shift down to shift range 3or 2
(Y page 116) depending on the incline of
the uphill or downhill gradient, even if
cruise control* is activated. Controls
* optional
211_AKB; 2; 5, en-GB
mkalafa
,V ersion: 2.9.4
2008-02-29T16:57:07+01:00 - Seite 117 ZDateiname: 6515_3416_02_buchblock.pdf; preflight
Page 121 of 401
Transmission
118 Steering wheel gearshift paddles*
and manual gearshift program*
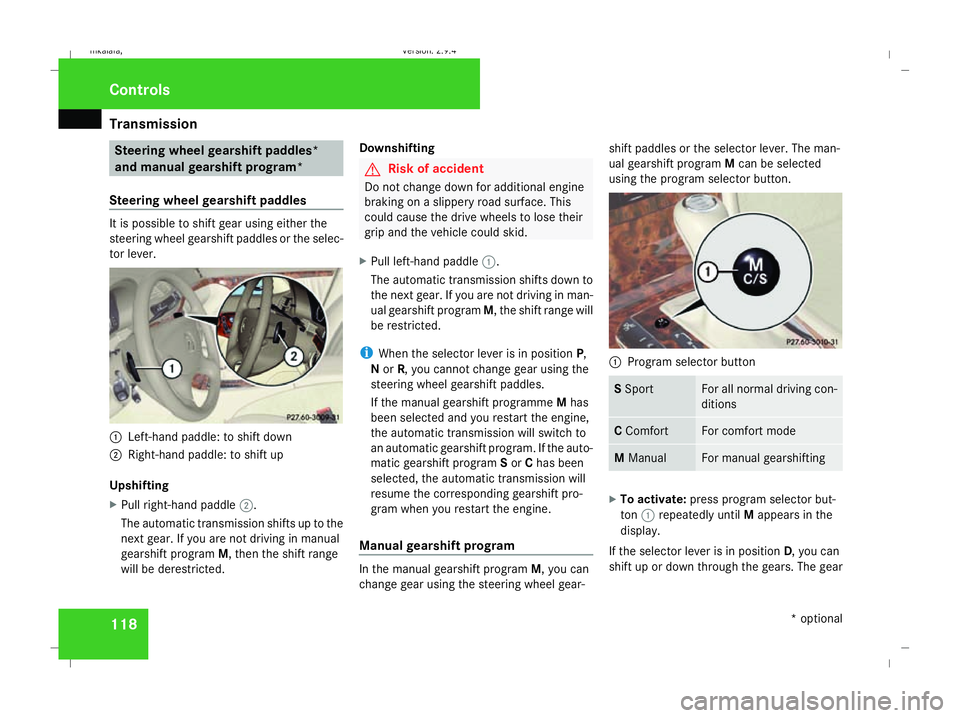
Steering wheel gearshift paddles It is possible to shift gear using either the
steering wheel gearshift paddles or the selec-
tor lever.
1
Left-hand paddle: to shift down
2 Right-hand paddle: to shift up
Upshifting
X Pull right-hand paddle 2.
The automatic transmission shifts up to the
next gear. If you are not driving in manual
gearshift program M, then the shift range
will be derestricted. Downshifting G
Risk of accident
Do not change down for additional engine
braking on a slippery road surface. This
could cause the drive wheels to lose their
grip and the vehicle could skid.
X Pull left-hand paddle 1.
The automatic transmission shifts down to
the next gear. If you are not driving in man-
ual gearshift program M, the shift range will
be restricted.
i When the selector lever is in position P,
N or R, you cannot change gear using the
steering wheel gearshift paddles.
If the manual gearshift programme Mhas
been selected and you restart the engine,
the automatic transmission will switch to
an automatic gearshift program. If the auto-
matic gearshift program Sor Chas been
selected, the automatic transmission will
resume the corresponding gearshift pro-
gram when you restart the engine.
Manual gearshift program In the manual gearshift program
M, you can
change gear using the steering wheel gear- shift paddles or the selector lever. The man-
ual gearshift program
Mcan be selected
using the program selector button. 1
Program selector button S
Sport For all normal driving con-
ditions
C
Comfort For comfort mode
M
Manual For manual gearshifting
X
To activate: press program selector but-
ton 1repeatedly until Mappears in the
display.
If the selector lever is in position D, you can
shift up or down through the gears. The gear Controls
* optional
211_AKB; 2; 5, en-GB
mkalafa
,V ersion: 2.9.4
2008-02-29T16:57:07+01:00 - Seite 118 Dateiname: 6515_3416_02_buchblock.pdf; preflight