2008 MERCEDES-BENZ E-CLASS SALOON lock
[x] Cancel search: lockPage 84 of 401
Seats
81
Luxury head restraint* G
Risk of injury
When folding back the head restraint side
bolsters, do not put your hands between
the side bolster and the cushion holder.
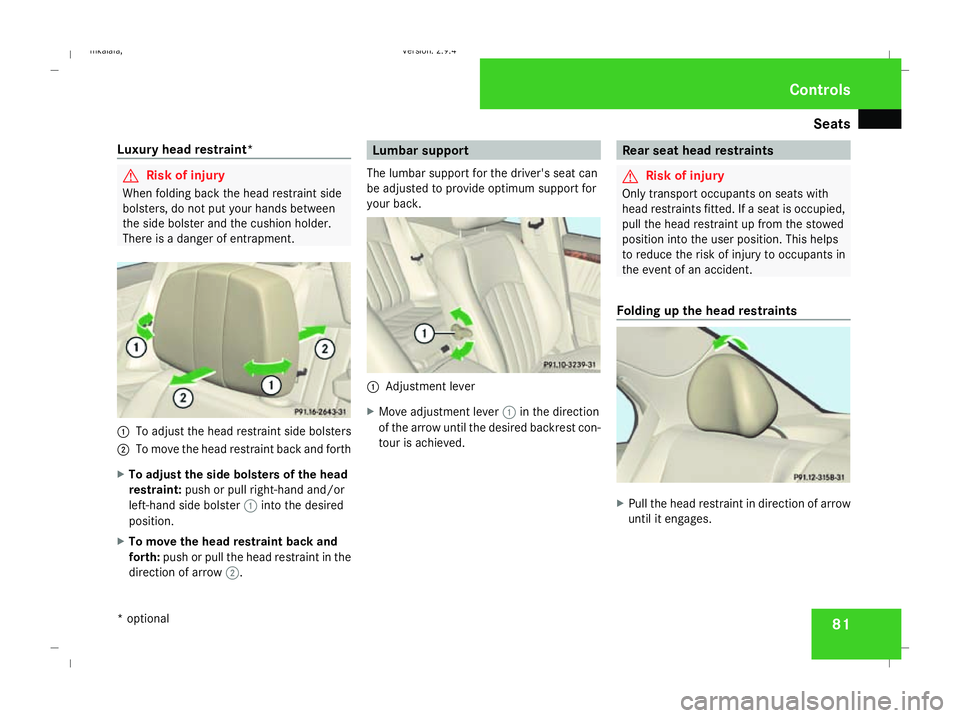
There is a danger of entrapment. 1
To adjust the head restraint side bolsters
2 To move the head restraint back and forth
X To adjust the side bolsters of the head
restraint: push or pull right-hand and/or
left-hand side bolster 1into the desired
position.
X To move the head restraint back and
forth: push or pull the head restraint in the
direction of arrow 2. Lumbar support
The lumbar support for the driver's seat can
be adjusted to provide optimum support for
your back. 1
Adjustment lever
X Move adjustment lever 1in the direction
of the arrow until the desired backrest con-
tour is achieved. Rear seat head restraints
G
Risk of injury
Only transport occupants on seats with
head restraints fitted. If a seat is occupied,
pull the head restraint up from the stowed
position into the user position. This helps
to reduce the risk of injury to occupants in
the event of an accident.
Folding up the head restraints X
Pull the head restraint in direction of arrow
until it engages. Controls
* optional
211_AKB; 2; 5, en-GB
mkalafa,
Version: 2.9.4 2008-02-29T16:57:07+01:00 - Seite 81 ZDateiname: 6515_3416_02_buchblock.pdf; preflight
Page 85 of 401
Seats
82
Folding back the head restraints from
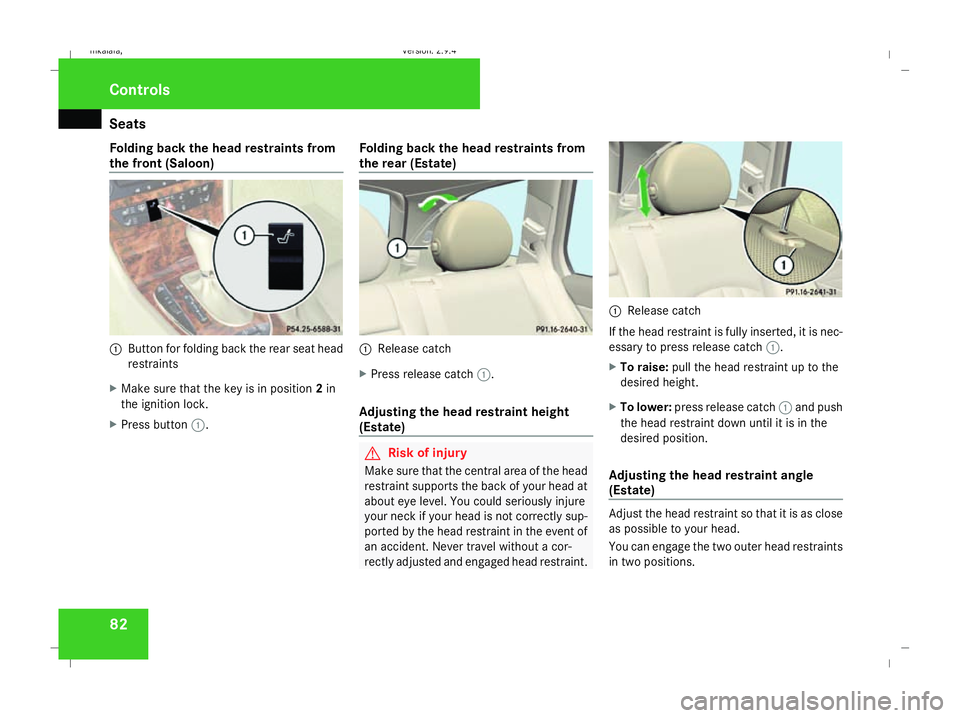
the front (Saloon) 1
Button for folding back the rear seat head
restraints
X Make sure that the key is in position 2in
the ignition lock.
X Press button 1. Folding back the head restraints from
the rear (Estate) 1
Release catch
X Press release catch 1.
Adjusting the head restraint height
(Estate) G
Risk of injury
Make sure that the central area of the head
restraint supports the back of your head at
about eye level. You could seriously injure
your neck if your head is not correctly sup-
ported by the head restraint in the event of
an accident. Never travel without a cor-
rectly adjusted and engaged head restraint. 1
Release catch
If the head restraint is fully inserted, it is nec-
essary to press release catch 1.
X To raise: pull the head restraint up to the
desired height.
X To lower: press release catch 1and push
the head restraint down until it is in the
desired position.
Adjusting the head restraint angle
(Estate) Adjust the head restraint so that it is as close
as possible to your head.
You can engage the two outer head restraints
in two positions.Controls
211_AKB; 2; 5, en-GB
mkalafa,
Version: 2.9.4 2008-02-29T16:57:07+01:00 - Seite 82Dateiname: 6515_3416_02_buchblock.pdf; preflight
Page 86 of 401
Seats
831
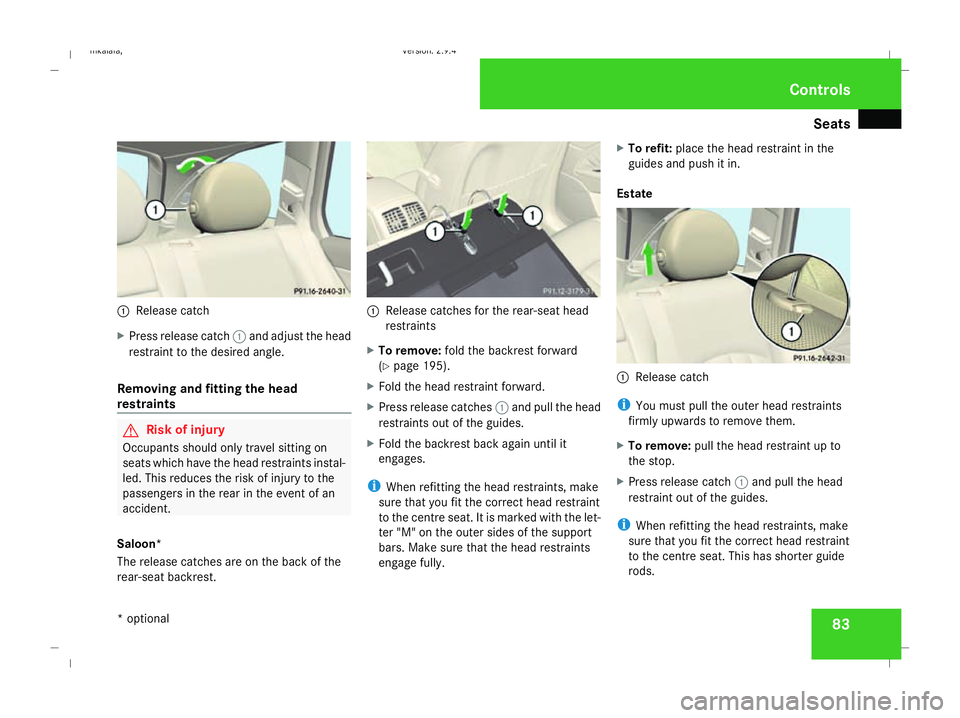
Release catch
X Press release catch 1and adjust the head
restraint to the desired angle.
Removing and fitting the head
restraints G
Risk of injury
Occupants should only travel sitting on
seats which have the head restraints instal-
led. This reduces the risk of injury to the
passengers in the rear in the event of an
accident.
Saloon*
The release catches are on the back of the
rear-seat backrest. 1
Release catches for the rear-seat head
restraints
X To remove: fold the backrest forward
(Y page 195).
X Fold the head restraint forward.
X Press release catches 1and pull the head
restraints out of the guides.
X Fold the backrest back again until it
engages.
i When refitting the head restraints, make
sure that you fit the correct head restraint
to the centre seat. It is marked with the let-
ter "M" on the outer sides of the support
bars. Make sure that the head restraints
engage fully. X
To refit: place the head restraint in the
guides and push it in.
Estate 1
Release catch
i You must pull the outer head restraints
firmly upwards to remove them.
X To remove: pull the head restraint up to
the stop.
X Press release catch 1and pull the head
restraint out of the guides.
i When refitting the head restraints, make
sure that you fit the correct head restraint
to the centre seat. This has shorter guide
rods. Controls
* optional
211_AKB; 2; 5, en-GB
mkalafa,
Version: 2.9.4 2008-02-29T16:57:07+01:00 - Seite 83 ZDateiname: 6515_3416_02_buchblock.pdf; preflight
Page 87 of 401
Seats
84
X
To refit: insert the head restraint so that
the notches on the bar are on the left when
viewed in the direction of travel.
X Push the head restraint down until you hear
it click into place. Multi-contour seat*
You can set the contour of the seat to provide
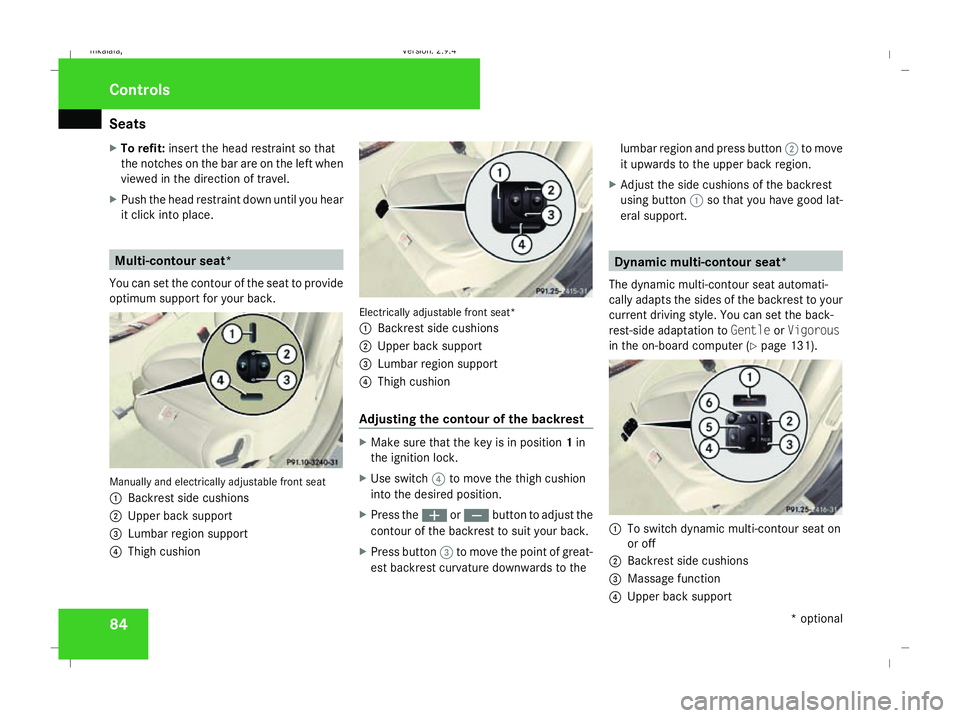
optimum support for your back. Manually and electrically adjustable front seat
1 Backrest side cushions
2 Upper back support
3 Lumbar region support
4 Thigh cushion Electrically adjustable front seat*
1
Backrest side cushions
2 Upper back support
3 Lumbar region support
4 Thigh cushion
Adjusting the contour of the backrest X
Make sure that the key is in position 1in
the ignition lock.
X Use switch 4to move the thigh cushion
into the desired position.
X Press the æorç button to adjust the
contour of the backrest to suit your back.
X Press button 3to move the point of great-
est backrest curvature downwards to the lumbar region and press button
2to move
it upwards to the upper back region.
X Adjust the side cushions of the backrest
using button 1so that you have good lat-
eral support. Dynamic multi-contour seat*
The dynamic multi-contour seat automati-
cally adapts the sides of the backrest to your
current driving style. You can set the back-
rest-side adaptation to GentleorVigorous
in the on-board computer (Y page 131). 1
To switch dynamic multi-contour seat on
or off
2 Backrest side cushions
3 Massage function
4 Upper back support Controls
* optional
211_AKB; 2; 5, en-GB
mkalafa,
Version: 2.9.4 2008-02-29T16:57:07+01:00 - Seite 84Dateiname: 6515_3416_02_buchblock.pdf; preflight
Page 88 of 401
Seats
85
5
Lumbar region support
6 Seat cushion length
X To activate/deactivate: press button1.
The indicator lamp in the button lights up/
goes out.
When switched on, the message Driving
dynamics seat adjustment appears in
the multi-function display for five seconds.
Massage function (PULSE) The massage function helps you to prevent
muscle tension on long journeys.
X Press button 3.
The indicator lamp in the button lights up.
The air cushions in the lumbar region
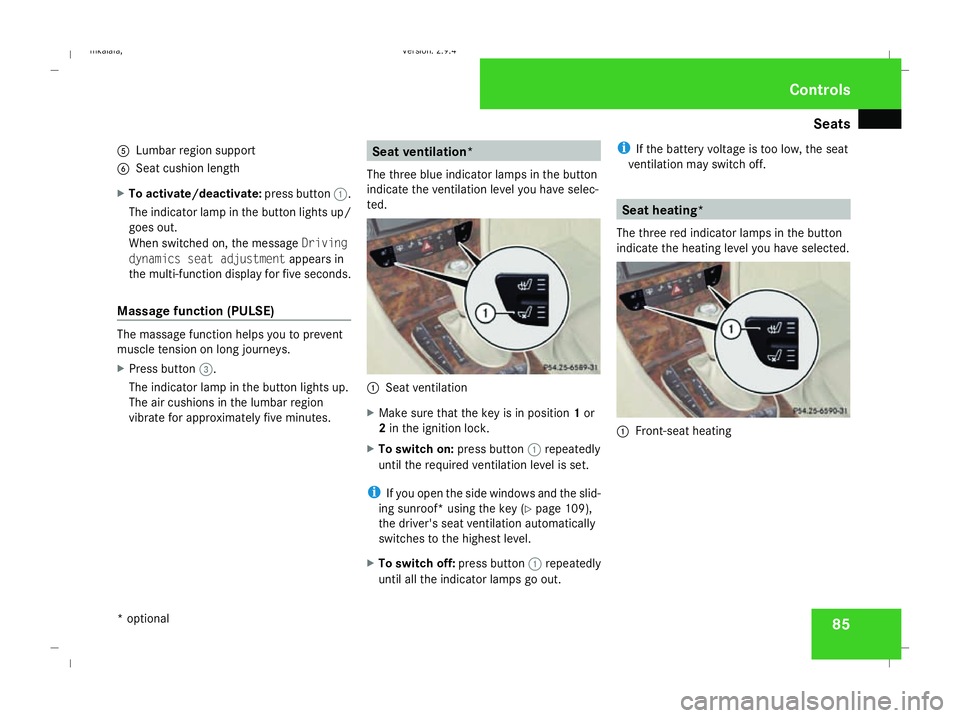
vibrate for approximately five minutes. Seat ventilation*
The three blue indicator lamps in the button
indicate the ventilation level you have selec-
ted. 1
Seat ventilation
X Make sure that the key is in position 1or
2 in the ignition lock.
X To switch on: press button1repeatedly
until the required ventilation level is set.
i If you open the side windows and the slid-
ing sunroof* using the key (Y page 109),
the driver's seat ventilation automatically
switches to the highest level.
X To switch off: press button1repeatedly
until all the indicator lamps go out. i
If the battery voltage is too low, the seat
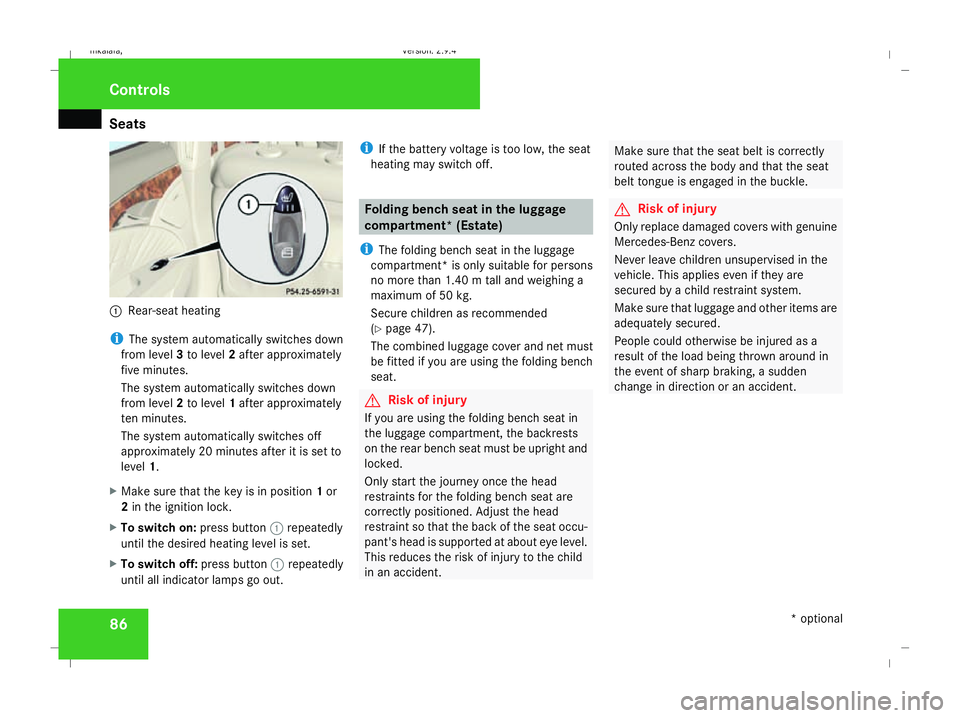
ventilation may switch off. Seat heating*
The three red indicator lamps in the button
indicate the heating level you have selected. 1
Front-seat heating Controls
* optional
211_AKB; 2; 5, en-GB
mkalafa,
Version: 2.9.4 2008-02-29T16:57:07+01:00 - Seite 85 ZDateiname: 6515_3416_02_buchblock.pdf; preflight
Page 89 of 401
Seats
861
Rear-seat heating
i The system automatically switches down
from level 3to level 2after approximately
five minutes.
The system automatically switches down
from level 2to level 1after approximately
ten minutes.
The system automatically switches off
approximately 20 minutes after it is set to
level 1.
X Make sure that the key is in position 1or
2 in the ignition lock.
X To switch on: press button1repeatedly
until the desired heating level is set.
X To switch off: press button1repeatedly
until all indicator lamps go out. i
If the battery voltage is too low, the seat
heating may switch off. Folding bench seat in the luggage
compartment* (Estate)
i The folding bench seat in the luggage
compartment* is only suitable for persons
no more than 1.40 m tall and weighing a
maximum of 50 kg.
Secure children as recommended
(Y page 47).
The combined luggage cover and net must
be fitted if you are using the folding bench
seat. G
Risk of injury
If you are using the folding bench seat in
the luggage compartment, the backrests
on the rear bench seat must be upright and
locked.
Only start the journey once the head
restraints for the folding bench seat are
correctly positioned. Adjust the head
restraint so that the back of the seat occu-
pant's head is supported at about eye level.
This reduces the risk of injury to the child
in an accident. Make sure that the seat belt is correctly
routed across the body and that the seat
belt tongue is engaged in the buckle. G
Risk of injury
Only replace damaged covers with genuine
Mercedes-Benz covers.
Never leave children unsupervised in the
vehicle. This applies even if they are
secured by a child restraint system.
Make sure that luggage and other items are
adequately secured.
People could otherwise be injured as a
result of the load being thrown around in
the event of sharp braking, a sudden
change in direction or an accident. Controls
* optional
211_AKB; 2; 5, en-GB
mkalafa,
Version: 2.9.4 2008-02-29T16:57:07+01:00 - Seite 86Dateiname: 6515_3416_02_buchblock.pdf; preflight
Page 90 of 401
Seats
87
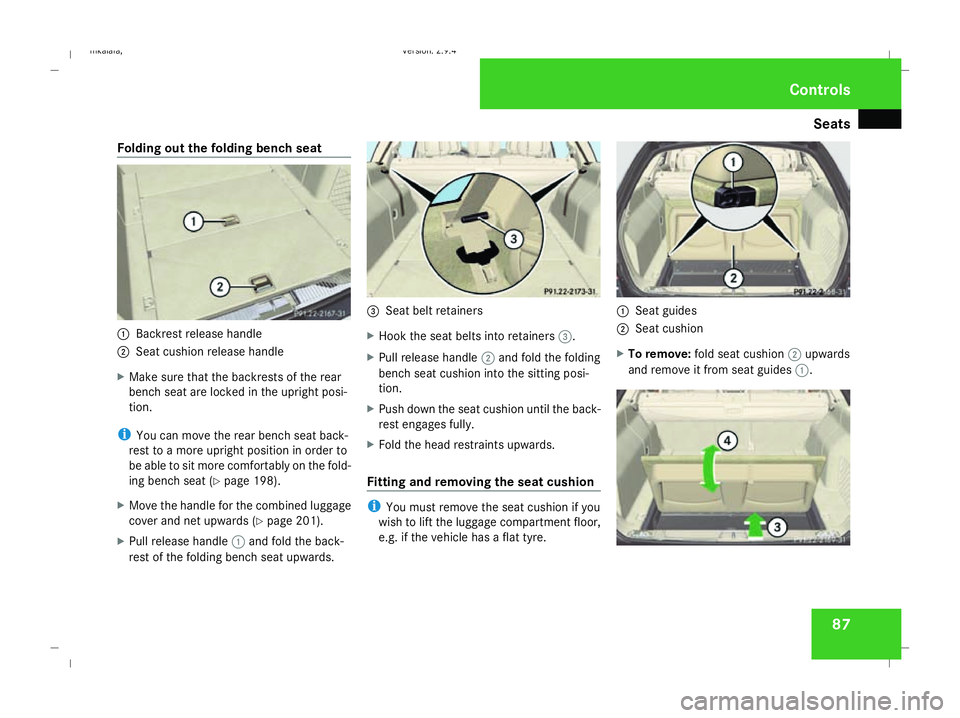
Folding out the folding bench seat
1
Backrest release handle
2 Seat cushion release handle
X Make sure that the backrests of the rear
bench seat are locked in the upright posi-
tion.
i You can move the rear bench seat back-
rest to a more upright position in order to
be able to sit more comfortably on the fold-
ing bench seat (Y page 198).
X Move the handle for the combined luggage
cover and net upwards (Y page 201).
X Pull release handle 1and fold the back-
rest of the folding bench seat upwards. 3
Seat belt retainers
X Hook the seat belts into retainers 3.
X Pull release handle 2and fold the folding
bench seat cushion into the sitting posi-
tion.
X Push down the seat cushion until the back-
rest engages fully.
X Fold the head restraints upwards.
Fitting and removing the seat cushion i
You must remove the seat cushion if you
wish to lift the luggage compartment floor,
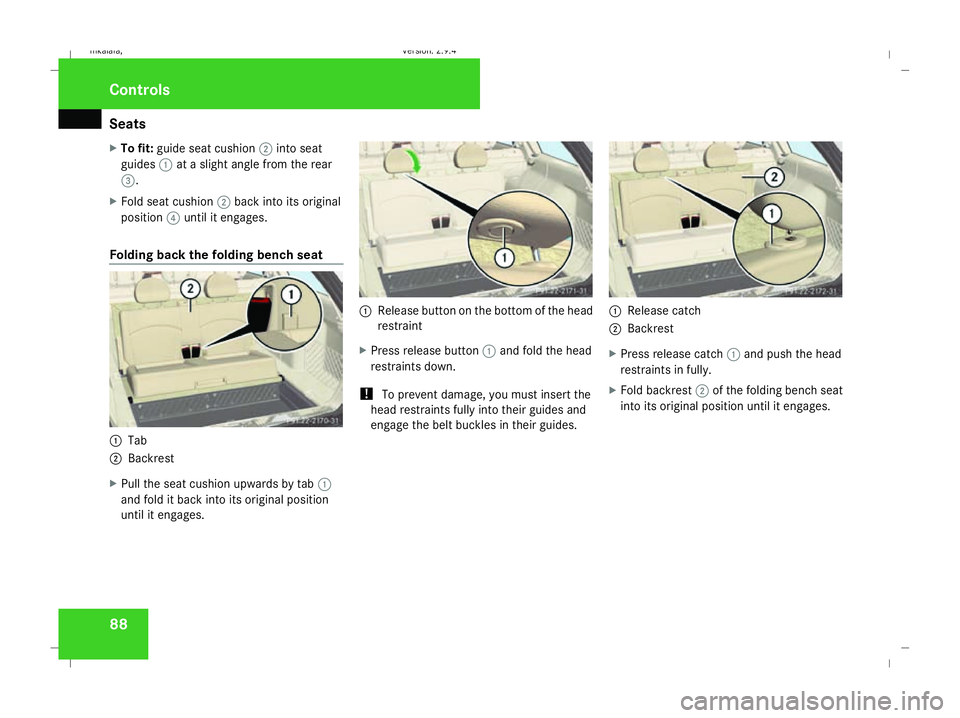
e.g. if the vehicle has a flat tyre. 1
Seat guides
2 Seat cushion
X To remove: fold seat cushion 2upwards
and remove it from seat guides 1. Controls
211_AKB; 2; 5, en-GB
mkalafa,
Version: 2.9.4
2008-02-29T16:57:07+01:00 - Seite 87 ZDateiname: 6515_3416_02_buchblock.pdf; preflight
Page 91 of 401
Seats
88
X
To fit: guide seat cushion 2into seat
guides 1at a slight angle from the rear
3.
X Fold seat cushion 2back into its original
position 4until it engages.
Folding back the folding bench seat 1
Tab
2 Backrest
X Pull the seat cushion upwards by tab 1
and fold it back into its original position
until it engages. 1
Release button on the bottom of the head
restraint
X Press release button 1and fold the head
restraints down.
! To prevent damage, you must insert the
head restraints fully into their guides and
engage the belt buckles in their guides. 1
Release catch
2 Backrest
X Press release catch 1and push the head
restraints in fully.
X Fold backrest 2of the folding bench seat
into its original position until it engages. Controls
211_AKB; 2; 5, en-GB
mkalafa,
Version: 2.9.4 2008-02-29T16:57:07+01:00 - Seite 88Dateiname: 6515_3416_02_buchblock.pdf; preflight