Page 229 of 769
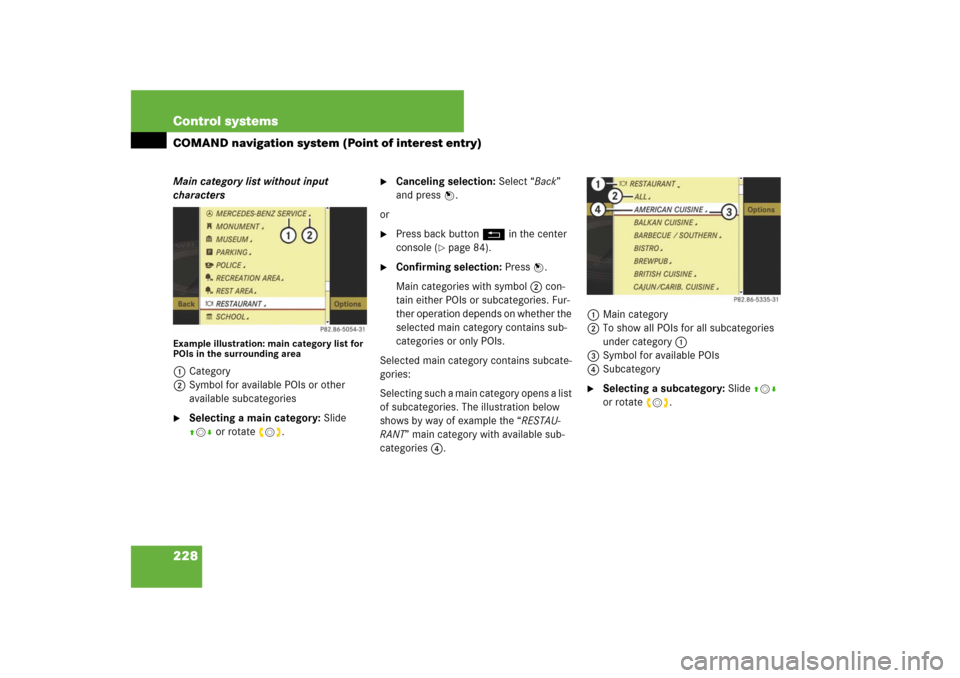
228 Control systemsCOMAND navigation system (Point of interest entry)Main category list without input
charactersExample illustration: main category list for
POIs in the surrounding area1Category
2Symbol for available POIs or other
available subcategories�
Selecting a main category: Slide
qmr or rotate ymz.
�
Canceling selection: Select “Back”
and press n.
or
�
Press back button L in the center
console (
�page 84).
�
Confirming selection: Press n.
Main categories with symbol 2 con-
tain either POIs or subcategories. Fur-
ther operation depends on whether the
selected main category contains sub-
categories or only POIs.
Selected main category contains subcate-
gories:
Selecting such a main category opens a list
of subcategories. The illustration below
shows by way of example the “RESTAU-
RANT” main category with available sub-
categories 4.1Main category
2To show all POIs for all subcategories
under category 1
3Symbol for available POIs
4Subcategory
�
Selecting a subcategory: Slide qmr
or rotate ymz.
Page 230 of 769
229 Control systems
COMAND navigation system (Point of interest entry)
�
Canceling selection: Select “Back”
and press n.
or
�
Press back button L in the center
console (
�page 84).
�
Confirming selection: Press n.
After selecting a subcategory, a list of
POIs appears. It contains the POIs
available within the search radius of
the subcategory.
Selected main category contains no sub-
categories, but only POIs:
Selecting such a main category immedi-
ately opens a list of POIs. The POI list con-
tains the available POIs within the search
radius of the main category.POI list
Depending on the situation, COMAND first
shows the following list or the POI list with
input characters.
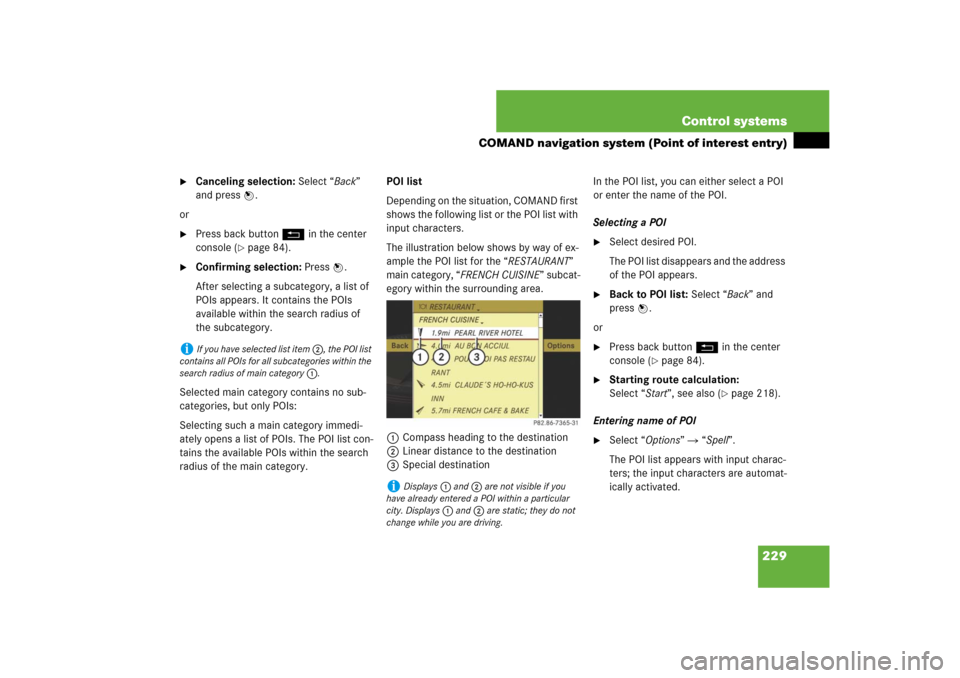
The illustration below shows by way of ex-
ample the POI list for the “RESTAURANT”
main category, “FRENCH CUISINE” subcat-
egory within the surrounding area.
1Compass heading to the destination
2Linear distance to the destination
3Special destinationIn the POI list, you can either select a POI
or enter the name of the POI.
Selecting a POI
�
Select desired POI.
The POI list disappears and the address
of the POI appears.
�
Back to POI list: Select “Back” and
press n.
or
�
Press back button L in the center
console (
�page 84).
�
Starting route calculation:
Select “Start”, see also (
�page 218).
Entering name of POI
�
Select “Options” � “Spell”.
The POI list appears with input charac-
ters; the input characters are automat-
ically activated.
i
If you have selected list item 2, the POI list
contains all POIs for all subcategories within the
search radius of main category 1.
i
Displays 1 and 2 are not visible if you
have already entered a POI within a particular
city. Displays 1 and 2 are static; they do not
change while you are driving.
Page 231 of 769
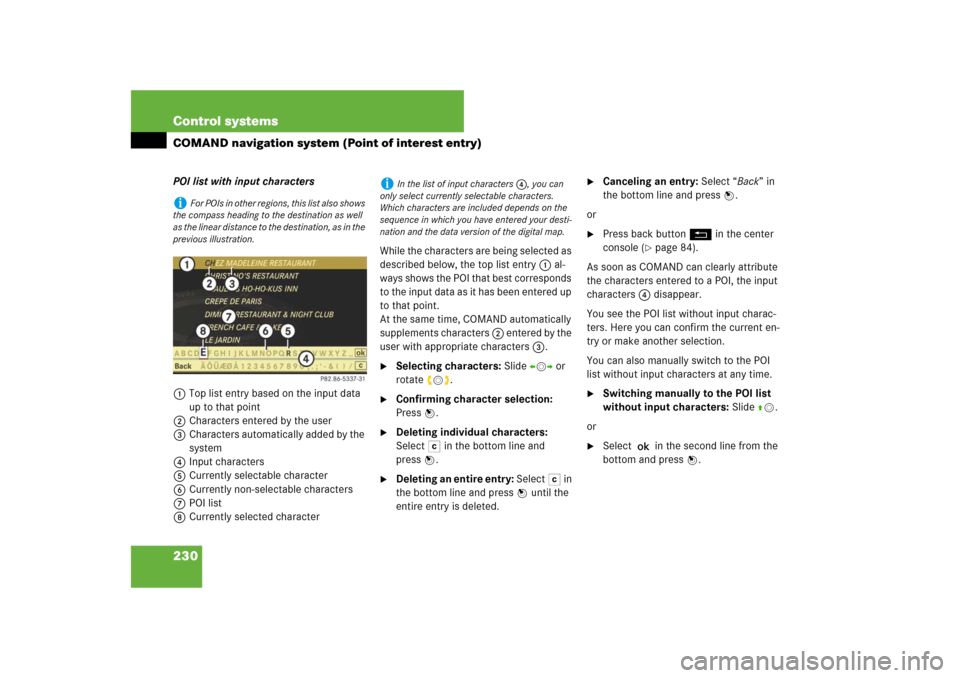
230 Control systemsCOMAND navigation system (Point of interest entry)POI list with input characters
1Top list entry based on the input data
up to that point
2Characters entered by the user
3Characters automatically added by the
system
4Input characters
5Currently selectable character
6Currently non-selectable characters
7POI list
8Currently selected characterWhile the characters are being selected as
described below, the top list entry 1 al-
ways shows the POI that best corresponds
to the input data as it has been entered up
to that point.
At the same time, COMAND automatically
supplements characters 2 entered by the
user with appropriate characters 3.
�
Selecting characters: Slide omp or
rotate ymz.
�
Confirming character selection:
Press n.
�
Deleting individual characters:
Select) in the bottom line and
pressn.
�
Deleting an entire entry: Select) in
the bottom line and press n until the
entire entry is deleted.
�
Canceling an entry: Select “Back” in
the bottom line and press n.
or
�
Press back button L in the center
console (
�page 84).
As soon as COMAND can clearly attribute
the characters entered to a POI, the input
characters 4 disappear.
You see the POI list without input charac-
ters. Here you can confirm the current en-
try or make another selection.
You can also manually switch to the POI
list without input characters at any time.
�
Switching manually to the POI list
without input characters: Slide qm.
or
�
Select ? in the second line from the
bottom and press n.
i
For POIs in other regions, this list also shows
the compass heading to the destination as well
as the linear distance to the destination, as in the
previous illustration.
i
In the list of input characters 4, you can
only select currently selectable characters.
Which characters are included depends on the
sequence in which you have entered your desti-
nation and the data version of the digital map.
Page 232 of 769
231 Control systems
COMAND navigation system (Point of interest entry)
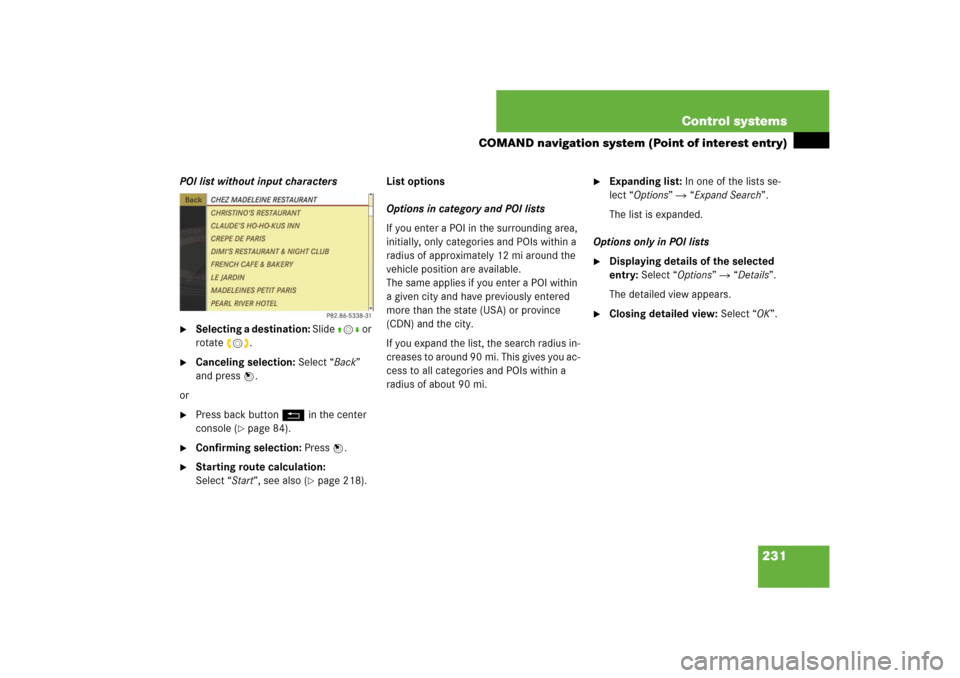
POI list without input characters�
Selecting a destination: Slide qmr or
rotate ymz.
�
Canceling selection: Select “Back”
and press n.
or
�
Press back button L in the center
console (
�page 84).
�
Confirming selection: Press n.
�
Starting route calculation:
Select “Start”, see also (
�page 218).List options
Options in category and POI lists
If you enter a POI in the surrounding area,
initially, only categories and POIs within a
radius of approximately 12 mi around the
vehicle position are available.
The same applies if you enter a POI within
a given city and have previously entered
more than the state (USA) or province
(CDN) and the city.
If you expand the list, the search radius in-
creases to around 90 mi. This gives you ac-
cess to all categories and POIs within a
radius of about 90 mi.
�
Expanding list: In one of the lists se-
lect “Options” � “Expand Search”.
The list is expanded.
Options only in POI lists
�
Displaying details of the selected
entry: Select “Options” � “Details”.
The detailed view appears.
�
Closing detailed view: Select “OK”.
Page 243 of 769
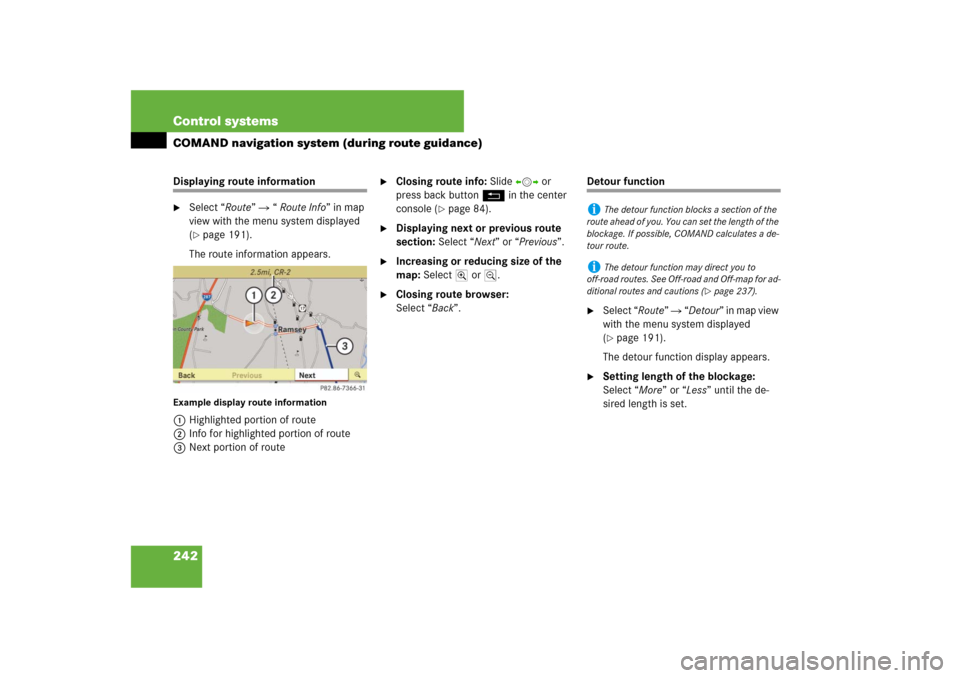
242 Control systemsCOMAND navigation system (during route guidance)Displaying route information�
Select “Route” � “ Route Info” in map
view with the menu system displayed
(�page 191).
The route information appears.
Example display route information1Highlighted portion of route
2Info for highlighted portion of route
3Next portion of route
�
Closing route info: Slide omp or
press back button L in the center
console (
�page 84).
�
Displaying next or previous route
section: Select “Next” or “Previous”.
�
Increasing or reducing size of the
map: Select; or :.
�
Closing route browser:
Select “Back”.
Detour function�
Select “Route” � “Detour” in map view
with the menu system displayed
(�page 191).
The detour function display appears.
�
Setting length of the blockage:
Select “More” or “Less” until the de-
sired length is set.
i
The detour function blocks a section of the
route ahead of you. You can set the length of the
blockage. If possible, COMAND calculates a de-
tour route.
i
The detour function may direct you to
off-road routes. See Off-road and Off-map for ad-
ditional routes and cautions (
�page 237).
Page 271 of 769
270 Control systemsCOMAND automatic climate controlThe automatic climate control menu is
called up via the climate control settings.Climate control settings with functions
(submenus)1Temperature, left
2Air distribution, left
3Air volume, left
4Central menu, climate control
5Air volume, right
6Air distribution, right
7Temperature, right
Setting temperature
Use the temperature controls %$
(�page 491) in the center console or
COMAND climate control settings to sepa-
rately adjust the air temperature on each
side of the passenger compartment.
�
Select climate control settings � Tem-
perature, left or right and then
pressn.
�
Changing temperature: Slide qmr or
rotate ymz.
�
Exiting menu: Press n, back
buttonL in the center console
(�page 84) or slideomp.
The setting is saved.
Page 272 of 769
271 Control systems
COMAND automatic climate control
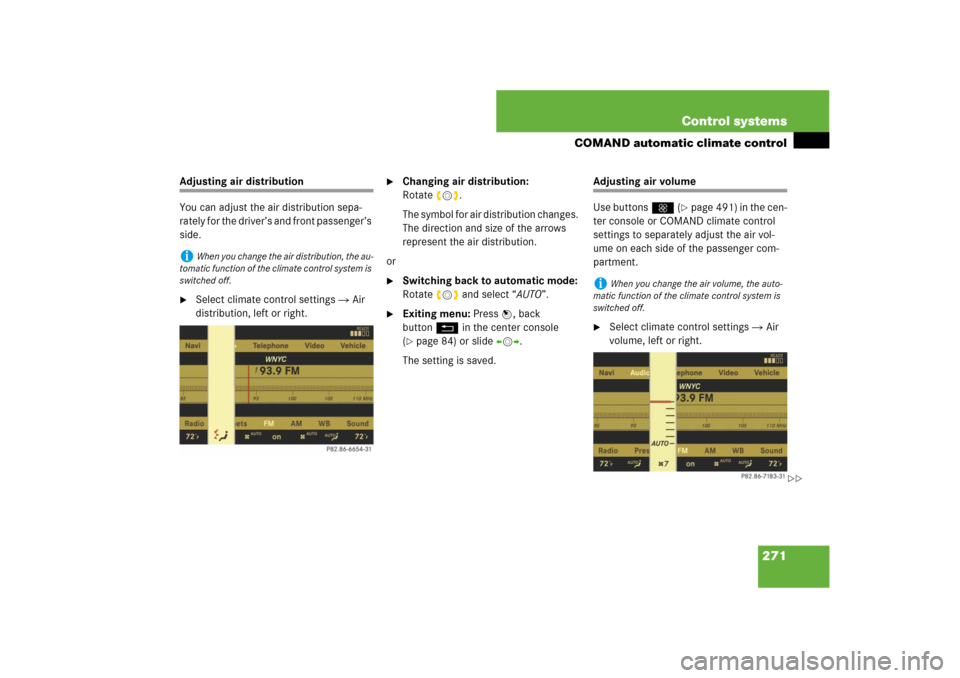
Adjusting air distribution
You can adjust the air distribution sepa-
rately for the driver’s and front passenger’s
side.�
Select climate control settings � Air
distribution, left or right.
�
Changing air distribution:
Rotateymz.
The symbol for air distribution changes.
The direction and size of the arrows
represent the air distribution.
or
�
Switching back to automatic mode:
Rotateymz and select “AUTO”.
�
Exiting menu: Press n, back
buttonL in the center console
(�page 84) or slideomp.
The setting is saved.
Adjusting air volume
Use buttonsQ (
�page 491) in the cen-
ter console or COMAND climate control
settings to separately adjust the air vol-
ume on each side of the passenger com-
partment.
�
Select climate control settings � Air
volume, left or right.
i
When you change the air distribution, the au-
tomatic function of the climate control system is
switched off.
i
When you change the air volume, the auto-
matic function of the climate control system is
switched off.
��
Page 273 of 769

272 Control systemsCOMAND automatic climate control�
Changing air volume: Slide qmr or
rotate ymz.
or
�
Switching back to automatic mode:
Rotateymz and select “AUTO”.
�
Exiting menu: Press n, back
buttonL in the center console
(�page 84) or slideomp.
The setting is saved.Central climate control menu via
COMAND
The central climate control menu is in the
center of the climate control settings.
When the automatic climate control is
switched on, you will see “on” in the cen-
tral menu. The following functions can only
be operated in the central climate control
menu via COMAND:�
Select climate control settings � Cen-
tral menu.Switching cooling on or off
The cooling function, only operational
when the engine is running, cools the vehi-
cle interior down to the selected tempera-
ture. The cooling function also
dehumidifies the air in the vehicle interior,
thus preventing the windows from fogging
up.
Function
Page
Switching off cooling (“AC
OFF”)
272
Central climate control (“Mono”)
273
Footwell temperature
274
Air flow from air vents
275
��