Page 413 of 509
412 Practical hints
What to do if …?
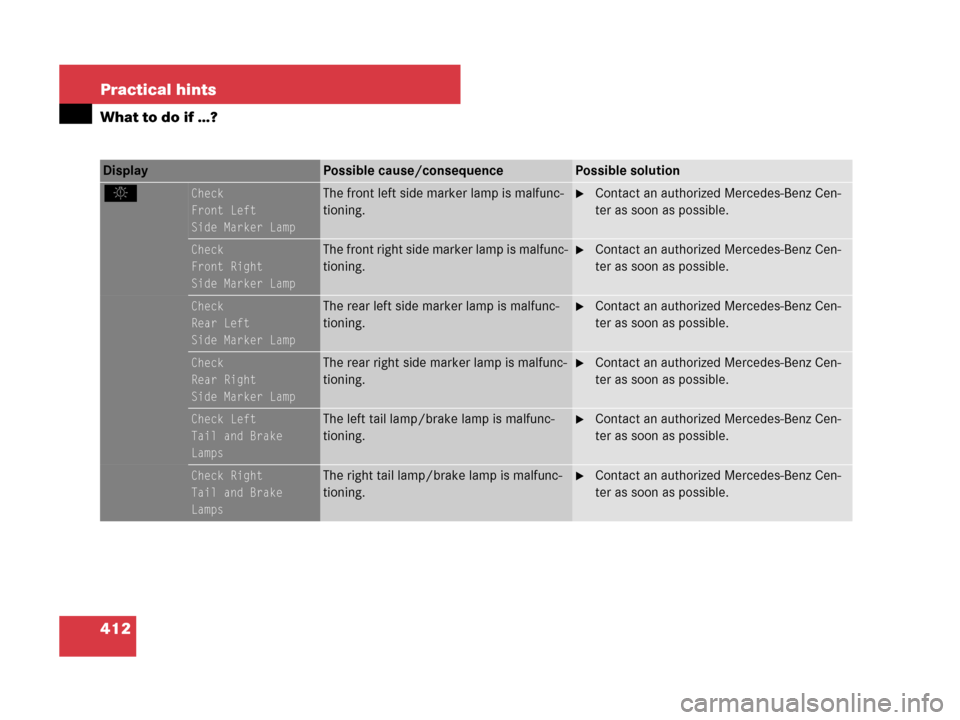
Display Possible cause/consequencePossible solution
.Check
Front Left
Side Marker LampThe front left side marker lamp is malfunc-
tioning.�Contact an authorized Mercedes-Benz Cen-
ter as soon as possible.
Check
Front Right
Side Marker LampThe front right side marker lamp is malfunc-
tioning.�Contact an authorized Mercedes-Benz Cen-
ter as soon as possible.
Check
Rear Left
Side Marker LampThe rear left side marker lamp is malfunc-
tioning.�Contact an authorized Mercedes-Benz Cen-
ter as soon as possible.
Check
Rear Right
Side Marker LampThe rear right side marker lamp is malfunc-
tioning.�Contact an authorized Mercedes-Benz Cen-
ter as soon as possible.
Check Left
Tail and Brake
LampsThe left tail lamp/brake lamp is malfunc-
tioning.�Contact an authorized Mercedes-Benz Cen-
ter as soon as possible.
Check Right
Tail and Brake
LampsThe right tail lamp/brake lamp is malfunc-
tioning.�Contact an authorized Mercedes-Benz Cen-
ter as soon as possible.
Page 431 of 509
430 Practical hints
Replacing bulbs
Safe vehicle operation depends on proper
exterior lighting and signaling. It is there-
fore essential that all bulbs and lamp
assemblies are in good working order at all
times.Correct headlamp adjustment is extremely
important. Have headlamps checked and
readjusted at regular intervals and when a
bulb has been replaced. See an authorized
Mercedes-Benz Center for headlamp
adjustment.iIf the headlamps or front fog lamps are
fogged up on the inside as a result of high
humidity, driving the vehicle a distance with the
lights on should clear up the fogging.
iBackup bulbs will be brought into use when
lamps malfunction. Read and observe the mes-
sages in the multifunction display (
�page 413).
Page 432 of 509
431 Practical hints
Replacing bulbs
Bulbs Front lamps Rear lamps
LampType
1Additional turn signal
lampLED
2Turn signal lampPY 21 W
3Halogen headlamp:
Low beam
Bi-Xenon* headlamp:
Low and high beam
1
1Regarding vehicles with Bi-Xenon headlamps*, do
not replace the Bi-Xenon bulbs yourself.
H7 (55 W)
D1S-35 W
4Halogen headlamp:
High beam/high beam
flasher
Bi-Xenon* headlamp:
High beam flasher
H7 (55 W)
H7 (55 W)
5Front fog lamp
Corner-illuminating
front fog lamp*H11 (55 W)
H11 (55 W)
6Side marker lampW 5 W
7Parking and standing
lamp2 x
W5W-BV
LampType
8High mounted brake
lampLED
9Side markerW 5 W
aTurn signal lampPY 21 W
bBrake lamp, parking
and standing lamp, tail
lamp2 x P 21 W
cBackup lampP 21 W
dLicense plate lampsW 5 W
eRear fog lamp
(driver’s side only),
Side markerP 21 W
W 5 W
Page 433 of 509
432 Practical hints
Replacing bulbs
Notes on bulb replacement
�Only use 12 volt bulbs of the same type
and with the specified watt rating.
�Switch lights off before changing a bulb
to prevent short circuits.
�Always use a clean lint-free cloth when
handling bulbs.
�Your hands should be dry and free of oil
and grease.
�If the newly installed bulb does not
come on, visit an authorized
Mercedes-Benz Center.Have the LEDs and bulbs for the following
lamps replaced at an authorized
Mercedes-Benz Center.
�Additional turn signal lamps in the exte-
rior rear view mirrors
�High mounted brake lamp
�Bi-Xenon* lamps
�Front fog lamps
�Front side marker lamps
�License plate lamps
Replacing bulbs for front lamps
Before you start to replace a bulb for a
front lamp, do the following first:
�Turn the exterior lamp switch to
positionM (
�page 108).
�Open the hood (�page 325).
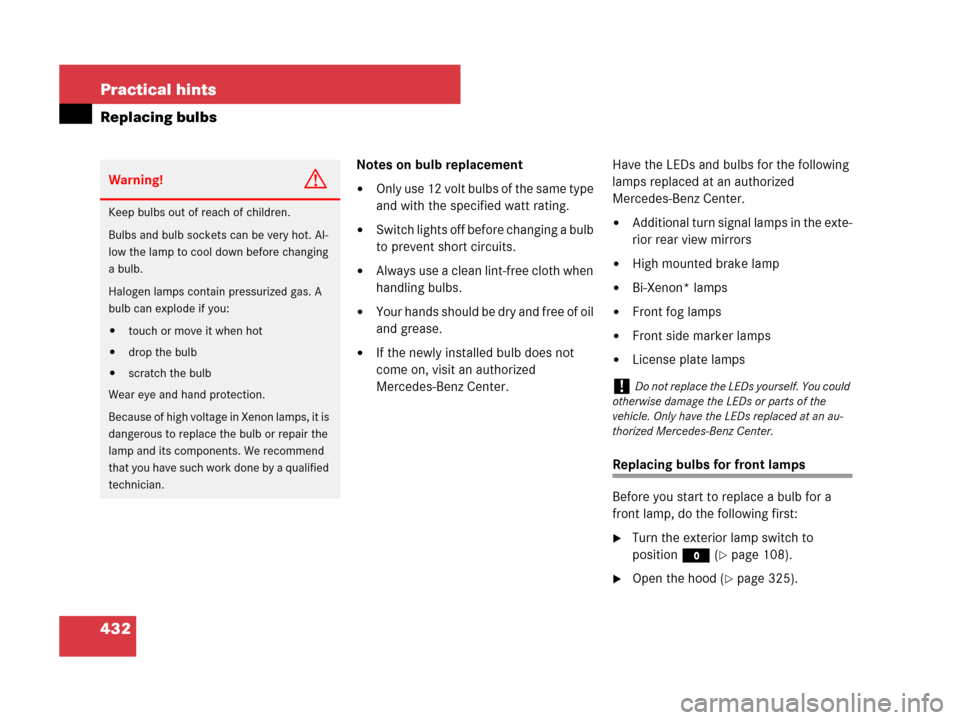
Warning!G
Keep bulbs out of reach of children.
Bulbs and bulb sockets can be very hot. Al-
low the lamp to cool down before changing
a bulb.
Halogen lamps contain pressurized gas. A
bulb can explode if you:
�touch or move it when hot
�drop the bulb
�scratch the bulb
Wear eye and hand protection.
Because of high voltage in Xenon lamps, it is
dangerous to replace the bulb or repair the
lamp and its components. We recommend
that you have such work done by a qualified
technician.!Do not replace the LEDs yourself. You could
otherwise damage the LEDs or parts of the
vehicle. Only have the LEDs replaced at an au-
thorized Mercedes-Benz Center.
Page 437 of 509
436 Practical hints
Replacing bulbs
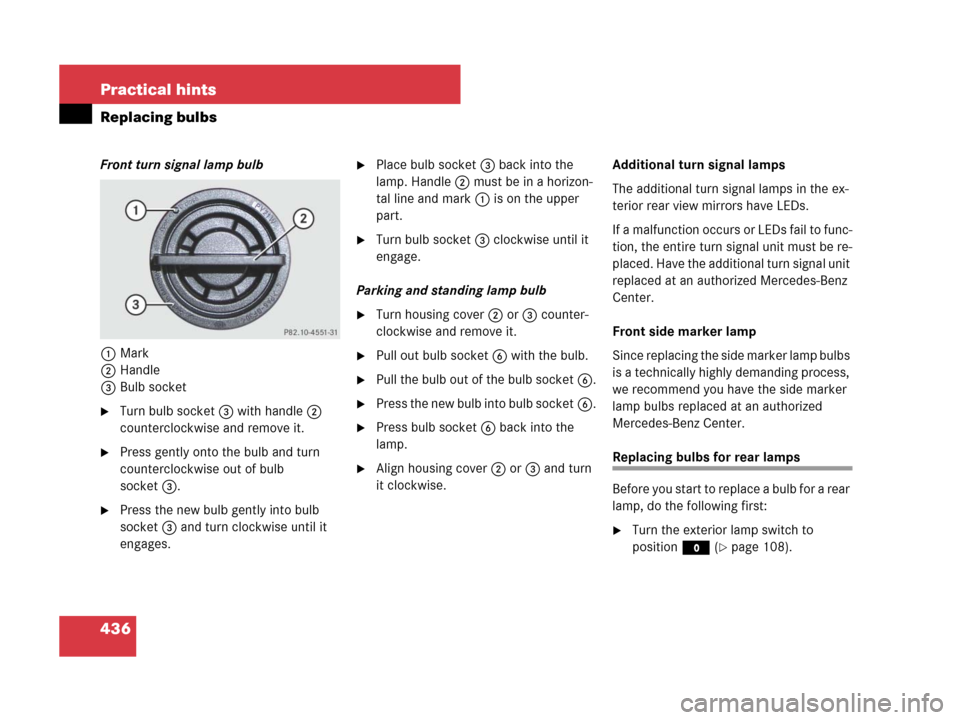
Front turn signal lamp bulb
1Mark
2Handle
3Bulb socket
�Turn bulb socket3 with handle2
counterclockwise and remove it.
�Press gently onto the bulb and turn
counterclockwise out of bulb
socket3.
�Press the new bulb gently into bulb
socket3 and turn clockwise until it
engages.
�Place bulb socket3 back into the
lamp. Handle2 must be in a horizon-
tal line and mark1 is on the upper
part.
�Turn bulb socket3 clockwise until it
engage.
Parking and standing lamp bulb
�Turn housing cover2 or3 counter-
clockwise and remove it.
�Pull out bulb socket6 with the bulb.
�Pull the bulb out of the bulb socket6.
�Press the new bulb into bulb socket6.
�Press bulb socket6 back into the
lamp.
�Align housing cover2 or3 and turn
it clockwise.Additional turn signal lamps
The additional turn signal lamps in the ex-
terior rear view mirrors have LEDs.
If a malfunction occurs or LEDs fail to func-
tion, the entire turn signal unit must be re-
placed. Have the additional turn signal unit
replaced at an authorized Mercedes-Benz
Center.
Front side marker lamp
Since replacing the side marker lamp bulbs
is a technically highly demanding process,
we recommend you have the side marker
lamp bulbs replaced at an authorized
Mercedes-Benz Center.Replacing bulbs for rear lamps
Before you start to replace a bulb for a rear
lamp, do the following first:
�Turn the exterior lamp switch to
positionM (
�page 108).
Page 453 of 509
452 Practical hints
Jump starting
The battery is located in the engine com-
partment on the right hand side. For jump
starting, use the under hood terminals in
front of the battery.
�Make sure the two vehicles do not
touch.
�Turn off all electrical consumers,
except hazard warning flashers or work
lights.
�Apply the parking brake (�page 134).
�Make sure gear selector lever* is set to
positionP (manual transmission to
Neutral).
�Open the hood (�page 326).
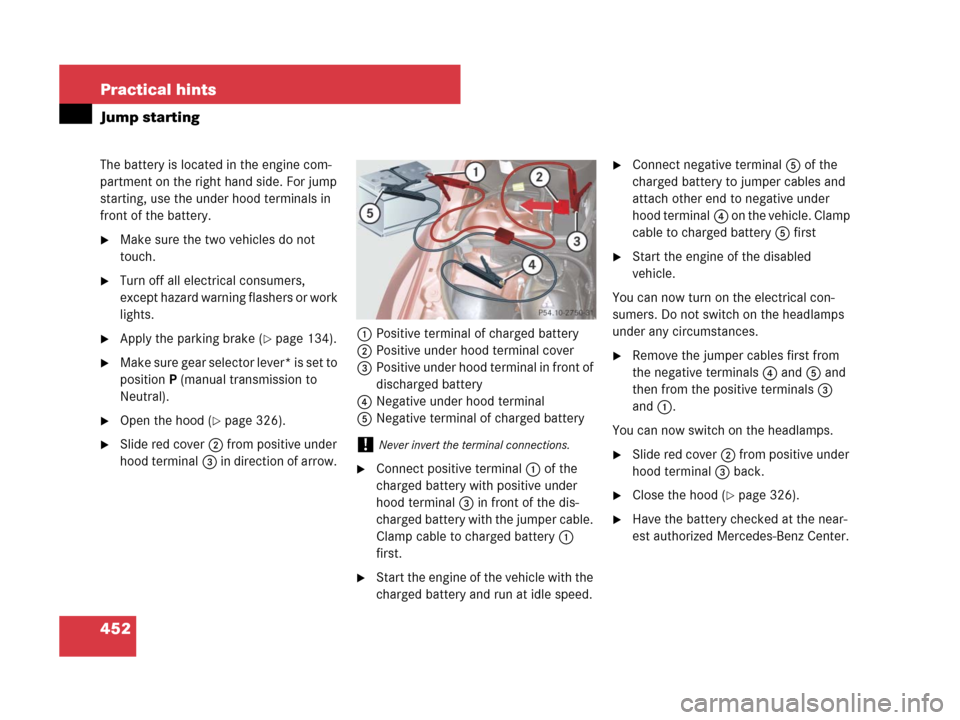
�Slide red cover2 from positive under
hood terminal3 in direction of arrow. 1Positive terminal of charged battery
2Positive under hood terminal cover
3Positive under hood terminal in front of
discharged battery
4Negative under hood terminal
5Negative terminal of charged battery
�Connect positive terminal1 of the
charged battery with positive under
hood terminal3 in front of the dis-
charged battery with the jumper cable.
Clamp cable to charged battery1
first.
�Start the engine of the vehicle with the
charged battery and run at idle speed.
�Connect negative terminal5 of the
charged battery to jumper cables and
attach other end to negative under
hood terminal4 on the vehicle. Clamp
cable to charged battery5 first
�Start the engine of the disabled
vehicle.
You can now turn on the electrical con-
sumers. Do not switch on the headlamps
under any circumstances.
�Remove the jumper cables first from
the negative terminals4 and5 and
then from the positive terminals3
and1.
You can now switch on the headlamps.
�Slide red cover2 from positive under
hood terminal3 back.
�Close the hood (�page 326).
�Have the battery checked at the near-
est authorized Mercedes-Benz Center.
!Never invert the terminal connections.
Page 488 of 509
487 Index
A
ABS 27, 59
Indicator lamp 59, 374
Messages in display 389, 398
Accelerator position, automatic
transmission 142
Accessory weight 356
Accident 132
Air bags 36
Children 51
Front 39
Front passenger front air bag off
indicator lamp 29, 45
OCS 41
Safety guidelines 38
Side impact 40
Window curtain 40, 41
Air conditioning system see Climate con-
trol system
Air conditioning, Cooling 258, 267
Air conditioning, Refrigerant 478, 480
Air distribution 254, 263
Air pressure see Tire inflation pressure
Air recirculation mode 257, 265Air vents 247
Center air vents 248
Rear center console air vents 249
Air volume 254, 263, 268
Alarm
Audible alarm and flashing exterior
lamps (Panic alarm) 58
Alarm system see Anti-theft systems
Antiglare
Rear view mirrors 100
Anti-theft systems 66
Alarm, visual and audible 66
Anti-theft alarm system 66
Immobilizer 66
Aquaplaning see Hydroplaning
Armrest 284, 286
Ashtrays 291, 292
Aspect ratio 356
Audio Aux mode 220
AUDIO menu (Control system) 158Audio system 176
“911” emergency call 231
Audio and telephone, operation 176
Audio Aux mode 220
Audio control unit 177
Audio display 180
Bluetooth
® operation 222
Call lists 236
CD changer* 208, 214
CD operation 208
CD player 160, 208
CD, fast forward/rewind 219
CD, pause function 218
CD, submenu overview 208
Components 177
Controller 182
Example, how to use 187
Functions during a single call 240
Making calls 237
On/Off 188
Operating 185
Operating and display elements 178
Operating CD player 213
Operating safety 177
Operation 188
Overview 176
Page 492 of 509
491 Index
D
Date display, setting 170
Daytime running lamp mode 110
Setting 171
Deep water see Standing water
Defogging
Windshield 255
Defrosting 264
Defrosting, Front 255
Delayed shut-off
Interior lighting 173
Department of Transportation see DOT
Difficulties
While driving 132
While starting 129
Digital clock see clock
Digital speedometer 158
Additional speedometer 169, 170
Permanent display 169
Dimensions, Vehicle 474
Direction of rotation, Tires 334Displays
Additional speedometer 169, 170
Digital speedometer 158
Maintenance service indicator 362
Multifunction display 151
Outside temperature 158
Permanent display 169
Vehicle status message see
Multifunction display messages
Vehicle status messages
memory 165
Distance to empty (range),
Trip computer 157
Document holder 289
Door
Control panel 32
Entry lamps 116
Inside door handle 79
Locking 72, 77
Locking with Tele Aid* 302
Messages in display 406
Opening from inside vehicle 79
Opening from outside 72, 77
Unlocking 71, 76
Unlocking with Tele Aid* 301
DOT 357Downhill driving
Cruise control 243
Drink holder see Cup holder
Drinking and driving 311
Driving 126
Abroad 318
Hydroplaning 315
In winter 317
Instructions 126, 311
Problems 132
Safety systems 59
Through standing water 318
Driving off 314
Driving safety systems
4MATIC 65
ABS 59
BAS 60
EBP 61
Electronic traction system 63
ESP
®62
Driving systems 241
Cruise control 241
Driving safety systems 59
Driving tips 142
Accelerator position 142
Kickdown 142