Page 328 of 509

327 Operation
Engine compartment
Engine oil
The amount of oil your engine needs will
depend on a number of factors, including
driving style. Higher oil consumption can
occur when
�the vehicle is new
�the vehicle is driven frequently at
higher engine speeds
Engine oil consumption checks should only
be made after the vehicle break-in period.Notes about checking engine oil level
When checking the oil level
�the vehicle must be parked on level
ground
�with the engine at operating tempera-
ture, the vehicle must have been
stationary for at least 5 minutes with
the engine turned off
�with the engine not at operating tem-
perature yet, the vehicle must have
been stationary for at least 30 minutes
with the engine turned offChecking engine oil level with the oil
dipstick
To check the engine oil level with the oil
dipstick, do the following:
�Open the hood (�page 325).
1Oil dipstick
2Upper mark
3Lower mark
�Pull out oil dipstick1.
�Wipe oil dipstick1 clean.
�Fully insert oil dipstick1 into the dip-
stick guide tube.
!Do not use any special lubricant additives,
as these may damage the drive assemblies. Us-
ing special additives not approved by
Mercedes-Benz may cause damage not covered
by the Mercedes-Benz Limited Warranty.
More information on this subject is available at
any Mercedes-Benz Center.
��
Page 330 of 509

329 Operation
Engine compartment
Coolant level
The engine coolant is a mixture of water
and anticorrosion/antifreeze. To check
the coolant level, the vehicle must be
parked on level ground and the engine
must be cool.
The coolant expansion tank is located on
the passenger side of the engine compart-
ment.
1Cap
2Coolant expansion tank
3Fluid level bridge�Using a rag, turn cap1 slowly approx-
imately a half-turn counterclockwise to
release any excess pressure.
�Continue turning the cap1 counter-
clockwise and remove it.
The coolant level is correct if the level
�for cold coolant: reaches the white
marking (plastic bridge)3 inside the
coolant expansion tank2
�for warm coolant: is approximately
0.6 in (1.5 cm) higher
�Add coolant as required.
�Replace and tighten cap1.
For more information on coolant, see the
“Technical data” section (
�page 484).
Warning!G
In order to avoid potentially serious burns:
�Use extreme caution when opening the
hood if there are any signs of steam or
coolant leaking from the cooling system,
or if the coolant temperature gauge indi-
cates that the coolant is overheated.
�Do not remove pressure cap on coolant
reservoir if coolant temperature is
above 158°F (70°C). Allow engine to
cool down before removing cap. The
coolant reservoir contains hot fluid and
is under pressure.
�Using a rag, slowly open the cap approx-
imately a half-turn to relieve excess
pressure. If opened immediately, scald-
ing hot fluid and steam will be blown out
under pressure.
�Do not spill antifreeze on hot engine
parts. Antifreeze contains ethylene gly-
col which may burn if it comes into con-
tact with hot engine parts.
Page 369 of 509

368 Operation
Vehicle care
Cleaning the windows and the wiper
blades
�Make sure the hood is fully closed.
Placing wiper arms in vertical position
Vehicles with SmartKey:
�Turn SmartKey in starter switch
position1.
�Turn combination switch to wiper
settingu (
�page 117).
�With wiper arm in vertical position, turn
the SmartKey in starter switch to
position0.Vehicles with KEYLESS-GO*
(Canada only):
�Make sure the vehicle’s on-board elec-
tronics have status 1 (
�page 84).
�Turn combination switch to wiper
settingu (
�page 117).
�Press KEYLESS-GO start/stop button
repeatedly until windshield wipers
start.
�Press KEYLESS-GO start/stop button
when the wiper arms are in a vertical
position.Cleaning
�Fold the wiper arms forward until they
snap into place.
�Clean the wiper blade inserts with a
clean cloth and detergent solution.
�Use a soft, clean cloth and a mild win-
dow cleaning solution on all outside
and inside glass surfaces.
An automotive glass cleaner is recom-
mended.
!The windshield wipers must be in a vertical
position before folding them away from the wind-
shield. They could otherwise damage the hood.
Never open the hood when the wiper arms are
folded forward.Warning!G
For safety reasons, switch off wipers and re-
move SmartKey from starter switch (vehi-
cles with KEYLESS-GO* (Canada only):
Make sure the vehicle’s on-board electron-
ics have status0) before cleaning the wind-
shield and/or the wiper blades. Otherwise,
the wiper motor could suddenly turn on and
cause injury.
!Do not pull on the wiper blade inserts. They
could tear.
Page 403 of 509
.
Display Possible cause/consequencePos")
402 Practical hints
What to do if …?
During severe operating conditions,
e.g. stop-and-go traffic, the coolant tem-
perature may rise close to 248°F (120°C).
Display Possible cause/consequencePossible solution
•Coolant Low
Stop Vehicle!
Turn Engine OffThe coolant is too hot. �Stop the vehicle in a safe location or as soon
as it is safe to do so and immediately turn off
the engine.
�Only start the engine again after the message
disappears. You could otherwise damage the
engine.
�Observe the coolant temperature gauge in
the instrument cluster (
�page 26).
Warning!G
�Driving when your engine is overheated
can cause some fluids which may have
leaked into the engine compartment to
catch fire. You could be seriously
burned.
�Steam from an overheated engine can
cause serious burns which can occur
just by opening the engine hood. Stay
away from the engine if you see or hear
steam coming from it.
Stop the vehicle in a safe location away from
other traffic. Turn off the engine, get out of
the vehicle and do not stand near the vehicle
until the engine has cooled down.!The engine should not be operated with the
coolant temperature above 248°F (120°C). Do-
ing so may cause serious engine damage which
is not covered by the Mercedes-Benz Limited
Warranty.
Page 407 of 509
406 Practical hints
What to do if …?
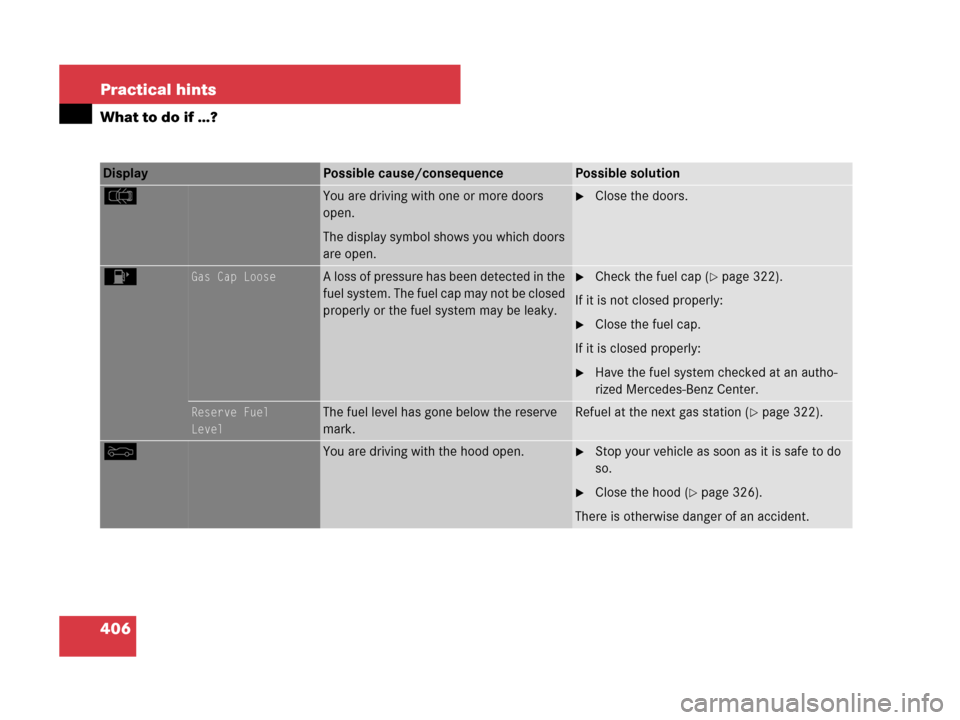
Display Possible cause/consequencePossible solution
$You are driving with one or more doors
open.
The display symbol shows you which doors
are open.�Close the doors.
4Gas Cap LooseA loss of pressure has been detected in the
fuel system. The fuel cap may not be closed
properly or the fuel system may be leaky.�Check the fuel cap (�page 322).
If it is not closed properly:
�Close the fuel cap.
If it is closed properly:
�Have the fuel system checked at an autho-
rized Mercedes-Benz Center.
Reserve Fuel
LevelThe fuel level has gone below the reserve
mark.Refuel at the next gas station (�page 322).
YYou are driving with the hood open.�Stop your vehicle as soon as it is safe to do
so.
�Close the hood (�page 326).
There is otherwise danger of an accident.
Page 433 of 509

432 Practical hints
Replacing bulbs
Notes on bulb replacement
�Only use 12 volt bulbs of the same type
and with the specified watt rating.
�Switch lights off before changing a bulb
to prevent short circuits.
�Always use a clean lint-free cloth when
handling bulbs.
�Your hands should be dry and free of oil
and grease.
�If the newly installed bulb does not
come on, visit an authorized
Mercedes-Benz Center.Have the LEDs and bulbs for the following
lamps replaced at an authorized
Mercedes-Benz Center.
�Additional turn signal lamps in the exte-
rior rear view mirrors
�High mounted brake lamp
�Bi-Xenon* lamps
�Front fog lamps
�Front side marker lamps
�License plate lamps
Replacing bulbs for front lamps
Before you start to replace a bulb for a
front lamp, do the following first:
�Turn the exterior lamp switch to
positionM (
�page 108).
�Open the hood (�page 325).
Warning!G
Keep bulbs out of reach of children.
Bulbs and bulb sockets can be very hot. Al-
low the lamp to cool down before changing
a bulb.
Halogen lamps contain pressurized gas. A
bulb can explode if you:
�touch or move it when hot
�drop the bulb
�scratch the bulb
Wear eye and hand protection.
Because of high voltage in Xenon lamps, it is
dangerous to replace the bulb or repair the
lamp and its components. We recommend
that you have such work done by a qualified
technician.!Do not replace the LEDs yourself. You could
otherwise damage the LEDs or parts of the
vehicle. Only have the LEDs replaced at an au-
thorized Mercedes-Benz Center.
Page 439 of 509
:
Make sure the vehicle�")
438 Practical hints
Replacing wiper blades
Warning!G
For safety reasons, switch off wipers and re-
move SmartKey from starter switch (vehi-
cles with KEYLESS-GO* (Canada only):
Make sure the vehicle’s on-board electron-
ics have status0) before replacing a wiper
blade. Otherwise, the wiper motor could
suddenly turn on and cause injury.
Warning!G
Wiper blades are components that are sub-
ject to wear and tear. Change the wiper
blades twice a year, preferably in the spring
and fall. Otherwise the windows will not be
properly wiped. As a result, you may not be
able to observe surrounding traffic condi-
tions and could cause an accident.
!To avoid damage to the hood, never open
the hood when the wiper arm is folded forward.
!Hold on to the wiper when folding the wiper
arm back. If released, the force of the impact
from the tensioning spring could crack the wind-
shield.
Do not allow the wiper arms to contact the wind-
shield glass without a wiper blade inserted.
For your convenience, we recommend that you
have this work carried out at an authorized
Mercedes-Benz Center.
Page 449 of 509
.
�Make sure gear selector l")
448 Practical hints
Battery
Starter battery
1Battery
2Positive terminal
3Negative terminal
4Ventilation hose
Disconnecting the battery
�Apply the parking brake (�page 134).
�Make sure gear selector lever* is set to
positionP (manual transmission to
Neutral).
�Turn off all electrical consumers.
�Remove SmartKey from starter switch.Vehicles with KEYLESS-GO* (Canada
only):
�Press the start / stop button until
the engine shuts off.
�Open the driver’s door.
�Open the hood (�page 325).
�Remove the filter box (�page 447).
�Read and observe safety instructions
and precautions (
�page 446).
�Disconnect the battery negative lead
from negative terminal3.
�Remove cover from the positive
terminal2.
�Disconnect the battery positive lead.iIf the battery is discharged, you must use
the mechanical key to unlock (
�page 424) or
lock (
�page 425) the vehicle.
Warning!G
With a disconnected battery
�you will no longer be able to turn the
SmartKey in the starter switch and
pressing the KEYLESS-GO* start/stop
button (Canada only) will have no effect
�vehicles with automatic transmission*:
the gear selector lever will remain
locked in positionP
!Always disconnect the starter battery in the
order described below. You could otherwise
damage the vehicle’s electronics.