Page 269 of 509

Rear climate control
The rear climate control panel is located in
the rear center console.
Setting temperature
Use temperature c")
268 Controls in detail
3-zone automatic climate control* (Canada only)
Rear climate control
The rear climate control panel is located in
the rear center console.
Setting temperature
Use temperature control 5 to adjust the
air temperature in the rear passenger com-
partment. You should raise or lower the
temperature setting in small increments,
preferably starting at 22°C (72°F). The cli-
mate control will adjust to the set temper-
ature as fast as possible.�Increasing/decreasing: Press the re-
spective temperature control
button5.
The 3-zone automatic climate control
system will correspondingly adjust the
temperature in the rear passenger
compartment.
Adjusting air volume
Use button· orQ (
�page 268) to
adjust the air volume.
�Press button· to decrease, or
buttonQ to increase air volume to
the desired level.
The air volume is adjusted correspond-
ing to the set blower speed.
Warning!G
Follow the recommended settings for heat-
ing and cooling as given in the instructions
for the front 3-zone automatic climate con-
trol (
�page 259). Otherwise the windows
could fog up, impairing visibility for the driv-
er and endangering you and others.
Item
1Decreasing/increasing air volume
for rear center air vents
2Right rear center air vent, adjustable
3Decreasing/increasing air volume
for rear center air vents
4Display
5Temperature control
6Left rear center air vent, adjustable
iAt low outside temperatures or if you have
switched off the cooling function, you cannot
cool the rear passenger compartment.
iIf you have switched off the cooling function
with the front 3-zone automatic climate control
panel, the cooling of the rear passenger com-
partment is also switched off. Adjusting with the
rear control panel is not possible.
Page 270 of 509
269 Controls in detail
Trunk
�Trunk
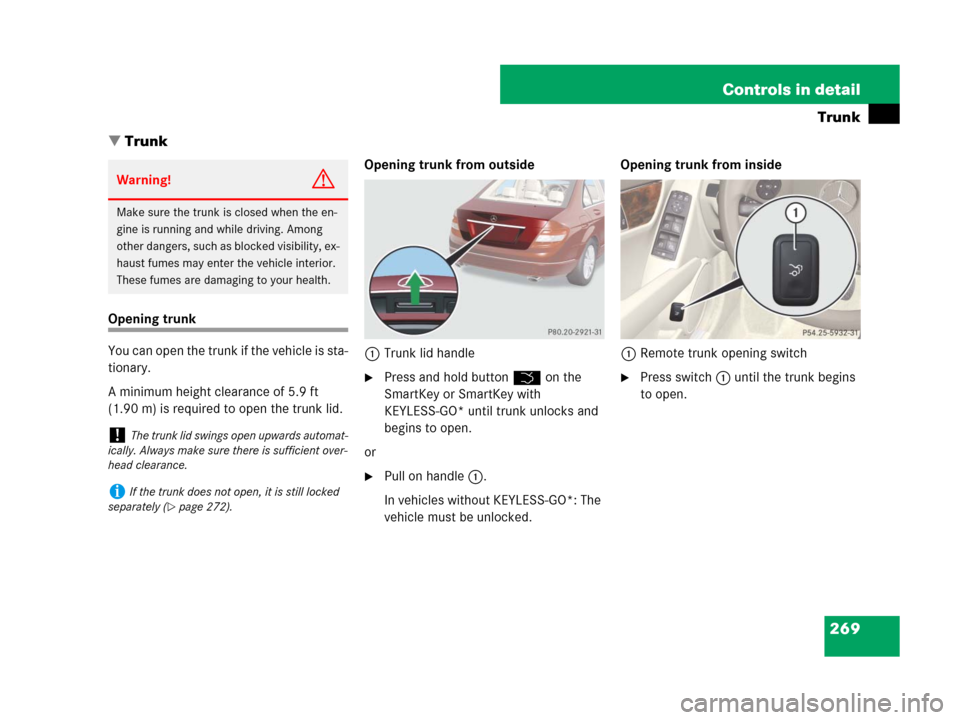
Opening trunk
You can open the trunk if the vehicle is sta-
tionary.
A minimum height clearance of 5.9 ft
(1.90 m) is required to open the trunk lid.Opening trunk from outside
1Trunk lid handle
�Press and hold button Š on the
SmartKey or SmartKey with
KEYLESS-GO* until trunk unlocks and
begins to open.
or
�Pull on handle1.
In vehicles without KEYLESS-GO*: The
vehicle must be unlocked.Opening trunk from inside
1Remote trunk opening switch
�Press switch1 until the trunk begins
to open.
Warning!G
Make sure the trunk is closed when the en-
gine is running and while driving. Among
other dangers, such as blocked visibility, ex-
haust fumes may enter the vehicle interior.
These fumes are damaging to your health.
!The trunk lid swings open upwards automat-
ically. Always make sure there is sufficient over-
head clearance.
iIf the trunk does not open, it is still locked
separately (
�page 272).
Page 272 of 509
271 Controls in detail
Trunk
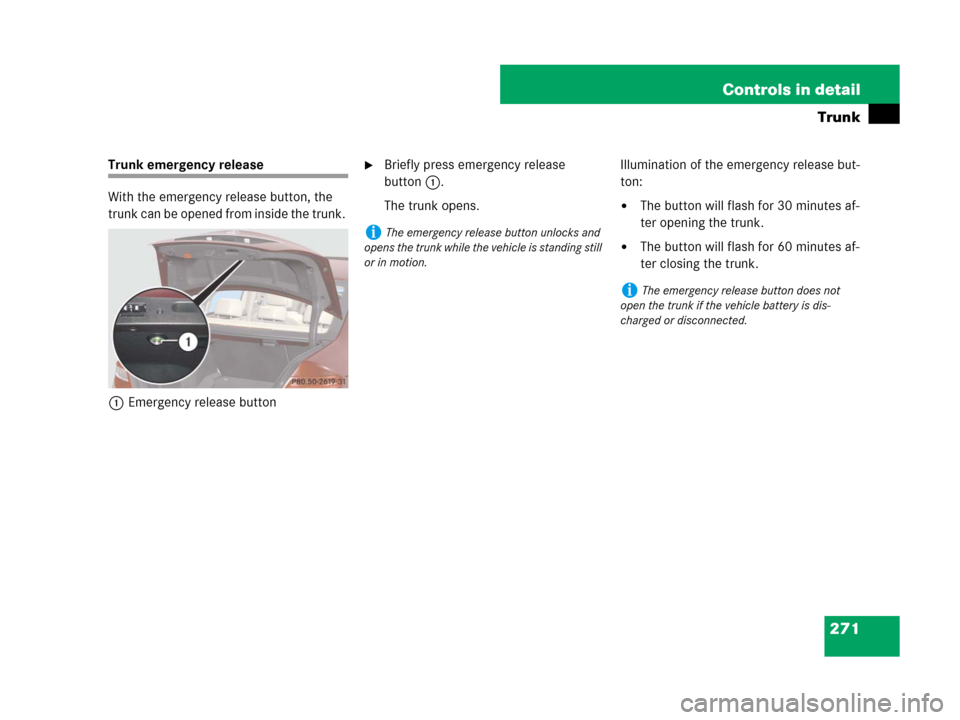
Trunk emergency release
With the emergency release button, the
trunk can be opened from inside the trunk.
1Emergency release button�Briefly press emergency release
button1.
The trunk opens.Illumination of the emergency release but-
ton:
�The button will flash for 30 minutes af-
ter opening the trunk.
�The button will flash for 60 minutes af-
ter closing the trunk.iThe emergency release button unlocks and
opens the trunk while the vehicle is standing still
or in motion.
iThe emergency release button does not
open the trunk if the vehicle battery is dis-
charged or disconnected.
Page 285 of 509
284 Controls in detail
Loading and storing
Storage compartments in the front pas-
senger compartment
Glove box
1Glove box lid release
The glove box can be unlocked and locked
with the mechanical key (
�page 424).
�Opening: Pull glove box lid release1.
�Closing: Push the lid up until it
engaged.
�Locking: Insert the mechanical key
into the glove box lock and turn it
clockwise to position2.
�Unlocking: Insert the mechanical key
into the glove box lock and turn it coun-
terclockwise to position1.Storage compartments in the front
armrest
1Right button for storage compartments
2Left button for large storage compart-
ments
1Unlocking glove box
2Locking glove box
Page 286 of 509
285 Controls in detail
Loading and storing
�Opening small and large storage
compartment: Press button1 or2
the armrests opens automatically to
the left and right side.
�Closing small or large storage com-
partment: Swing the left or right arm-
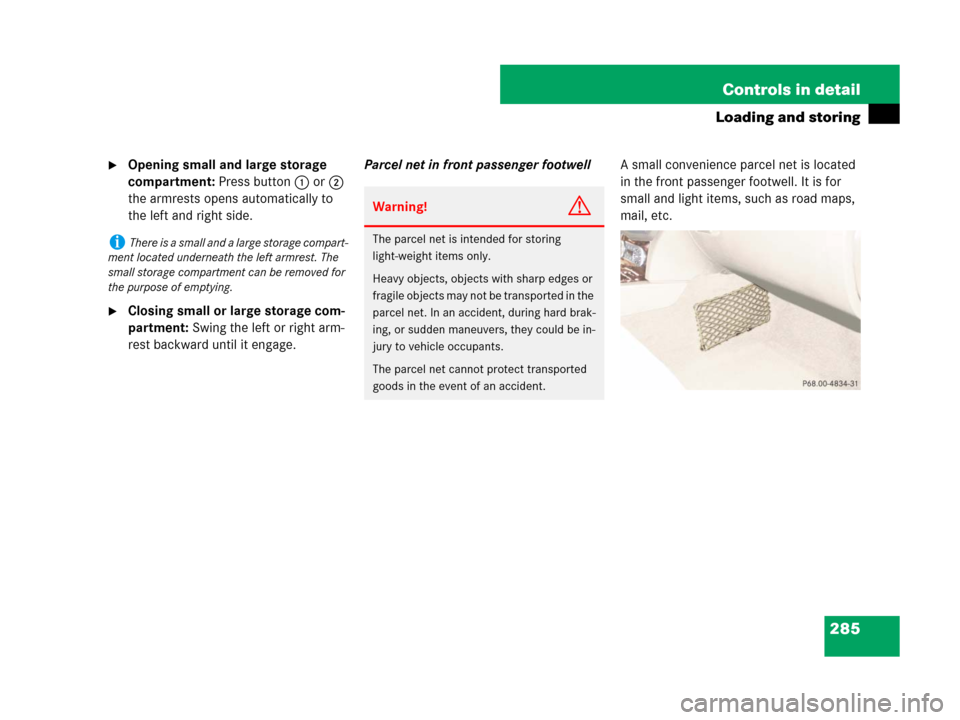
rest backward until it engage.Parcel net in front passenger footwellA small convenience parcel net is located
in the front passenger footwell. It is for
small and light items, such as road maps,
mail, etc.
iThere is a small and a large storage compart-
ment located underneath the left armrest. The
small storage compartment can be removed for
the purpose of emptying.
Warning!G
The parcel net is intended for storing
light-weight items only.
Heavy objects, objects with sharp edges or
fragile objects may not be transported in the
parcel net. In an accident, during hard brak-
ing, or sudden maneuvers, they could be in-
jury to vehicle occupants.
The parcel net cannot protect transported
goods in the event of an accident.
Page 288 of 509

287 Controls in detail
Loading and storing
Cup holders
Cup holder in front center console
1Cup holderCup holder in rear center armrest
1Release button
2Cup holder
�Opening: Pull down the armrest.
�Pull the release catch and swing the
armrest storage compartment cover
upward.
�Press release button1.
�Cup holder2 swing out and open au-
tomaticaly.
Warning!G
In order to help prevent spilling liquids on
vehicle occupants and/or vehicle equip-
ment, only use containers that fit into the
cup holder. Use lids on open containers and
do not fill containers to a height where the
contents, especially hot liquids, could spill
during braking, vehicle maneuvers, or in an
accident. Liquids spilled on vehicle occu-
pants may cause serious personal injury.
Liquids spilled on vehicle equipment may
cause damage not covered by the
Mercedes-Benz Limited Warranty.
When not in use, keep the cup holders
closed. An open cup holder may cause injury
to you or others when contacted during
braking, vehicle maneuvers, or in an
accident.
Keep in mind that objects placed in the cup
holder may come loose during braking, vehi-
cle maneuvers, or in an accident and be
thrown around in the vehicle interior.
Objects thrown around in the vehicle interi-
or may cause an accident and/or serious
personal injury.
iYou can now close the armrest storage
compartment.
Page 293 of 509

292 Controls in detail
Useful features
Rear seat ashtray
1Ashtray insert
2Cover
3Button
�Opening: Pull at top of cover2.
�Removing ashtray insert: Push
button3 to disengage ashtray
insert1 and remove it.
�Reinstalling ashtray insert: Push the
ashtray insert1 down into the retain-
er until it engages.
�Push at top of cover2 to close
ashtray.
Cigarette lighter
�Switch on the ignition.1Cover
2Cigarette lighter
�Press cover plate1 forward until it en-
gaged.
�Push in cigarette lighter2.
The cigarette lighter will pop out
automatically when hot.
Warning!G
Never touch the heating element or sides of
the cigarette lighter; they are extremely hot.
Hold the knob only.
Make sure any children traveling with you do
not injure themselves or start a fire with the
hot cigarette lighter.
When leaving the vehicle, always remove the
SmartKey or SmartKey with KEYLESS-GO*
(Canada only) from the starter switch, take
it with you, and lock the vehicle. Do not
leave children unattended in the vehicle, or
with access to an unlocked vehicle.
A child’s unsupervised access to a vehicle
could result in an accident and/or serious
personal injury.
Page 296 of 509

The Tele Aid system consists of three
types of response:
�automatic and manual emer")
295 Controls in detail
Useful features
lTele Aid*
The Tele Aid system
(Tele
matic Alarm Identification on De-
mand)
The Tele Aid system consists of three
types of response:
�automatic and manual emergency
�Roadside Assistance, and
�informationThe Tele Aid system is operational provid-
ing that the vehicle’s battery is charged,
properly connected, not damaged and
telephone phone and GPS coverage are
available.
The speaker volume of a Tele Aid call can
be adjusted when using the volume control
on the multifunction steering wheel. To
raise, press buttonæ and to lower,
press buttonç or use the audio system
rotary control button (
�page 189).
�To activate, press the SOS button, the
Roadside Assistance button*b or
the Information button*}, depend-
ing on the type of response required.
Shortly after the completion of your
Tele Aid acquaintance call, you will receive
a user ID and password. By visiting
www.mbusa.com and selecting “Tele Aid”
(USA only), you will have access to account
information, remote door unlock and
more.
!The initial activation of the Tele Aid system
may only be performed by completing the sub-
scriber agreement and placing an acquaintance
call using the Information button*}. Failure
to complete either of these steps will result in a
system that is not activated.
If you have any questions regarding activation,
please call the Response Center at
1-800-756-9018 (in the USA) or
1-888-923-8367 (in Canada).
iThe Tele Aid system utilizes the telephone
network for communication and the GPS (Global
Positioning System) satellites for vehicle loca-
tion. If either of these signals are unavailable, the
Tele Aid system may not function and if this oc-
curs, assistance must be summoned by other
means.
iThe SOS button, the Roadside Assistance
button*b, and the Information
button*} are located in the overhead con-
trol panel (
�page 31).