2008 MERCEDES-BENZ A-CLASS HATCHBACK length
[x] Cancel search: lengthPage 130 of 305

Driving sys
tems 127
A warning tone sounds. the multi-function
display shows the message:
Park Assist
cancelled.
When active parking assist is cancelled, you
must steer again yourself.
Trailer towing* For vehicles with a trailer coupling, the mini-
mum length for parking spaces is slightly
increased.
If you have attached a trailer to your vehicle,
you should not use active parking assist.
Once the electrical connection is established
between your vehicle and the trailer, active
parking assist is no longer available. Park-
tronic is deactivated for the rear area. ECO start/stop function*
The ECO start/stop function automatically
switches off the engine as soon as you stop
the vehicle and restarts the engine as soon as
you prepare to pull away again. Each time the
engine is started using the key, the ECO
start/stop function is activated.
Conditions for the automatic engine
switch-off The ECO start/stop function automatically
switches off the engine if all of the following
conditions are met:
R you have shifted to neutral
R the clutch pedal is not depressed
R the brake pedal is depressed
R the vehicle speed is very low
R the engine has reached its operating tem-
perature
R the indicator lamp in the ECO button is lit
green
R the bonnet is closed
R the outside temperature is within the com-
fort range R
the battery is sufficiently charged
R the brake vacuum is stable
Conditions for the automatic engine
start The ECO start/stop function automatically
switches on the engine if one of the following
conditions is met:
R
the brake pedal is released
R the clutch pedal is depressed
R the vehicle speed exceeds a certain thresh-
old
R the ECO button is pressed
R the brake vacuum has decreased
R the battery charge has dropped
R the demister function of Thermotronic *is
selected Controls
* optional
169_AKB; 2; 4, en-GB
wdomann,
Version: 2.10.6 2008-07-16T08:52:06+02:00 - Seite 127 ZDateiname: 6515_0315_02_buchblock.pdf; preflight
Page 266 of 305

Battery
263R
ESP ®
is intervening constantly.
R there are tears in the sidewalls of the
tyre.
After driving in run-flat mode, you must
have the wheel(s) checked for damage at a
qualified specialist workshop which has the
necessary specialist knowledge and tools
to carry out the work required. The faulty
tyre must be replaced in every case.
Mercedes-Benz recommends that you use
a Mercedes-Benz Service Centre for this
purpose. In particular, work relevant to
safety or on safety-related systems must be
carried out at a qualified specialist work-
shop.
i On a vehicle with MOExtended tyres, only
use MOExtended spare tyres. These must
be of the size specified for the vehicle. Battery
Notes on the vehicle battery
In order for the battery to achieve the maxi-
mum possible service life, it must always be
sufficiently charged.
Have the battery charge checked more fre-
quently if you use the vehicle mainly for short
trips or if you leave it standing idle for a
lengthy period.
To prevent damage from corrosion, only
replace the battery with one that has a central
ventilation cover.
Consult a Mercedes-Benz Service Centre if
you wish to leave your vehicle parked up for
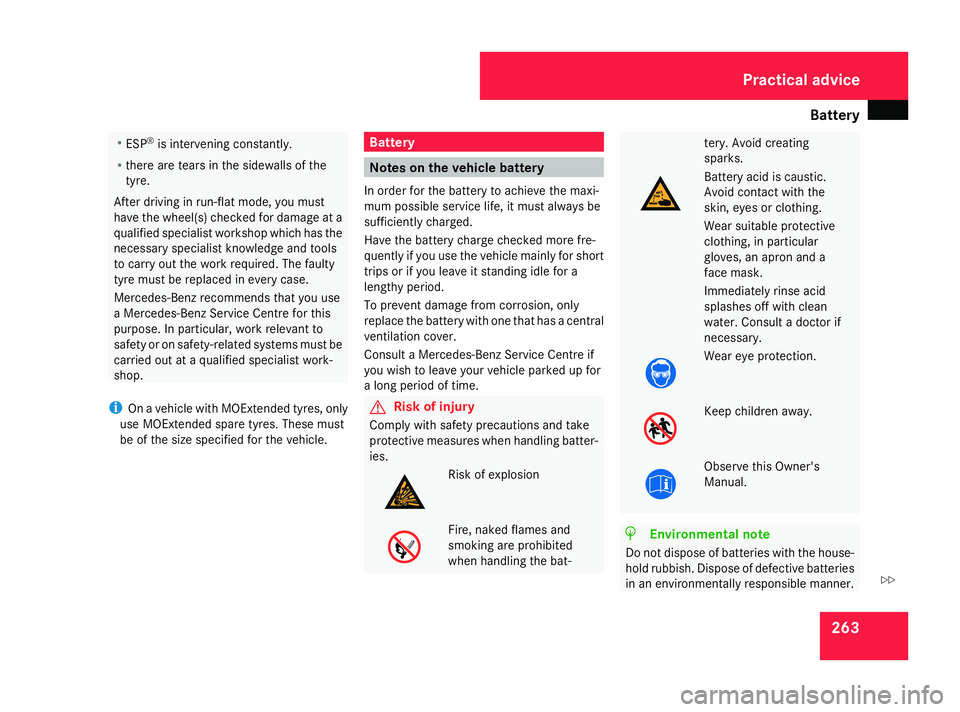
a long period of time. G
Risk of injury
Comply with safety precautions and take
protective measures when handling batter-
ies. Risk of explosion
Fire, naked flames and
smoking are prohibited
when handling the bat- tery. Avoid creating
sparks.
Battery acid is caustic.
Avoid contact with the
skin, eyes or clothing.
Wear suitable protective
clothing, in particular
gloves, an apron and a
face mask.
Immediately rinse acid
splashes off with clean
water. Consult a doctor if
necessary.
Wear eye protection.
Keep children away.
Observe this Owner's
Manual.
H
Environmental note
Do not dispose of batteries with the house-
hold rubbish. Dispose of defective batteries
in an environmentally responsible manner. Practical advice
169_AKB; 2; 4, en-GB
wdomann, Version: 2.10.6 2008-07-16T08:52:06+02:00 - Seite 263 ZDateiname: 6515_0315_02_buchblock.pdf; preflight
Page 269 of 305

Jump-starting
266 G
Risk of injury
Battery acid is caustic. Avoid contact with
the skin, eyes or clothing.
! Only charge the installed battery with a
battery charger which has been tested and
approved by Mercedes-Benz. These battery
chargers allow the battery to be charged
while it is still installed. However, the bat-
tery must always be disconnected first.
! Only use battery chargers with a maxi-
mum charging voltage of 14.8 V.
X Charge the battery. Observe the notes in
the operating instructions for your battery
charger.
X Refit the charged battery.
To do this, follow the steps described in
"Removing the battery" (Y page 265) in
reverse order. Reconnecting the battery
! Always reconnect the battery in the
sequence described below. Never swap the
terminal clamps. You may otherwise dam-
age the vehicle electronics.
X Switch off all electrical consumers.
X Connect the positive terminal clamp and
secure the cover.
X Connect the negative terminal clamp.
X Connect the breather hose. Make sure that
a cell cap is fitted on the side.
i If the battery power supply has been inter-
rupted (e.g. if it has been reconnected), you
must carry out the following tasks:
R set the time (Y page 109).
R reset the function for folding the exterior
mirrors in/out automatically* by folding
the mirrors out once (Y page 72).
R reset the side windows ( Ypage 85) Jump-starting
If your vehicle's battery is discharged, the
engine can be jump-started from another
vehicle or from an external battery using jump
leads.
Observe the following points:
R Jump-starting may only be performed when
the engine and catalytic converter are cold.
R Do not start the engine if the battery is fro-
zen. Let the battery thaw first.
R Jump-starting may only be performed from
batteries with a nominal voltage of 12 V.
R Only use jump leads which have a sufficient
cross-section and insulated terminal
clamps.
i Jump leads and further information about
jump-starting can be obtained from any
Mercedes-Benz Service Centre.
! Avoid repeated and lengthy starting
attempts.
Never start the vehicle using a rapid battery
charger. Practical advice
* optional
169_AKB; 2; 4, en-GB
wdomann
,V ersion: 2.10.6
2008-07-16T08:52:06+02:00 - Seite 266 Dateiname: 6515_0315_02_buchblock.pdf; preflight
Page 273 of 305

Towing and tow-starting
270
Vehicles with AUTOTRONIC* X
Turn the key to position 2in the ignition
lock.
X Move the selector lever to N.Tow-starting (emergency engine
starting)
Please note:
R Vehicles with AUTOTRONIC* must not be
tow-started.
R The battery must be connected.
R The engine and catalytic converter must be
cold.
R Avoid repeated and lengthy starting
attempts.
Vehicles with manual transmission X
Turn the key to position 2(Y page 62) in
the ignition lock.
X Fully depress the clutch pedal.
X Shift to neutral. X
Tow the vehicle or let it roll.
X Shift to a suitable gear and bring the clutch
pedal up slowly. Do not depress the accel-
erator pedal.
The engine is started. Removing the towing eye
X Take the wheel wrench from the vehicle
tool kit ( Ypage 200).
X Insert the wheel wrench handle into the
towing eye and turn it anti-clockwise.
X Unscrew the towing eye.
X Replace the cover and press it until it
engages.
X Return the towing eye and the wheel
wrench to the vehicle tool kit. Transporting the vehicle
The towing eyes or trailer coupling *can be
used to pull the vehicle onto a trailer or trans-
porter if you wish to transport it.
! Only lash the vehicle down by the wheels
or wheel rims, not by parts of the vehicle
such as axle or steering components. The
vehicle could otherwise be damaged.
Vehicles with manual transmission X
Shift to neutral.
Vehicles with AUTOTRONIC* X
Turn the key to position 2(Y page 62) in
the ignition lock.
X Move the selector lever to N.Practical advice
* optional
169_AKB; 2; 4, en-GB
wdomann,
Version: 2.10.6
2008-07-16T08:52:06+02:00 - Seite 270 Dateiname: 6515_0315_02_buchblock.pdf; preflight
Page 289 of 305

Vehicle weights
286 Vehicle dimensions
A 150 A 150
BlueEFFICIENCY A 170 A 170
BlueEFFICIENCY A 200
Vehicle length (ECE)
3,883 mm 3,883 mm 3,883 mm 3,883 mm 3,883 mm
Vehicle width including exte-
ri or mirrors 2,040 mm 2,040 mm 2,040 mm 2,040 mm 2,040 mm
Vehicle height
1,593 mm 1,593 mm 1,593 mm 1,593 mm 1,595 mm
Wheelbase
2,568 mm 2,568 mm 2,568 mm 2,568 mm 2,568 mm
A 200 TURBO A 160 CDI A 180 CDI A 200 CDI
Vehicle length (ECE)
3,883 mm 3,883 mm 3,883 mm 3,883 mm
Vehicle width including exte-
rior mirrors
2,040 mm 2,040 mm 2,040 mm 2,040 mm
Vehicle height
1,595 mm 1,593 mm 1,593 mm 1,595 mm
Wheelbase
2,568 mm 2,568 mm 2,568 mm 2,568 mm
Vehicle weights
The unladen weight includes the driver (68 kg), luggage (7 kg) and all fluids (fuel tank 90% full). Items of optional equipment increase the
unladen weight and reduce the maximum payload. You will find more specific weight information on the vehicle identification plate
(Y page 276). Technical data
169_AKB; 2; 4, en-GB
wdomann
,V ersion: 2.10.6
2008-07-16T08:52:06+02:00 - Seite 286 Dateiname: 6515_0315_02_buchblock.pdf; preflight