Page 9 of 312
8
6 Audio/video System
Quick reference184
..........................................
Using your audio/video system 185
...........................
Some basics 185 ..........................................
Radio operation 192 .......................................
Cassette tape player operation 204 ..........................
DVD changer operation 207 .................................
DVD player operation 237 ..................................
Audio/video remote controls 260 ...............................
Audio/video system operating hints 262 .........................
7 Air Conditioning
Automatic air conditioning controls 272
..........................
Rear cooler controls 283
......................................
8 Rear View Monitor System
Rear view monitor system 286
.................................
9 Appendix
Limitations of the navigation system 292
.........................
Map database information and updates 294
......................
Index305
.......................................................
For information about the optional “Rear seat entertainment system” ,
please refer to the Owner’s Manual.
GX470_Navi_U (OM60D58U) 07/06/27
Page 129 of 312
OTHER FUNCTIONS
128
An antenna for the Bluetoothrconnec-
tion is built in the display. The indica-
tion of the Bluetooth rconnection may
turn yellow and the system may not
function when you use the Bluetooth r
phone in the following conditions and
places.
DYour cellular phone is hiding behind the
display (behind the seat or in the glove box and console box).
DYour cellular phone touches or is
covered with metal materials.
Leave the Bluetooth rphone on the place
where “Blue” indication is displayed.
Bluetooth is a trademark owned by
Bluetooth SIG, Inc.
When you release your car:
A lot of personal data is registered
when you use the Hands− free system.
When you release your car, initialize
your data. (See “(c) Delete personal
data” on page 180.)
If you initialize it, the former state will never
come back again. Pay much attention
when initializing the data.
You can initialize the following data in the
system.
DPhone book data
DDialed numbers and received calls
DSpeed dial
DBluetooth rphone data
DSecurity code
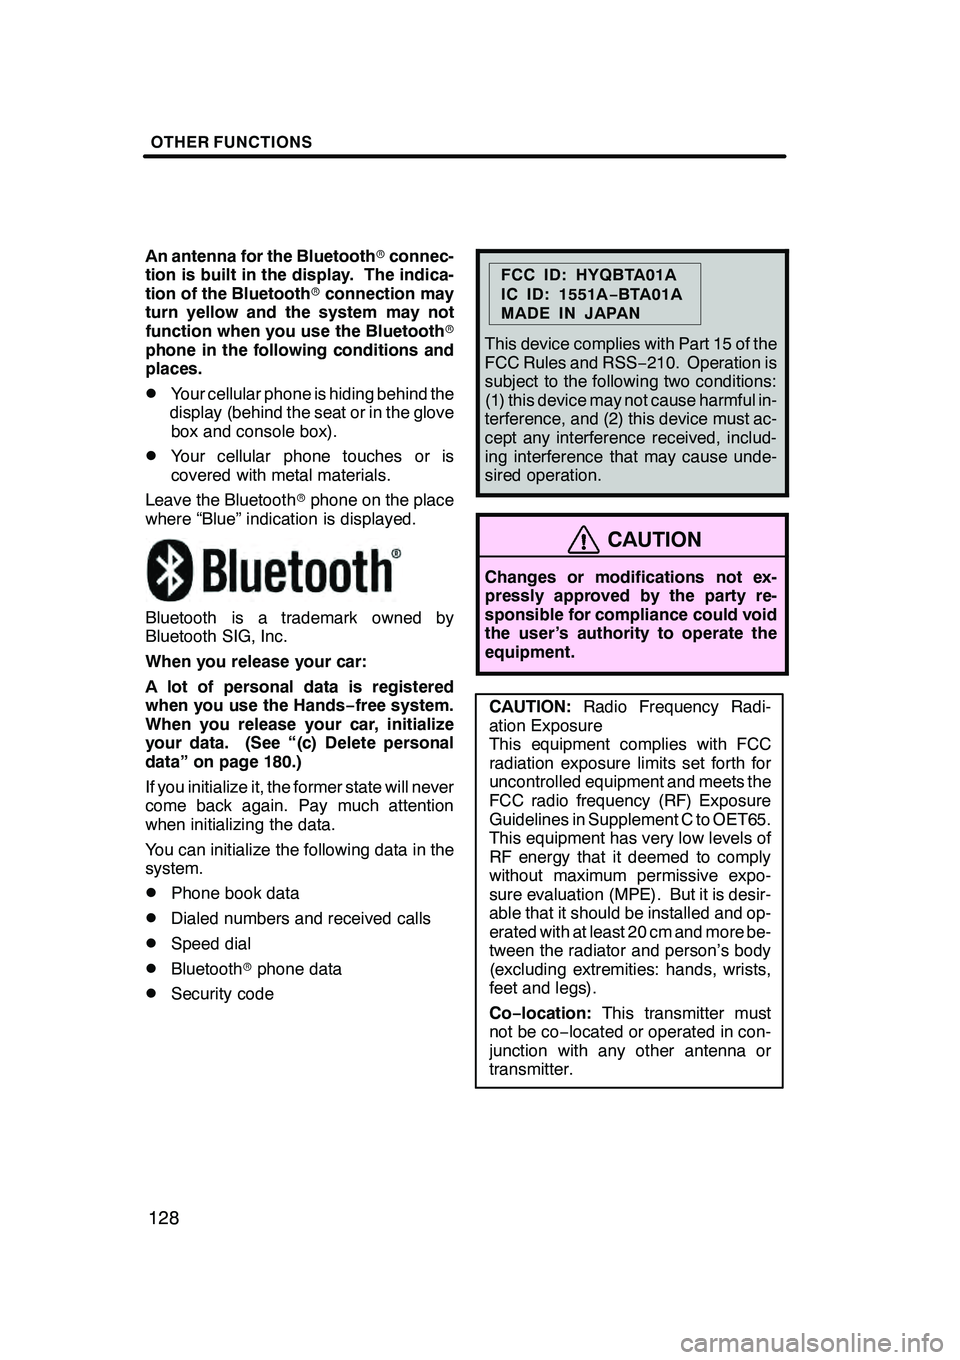
FCC ID: HYQBTA01A
IC ID: 1551A −BTA01A
MADE IN JAPAN
This device complies with Part 15 of the
FCC Rules and RSS −210. Operation is
subject to the following two conditions:
(1) this device may not cause harmful in-
terference, and (2) this device must ac-
cept any interference received, includ-
ing interference that may cause unde-
sired operation.
CAUTION
Changes or modifications not ex-
pressly approved by the party re-
sponsible for compliance could void
the user’s authority to operate the
equipment.
CAUTION: Radio Frequency Radi-
ation Exposure
This equipment complies with FCC
radiation exposure limits set forth for
uncontrolled equipment and meets the
FCC radio frequency (RF) Exposure
Guidelines in Supplement C to OET65.
This equipment has very low levels of
RF energy that it deemed to comply
without maximum permissive expo-
sure evaluation (MPE). But it is desir-
able that it should be installed and op-
erated with at least 20 cm and more be-
tween the radiator and person’s body
(excluding extremities: hands, wrists,
feet and legs).
Co− location: This transmitter must
not be co− located or operated in con-
junction with any other antenna or
transmitter.
GX470_Navi_U (OM60D58U) 07/06/16
Page 184 of 312
SECTION6
AUDIO/VIDEO SYSTEM
183
AUDIO/VIDEO SYSTEM
DQuick reference 184 .......................................
D Using your audio/video system 185
........................
Some basics 185 ........................................
Radio operation 192 .....................................
Cassette tape player operation 204 ........................
DVD changer operation 207 ..............................
DVD player operation 237 ................................
D Audio/video remote controls 260 .............................
D Audio/video system operating hints 262 ......................
GX470_Navi_U (OM60D58U) 07/06/16
Page 185 of 312
AUDIO/VIDEO SYSTEM
184
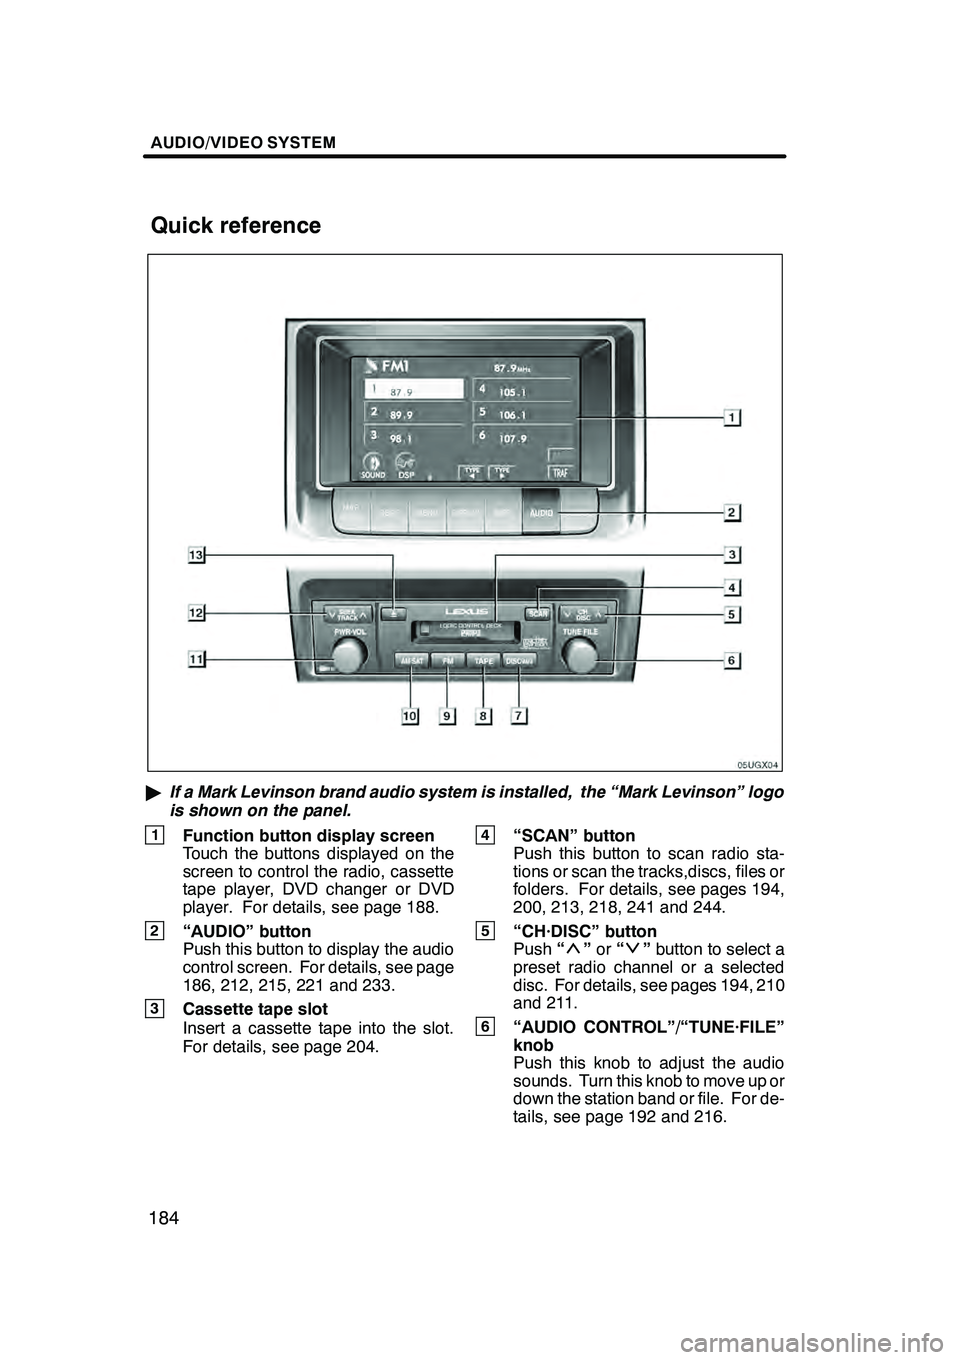
"If a Mark Levinson brand audio system is installed, the “Mark Levinson” logo
is shown on the panel.
1Function button display screen
Touch the buttons displayed on the
screen to control the radio, cassette
tape player, DVD changer or DVD
player. For details, see page 188.
2“AUDIO” button
Push this button to display the audio
control screen. For details, see page
186, 212, 215, 221 and 233.
3Cassette tape slot
Insert a cassette tape into the slot.
For details, see page 204.
4“SCAN” button
Push this button to scan radio sta-
tions or scan the tracks,discs, files or
folders. For details, see pages 194,
200, 213, 218, 241 and 244.
5“CH·DISC” button
Push “”or “”button to select a
preset radio channel or a selected
disc. For details, see pages 194, 210
and 211.
6“AUDIO CONTROL”/“TUNE·FILE”
knob
Push this knob to adjust the audio
sounds. Turn this knob to move up or
down the station band or file. For de-
tails, see page 192 and 216.
GX470_Navi_U (OM60D58U) 07/06/16
Quick reference
Page 189 of 312
AUDIO/VIDEO SYSTEM
188
The buttons for radio, cassette tape player,
DVD changer and DVD player operation
are displayed on the function button dis-
play screen when the audio control mode
is selected.
Touch them lightly and directly on the
screen.
The selected button is highlighted.
INFORMATION
DIf the system does not respond to
a touch of a touch− screen button,
move your finger away from the
screen and then touch it again.
D You cannot operate dimmed
touch− screen buttons.
D Wipe off fingerprints on the sur-
face of the display using a glass
cleaning cloth.
GX470_Navi_U (OM60D58U) 07/06/16
Page 193 of 312
AUDIO/VIDEO SYSTEM
192
D
Your DVD player
(with rear seat entertainment sys-
tem)
The sound of the rear seat entertainment
system can be enjoyed by pushing the
“DISC” button.DListening to the radio
Push these buttons to choose either an
AM or FM station.
“AM”, “FM1” or “FM2” appears on the
screen.
If your vehicle is equipped with a satellite
radio broadcast system, when you push
the“AM·SAT” button, “AM”, “SAT1”,
“SAT2”, “SAT3” station appears on the dis-
play. For details about satellite radio
broadcast, see “— Radio operation (XM r
Satellite Radio broadcast)” on page 197.
GX470_Navi_U (OM60D58U) 07/06/16
— Radio operation
Page 194 of 312
AUDIO/VIDEO SYSTEM
193
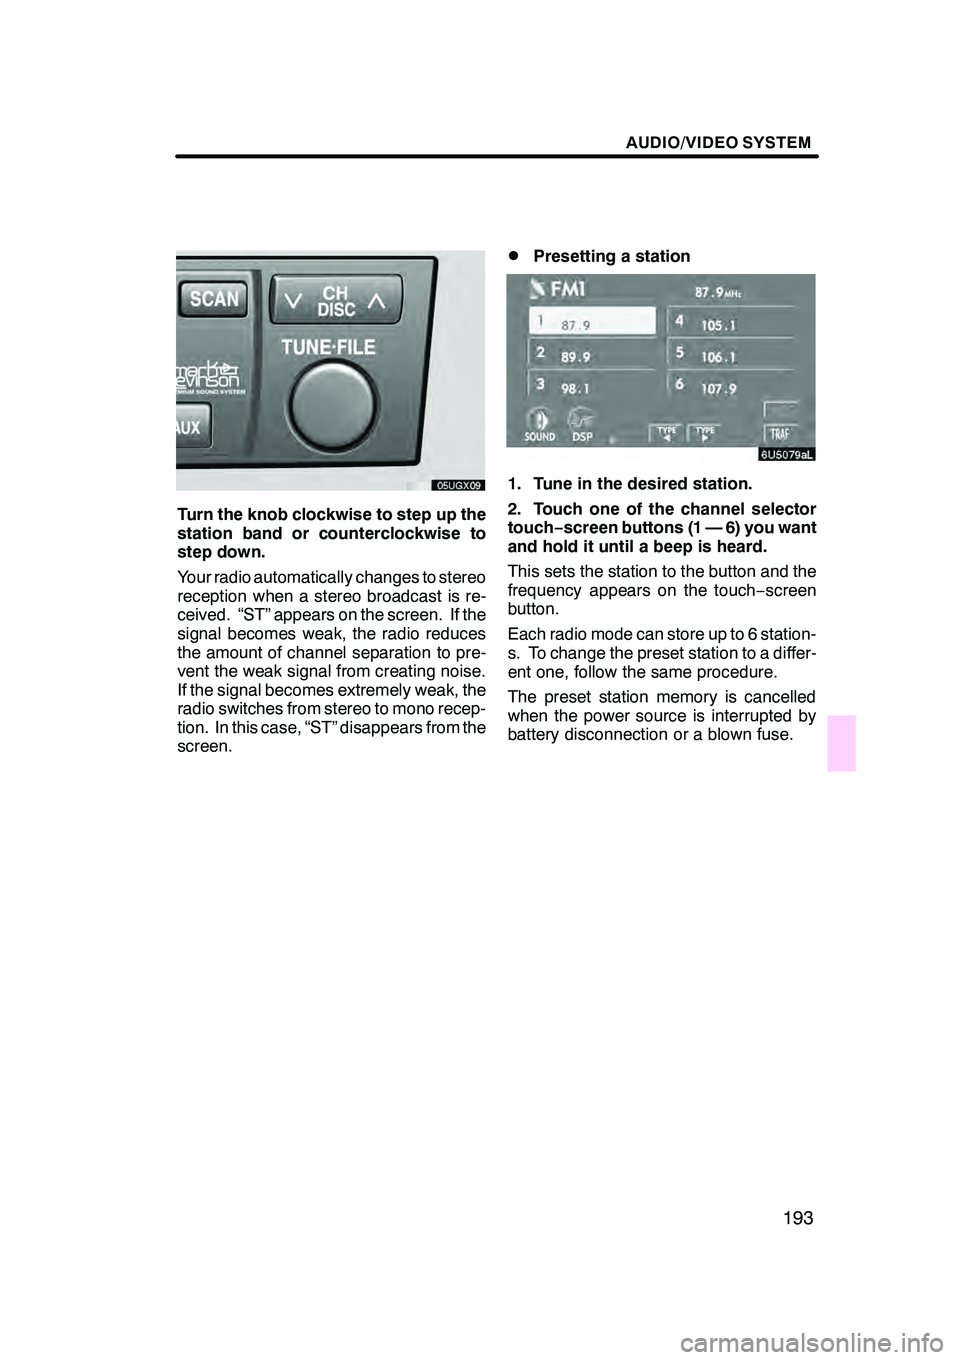
Turn the knob clockwise to step up the
station band or counterclockwise to
step down.
Your radio automatically changes to stereo
reception when a stereo broadcast is re-
ceived. “ST” appears on the screen. If the
signal becomes weak, the radio reduces
the amount of channel separation to pre-
vent the weak signal from creating noise.
If the signal becomes extremely weak, the
radio switches from stereo to mono recep-
tion. In this case, “ST” disappears from the
screen.
DPresetting a station
1. Tune in the desired station.
2. Touch one of the channel selector
touch−screen buttons (1 — 6) you want
and hold it until a beep is heard.
This sets the station to the button and the
frequency appears on the touch −screen
button.
Each radio mode can store up to 6 station-
s. To change the preset station to a differ-
ent one, follow the same procedure.
The preset station memory is cancelled
when the power source is interrupted by
battery disconnection or a blown fuse.
GX470_Navi_U (OM60D58U) 07/06/16
Page 195 of 312
AUDIO/VIDEO SYSTEM
194
D
Selecting a station
Tune in the desired station using one of the
following methods.
Preset tuning: Touch the channel selec-
tor touch− screen button (1 — 6) for the sta-
tion you want. The touch −screen button is
highlighted and the station frequency ap-
pears on the screen.
Seek tuning: Push the“
”or “”but-
ton of “SEEK·TRACK” . The radio will be-
gin seeking up or down for a station of the
nearest frequency and will stop on recep-
tion. Each time you push the button, the
stations will be searched automatically
one after another.
To scan all the frequencies: Touch
“SCAN” on the screen or push the
“SCAN” button briefly. “SCAN” appears
on the screen. The radio will find the next
station and stay there for a few seconds,
and then scan again. To select a station,
touch “SCAN” or push the “SCAN”but-
ton again.
To scan the preset stations: Touch
“SCAN” on the screen or push the
“SCAN” button for longer than approxi-
mately a second. “P·SCAN” appears on
the screen. The radio will tune in the next
preset station, stay there for a few se-
conds, and then move to the next preset
station. To select a station, touch “SCAN”
or push the “SCAN”button again.
DRDS (Radio Data System)
Your audio system is equipped with Radio
Data Systems (RDS). RDS mode allows
you to receive text messages from radio
stations that utilize RDS transmitters.
When RDS is on, the radio can
— select only stations of a particular pro-
gram type,
— display messages from radio stations,
— search for a stronger signal station.
RDS features are available for use only on
FM stations which broadcast RDS infor-
mation.
If the system receives no RDS stations,
“NO PTY” appears on the display.
GX470_Navi_U (OM60D58U) 07/06/16