Page 119 of 350
1
2
3
4
5
6
7
8
9Ignition switch / 4-2
Starting the engine / 4-4
Manual transaxle / 4-5
Automatic transaxle / 4-6
Four wheel drive (4WD) / 4-12
Brake system / 4-18
Steering wheel / 4-25
Cruise control system / 4-28
Traction control system / 4-33
Electronic stability control / 4-36
Instrument cluster / 4-39
Gauges / 4-40
Warnings and indicators / 4-46
Compass / 4-54
Lighting / 4-57
Wipers and washers / 4-61
Defroster / 4-64
Hazard warning flasher / 4-65
Manual climate control system / 4-66
Automatic climate control system / 4-75
Windshield defrosting and defogging / 4-88
Driving your vehicle
10
Page 173 of 350
455
Driving your vehicle
1
2
3
4
5
6
7
8
9
4) Make sure the vehicle windshield
wipers are turned off.
5) Drive your vehicle in at least 2
complete (either clockwise or
counter-clockwise) circles at less
than 8 km/h (5 mph) until the com-
pass heading appears. Driving in
a circle in right-handed direction
and opposite direction is possible
and if possible, stop the wiper
operation.
6) If the vehicle's compass headings
become inaccurate again, repeat
steps 1 through 6 above.
✽
NOTICE
If new vehicle is first driven or if the
battery has been disconnected, do
the calibration procedure as above.
Setting the compass zone
This compass must be set to com-
pensate for the variation between
true north and magnetic north. To set
variation:
1. Find your current location and
variance zone number on the zone
map.
2. Press and hold the ON/OFF but-
ton for 6~9 seconds. The current
zone number will appear in the
display.
3. Release and press the ON/OFF
button until the new zone number
appears in the display. After you
stop pressing the button in, the
display will show a compass direc-
tion within a few seconds.
✽
NOTICE
1. Do not install a ski rack, antenna,
etc. that are attached to the vehi-
cle using a magnet as anything
attached to the roof of the vehicle
with a magnet will effect compass
operation.
2. If the compass deviates from the
correct indication soon after
repeated adjustment, have the
compass checked at an authorized
dealer.
3. The compass may not indicate the
correct compass point in tunnels
or while driving up or down a
steep hill.
(The compass returns to the cor-
rect compass point when the vehi-
cle moves to an area where the
geomagnetism is stabilized.)
Page 179 of 350
461
Driving your vehicle
A : Wiper speed control
· MIST/ – Single wipe
· OFF – Off
· INT – Intermittent wipe
(if equipped)
· LO – Low wiper speed
· HI – High wiper speed
B : Intermittent wipe time adjust-
ment (if equipped)
C : Wash with brief wipes
D : Rear wiper/washer control
· – Spraying washer fluid
· ON – Continuous wipe
· INT – Intermittent wipe
(if equipped)
· OFF – Off
· – Wash with
brief wipes
WIPERS AND WASHERS
1
2
3
4
5
6
7
8
9Type A
Type BType B
Type A
OKM048117N/OBL048440N/OKM048120N/OBL048441N
Windshield wiper/washer Rear window wiper/washer
(if equipped)
Page 180 of 350
Driving your vehicle
62 4
1
2
3
4
5
6
7
8
9
Windshield wipers
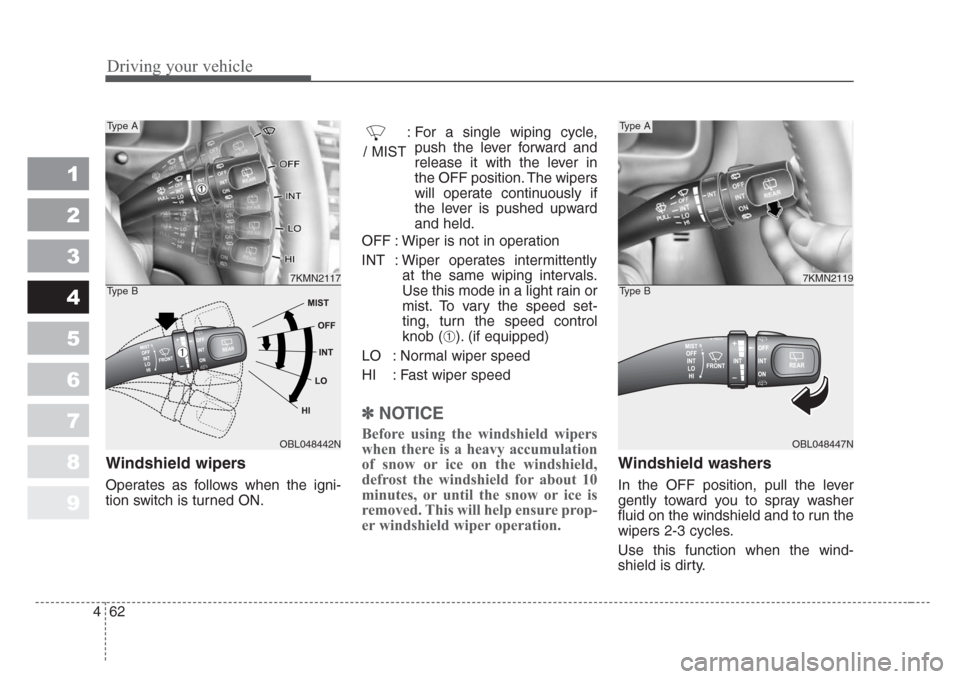
Operates as follows when the igni-
tion switch is turned ON.: For a single wiping cycle,
push the lever forward and
release it with the lever in
the OFF position. The wipers
will operate continuously if
the lever is pushed upward
and held.
OFF : Wiper is not in operation
INT : Wiper operates intermittently
at the same wiping intervals.
Use this mode in a light rain or
mist. To vary the speed set-
ting, turn the speed control
knob (
➀). (if equipped)
LO : Normal wiper speed
HI : Fast wiper speed
✽
NOTICE
Before using the windshield wipers
when there is a heavy accumulation
of snow or ice on the windshield,
defrost the windshield for about 10
minutes, or until the snow or ice is
removed. This will help ensure prop-
er windshield wiper operation.
Windshield washers
In the OFF position, pull the lever
gently toward you to spray washer
fluid on the windshield and to run the
wipers 2-3 cycles.
Use this function when the wind-
shield is dirty.
7KMN2117
OBL048442N
Type A
Type B
/ MIST
7KMN2119
OBL048447N
Type A
Type B
➀
Page 181 of 350
463
Driving your vehicle
1
2
3
4
5
6
7
8
9
The spray and wiper operation will
continue until you release the lever.
If the washer does not work, check
the washer fluid level. If the fluid level
is not sufficient, you will need to add
appropriate non-abrasive windshield
washer fluid to the washer reservoir.
The reservoir filler neck is located in
the front of the engine compartment
on the passenger side.
✽
NOTICE
To prevent possible damage to the
washer pump, do not operate the
washer when the fluid reservoir is
empty.
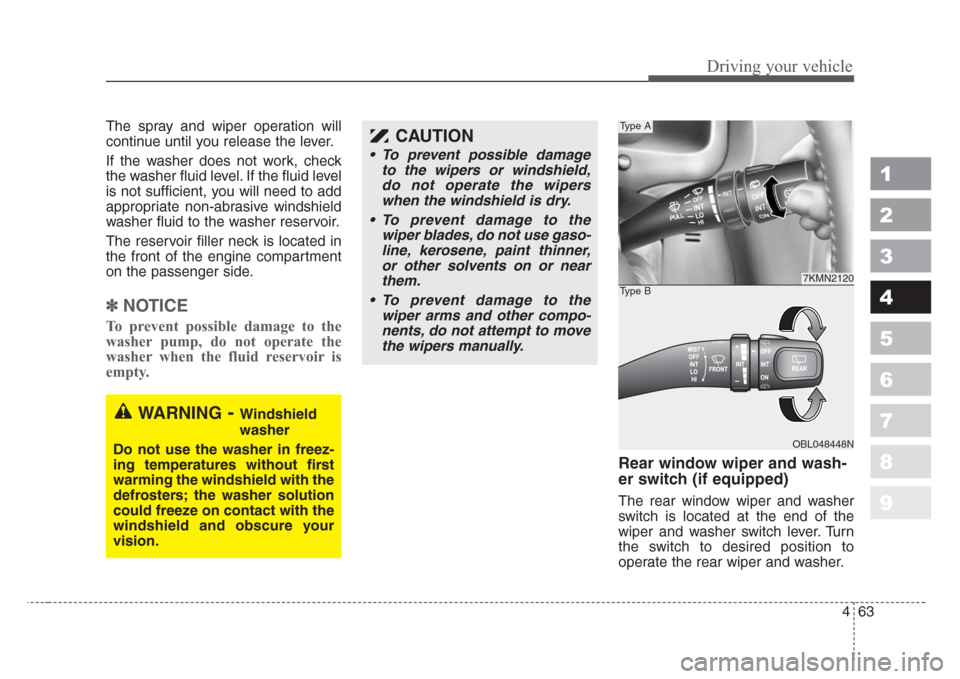
Rear window wiper and wash-
er switch (if equipped)
The rear window wiper and washer
switch is located at the end of the
wiper and washer switch lever. Turn
the switch to desired position to
operate the rear wiper and washer.
CAUTION
• To prevent possible damage
to the wipers or windshield,
do not operate the wipers
when the windshield is dry.
• To prevent damage to the
wiper blades, do not use gaso-
line, kerosene, paint thinner,
or other solvents on or near
them.
• To prevent damage to the
wiper arms and other compo-
nents, do not attempt to move
the wipers manually.
WARNING-Windshield
washer
Do not use the washer in freez-
ing temperatures without first
warming the windshield with the
defrosters; the washer solution
could freeze on contact with the
windshield and obscure your
vision.
7KMN2120
OBL048448N
Type A
Type B
Page 316 of 350
729
Maintenance
1
2
3
4
5
6
7
8
9
WIPER BLADES
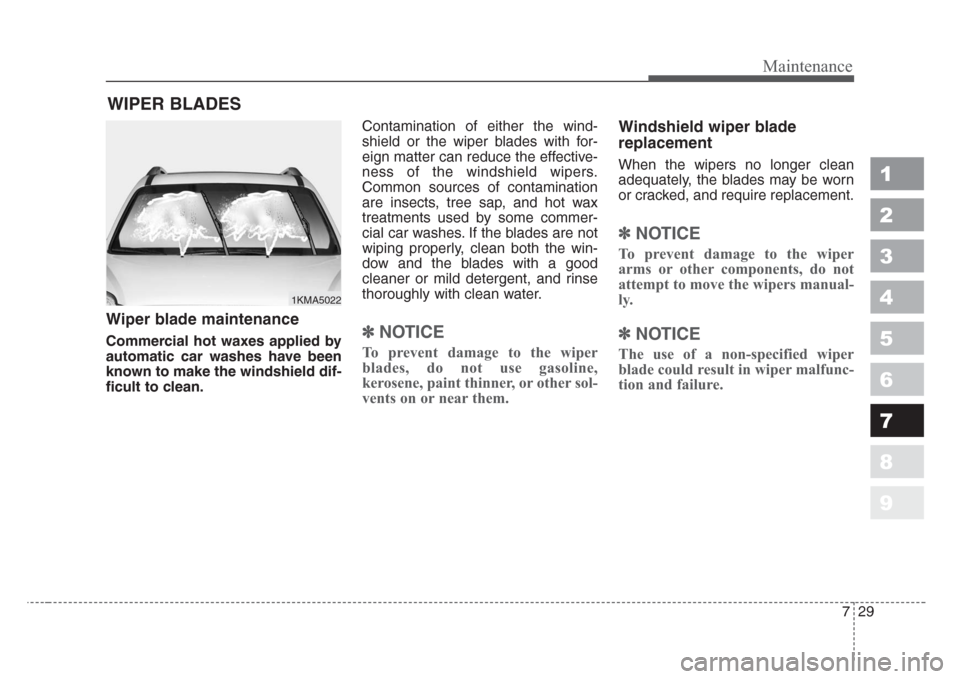
Wiper blade maintenance
Commercial hot waxes applied by
automatic car washes have been
known to make the windshield dif-
ficult to clean.Contamination of either the wind-
shield or the wiper blades with for-
eign matter can reduce the effective-
ness of the windshield wipers.
Common sources of contamination
are insects, tree sap, and hot wax
treatments used by some commer-
cial car washes. If the blades are not
wiping properly, clean both the win-
dow and the blades with a good
cleaner or mild detergent, and rinse
thoroughly with clean water.✽
NOTICE
To prevent damage to the wiper
blades, do not use gasoline,
kerosene, paint thinner, or other sol-
vents on or near them.
Windshield wiper blade
replacement
When the wipers no longer clean
adequately, the blades may be worn
or cracked, and require replacement.
✽
NOTICE
To prevent damage to the wiper
arms or other components, do not
attempt to move the wipers manual-
ly.
✽
NOTICE
The use of a non-specified wiper
blade could result in wiper malfunc-
tion and failure.
1KMA5022
Page 350 of 350
Index
4 9
1
2
3
4
5
6
7
8
9
Towing. . . . . . . . . . . . . . . . . . . . . . . . . . . . . . . . . . . 6-14
Traction control system . . . . . . . . . . . . . . . . . . . . . . 4-33
Trailer towing. . . . . . . . . . . . . . . . . . . . . . . . . . . . . 5-33
Transfer case (4WD) . . . . . . . . . . . . . . . . . . . . . . . . 7-25
Using four-wheel drive . . . . . . . . . . . . . . . . . . . . . . 5-14
Vehicle break-in process . . . . . . . . . . . . . . . . . . . . . . 1-3
Vehicle handling instructions . . . . . . . . . . . . . . . . . . 1-3
Vehicle load limit . . . . . . . . . . . . . . . . . . . . . . . . . . . 5-41
Warnings and indicators . . . . . . . . . . . . . . . . . . . . . 4-46
We ight of the vehicle . . . . . . . . . . . . . . . . . . . . . . . . 5-32
Window . . . . . . . . . . . . . . . . . . . . . . . . . . . . . . . . . . 3-16
Windshield defrosting and defogging. . . . . . . . . . . 4-88
Wiper blades . . . . . . . . . . . . . . . . . . . . . . . . . . . . . . 7-29
Wipers and washers. . . . . . . . . . . . . . . . . . . . . . . . . 4-61
U
V
W