Page 137 of 298

Driving your vehicle
4 4
1
2
3
4
5
6
7
8
9
1. Make sure the parking brake is
applied.
2.Manual Transaxle- Depress the
clutch pedal fully and shift the
transaxle into Neutral. Keep the
clutch pedal depressed while turn-
ing the ignition switch to the start
position. The starter will not oper-
ate if the clutch pedal is not fully
depressed.
Automatic Transaxle- Place the
transaxle shift lever in P (Park).
Depress the brake pedal fully.
You can also start the engine
when the shift lever is in the N
(Neutral) position.
3. Turn the ignition switch to START
and hold it there until the engine
starts (a maximum of 10 seconds),
then release the key.
4. In extremely cold weather (below
-18°C / 0°F) or after the vehicle
has not been operated for several
days, let the engine warm up with-
out depressing the accelerator.
Whether the engine is cold or warm,
it should be started without
depressing the accelerator.
The starter will not operate if:
•Manual Transaxle- the clutch
pedal is not fully depressed.
•Automatic Transaxle- the shift
lever is NOT in the P (Park) or N
(Neutral) position.
STARTING THE ENGINE
CAUTION
If the engine stalls while you are
in motion, do not attempt to
move the shift lever to the P
(Park) position. If traffic and
road conditions permit, you may
put the shift lever in the N
(Neutral) position while the
vehicle is still moving and turn
the ignition switch to the START
position in an attempt to restart
the engine.
WARNING
Always wear appropriate shoes
when operating your vehicle.
Unsuitable shoes (high heels,
ski boots,etc.) may interfere
with your ability to use the
brake and accelerator pedal,
and the clutch (if equipped).
CAUTION
Do not engage the starter for
more than 10 seconds. If the
engine stalls or fails to start,
wait 5 to 10 seconds before re-
engaging the starter. Improper
use of the starter may damage
it.
Page 143 of 298

Driving your vehicle
10 4
1
2
3
4
5
6
7
8
9
Moving up a steep grade from
a standing start
To move up a steep grade from a
standing start, depress the brake
pedal, shift the shift lever to D
(Drive). Select the appropriate gear
depending on load weight and steep-
ness of the grade, and release the
parking brake. Depress the accelera-
tor gradually while releasing the
service brakes.
Shift lock system
For your safety, the Automatic
Transaxle has a shift lock system
which prevents shifting the transaxle
out of P (Park) unless the brake
pedal is depressed.
To shift the transaxle out of P (Park):
1. Depress and hold the brake pedal.
2. Start the engine or turn the ignition
to the ON position.
3. Depress the lock release button
and move the shift lever.
When the ignition switch is in the
LOCK position, the transaxle cannot
be shifted from P (Park).
Ignition key interlock system
The ignition key cannot be removed
unless the shift lever is in the P
(Park) position. If the ignition switch
is in any other position, the key can-
not be removed.
WARNING
Always fully depress the brake
pedal before and while shifting
out of the P (Park) position into
another position to avoid inad-
vertent motion of the vehicle
which could injure persons in or
around the car.
Page 147 of 298

Driving your vehicle
14 4
1
2
3
4
5
6
7
8
9
Check the brake warning light by
turning the ignition switch ON (do not
start the engine). This light will be
illuminated when the parking brake is
applied with the ignition switch in the
START or ON position.
Before driving, be sure the parking
brake is fully released and the brake
warning light is off.If the brake warning light remains on
after the parking brake is released,
there may be a malfunction in the
brake system. Immediate attention is
necessary.
If at all possible, cease driving the
vehicle immediately. If that is not pos-
sible, use extreme caution while
operating the vehicle and only con-
tinue to drive the vehicle until you
can reach a safe location or repair
shop.
Parking on curbed streets
• When parking your vehicle on an
uphill grade, park as close to the
curb as possible and turn the front
wheels away from the curb so that
the front wheels will contact the
curb if the vehicle moves back-
ward.
• When parking your vehicle on a
downhill grade, park as close to the
curb as possible and turn the front
wheels toward the curb so that the
front wheels will contact the curb if
the vehicle moves forward.
W-75
Page 149 of 298

Driving your vehicle
16 4
1
2
3
4
5
6
7
8
9
• Even with the anti-lock brake sys-
tem, your vehicle still requires suf-
ficient stopping distance. Always
maintain a safe distance from the
vehicle in front of you.
• Always slow down when cornering.
The anti-lock brake system cannot
prevent accidents resulting from
excessive speeds.
• On loose or uneven road surfaces,
operation of the anti-lock brake
system may result in a longer stop-
ping distance than for vehicles
equipped with a conventional
brake system.
ABS
W-78
CAUTION
• If the ABS warning light is on
and stays on, you may have a
problem with the ABS system.
In this case, however, your reg-
ular brakes will work normally.
• The ABS warning light will stay
on for approximately 3 sec-
onds after the ignition switch
is ON. During that time, the
ABS will go through self-diag-
nosis and the light will go off if
everything is normal. If the
light stays on, you may have a
problem with your ABS sys-
tem. Contact an authorized Kia
dealer as soon as possible.
CAUTION
• When you drive on a road hav-
ing poor traction,such as an
icy road, and operate your
brakes continuously, the ABS
will be active continuously
and the ABS warning light
may illuminate. Pull your car
over to a safe place and stop
the engine.
•Restart the engine. If the ABS
warning light is off, then your
ABS system is normal.
Otherwise, you may have a
problem with the ABS.
Contact an authorized Kia
dealer as soon as possible.
Page 155 of 298

Driving your vehicle
22 4
1
2
3
4
5
6
7
8
9
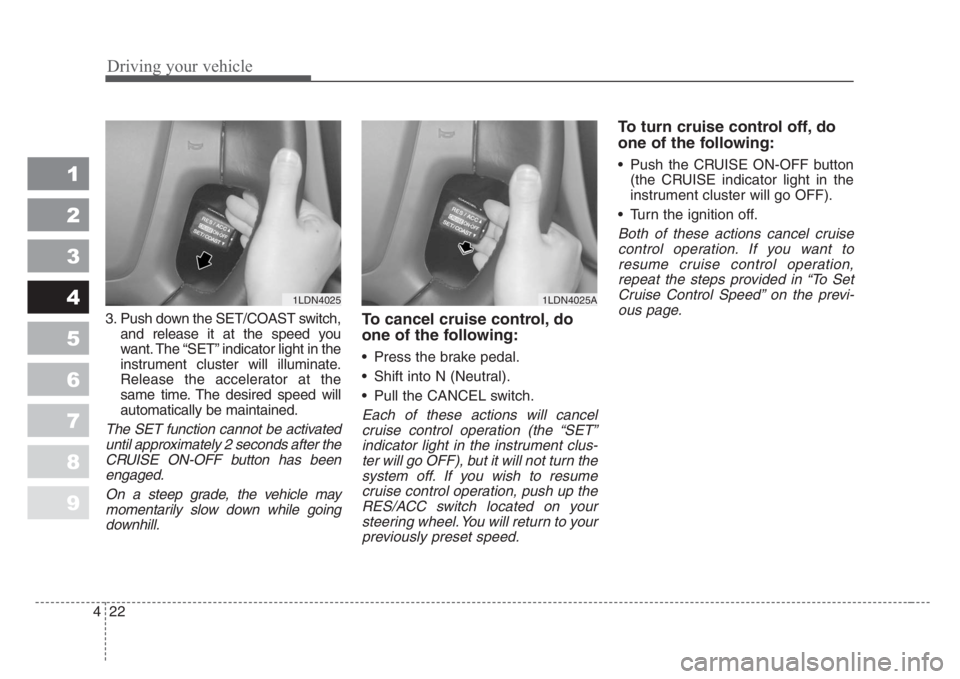
3. Push down the SET/COAST switch,
and release it at the speed you
want. The “SET” indicator light in the
instrument cluster will illuminate.
Release the accelerator at the
same time. The desired speed will
automatically be maintained.
The SET function cannot be activated
until approximately 2 seconds after the
CRUISE ON-OFF button has been
engaged.
On a steep grade, the vehicle may
momentarily slow down while going
downhill.
To cancel cruise control, do
one of the following:
• Press the brake pedal.
• Shift into N (Neutral).
• Pull the CANCEL switch.
Each of these actions will cancel
cruise control operation (the “SET”
indicator light in the instrument clus-
ter will go OFF), but it will not turn the
system off. If you wish to resume
cruise control operation, push up the
RES/ACC switch located on your
steering wheel. You will return to your
previously preset speed.
To turn cruise control off, do
one of the following:
• Push the CRUISE ON-OFF button
(the CRUISE indicator light in the
instrument cluster will go OFF).
• Turn the ignition off.
Both of these actions cancel cruise
control operation. If you want to
resume cruise control operation,
repeat the steps provided in “To Set
Cruise Control Speed” on the previ-
ous page.
1LDN40251LDN4025A
Page 158 of 298

425
1
2
3
4
5
6
7
8
9
Driving your vehicle
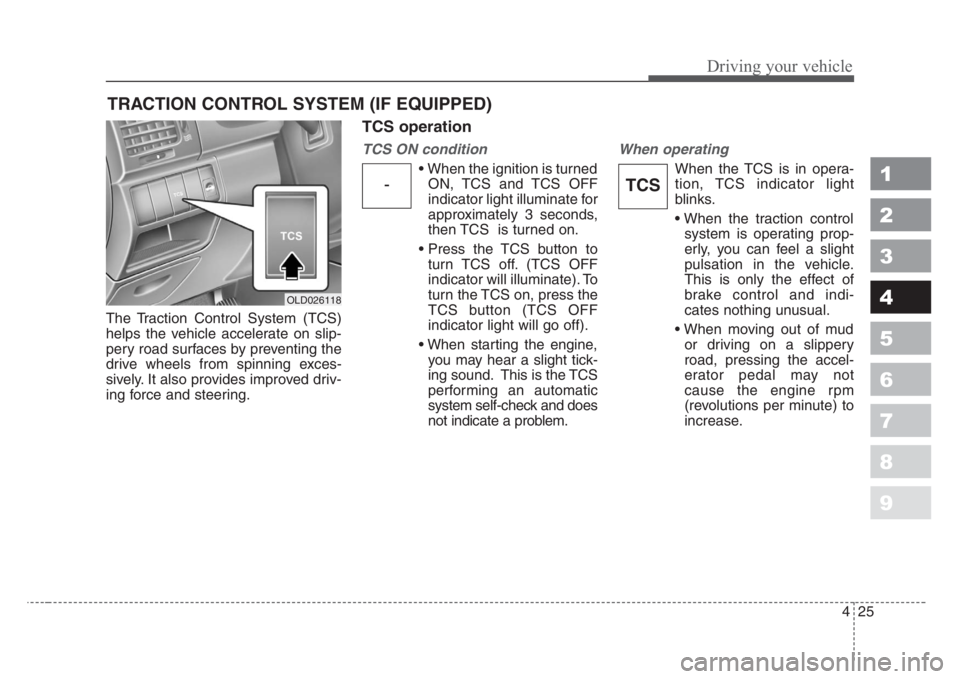
The Traction Control System (TCS)
helps the vehicle accelerate on slip-
pery road surfaces by preventing the
drive wheels from spinning exces-
sively. It also provides improved driv-
ing force and steering.
TCS operation
TCS ON condition
• When the ignition is turned
ON, TCS and TCS OFF
indicator light illuminate for
approximately 3 seconds,
then TCS is turned on.
• Press the TCS button to
turn TCS off. (TCS OFF
indicator will illuminate). To
turn the TCS on, press the
TCS button (TCS OFF
indicator light will go off).
• When starting the engine,
you may hear a slight tick-
ing sound. This is the TCS
performing an automatic
system self-check and does
not indicate a problem.
When operating
When the TCS is in opera-
tion, TCS indicator light
blinks.
• When the traction control
system is operating prop-
erly, you can feel a slight
pulsation in the vehicle.
This is only the effect of
brake control and indi-
cates nothing unusual.
• When moving out of mud
or driving on a slippery
road, pressing the accel-
erator pedal may not
cause the engine rpm
(revolutions per minute) to
increase.
TRACTION CONTROL SYSTEM (IF EQUIPPED)
-TCS
OLD026118
Page 159 of 298
Driving your vehicle
26 4
1
2
3
4
5
6
7
8
9
TCS operation off
TCS OFF state
• To cancel TCS operation,
press the TCS button
(TCS OFF indicator light
illuminates).
• If the ignition switch is
turned to LOCK position
when TCS is off, TCS
remains off. Upon restart-
ing the engine, the TCS will
automatically turn on
again.
Indicator light
When ignition switch is turned to ON,
the indicator light illuminates, then
goes off if TCS system is operating
normally.
The TCS indicator light blinks when-
ever TCS is operating.
TCS OFF indicator light comes on
when either the TCS is turned off
with the button, or TCS fails to oper-
ate when turned on.
TCS
OFFTCS
TCS
OFF
■TCS indicator light (blinks)
■ TCS OFF indicator light (comes on)WARNING
The Traction Control System is
only a driving aid; use precau-
tions for safe driving by slowing
down on curved,snowy, or icy
roads.
Page 162 of 298

429
1
2
3
4
5
6
7
8
9
Driving your vehicle
Speedometer
The speedometer indicates the for-
ward speed of the vehicle.
Odometer/Tripmeter
You can choose the odometer, trip-
meter A or tripmeter B by pressing
the TRIP button.
Odometer
The odometer indicates the total dis-
tance the vehicle has been driven.
Tripmeter
TRIP A: Tripmeter A
TRIP B: Tripmeter B
The tripmeter indicates the distance
of individual trips selected by the
driver. Tripmeter A and B can be
reset to 0 by pressing the TRIP but-
ton for 1 second or more, and then
releasing.
Tachometer
The tachometer indicates the
approximate number of engine revo-
lutions per minute (rpm).
Use the tachometer to select the cor-
rect shift points and to prevent lug-
ging and/or over-revving the engine.
The tachometer pointer may move
slightly when the ignition switch is in
ACC or ON position with the engine
OFF. This movement is normal and
will not affect the accuracy of the
tachometer once the engine is run-
ning.
GAUGES
OLD026200L
CAUTION
Do not operate the engine with-
in the tachometer's RED ZONE.
This may cause severe engine
damage.