2008 KIA Rio ECU
[x] Cancel search: ECUPage 75 of 219

Knowing your vehicle
66 3
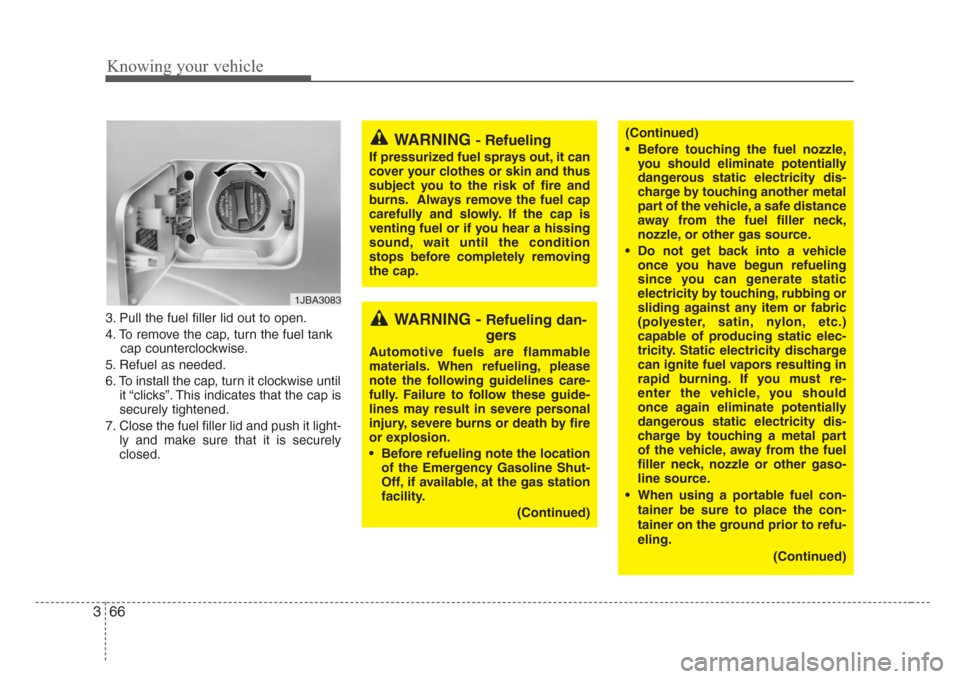
3. Pull the fuel filler lid out to open.
4. To remove the cap, turn the fuel tank
cap counterclockwise.
5. Refuel as needed.
6. To install the cap, turn it clockwise until
it “clicks”. This indicates that the cap is
securely tightened.
7. Close the fuel filler lid and push it light-
ly and make sure that it is securely
closed.
1JBA3083
WARNING - Refueling
If pressurized fuel sprays out, it can
cover your clothes or skin and thus
subject you to the risk of fire and
burns.Always remove the fuel cap
carefully and slowly. If the cap is
venting fuel or if you hear a hissing
sound, wait until the condition
stops before completely removing
the cap.
WARNING - Refueling dan-
gers
Automotive fuels are flammable
materials. When refueling, please
note the following guidelines care-
fully. Failure to follow these guide-
lines may result in severe personal
injury,severe burns or death by fire
or explosion.
• Before refueling note the location
of the Emergency Gasoline Shut-
Off, if available, at the gas station
facility.
(Continued)
(Continued)
• Before touching the fuel nozzle,
you should eliminate potentially
dangerous static electricity dis-
charge by touching another metal
part of the vehicle, a safe distance
away from the fuel filler neck,
nozzle, or other gas source.
• Do not get back into a vehicle
once you have begun refueling
since you can generate static
electricity by touching, rubbing or
sliding against any item or fabric
(polyester,satin, nylon, etc.)
capable of producing static elec-
tricity. Static electricity discharge
can ignite fuel vapors resulting in
rapid burning. If you must re-
enter the vehicle, you should
once again eliminate potentially
dangerous static electricity dis-
charge by touching a metal part
of the vehicle, away from the fuel
filler neck, nozzle or other gaso-
line source.
• When using a portable fuel con-
tainer be sure to place the con-
tainer on the ground prior to refu-
eling.
(Continued)
Page 76 of 219

367
Knowing your vehicle
✽
NOTICE
• Make sure to refuel with unleaded
fuel only.
• Check to make sure the fuel filler cap
is securely closed after refueling. A
loose fuel filler cap may cause the
“Check fuel filler cap ( )” light in
the instrument panel to illuminate
unnecessarily.
• If the fuel filler cap requires replace-
ment, use only a genuine Kia cap or
the equivalent specified for your vehi-
cle. An incorrect fuel filler cap can
result in a serious malfunction of the
fuel system or emission control sys-
tem.
• Do not spill fuel on the exterior sur-
faces of the vehicle. Any type of fuel
spilled on painted surfaces may dam-
age the paint.
(Continued)
• DO NOT use matches or a lighter
and DO NOT SMOKE or leave a lit
cigarette in your vehicle while at a
gas station especially during
refueling. Automotive fuel is high-
ly flammable and can, when ignit-
ed, result in fire.
• If a fire breaks out during refuel-
ing, leave the vicinity of the vehi-
cle, and immediately contact the
manager of the gas station and
then contact the local fire depart-
ment or 911.(Continued)
Static electricity discharge from
the container can ignite fuel
vapors causing a fire. Once refu-
eling has begun, contact with the
vehicle should be maintained
until the filling is complete.
Use only portable plastic fuel
containers designed to carry and
store gasoline.
• Do not use cellular phones while
refueling. Electric current and/or
electronic interference from cellu-
lar phones can potentially ignite
fuel vapors causing a fire.
• When refueling, always shut the
engine off. Sparks produced by
electrical components related to
the engine can ignite fuel vapors
causing a fire. Once refueling is
complete, check to make sure the
filler cap and filler door are
securely closed, before starting
the engine.
(Continued)
Page 81 of 219

Knowing your vehicle
72 3
✽
NOTICE
• To avoid possible theft, do not leave
valuables in the storage compartment.
• Since stored items may move while
driving, be sure to position them in
the storage compartment so that they
do not make noise or cause a potential
safety hazard when the vehicle is mov-
ing.
• Always keep the storage compartment
covers closed while driving. Do not
attempt to place many items in the
storage compartment that the storage
compartment cover can not close
securely.
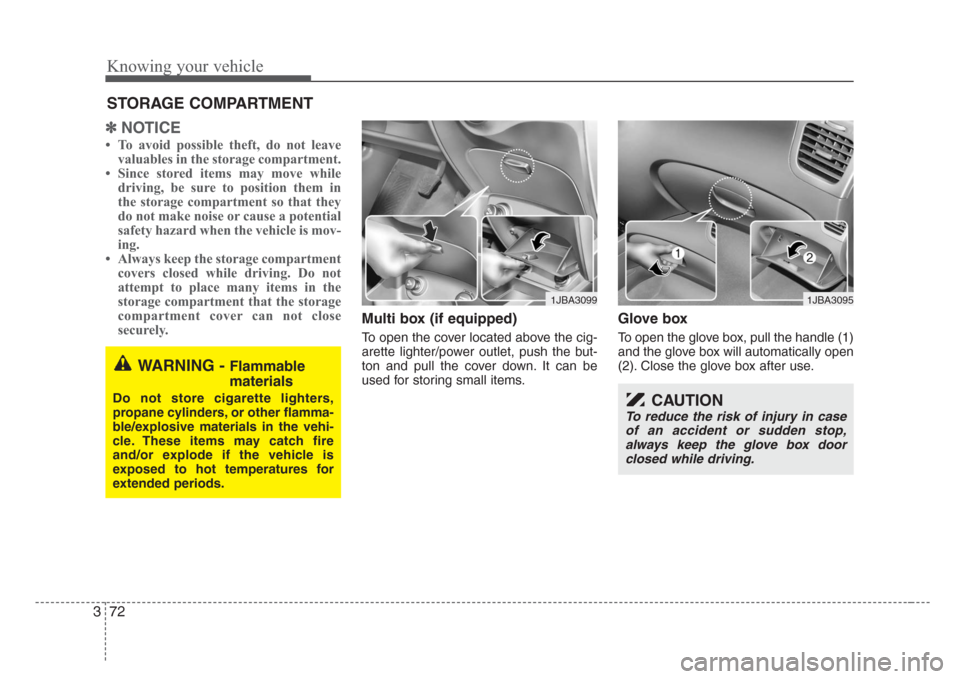
Multi box (if equipped)
To open the cover located above the cig-
arette lighter/power outlet, push the but-
ton and pull the cover down. It can be
used for storing small items.
Glove box
To open the glove box, pull the handle (1)
and the glove box will automatically open
(2). Close the glove box after use.
STORAGE COMPARTMENT
WARNING - Flammable
materials
Do not store cigarette lighters,
propane cylinders, or other flamma-
ble/explosive materials in the vehi-
cle. These items may catch fire
and/or explode if the vehicle is
exposed to hot temperatures for
extended periods.
1JBA30991JBA3095
CAUTION
To reduce the risk of injury in case
of an accident or sudden stop,
always keep the glove box door
closed while driving.
Page 83 of 219

Knowing your vehicle
74 3
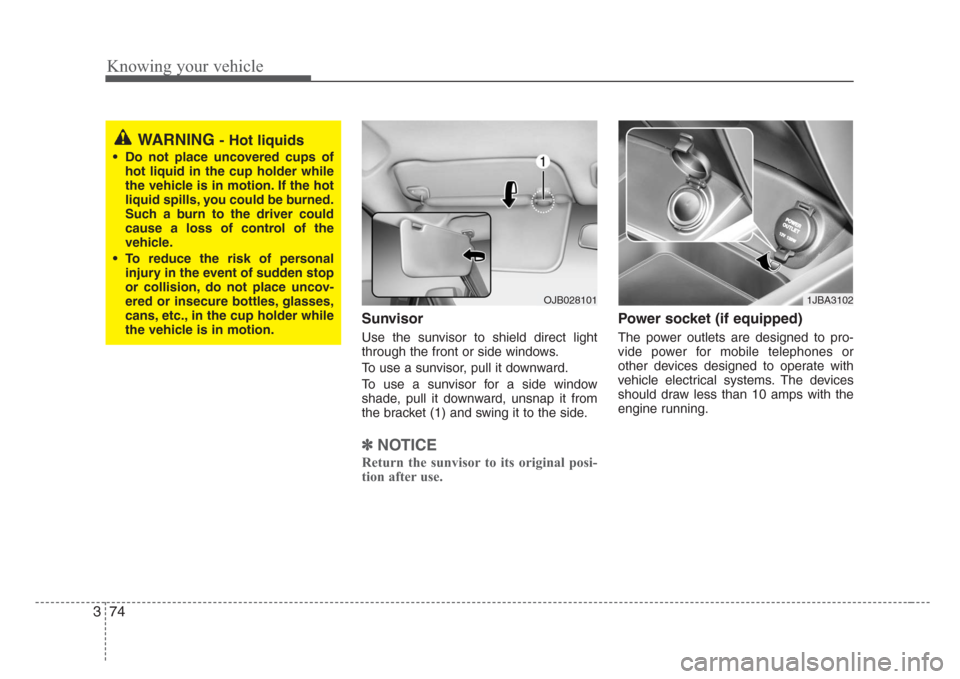
Sunvisor
Use the sunvisor to shield direct light
through the front or side windows.
To use a sunvisor, pull it downward.
To use a sunvisor for a side window
shade, pull it downward, unsnap it from
the bracket (1) and swing it to the side.
✽
NOTICE
Return the sunvisor to its original posi-
tion after use.
Power socket (if equipped)
The power outlets are designed to pro-
vide power for mobile telephones or
other devices designed to operate with
vehicle electrical systems. The devices
should draw less than 10 amps with the
engine running.
WARNING - Hot liquids
• Do not place uncovered cups of
hot liquid in the cup holder while
the vehicle is in motion. If the hot
liquid spills, you could be burned.
Such a burn to the driver could
cause a loss of control of the
vehicle.
• To reduce the risk of personal
injury in the event of sudden stop
or collision, do not place uncov-
ered or insecure bottles, glasses,
cans, etc., in the cup holder while
the vehicle is in motion.
OJB0281011JBA3102
Page 117 of 219

411
Driving your vehicle
Releasing the parking brake
To release the parking brake, first apply
the foot brake and pull up the parking
brake lever slightly. Secondly, depress
the release button and lower the parking
brake lever while holding the button.Check the brake warning light by turning
the ignition switch ON (do not start the
engine). This light will be illuminated
when the parking brake is applied with
the ignition switch in the START or ON
position.
Before driving, be sure the parking brake
is fully released and the brake warning
light is off.
If the brake warning light remains on
after the parking brake is released, there
may be a malfunction in the brake sys-
tem. Immediate attention is necessary.
If at all possible, cease driving the vehi-
cle immediately. If that is not possible,
use extreme caution while operating the
vehicle and only continue to drive the
vehicle until you can reach a safe loca-
tion or repair shop.
WARNING- Parking brake
• To prevent unintentional move-
ment when stopped and leaving
the vehicle, do not use the
gearshift lever in place of the
parking brake. Set the parking
brake AND make sure the
gearshift lever is securely posi-
tioned in 1st (First) gear or R
(Reverse) for manual transaxle
equipped vehicles and in P (Park)
for automatic transaxle equipped
vehicles.
• Never allow a person who is unfa-
miliar with the vehicle or children
to touch the parking brake. If the
parking brake is released unin-
tentionally,serious injury may
occur.
W-751JBA4006
Page 127 of 219

421
Driving your vehicle
Low brake fluid level warning
If the warning light remains on, it may
indicate that the brake fluid level in the
reservoir is low.
If the warning light remains on:
1. Drive carefully to the nearest safe
location and stop your vehicle.
2. With the engine stopped, check the
brake fluid level immediately and add
fluid as required. Then check all brake
components for fluid leaks.
3. Do not drive the vehicle if leaks are
found, the warning light remains on or
the brakes do not operate properly.
Have it towed to any authorized Kia
dealer for a brake system inspection
and necessary repairs.
To check bulb operation, check whether
the parking brake and brake fluid warning
light illuminates when the ignition switch
is in the ON position.
Trunk lid open
warning (if equipped)
This warning light activates when the
trunk is not closed securely.
Door ajar warning
This warning light illuminates when a
door is not closed securely.
Low fuel level
warning
This warning light indicates the fuel tank
is nearly empty. The warning light will
come on when the fuel level has dropped
to about 5.5~6.5 liters (1.5~1.7 gallons).
Refuel as soon as possible.
Headlight high beam
indicator
This indicator illuminates when the head-
lights are on and in the high beam posi-
tion or when the turn signal lever is pulled
into the Flash-to-Pass position.
Air bag warning
(if equipped)
This warning light will blink or illuminate
for approximately 6 seconds each time
you turn the ignition switch to the ON
position.
If this indicator does not go out, or if it illu-
minates while the vehicle is being driven,
see an authorized Kia dealer for immedi-
ate service.
Check fuel filler cap
warning
This warning light indicates the fuel filler
cap is not tight securely.
Always make sure that the fuel filler cap
is tight.
WARNING
Driving the vehicle with a brake
warning light on is dangerous. If the
brake warning light remains on,
have the brakes checked and
repaired immediately by an author-
ized Kia dealer.
AIR
BAG
CHECK
FUEL
CAP
Page 162 of 219

In case of an emergency
8 6
Engine compartment
1. Turn the ignition switch and all other
switches off.
2. Remove the fuse box cover by press-
ing the taps and pulling up.
3. Check the removed fuse; replace it if it
is blown.
4. Push in a new fuse of the same rating,
and make sure it fits tightly in the clips.
If it fits loosely, consult an authorized Kia
dealer.
✽
NOTICE
After checking the fuse box in the engine
compartment, securely install the fuse
box cover. If not, electrical failures may
occur from water leaking in.
Main fuse
If the MAIN fuse is blown, it must be
removed as follows:
1. Disconnect the negative battery cable.
2. Remove the screws shown in the pic-
ture above.
3. Replace the fuse with a new one of the
same rating.
4. Reinstall in the reverse order of
removal.
✽
NOTICE
If the MAIN fuse is blown, consult an
authorized Kia dealer.
1JBA60051JBA6007
Page 163 of 219

69
In case of an emergency
Engine compartment
Engine compartment
1JBH6008
Fuse/Relay panel description
Inside the fuse/relay box covers, you can find the fuse/relay
label describing fuse/relay name and capacity.Description Fuse rating Protected component
BATT_1 50A Alternator, Battery
ECU A 30A Engine control unit
RAD 30A Radiator fan
COND 30A Condenser fan
ECU B 10A Engine control unit
SPARE - Spare fuse
HORN 10A Horn
IGN1 30A Ignition
IGN2 40A Ignition
BATT_2 30A Alternator, Battery
MAIN 125A Alternator
MDPS 80A Power steering wheel
ABS1 40A ABS
ABS2 40A ABS
P/WDW 30A Power window
BLW 40A Blower
SPARE - Spare fuse
A/CON1 10A Air conditioner
A/CON2 10A Air conditioner
ECU D 10A Engine control unit
SNSR 10A Sensors
INJ 15A Injector
ECU C 20A Engine control unit
SPARE - Spare fuse
SPARE - Spare fuse
HORN - Horn relay
MAIN - Main relay