2008 KIA Optima key
[x] Cancel search: keyPage 138 of 289

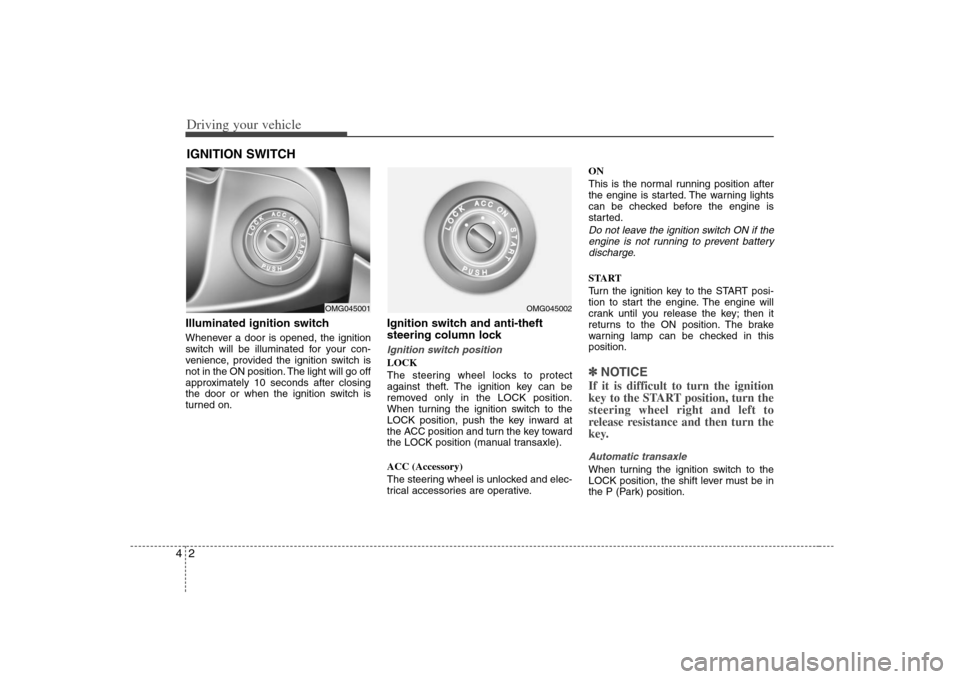
Driving your vehicle2 4Illuminated ignition switchWhenever a door is opened, the ignition
switch will be illuminated for your con-
venience, provided the ignition switch is
not in the ON position. The light will go off
approximately 10 seconds after closing
the door or when the ignition switch is
turned on.
Ignition switch and anti-theft
steering column lock Ignition switch positionLOCK
The steering wheel locks to protect
against theft. The ignition key can be
removed only in the LOCK position.
When turning the ignition switch to the
LOCK position, push the key inward at
the ACC position and turn the key toward
the LOCK position (manual transaxle).
ACC (Accessory)
The steering wheel is unlocked and elec-
trical accessories are operative.ON
This is the normal running position after
the engine is started. The warning lights
can be checked before the engine is
started.
Do not leave the ignition switch ON if the
engine is not running to prevent battery
discharge.START
Turn the ignition key to the START posi-
tion to start the engine. The engine will
crank until you release the key; then it
returns to the ON position. The brake
warning lamp can be checked in this
position.✽ ✽
NOTICEIf it is difficult to turn the ignition
key to the START position, turn the
steering wheel right and left to
release resistance and then turn the
key.Automatic transaxleWhen turning the ignition switch to the
LOCK position, the shift lever must be in
the P (Park) position.
IGNITION SWITCH
OMG045001
OMG045002
Page 139 of 289

43
Driving your vehicle
STARTING THE ENGINE 1. Make sure the parking brake is
applied.
2.Manual Transaxle- Depress the
clutch pedal fully and shift the
transaxle into Neutral. Keep the clutch
pedal depressed while turning the
ignition switch to the start position.
The starter will not operate if the
clutch pedal is not fully depressed.
Automatic Transaxle- Place the
transaxle shift lever in P (Park).
Depress the brake pedal fully.
You can also start the engine when
the shift lever is in the N (Neutral)
position.
3. Turn the ignition switch to START and
hold it there until the engine starts (a
maximum of 10 seconds), then
release the key.
4. In extremely cold weather (below
0°F / -18°C) or after the vehicle has
not been operated for several days, let
the engine warm up without depress-
ing the accelerator.
Whether the engine is cold or warm, it
should be started without depressing
the accelerator.✽ ✽
NOTICEDo not engage the starter for more than
10 seconds. If the engine stalls or fails to
start, wait 5 to 10 seconds before re-
engaging the starter. Excessive or
improper use of the starter may damage
it. The starter will not operate if:
Manual Transaxle- the clutch pedal is
not fully depressed.
Automatic Transaxle- the shift lever
is NOT in the P (Park) or N (Neutral)
position.
WARNING
- Ignition key
• Never turn the ignition switch to
LOCK or ACC while the vehicle is
moving. This would result in loss
of directional control and braking
function, which could cause an
accident or collision.
Before leaving the driver’s seat,
always make sure the shift lever
is engaged in 1
stgear for manual
transaxle or P (Park) for automat-
ic transaxle. Then, set the parking
brake fully and shut the engine
off. Unexpected and sudden vehi-
cle movement may occur if these
precautions are not taken.
Never reach for the ignition
switch, or any other controls
through the steering wheel while
the vehicle is in motion. The pres-
ence of your hand or arm in this
area could cause a loss of vehicle
control, an accident and serious
bodily injury or death.
Do not place any movable objects
around the driver’s seat as they
may move while driving, interfere
with the driver and lead to an
accident.
CAUTION -
Stall
If the engine stalls while you are in
motion, do not attempt to move the
shift lever to the P (Park) position. If
traffic and road conditions permit,
you may put the shift lever in the N
(Neutral) position while the vehicle
is still moving and turn the ignition
switch to the START position in an
attempt to restart the engine.
WARNING
Always wear appropriate shoes
when operating your vehicle.
Unsuitable shoes (high heels, ski
boots,etc.) may interfere with your
ability to use the brake and acceler-
ator pedal, and the clutch (if
equipped).
Page 143 of 289

47
Driving your vehicle
✽ ✽
NOTICE• To avoid damage to your transaxle, do
not accelerate the engine in R
(Reverse) or any forward gear posi-
tion with the brakes on.
• When stopped on an uphill grade, do
not hold the vehicle stationary with
engine power. Use the service brake
or the parking brake.
• Do not shift from N (Neutral) or P
(Park) into D (Drive), or R (Reverse)
when the engine is above idle speed.Transaxle rangesP (Park)This position locks the transaxle and pre-
vents the front wheels from rotating.
Always come to a complete stop before
shifting into this position.
✽ ✽
NOTICEThe transaxle may be damaged if you
shift into P (Park) while the vehicle is in
motion.R (Reverse)Use this position to drive the vehicle
backward.
✽ ✽
NOTICEAlways come to a complete stop before
shifting into or out of R (Reverse); you
may damage the transaxle if you shift
into R while the vehicle is in motion.N (Neutral)With the gearshift in the N position, the
wheels and transaxle are not locked. The
vehicle will roll freely even on the slight-
est incline unless the parking brake or
service brakes are applied.D (Drive)This is the normal forward driving posi-
tion. The transaxle will automatically shift
through a 5-gear sequence, providing the
best fuel economy and power.
For extra power when passing another
vehicle or climbing grades, depress the
accelerator fully, at which time the
transaxle will automatically downshift to
the next lower gear.✽ ✽
NOTICEAlways come to a complete stop before
shifting into D (Drive).
(Continued)
Do not use the P (Park) position in
place of the parking brake.
Always make sure the shift lever
is latched in the P (Park) position
AND set the parking brake fully.
Before leaving the driver’s seat,
always make sure the shift lever
is in the P (Park) position. Set the
parking brake fully, shut the
engine off and take the key with
you. Unexpected and sudden
vehicle movement can occur if
you do not follow these precau-
tions in the order specified.
Never leave a child unattended in
a vehicle.
WARNING
- Automatic
transaxle
Shifting into P (Park) while the
vehicle is in motion will cause the
drive wheels to lock which will
cause you to lose control of the
vehicle.
(Continued)
Page 145 of 289

49
Driving your vehicle
Moving up a steep grade from a
standing startTo move up a steep grade from a stand-
ing start, depress the brake pedal, shift
the shift lever to D (Drive). Select the
appropriate gear depending on load
weight and steepness of the grade, and
release the parking brake. Depress the
accelerator gradually while releasing the
service brakes.
When accelerating from a stop on a
steep hill, the vehicle may have a ten-
dency to roll backwards. Shifting the
shift lever into 2 (Second Gear) while
in Sport mode will help prevent the
vehicle from rolling backwards.Ignition key interlock systemThe ignition key cannot be removed
unless the shift lever is in the P (Park)
position. If the ignition switch is in any
other position, the key cannot be
removed.
Shift lock systemFor your safety, the Automatic Transaxle
has a shift lock system which prevents
shifting the transaxle out of P (Park)
unless the brake pedal is depressed.
To shift the transaxle out of P (Park):
1. Depress and hold the brake pedal.
2. Start the engine or turn the ignition to
the ON position.
3. Move the shift lever.
If the brake pedal is repeatedly
depressed and released with the shift
lever in the P (Park) position, a chattering
sound near the shift lever may be heard.
This is a normal condition.
Shift-lock overrideIf the shift lever should fail to move from
the P (Park) position with the brake pedal
depressed, continue depressing the
brake, then do the following:
1. Carefully remove the cap covering the
S/Lock override access hole which is
located on the right side of the shift
lever.
2. Insert the screwdriver into the access
hole and press down on the key.
3. Depress the lock release button and
move the shift lever.
4. Have your vehicle inspected by an
authorized Kia dealership immediately.
OMG045061
Page 147 of 289

411
Driving your vehicle
Disc brakes wear indicator Your vehicle has disc brakes.
When your brake pads are worn and it's
time for new pads, you will hear a high-
pitched warning sound from your front
brakes or rear brakes (if equipped). You
may hear this sound come and go or it
may occur whenever you depress the
brake pedal.
Please remember that some driving
conditions or climates may cause a
brake squeal when you first apply (or
lightly apply) the brakes. This is nor-
mal and does not indicate a problem
with your brakes.
✽ ✽
NOTICETo avoid costly brake repairs, do not
continue to drive with worn brake pads.
Power adjustable pedals
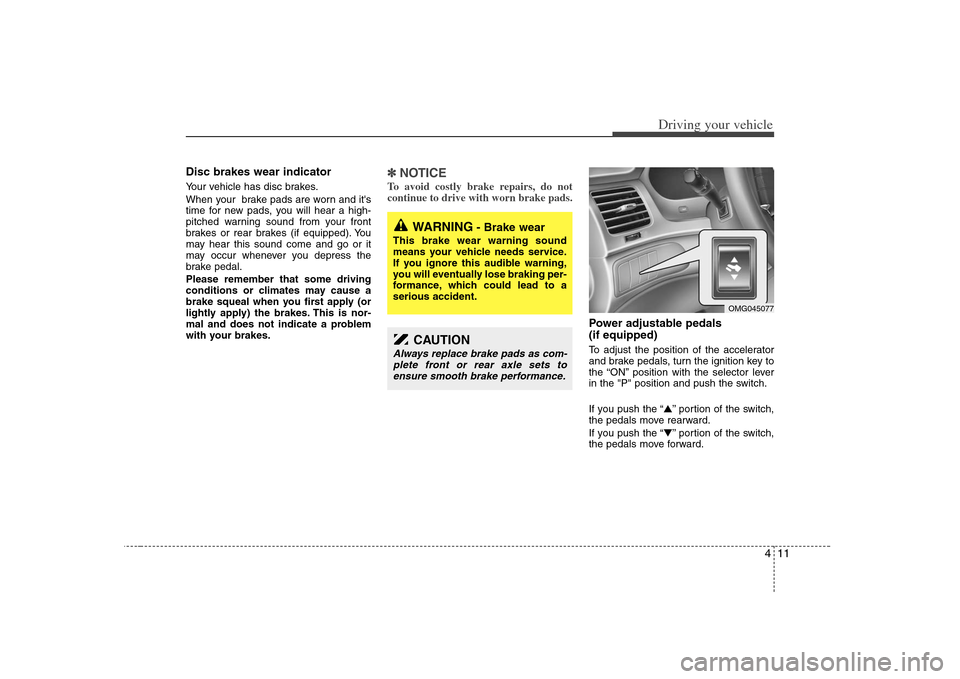
(if equipped)To adjust the position of the accelerator
and brake pedals, turn the ignition key to
the “ON” position with the selector lever
in the "P" position and push the switch.
If you push the “▲” portion of the switch,
the pedals move rearward.
If you push the “▼” portion of the switch,
the pedals move forward.
WARNING
- Brake wear
This brake wear warning sound
means your vehicle needs service.
If you ignore this audible warning,
you will eventually lose braking per-
formance, which could lead to a
serious accident.
CAUTION
Always replace brake pads as com-
plete front or rear axle sets to
ensure smooth brake performance.
OMG045077
Page 163 of 289

427
Driving your vehicle
ModeEach push of the button (TRIP) changes
the display as follows:
Tripmeter (km or MI)This mode indicates the total distance
traveled since the last tripmeter reset.
The meter's working range is from 0.0 to
999.9 km (mile).
Pressing the TRIP button for more than 1
second, when the tripmeter is being dis-
played, clears the tripmeter to zero.
Driving timeThis mode displays the total time elepsed
from engine start to key OFF conditions.
When the “TRIP” switch is pushed, it will
reset to 0:00.
Reset
Push “TRIP” for more than 1 second to
initialize the displayed information such
as average speed and driving time.
OMG045014
1MGH4922
Type AType B
DISTANCE TO EMPTYAMBIENT TEMPERATURE
TRIPMETER
AVERAGE VEHICLE SPEED
DRIVING TIME
1MGH4923N
Type AType B
Page 164 of 289

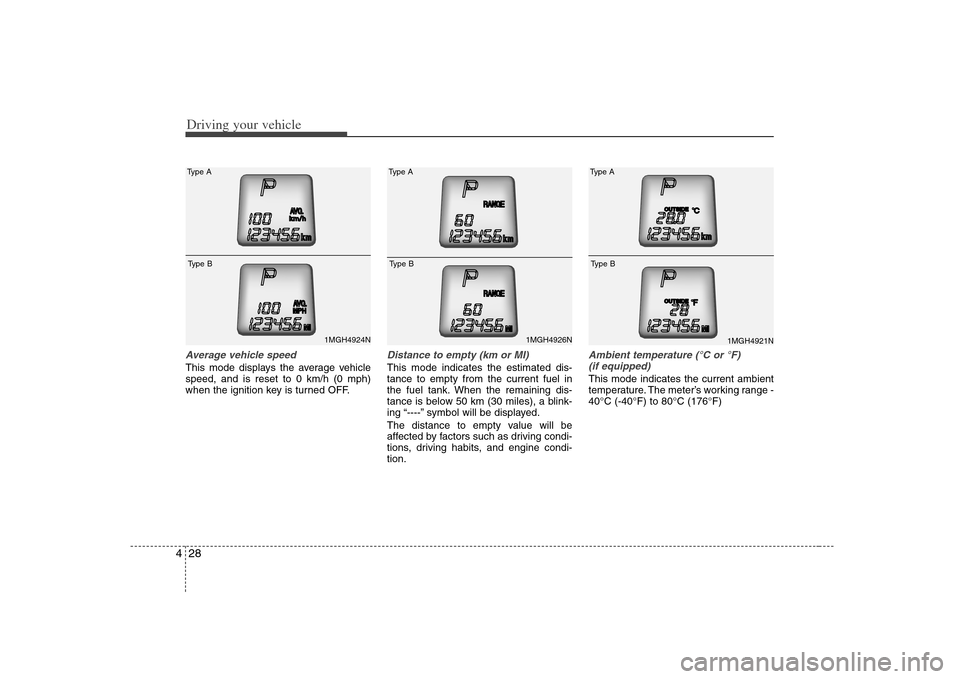
Driving your vehicle28 4Average vehicle speedThis mode displays the average vehicle
speed, and is reset to 0 km/h (0 mph)
when the ignition key is turned OFF.
Distance to empty (km or MI)This mode indicates the estimated dis-
tance to empty from the current fuel in
the fuel tank. When the remaining dis-
tance is below 50 km (30 miles), a blink-
ing “----” symbol will be displayed.
The distance to empty value will be
affected by factors such as driving condi-
tions, driving habits, and engine condi-
tion.
Ambient temperature (°C or °F)
(if equipped)This mode indicates the current ambient
temperature. The meter’s working range -
40°C (-40°F) to 80°C (176°F)
1MGH4924N
Type AType B
1MGH4926N
Type AType B
1MGH4921N
Type AType B
Page 166 of 289

Driving your vehicle30 4Warning lights / audible indicators Checking operation All warning lights are checked by turning
the ignition switch ON (do not start the
engine). Any light that does not illuminate
should be checked by an authorized Kia
dealer.
After starting the engine, check to make
sure that all warning lights are off. If any
are still on, this indicates a situation that
needs attention. When releasing the
parking brake, the brake system warning
light should go off. The fuel warning light
will stay on if the fuel level is low.Anti-lock brake system
(ABS) warning light (if
equipped) This light illuminates if the key is turned
to ON and goes off in approximately 3
seconds if the system is operating nor-
mally.
If the light stays on, you may have a
problem with your ABS. Contact an
authorized Kia dealer as soon as possi-
ble.
Electronic brake force
distribution (EBD) sys-
tem warning
(if equipped)If ABS and BRAKE warning lights illumi-
nate at the same time while driving, your
vehicle has a problem with the ABS and
EBD system.
In this case, your ABS and regular brake
system may not work normally. Have the
vehicle checked by an authorized Kia
dealer as soon as possible.
Engine oil pressure
warning This warning light indicates the engine oil
pressure is low.
If the warning light illuminates while driv-
ing:
1. Drive safely to the side of the road and
stop.
2. With the engine off, check the engine
oil level. If the level is low, add oil as
required.
If the warning light remains on after
adding oil or if oil is not available, call an
authorized Kia dealer.✽ ✽
NOTICEIf the engine is not stopped immediately,
severe damage could result.
WARNINGS AND INDICATORS
ABS
ABS
WARNING
- Brake indica-
tors
If the both ABS and Brake warning
lights are ON and stay ON, your
vehicle’s brake system will not work
normally. You may experience an
unexpected and dangerous situa-
tion during sudden braking. In this
case, avoid high speed driving and
abrupt braking. Have your vehicle
checked by Authorized Kia Dealer
as soon as possible.