2008 KIA Opirus window
[x] Cancel search: windowPage 26 of 283

Knowing your vehicle
163
Power window lock switch
• The driver can disable the power win-
dow switches on a passenger door by
depressing the power window lock
switch located on the driver’s door to
LOCK (pressed).
• When the power window lock switch is ON, the driver’s master control cannot
operate the passenger door power
windows either.
Power window timer (if equipped)
The power windows can be operated for
approximately 30 seconds after the igni-
tion key is removed or turned to the ACC
or LOCK position. However, if the front
doors are opened, the power windows
cannot be operated even within 30 sec-
onds after the ignition key is removed.
WARNING
• The automatic window rever sal
feature (window lower s 150 mm
[5.9 inches] when a resistance is
detected) will only operate when
the automatic power window up
operation feature is used.
Automatic window rever sal will
not operate if the window is
raised using the fir st detent posi-
tion (
➄) on the power window
s witch. Always double check to
make sure all faces, arms, hands
and other obstructions are safely
out of the way before operating
the power window.
• If an object less than 4 mm (0.16 inch) in diameter is caught
between the window gla ss and
the upper window channel, the
automatic rever sal may not detect
the resistance and will not oper-
ate. Therefore, always check for
any obstructions before raising
any window.
Page 75 of 283

365
Knowing your vehicle
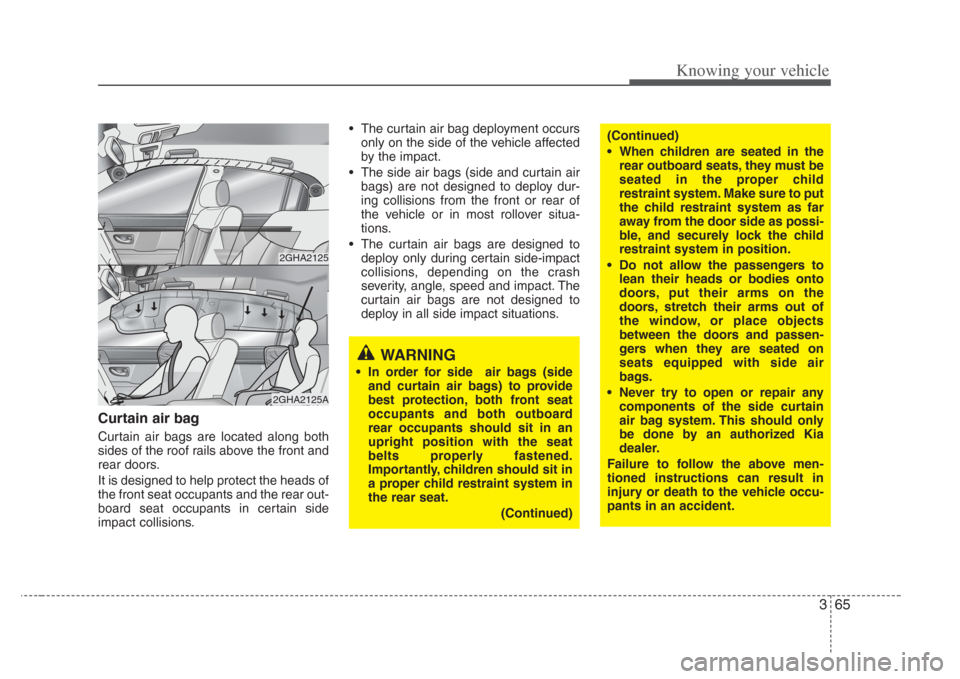
Curtain air bag
Curtain air bags are located along both
sides of the roof rails above the front and
rear doors.
It is designed to help protect the heads of
the front seat occupants and the rear out-
board seat occupants in certain side
impact collisions.• The curtain air bag deployment occurs
only on the side of the vehicle affected
by the impact.
• The side air bags (side and curtain air bags) are not designed to deploy dur-
ing collisions from the front or rear of
the vehicle or in most rollover situa-
tions.
• The curtain air bags are designed to deploy only during certain side-impact
collisions, depending on the crash
severity, angle, speed and impact. The
curtain air bags are not designed to
deploy in all side impact situations.
WARNING
• In order for side air bags ( side
and curtain air bag s) to provide
best protection, both front seat
occupants and both outboard
rear occupants should sit in an
upright pos ition with the s eat
belts properly fas tened.
Importantly, children should sit in
a proper child restraint system in
the rear seat.
(Continued)
(Continued)
• When children are seated in the
rear outboard seats, they must be
s eated in the proper child
restraint system. Make sure to put
the child restraint system as far
away from the door side as possi-
ble, and securely lock the child
restraint system in position.
• Do not allow the pa ssengers to
lean their head s or bodies onto
door s, put their arms on the
door s,stretch their arms out of
the window, or place objects
between the door s and passen-
ger s when they are seated on
s eats equipped with s ide air
bags.
• Never try to open or repair any components of the side curtain
air bag system.
This should only
be done by an authorized Kia
dealer.
Failure to follow the above men-
tioned ins tructions can res ult in
injury or death to the vehicle occu-
pants in an accident.
2GHA2125
2GHA2125A
Page 96 of 283

Knowing your vehicle
863
Outside rearview mirror heater (if equipped)
The outside rearview mirror heater is
actuated in connection with the rear win-
dow defroster. To heat the outside
rearview mirror glass, push the button for
the rear window defroster.
The outside rearview mirror glass will be
heated for defrosting or defogging and
will give you improved rear vision in
inclement weather conditions. Push the
button again to turn the heater off. The
outside rearview mirror heater automati-
cally turns off after 20 minutes.
Day/night rearview mirror
Adjust the rearview mirror to the center
on the view through the rear window.
Make this adjustment before you start
driving.
Manual type
Make this adjustment before you start
driving and while the day/night lever is in
the day position.
Pull the day/night lever toward you to
reduce glare from the headlights of vehi-
cles behind you during night driving.
Remember that you lose some rearviewclarity in the night position.
WARNING
Do not place objects in the rear seat
or cargo area which would interfere
with your vi sion out the rear win-
dow.
2GHA2203
Day
Night
Day/Night lever
Page 103 of 283

393
Knowing your vehicle
Rear
To use cup holders in rear seat, pull
down the rear seat armrest.
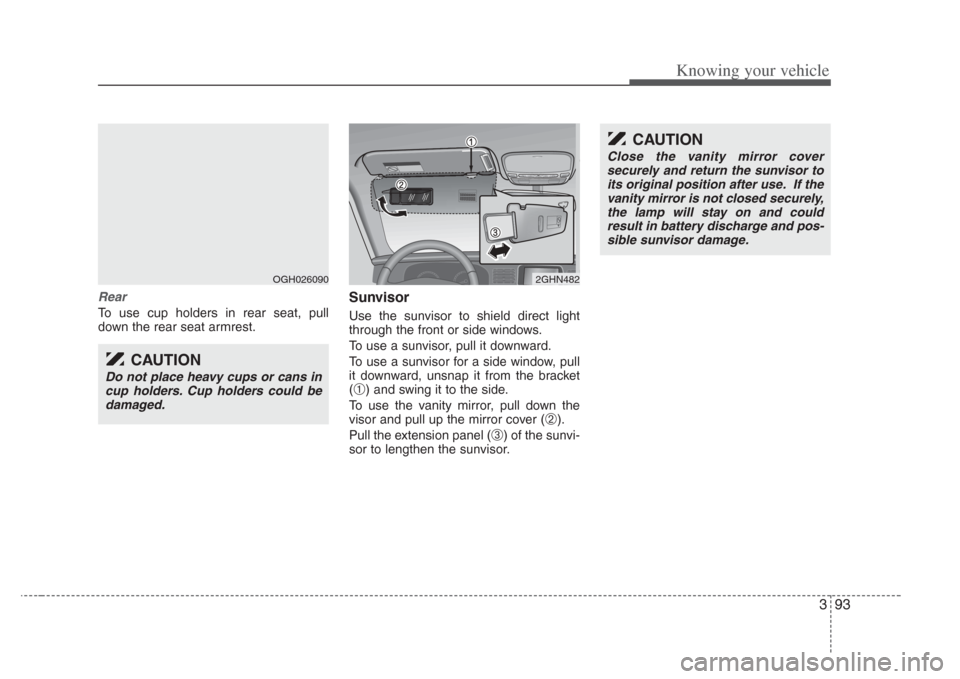
Sunvisor
Use the sunvisor to shield direct light
through the front or side windows.
To use a sunvisor, pull it downward.
To use a sunvisor for a side window, pull
it downward, unsnap it from the bracket
(
➀) and swing it to the side.
To use the vanity mirror, pull down the
visor and pull up the mirror cover (
➁).
Pull the extension panel (
➂) of the sunvi-
sor to lengthen the sunvisor.
OGH0260902GHN482
CAUTION
Do not place heavy cups or cans in cup holder s. Cup holder s could be
damaged.
CAUTION
Clos e the vanity mirror cover
securely and return the sunvisor to
its original position after use. If the vanity mirror is not clo sed securely,
the lamp will stay on and could result in battery di scharge and pos-
sible sunvisor damage.
Page 108 of 283

Knowing your vehicle
983
Resetting the sunroof
Whenever the vehicle battery is discon-
nected or discharged, or you use the
emergency handle to operate the sun-
roof, you have to reset your sunroof sys-
tem as follows:
1. Turn the ignition key to the ON posi-tion.
2. According to the position of the sun- roof, do as follows.
1) in case that the sunroof has closedcompletely or been tilted
: Press the TILT UP button for 1 second.
2) in case that the sunroof has slide- opened
: Press and hold the CLOSE button for more than 5 seconds until the
sunroof has closed completely.
And then press the TILT UP but-
ton for 1 second
3. Then, release it.
4. Press and hold the TILT UP button once again until the sunroof has
returned to the original position of
TILT UP after it is raised a little higher
than the maximum TILT UP position.
When this is complete, the sunroof sys-
tem is reset.
Glass antenna (if equipped)
When the radio power switch is turned on
while the ignition key is in either the “ON”
or “ACC” position, your car will receive
both AM and FM broadcast signals
through the antenna in the rear window
glass.
ANTENNA
OGH036399N
CAUTION
• Do not clean the in side of the rear
window gla ss with a cleaner or
s craper to remove the foreign
deposits a s this may cause dam-
age to the antenna element s.
• Avoid adding metallic coating such as Ni, Cd, and so on. Thesecan disturb receiving AM and FMbroadcast signals.
Page 112 of 283

Knowing your vehicle
1023
Care of cassette tapes
(if equipped)
• Because the thickness of a cassette
tape with the total playback time of
over 60 minutes (C-60) are too thin, we
suggest that you do not use any of
them to avoid having tapes being tan-
gled.
• To achieve better sound quality, period- ically clean the tape head using a cot-
ton stick with colorless alcohol (once
per month).
• If a tape is too loose, fasten it to reel by winding with objects like a pencil.
• Because dust or foreign objects on a cassette tape may damage the play-
back head, always store tapes in their
cases when not in use.
• Make sure cassette tapes are kept away from magnetic devices (TV,
stereo system, etc) in order to achieve
better sound quality.
• Be certain that no objects or sub- stances other than cassette tapes are
inserted into the cassette tape player.
• Because tape media can be distorted when exposed to direct sunlight, Do
not leave cassette tapes on the seats,
dashboard or near the back wind-
shield.
Care of di sc (if equipped)
• If the temperature inside the car is too
high, open the car windows for ventilation
before using your car audio.
• Do not apply volatile agents such as benzene and thinner, normal cleaners
and magnetic sprays made for ana-
logue disc onto CDs.
• To prevent the disc surface from get- ting damaged. Hold and carry CDs by
the edges or the edges of the center
hole only.
• Clean the disc surface with a piece of soft cloth before playback (wipe it from the
center to the outside edge.)
• Do not damage the disc surface or attach pieces of sticky tape or paper
onto it.
• Make sure on undesirable matter other than CDs are inserted into the CD
player (Do not insert more than one
CD at a time).
• Keep CDs in their cases after use to protect them from scratches or dirt. • Depending on the type of CD-R/CD-
RW CDs, certain CDs may not operate
normally according to manufacturing
companies or making and recording
methods. In such circumstances, if you
still continue to use those CDs, they
may cause the malfunction of your car
audio system.
✽ NOTICE-Playing an
Incompatible Copy-Protected
Audio CD
Some copy-protected CDs, which do not
comply with the international audio CD
standards (Red Book), may not play on
your car audio. Please note that if you
try to play copy protected CDs and the
CD player of your car audio is not per-
forming to your expectation, this may be
caused by those CDs and not a defect in
the device itself. Please replace those
CDs.
Page 172 of 283

441
Driving your vehicle
If the washer does not work, check the
washer fluid level. If the fluid level is not
sufficient, you will need to add appropri-
ate non-abrasive windshield washer fluid
to the washer reservoir.
The reservoir filler neck is located in the
front of the engine compartment on the
passenger side.The defroster heats the window to
remove frost, fog and thin ice from the
interior and exterior of the rear window,
while the engine is running.To activate the rear window defroster,
press the rear window defroster button
located in the heater contorl panel. The
indicator on the rear window defroster
button illuminates when the defroster is
ON.
If your vehicle is equipped with the front
windshield deicer, it will be operating at
the same time when you operate the rear
window defroster.
If there is heavy accumulation of snow on
the rear window, brush it off before oper-
ating the rear defroster.
The rear window defroster automatically
turns off after 20 minutes or when the
ignition switch is turned off. To turn off the
defroster, press the rear window
defroster button again.
WARNING
Do not use the washer in freezing
temperature s without fir st warming
the windshield with the defroster s;
the washer solution could freeze on
contact with the winds hield and
obscure your vision.
DEFROSTER
OGH026044
CAUTION
To prevent possible damage to the washer pump, do not operate thewasher when the fluid reservoir isempty.
Page 173 of 283

Driving your vehicle
424
✽NOTICE
To prevent damage to the conductors
bonded to the inside surface of the
bottom of the front windshield and the
rear window, never use sharp instru-
ments or window cleaners containing
abrasives to clean the window.
To prevent the battery from being dis- charged, operate the defroster only
while the engine is running.
The front windshield defroster is designed to defrost wiper blades. If
you want to defrost and defog the
front windshield, refer to “Windshield
Defrosting and Defogging” in this sec-
tion.
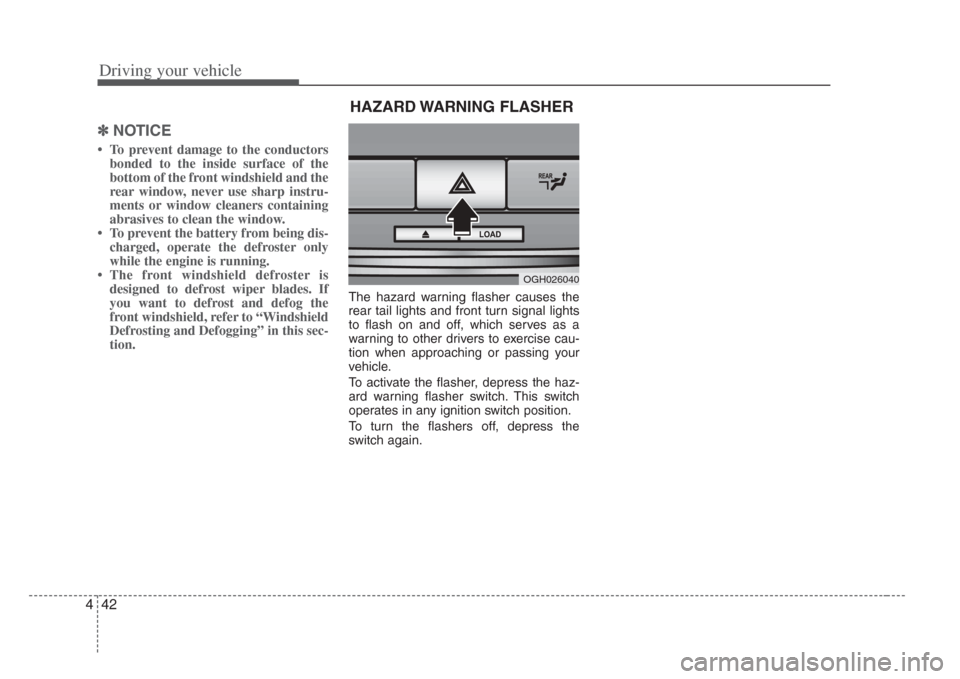
The hazard warning flasher causes the
rear tail lights and front turn signal lights
to flash on and off, which serves as a
warning to other drivers to exercise cau-
tion when approaching or passing your
vehicle.
To activate the flasher, depress the haz-
ard warning flasher switch. This switch
operates in any ignition switch position.
To turn the flashers off, depress the
switch again.
OGH026040
HAZARD WARNING FLASHER