Page 176 of 327

441
1 23456789
Driving your vehicle
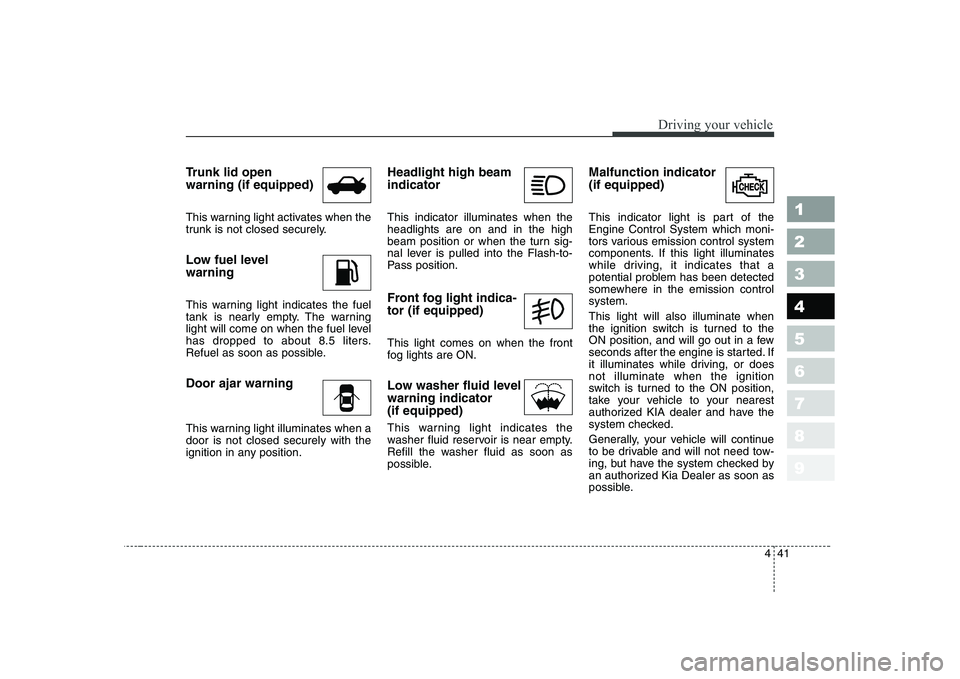
Trunk lid open warning (if equipped)
This warning light activates when the
trunk is not closed securely.
Low fuel level warning
This warning light indicates the fuel
tank is nearly empty. The warning
light will come on when the fuel level
has dropped to about 8.5 liters.
Refuel as soon as possible. Door ajar warning
This warning light illuminates when a door is not closed securely with the
ignition in any position.Headlight high beam indicator This indicator illuminates when the headlights are on and in the high
beam position or when the turn sig-
nal lever is pulled into the Flash-to-
Pass position.
Front fog light indica- tor (if equipped) This light comes on when the front
fog lights are ON.
Low washer fluid level warning indicator(if equipped)
This warning light indicates the
washer fluid reservoir is near empty.
Refill the washer fluid as soon as
possible.Malfunction indicator (if equipped)
This indicator light is part of the Engine Control System which moni-
tors various emission control system
components. If this light illuminates
while driving, it indicates that a
potential problem has been detected
somewhere in the emission controlsystem. This light will also illuminate when
the ignition switch is turned to the
ON position, and will go out in a few
seconds after the engine is started. If
it illuminates while driving, or doesnot illuminate when the ignition
switch is turned to the ON position,
take your vehicle to your nearest
authorized KIA dealer and have the
system checked.
Generally, your vehicle will continue
to be drivable and will not need tow-
ing, but have the system checked by
an authorized Kia Dealer as soon as
possible.
Page 184 of 327

449
1 23456789
Driving your vehicle
Daytime running light (if equipped)
Daytime Running Lights (DRL) can
make it easier for others to see the
front of your vehicle during the day.
DRL can be helpful in many different
driving conditions, and it is especial-
ly helpful after dawn and before sun-set.
The DRL system will make your low-
beam headlights turn OFF when:
1. The headlight switch is ON.
2. The parklight switch is ON.
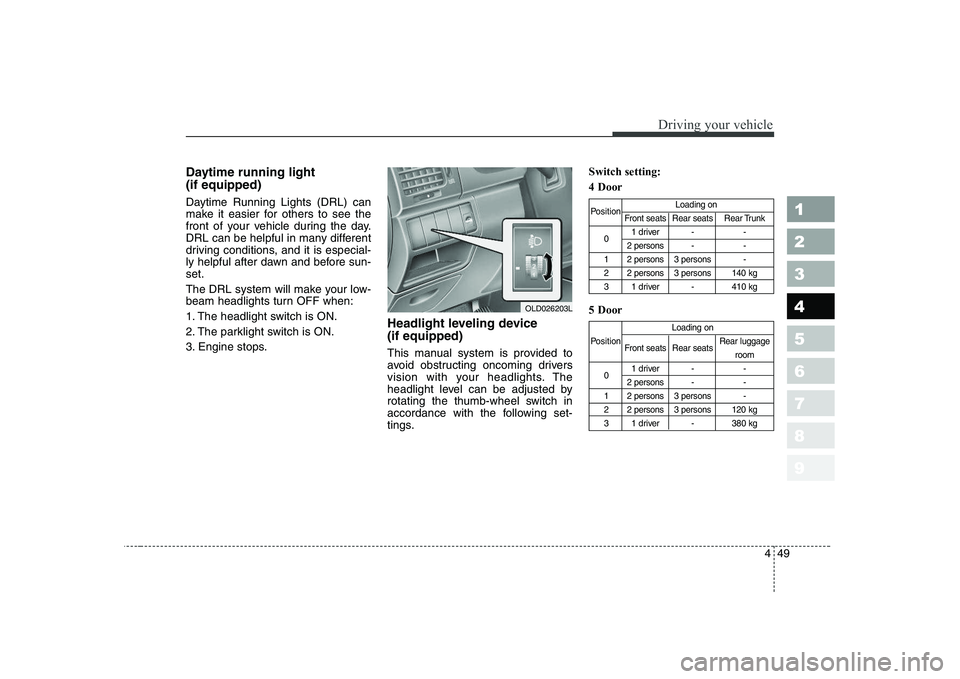
3. Engine stops.Headlight leveling device (if equipped)
This manual system is provided to
avoid obstructing oncoming drivers
vision with your headlights. The
headlight level can be adjusted by
rotating the thumb-wheel switch in
accordance with the following set-
tings.Switch setting: 4 Door 5 Door
Position
Loading on
Front seats Rear seats Rear Trunk
0 1 driver - -
2 persons - -
1 2 persons 3 persons -
2 2 persons 3 persons 140 kg
3 1 driver - 410 kg
Loading on
Position Front seats Rear seats Rear luggage
room
0 1 driver - -
2 persons - -
1 2 persons 3 persons -
2 2 persons 3 persons 120 kg
3 1 driver - 380 kg
OLD026203L
Page 248 of 327

611
In case of an emergency
1 23456789
Description Fuse rating Protected component
ECU1 10A Engine control unit
STOP 15A Stop light
F/WIPER 20A Front wiper
R/FOG 10A Rear fog light
F/FOG 15A Front fog light
LO HDLP 15A Headlight (low)
HI HDLP 15A Headlight (high)
A/CON 10A Air conditioner
F/PUMP 15A Fuel pump
T/OPEN 10A Trunk lid opener
SAFTY P/WINDOW 20A Safety power window module
HORN 10A Horn
INJ 15A Injector
SNSR 10A O2 sensor
ECU2 30A Engine control unit
SPARE 10A spare fuse
SPARE 15A spare fuse
SPARE 20A spare fuse
SPARE 30A spare fuse
ABS2 30A Anti-lock brake system
ABS1 30A Anti-lock brake system
IP B+ 50A In panel B+
BLOWER 30A Blower
IGN2 30A Ignition switch
IGN1 30A Ignition switchDescription Fuse rating Protected component
RAD
30A (Gasoline)Radiator fan
40A (Diesel)
COND 20A Condenser fan
ALT
120A (Gasoline)Alternator
140A (Diesel)
ATM - Automatic transaxle control relay
WIPER - Wiper relay
F/FOG - Front fog light relay
LO HDLP - Headlight relay (low)
HI HDLP - Headlight relay (high)
A/CON - Air conditioner relay
F/PUMP - Fuel pump relay
DRL - Daytime running light relay
COND2 - Condenser fan relay
HORN - Horn relay
MAIN - Main relay
START - Start motor relay
RAD - Radiator fan relay
COND - Condenser fan relay
Engine compartment
Page 256 of 327

619
In case of an emergency
1 23456789
IF YOU HAVE A FLAT TIRE
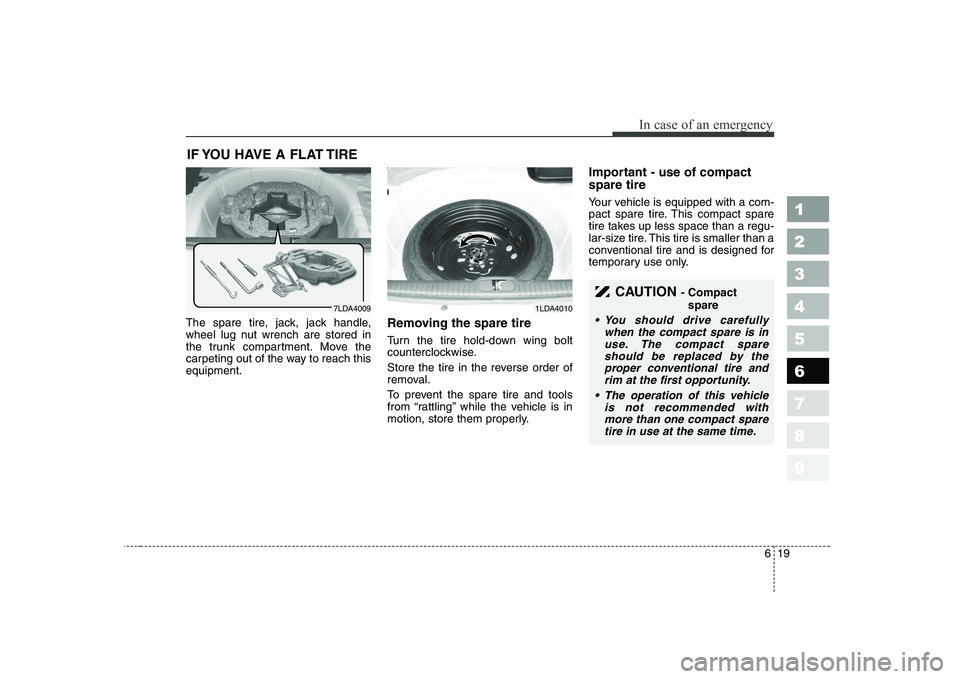
The spare tire, jack, jack handle,
wheel lug nut wrench are stored in
the trunk compartment. Move the
carpeting out of the way to reach thisequipment. Removing the spare tire
Turn the tire hold-down wing bolt
counterclockwise.
Store the tire in the reverse order of
removal.
To prevent the spare tire and tools
from “rattling” while the vehicle is in
motion, store them properly.Important - use of compact spare tire
Your vehicle is equipped with a com-
pact spare tire. This compact spare
tire takes up less space than a regu-
lar-size tire. This tire is smaller than a
conventional tire and is designed for
temporary use only.
7LDA40091LDA4010
CAUTION
- Compact
spare
You should drive carefully when the compact spare is inuse. The compact spareshould be replaced by theproper conventional tire and rim at the first opportunity.
The operation of this vehicle is not recommended withmore than one compact sparetire in use at the same time.
Page 262 of 327

625
In case of an emergency
1 23456789
EMERGENCY COMMODITY (IF EQUIPPED)
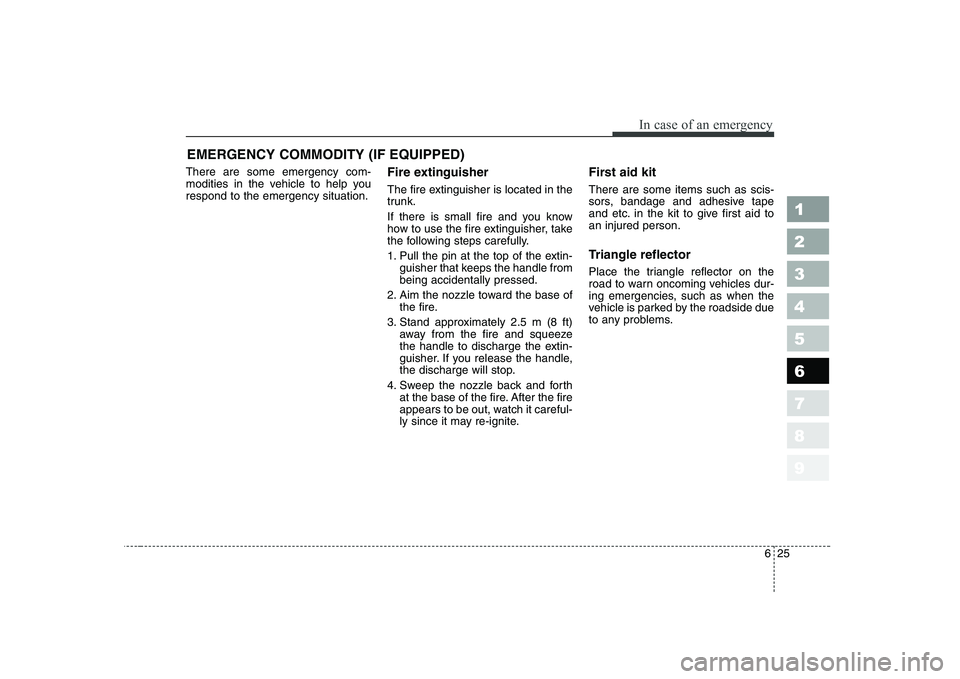
There are some emergency com-
modities in the vehicle to help yourespond to the emergency situation. Fire extinguisher
The fire extinguisher is located in the
trunk.
If there is small fire and you know
how to use the fire extinguisher, take
the following steps carefully.
1. Pull the pin at the top of the extin-
guisher that keeps the handle from being accidentally pressed.
2. Aim the nozzle toward the base of the fire.
3. Stand approximately 2.5 m (8 ft) away from the fire and squeeze
the handle to discharge the extin-
guisher. If you release the handle,
the discharge will stop.
4. Sweep the nozzle back and forth at the base of the fire. After the fire
appears to be out, watch it careful-
ly since it may re-ignite. First aid kit There are some items such as scis-
sors, bandage and adhesive tape
and etc. in the kit to give first aid toan injured person.
Triangle reflector
Place the triangle reflector on the
road to warn oncoming vehicles dur-
ing emergencies, such as when the
vehicle is parked by the roadside due
to any problems.
Page 310 of 327
747
Maintenance
1 23456789
Interior lights bulb replace- ment
1. Using a flat-blade screwdriver,gently pry the lens from the interi- or light housing.
2. Remove the bulb by pulling it straight out.
3. Install a new bulb in the socket.
4. Align the lens tabs with the interior light housing notches and snap
the lens into place.
CAUTION
Prior to working on the Interior
Lights, ensure that the “OFF”button is depressed to avoid burning your fingers or receiv-ing an electric shock.
1LDE5041
1LDA5041
Trunk room lamp (4 Door)
1LDA5039Trunk room lamp (5 Door)
1LDA5040
Center dome lamp
Front map lamp
Page 311 of 327
Maintenance
48
7
1 23456789
License plate lights bulb replacement
1. Loosen the lens retaining screws
with a cross-tip screwdriver.
2. Remove the lens.
3. Remove the bulb by pulling it straight out.
4. Install a new bulb.
5. Reinstall the lens securely with the lens retaining screws. Rear combination light bulb replacement (1) Stop and tail light
(2) Rear turn signal light
(3) Back-up light
1. Open the trunk lid or rear hatch.
2. Remove the service cover by turn-
ing the plastic screw counterclock-
wise and removing the cover.
1LDA5043OLD056035OLD056034
Page 312 of 327
749
Maintenance
1 23456789
3. Remove the socket from theassembly by turning the socket
counterclockwise until the tabs on
the socket align with the slots on
the assembly. 4. Remove the bulb from the socket
by pressing it in and rotating it until
the tabs on the bulb align with the
slots in the socket. Pull the bulb
out of the socket.
5. Insert a new bulb by inserting it into the socket and rotating it until
it locks into place.
6. Install the socket in the assembly by aligning the tabs on the socket
with the slots in the assembly.
Push the socket into the assembly
and turn the socket clockwise.
7. Replace the service cover and tighten the screws. High mounted stop light bulb replacement
Ty p e A
If the light bulb is not operating, have
the vehicle checked by an authorized
Kia Dealer.
Ty p e B
1. Open the trunk lid.
OLD056037OLD056036
Type A