Page 298 of 327

735
Maintenance
1 23456789
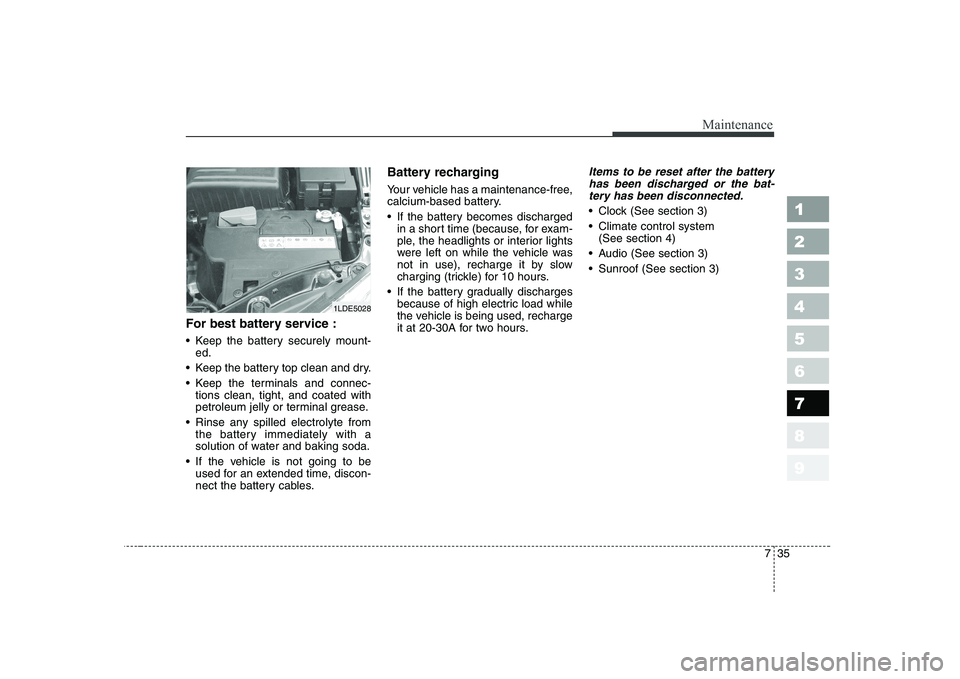
For best battery service :
Keep the battery securely mount-ed.
Keep the battery top clean and dry.
Keep the terminals and connec- tions clean, tight, and coated with
petroleum jelly or terminal grease.
Rinse any spilled electrolyte from the battery immediately with a
solution of water and baking soda.
If the vehicle is not going to be used for an extended time, discon-
nect the battery cables. Battery recharging
Your vehicle has a maintenance-free,
calcium-based battery.
If the battery becomes discharged
in a short time (because, for exam-
ple, the headlights or interior lights
were left on while the vehicle was
not in use), recharge it by slow
charging (trickle) for 10 hours.
If the battery gradually discharges because of high electric load while
the vehicle is being used, recharge
it at 20-30A for two hours.
Items to be reset after the battery
has been discharged or the bat-tery has been disconnected.
Clock (See section 3)
Climate control system (See section 4)
Audio (See section 3)
Sunroof (See section 3)
1LDE5028
Page 303 of 327

Maintenance
40
7
1 23456789
Wheel replacement
When replacing the metal wheels for
any reason, make sure the new
wheels are equivalent to the original
factory units in diameter, rim widthand offset.WARNING
When replacing tires, never mix radial, bias-belted, and
bias-type tires. All four tires
should be of the same size,
design and construction. Use
only the tire sizes listed on the
Tire Label found below the
door striker on the driver’s
side. Make sure that all tires
and wheels are the same size
and have the same load-carry-
ing capacity. Use only tire andwheel combinations recom-
mended on the Tire Label or
by an Authorized Kia Dealer.
Failure to follow these precau-
tions can adversely affect the
safety and handling of your
vehicle.
(Continued)(Continued)
The use of any other tire sizeor type may seriously affect
ride, handling, ground clear-
ance, tire clearance, andspeedometer calibration.
Driving on worn-out tires is very hazardous and will
reduce braking effectiveness,
steering accuracy, and trac-tion.
It is best to replace all four tires at the same time. If that is
not possible, or necessary,
then replace the two front or
two rear tires as a pair.Replacing just one tire can
seriously affect your vehicle’shandling.
WARNING
A wheel that is not the correct
size may adversely affect wheel
and bearing life, braking and
stopping abilities, handling
characteristics, ground clear-
ance, body-to-tire clearance,
snow chain clearance,
speedometer calibration, head-
light aim and bumper height.
Page 307 of 327

Maintenance
44
7
1 23456789
BULB REPLACEMENT
Use only the bulbs of the specified
wattage.
✽✽ NOTICE
If you don’t have necessary tools,
the correct bulbs and the expertise,
consult an Authorized Kia Dealer. In
many cases, it is difficult to replacevehicle light bulbs because other
parts of the vehicle must be removed
before you can get to the bulb. Thisis especially true if you have to
remove the front bumper to get tothe bulb(s). Removing/installing the
front bumper or bumper hardware
can result in damage to the vehicle.
✽
✽ NOTICE
After heavy, driving rain or washing, headlight and taillight lenses could
appear frosty. This condition is
caused by the temperature differencebetween the lamp inside and outside.
This is similar to the condensation on
your windows inside your vehicleduring the rain and doesn’t indicate
a problem with your vehicle. If the
water leaks into the lamp bulb cir-
cuitry, have the vehicle checked by
an Authorized Kia Dealer.
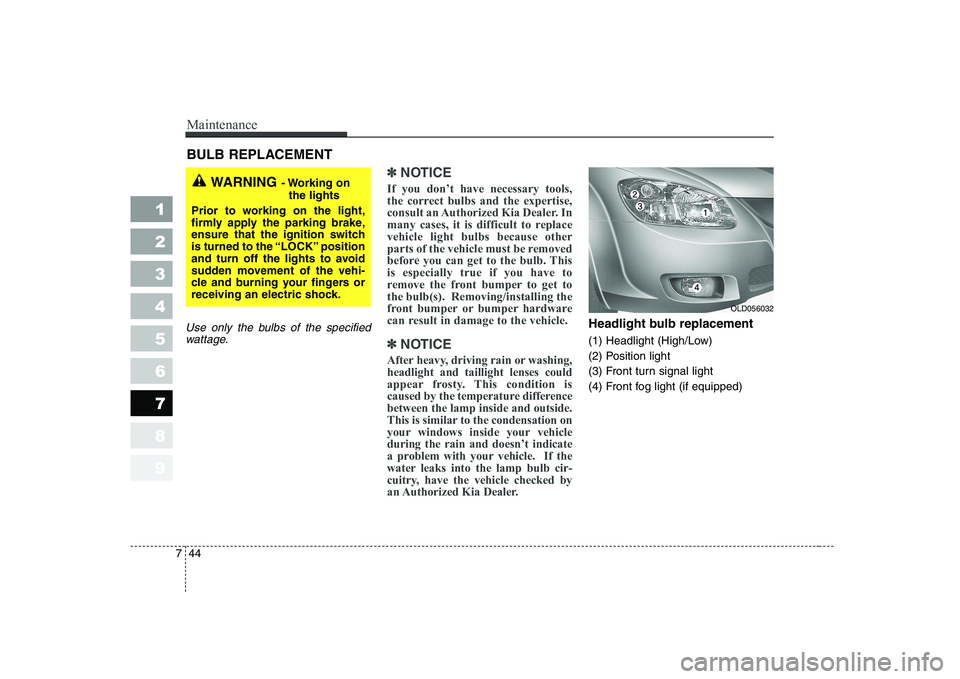
Headlight bulb replacement
(1) Headlight (High/Low)
(2) Position light
(3) Front turn signal light
(4) Front fog light (if equipped)
WARNING - Working on
the lights
Prior to working on the light,
firmly apply the parking brake,
ensure that the ignition switch
is turned to the “LOCK” position
and turn off the lights to avoid
sudden movement of the vehi-
cle and burning your fingers or
receiving an electric shock.
OLD056032
Page 308 of 327
745
Maintenance
1 23456789
1. Open the hood.
2. Remove the headlight bulb coverby turning it counterclockwise.
3. Disconnect the headlight bulb socket-connector.
4. Unsnap the headlight bulb retain- ing wire by depressing the end
and pushing it upward.
5. Remove the bulb from the head- light assembly.
WARNING - Halogen bulbs
Halogen bulbs contain pres-
surized gas that will produce
flying pieces of glass if broken.
Always handle them carefully, and avoid scratches and abra-
sions. If the bulbs are lit, avoid
contact with liquids. Never
touch the glass with bare
hands. Residual oil may cause
the bulb to overheat and burst
when lit. A bulb should be
operated only when installedin a headlight.
(Continued)
(Continued)
If a bulb becomes damaged orcracked, replace it immediate-
ly and carefully dispose of it.
Wear eye protection when changing a bulb. Allow the
bulb to cool down before han-dling it.
1LDA50301LDA7048
Page 309 of 327

Maintenance
46
7
1 23456789
6. Install a new headlight bulb and
snap the headlight bulb retaining
wire into position by aligning the
wire with the groove on the bulb.
7. Connect the headlight bulb socket- connector.
8. Install the headlight bulb cover by turning it clockwise.
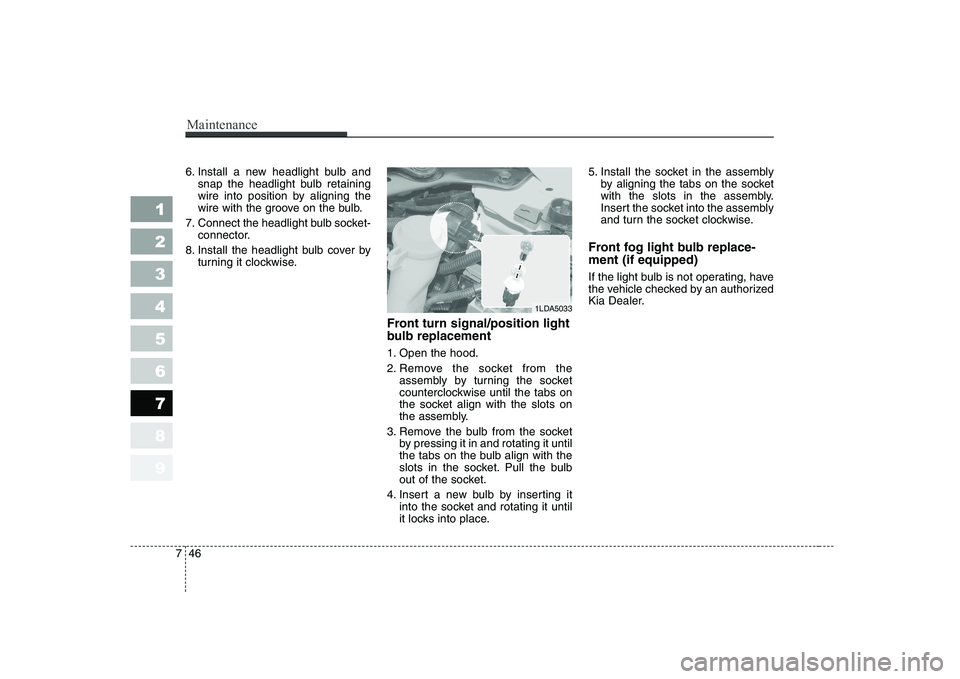
Front turn signal/position light
bulb replacement
1. Open the hood.
2. Remove the socket from theassembly by turning the socket
counterclockwise until the tabs on
the socket align with the slots on
the assembly.
3. Remove the bulb from the socket by pressing it in and rotating it until
the tabs on the bulb align with the
slots in the socket. Pull the bulb
out of the socket.
4. Insert a new bulb by inserting it into the socket and rotating it until
it locks into place. 5. Install the socket in the assembly
by aligning the tabs on the socket
with the slots in the assembly.
Insert the socket into the assembly
and turn the socket clockwise.
Front fog light bulb replace- ment (if equipped)
If the light bulb is not operating, have
the vehicle checked by an authorized
Kia Dealer.
1LDA5033
Page 310 of 327
747
Maintenance
1 23456789
Interior lights bulb replace- ment
1. Using a flat-blade screwdriver,gently pry the lens from the interi- or light housing.
2. Remove the bulb by pulling it straight out.
3. Install a new bulb in the socket.
4. Align the lens tabs with the interior light housing notches and snap
the lens into place.
CAUTION
Prior to working on the Interior
Lights, ensure that the “OFF”button is depressed to avoid burning your fingers or receiv-ing an electric shock.
1LDE5041
1LDA5041
Trunk room lamp (4 Door)
1LDA5039Trunk room lamp (5 Door)
1LDA5040
Center dome lamp
Front map lamp
Page 311 of 327
Maintenance
48
7
1 23456789
License plate lights bulb replacement
1. Loosen the lens retaining screws
with a cross-tip screwdriver.
2. Remove the lens.
3. Remove the bulb by pulling it straight out.
4. Install a new bulb.
5. Reinstall the lens securely with the lens retaining screws. Rear combination light bulb replacement (1) Stop and tail light
(2) Rear turn signal light
(3) Back-up light
1. Open the trunk lid or rear hatch.
2. Remove the service cover by turn-
ing the plastic screw counterclock-
wise and removing the cover.
1LDA5043OLD056035OLD056034
Page 312 of 327
749
Maintenance
1 23456789
3. Remove the socket from theassembly by turning the socket
counterclockwise until the tabs on
the socket align with the slots on
the assembly. 4. Remove the bulb from the socket
by pressing it in and rotating it until
the tabs on the bulb align with the
slots in the socket. Pull the bulb
out of the socket.
5. Insert a new bulb by inserting it into the socket and rotating it until
it locks into place.
6. Install the socket in the assembly by aligning the tabs on the socket
with the slots in the assembly.
Push the socket into the assembly
and turn the socket clockwise.
7. Replace the service cover and tighten the screws. High mounted stop light bulb replacement
Ty p e A
If the light bulb is not operating, have
the vehicle checked by an authorized
Kia Dealer.
Ty p e B
1. Open the trunk lid.
OLD056037OLD056036
Type A