Page 3 of 438
TABLE OF CONTENTSSECTIONPAGE
1INTRODUCTION.............................................................3
2THINGS TO KNOW BEFORE STARTING YOUR VEHICLE...............................9
3UNDERSTANDING THE FEATURES OF YOUR VEHICLE...............................73
4UNDERSTANDING YOUR INSTRUMENT PANEL................................... 167
5STARTING AND OPERATING................................................. 235
6WHAT TO DO IN EMERGENCIES...............................................331
7MAINTAINING YOUR VEHICLE............................................... 345
8MAINTENANCE SCHEDULES.................................................. 399
9IF YOU NEED CONSUMER ASSISTANCE..........................................407
10INDEX....................................................................417
1
2
3
4
5
6
7
8
9
10
Page 182 of 438

U.S. Federal regulations require that upon transfer of
vehicle ownership, the seller certify to the purchaser the
correct mileage that the vehicle has been driven. There-
fore, if the odometer reading is changed during repair or
replacement, be sure to keep a record of the reading
before and after the service so that the correct mileage can
be determined.
Change Oil Message
Your vehicle is equipped with an engine oil change
indicator system. The “Change Oil” message will flash in
the instrument cluster odometer for approximately 12
seconds after a single chime has sounded to indicate the
next scheduled oil change interval. The engine oil change
indicator system is duty cycle based, which means the
engine oil change interval may fluctuate dependent upon
your personal driving style. Unless reset, this message
will continue to display each time you turn the ignition
switch to the ON/RUN position. To turn off the messagetemporarily, press and release the Trip Odometer button
on the instrument cluster. To reset the oil change indica-
tor system (after performing the scheduled maintenance)
refer to the following procedure.
1. Turn the ignition switch to the ON position.Do not
start the engine.
2. Fully depress the accelerator pedal slowly three
times within 10 seconds.
3. Turn the ignition switch to the OFF/LOCK position.
NOTE:If the indicator message illuminates when you
start the vehicle, the oil change indicator system did not
reset. If necessary repeat this procedure.
25. OFF ROAD Indicator Light — If Equipped
The symbol illuminates (is armed) when the 4WD lock
switch is activated and the transmission range indicator
is in LOW or REVERSE position.
180 UNDERSTANDING YOUR INSTRUMENT PANEL
Page 187 of 438
cluster. To reset the oil change indicator system (after
performing the scheduled maintenance) refer to the fol-
lowing procedure.
1. Turn the ignition switch to the ON position.Do not
start the engine.
2. Fully depress the accelerator pedal, slowly, three times
within 10 seconds.
3. Turn the ignition switch to the OFF/LOCK position.
NOTE:If the indicator message illuminates when you
start the vehicle, the oil change indicator system did not
reset. If necessary repeat this procedure.EVIC Functions
Press the EVIC button until one of the following func-
tions is displayed on the EVIC:
•Compass/Temperature/Audio
•Average Fuel Economy
EVIC Button
UNDERSTANDING YOUR INSTRUMENT PANEL 185
4
Page 233 of 438

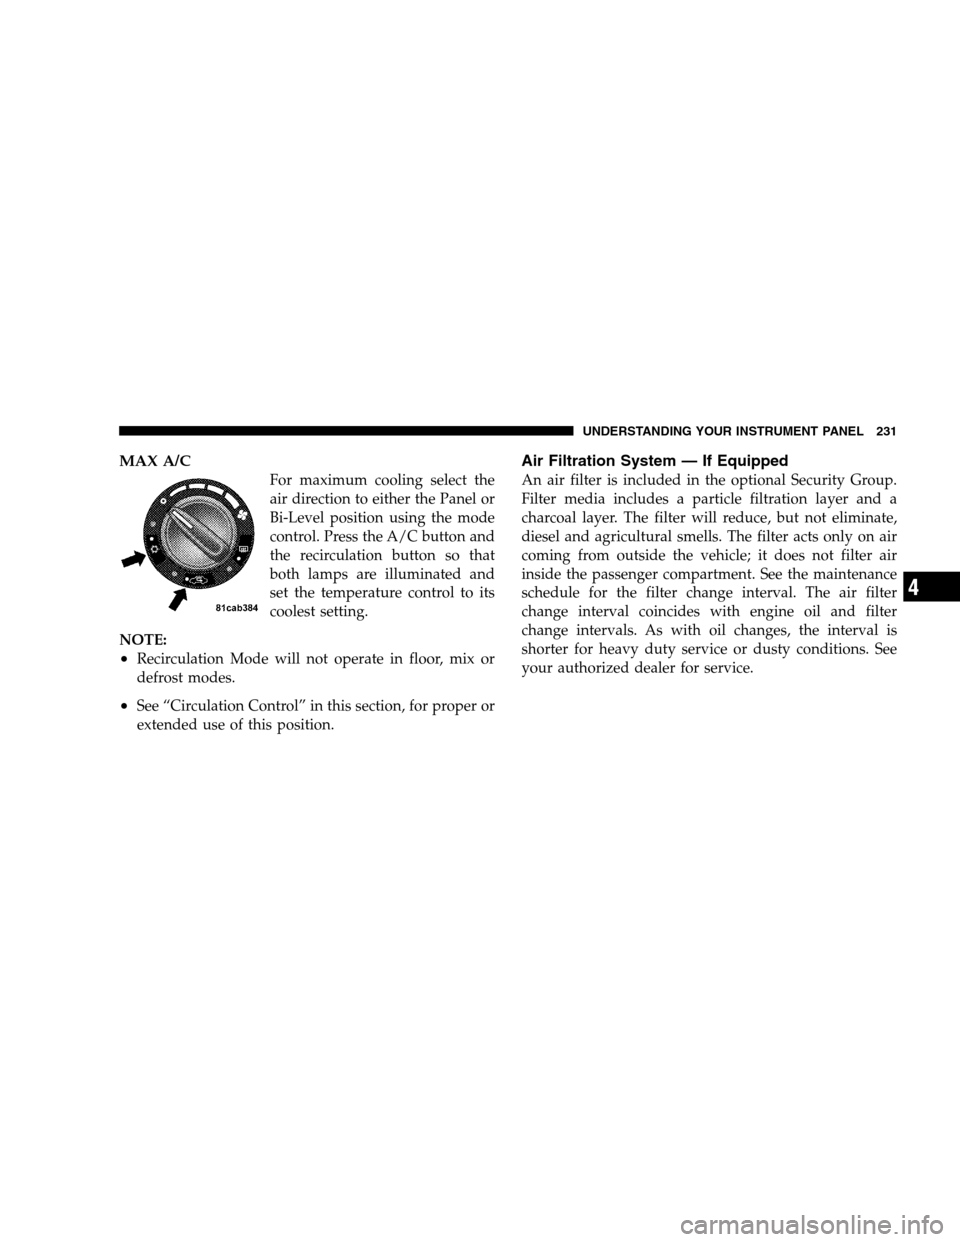
MAX A/C
For maximum cooling select the
air direction to either the Panel or
Bi-Level position using the mode
control. Press the A/C button and
the recirculation button so that
both lamps are illuminated and
set the temperature control to its
coolest setting.
NOTE:
•Recirculation Mode will not operate in floor, mix or
defrost modes.
•See “Circulation Control” in this section, for proper or
extended use of this position.
Air Filtration System — If Equipped
An air filter is included in the optional Security Group.
Filter media includes a particle filtration layer and a
charcoal layer. The filter will reduce, but not eliminate,
diesel and agricultural smells. The filter acts only on air
coming from outside the vehicle; it does not filter air
inside the passenger compartment. See the maintenance
schedule for the filter change interval. The air filter
change interval coincides with engine oil and filter
change intervals. As with oil changes, the interval is
shorter for heavy duty service or dusty conditions. See
your authorized dealer for service.
UNDERSTANDING YOUR INSTRUMENT PANEL 231
4
Page 303 of 438

type tires. Rotation will increase tread life, help to main-
tain mud, snow, and wet traction levels and contribute to
a smooth, quiet ride.
Follow the recommended tire rotation frequency for your
type of driving found in the “Maintenance Schedules”
Section of this manual. More frequent rotation is permis-
sible, if desired. The reason(s) for any rapid or unusual
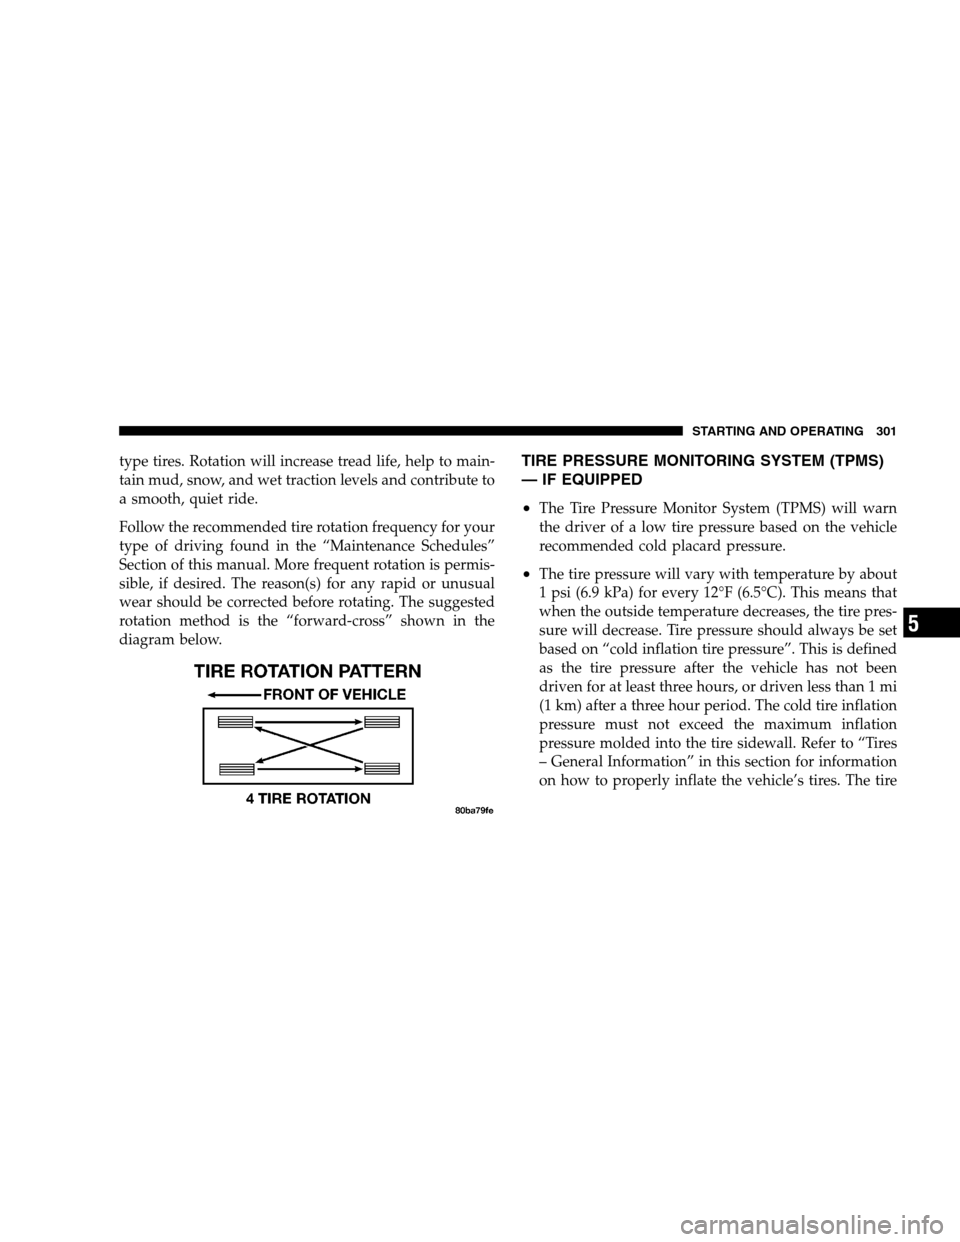
wear should be corrected before rotating. The suggested
rotation method is the “forward-cross” shown in the
diagram below.TIRE PRESSURE MONITORING SYSTEM (TPMS)
— IF EQUIPPED
•
The Tire Pressure Monitor System (TPMS) will warn
the driver of a low tire pressure based on the vehicle
recommended cold placard pressure.
•The tire pressure will vary with temperature by about
1 psi (6.9 kPa) for every 12°F (6.5°C). This means that
when the outside temperature decreases, the tire pres-
sure will decrease. Tire pressure should always be set
based on “cold inflation tire pressure”. This is defined
as the tire pressure after the vehicle has not been
driven for at least three hours, or driven less than 1 mi
(1 km) after a three hour period. The cold tire inflation
pressure must not exceed the maximum inflation
pressure molded into the tire sidewall. Refer to “Tires
– General Information” in this section for information
on how to properly inflate the vehicle’s tires. The tire
STARTING AND OPERATING 301
5
Page 325 of 438
NOTE:Remember that everything put into or on the
trailer adds to the load on your vehicle. Also, additional
factory-installed options, or authorized dealer-installed
options, must be considered as part of the total load on
your vehicle. Refer to the Tire and Loading Information
placard in the Tire Safety Information Section of this
manual for the maximum combined weight of occupants
and cargo for your vehicle.
Towing Requirements
To promote proper break-in of your vehicle drivetrain
components, the following guidelines are recommended:
CAUTION!
•Avoid towing a trailer for the first 500 mi (805 km)
of vehicle operation. Doing so may damage your
vehicle.
•During the first 500 mi (805 km) of trailer towing,
limit your speed to 50 mph (80 km/h).
Perform the maintenance listed in the “Maintenance
Schedule.” Refer to Section 8 of this manual. When
towing a trailer, never exceed the GAWR, or GCWR,
ratings.
STARTING AND OPERATING 323
5
Page 330 of 438

Towing Tips — Automatic Transmission
The automatic transmission fluid and filter should be
changed if you REGULARLY tow a trailer for more than
45 minutes of continuous operation. Refer to the “Main-
tenance Schedule” in Section 8 for transmission fluid
change intervals.
NOTE:Check the automatic transmission fluid level
before towing.
Towing Tips — Electronic Speed Control (If
Equipped)
�
Don’t use in hilly terrain or with heavy loads.
�When using the speed control, if you experience speed
drops greater than 10 mph (16 km/h), disengage until
you can get back to cruising speed.
�Use speed control in flat terrain and with light loads to
maximize fuel efficiency.
Towing Tips — Cooling System
To reduce the potential for engine and transmission
overheating, take the following actions:
�City Driving
When stopped for short periods of time, put transmission
in NEUTRAL but do not increase engine idle speed.
�Highway Driving
Reduce speed.
�Air Conditioning
Turn off temporarily.
�refer to Cooling System Operating information in the
Maintenance section of this manual for more informa-
tion.
328 STARTING AND OPERATING
Page 353 of 438

5. Approximately 15 seconds later, one of two things will
happen:
a. The MIL will flash for about 10 seconds and then
return to being fully illuminated until you turn OFF
the ignition key or start the engine. This means that the
vehicle’s OBD II system isnot readyand you should
notproceed to the I/M station.
b. The MIL will not flash at all and will remain fully
illuminated until you turn OFF the ignition key or start
the engine. This means that the vehicle’s OBD II
system isready,and you can proceed to the I/M
station.
If the OBD II system isnot ready,you should see an
authorized dealer or repair facility. If this vehicle was
recently serviced or had a battery failure or replacement,
you may need to do nothing more than drive the vehicleas you normally would in order for the OBD II system to
update. A recheck with the above test routine may then
indicate that the system is now ready.
Regardless of whether the vehicle’s OBD II system is
ready or not ready, if the MIL is illuminated during
normal vehicle operation, you should have the vehicle
serviced before going to the I/M station. The I/M station
can fail the vehicle because the MIL is on with the engine
running.
REPLACEMENT PARTS
The use of genuine Mopar�parts for normal/scheduled
maintenance and repairs is highly recommended to en-
sure the designed performance. Damage or failures
caused by the use of non-Mopar�parts for maintenance
and repairs will not be covered by the manufacturer’s
warranty.
MAINTAINING YOUR VEHICLE 351
7