2008 JEEP GRAND CHEROKEE center console
[x] Cancel search: center consolePage 113 of 490

WARNING!
Persons who are unable to feel pain to the skin
because of advanced age, chronic illness, diabetes,
spinal cord injury, medication, alcohol use, exhaus-
tion or other physical condition must exercise care
when using the seat heater. It may cause burns even
at low temperatures, especially if used for long
periods of time.
Do not place anything on the seat that insulates
against heat, such as a blanket or cushion. This may
cause the seat heater to overheat.
Rear Heated Seats Ð If Equipped
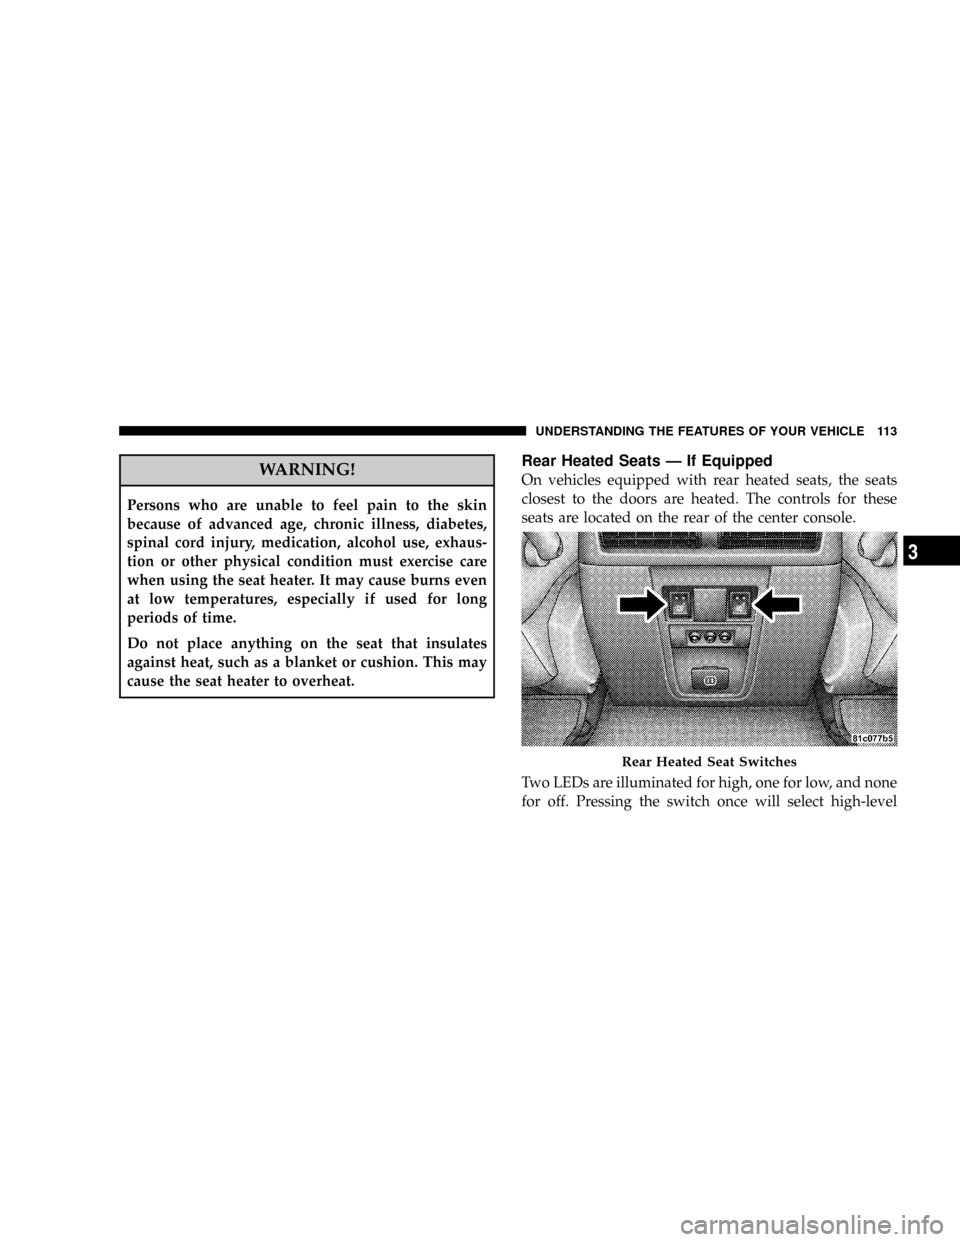
On vehicles equipped with rear heated seats, the seats
closest to the doors are heated. The controls for these
seats are located on the rear of the center console.
Two LEDs are illuminated for high, one for low, and none
for off. Pressing the switch once will select high-level
Rear Heated Seat Switches
UNDERSTANDING THE FEATURES OF YOUR VEHICLE 113
3
Page 126 of 490

To Activate
1. Select ªAuto Headlamp Low/High Beams? Ð Low/
High Beam.º Refer to ªEVIC Ð Customer Programmable
Featuresº in Section 4 of this manual.
2. Turn the end of the multi-function control lever to the
A (Auto) headlight position.
3. Push the multi-function control lever away from you
(toward front of vehicle) to engage the high beam mode.
NOTE:This system will not activate until the vehicle is
at or above 20 mph (32 km/h).
To Deactivate
1. Pull back on the muti-function control lever to manu-
ally deactivate the system (normal operation of low
beams).
2. Push back on the multi-function control lever once
again to re-activate the system.NOTE:Broken, muddy, or obstructed headlights and
taillights of vehicles in the field of view will cause
headlights to remain on longer (closer to the vehicle).
Also, dirt, film, and other obstructions (sticker, toll box,
etc.) on the windshield or camera lens will cause the
system to function improperly.
Instrument Panel and Interior Lights
When the multi-function control lever is in the parklight,
headlight, or A (Auto) position (if equipped), rotating the
center portion of the lever up and down will increase and
decrease the brightness (dimmer control) of the instru-
ment panel lights. Full daytime brightness on all elec-
tronic displays (odometer, overhead console, radio, and
Automatic Climate Control (if equipped) is obtained by
rotating the center portion of the control to the first
detent above the dimmer range. Rotating the control to
the second detent above the dimmer range turns the
interior lights on. Rotating the control to the ªOffº
(extreme bottom) position disables all the interior lights,
126 UNDERSTANDING THE FEATURES OF YOUR VEHICLE
Page 129 of 490

Interior Lights
The interior lighting consists of courtesy lights mounted
below the instrument panel, an overhead console light
assembly which contains both driver and passenger
reading lights, reading lights located above the rear
doors, and a rear cargo light. Opening a door or turning
the center of the multi-function control lever to the
extreme up position will activate all interior courtesy
lights.
Front Map/Reading Lights
These lights are mounted in the overhead console. Each
light can be turned on by pressing the recessed area of the
lens. To turn these lights off, press the recessed area of the
lens a second time. There are also reading lights located
above the rear doors. Each light can be turned on by
pressing the front recessed area of the lens. To turn these
lights off, press the recessed area of the lens a second
time.
WINDSHIELD WIPERS AND WASHERS
The front and rear wipers and washers are operated by a
switch in the right side control lever. Turn the end of the
control lever to select ªLo,º ªHi,º or one of the five speed
sensitive intermittent windshield wiper speeds. Refer to
ªSpeed Sensitive Intermittent Wiper Systemº in this
Front Map/Reading Lights
UNDERSTANDING THE FEATURES OF YOUR VEHICLE 129
3
Page 169 of 490

CAUTION!
Electrical Outlet Use With Engine Off
²Many accessories that can be plugged in draw
power from the vehicle's battery, even when not in
use (i.e., cellular phones, etc.). Eventually, if
plugged in long enough, the vehicle's battery will
discharge sufficiently to degrade battery life
and/or prevent engine starting.
²Accessories that draw higher power (i.e., coolers,
vacuum cleaners, lights, etc.) will degrade the
battery even more quickly. Only use these inter-
mittently and with greater caution.
²After the use of high power draw accessories, or
long periods of the vehicle not being started (with
accessories still plugged in), the vehicle must be
driven a sufficient length of time to allow the
generator to recharge the vehicle's battery.
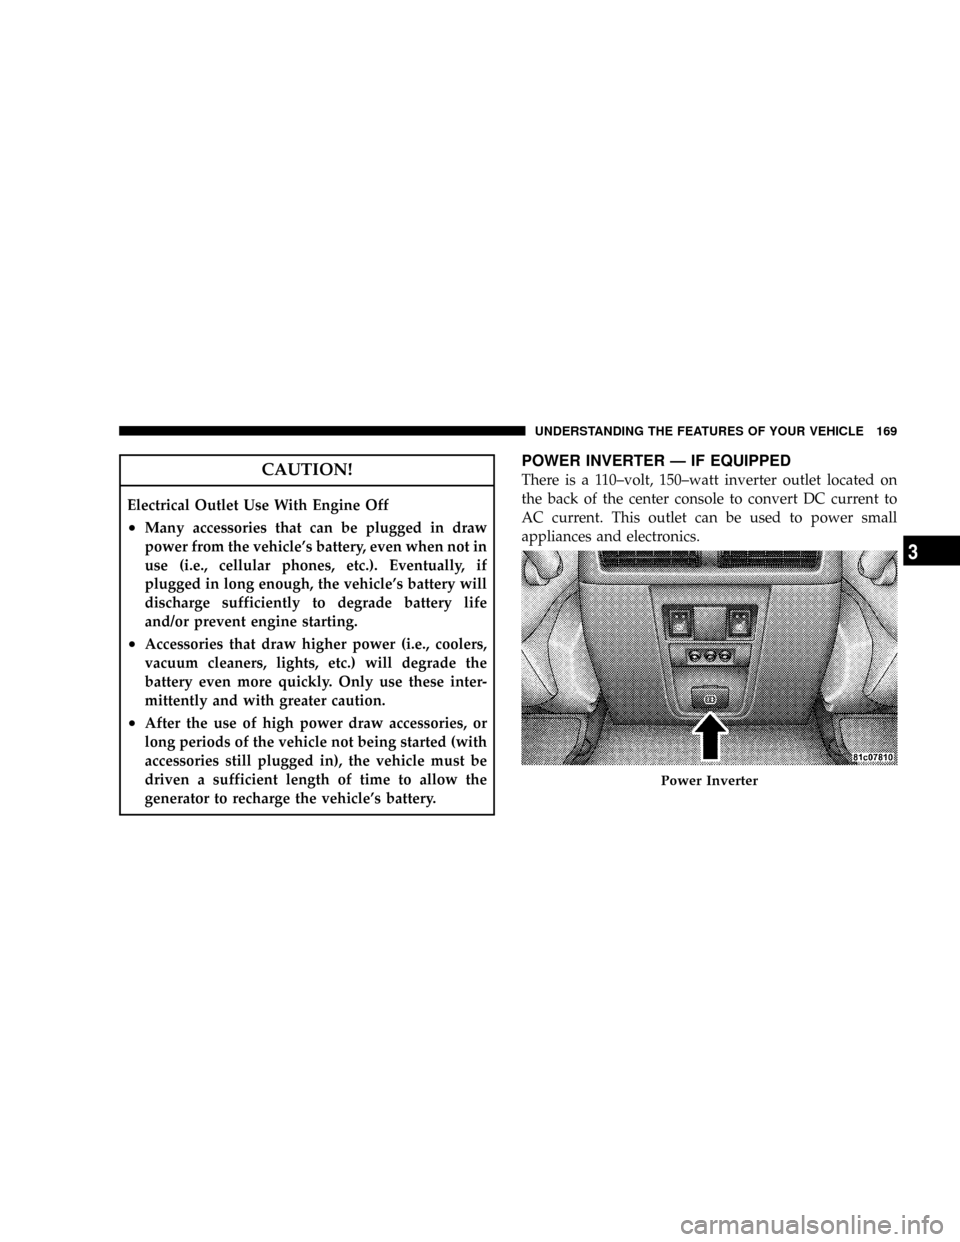
POWER INVERTER Ð IF EQUIPPED
There is a 110±volt, 150±watt inverter outlet located on
the back of the center console to convert DC current to
AC current. This outlet can be used to power small
appliances and electronics.
Power Inverter
UNDERSTANDING THE FEATURES OF YOUR VEHICLE 169
3
Page 171 of 490

CUP HOLDERS
In the center console there are two cup holders for the
front seat passengers.
NOTE:The cup holder insert is removable, from the
console, for cleaning. It can be reinstalled with the largercup depression towards the passenger seat, but the top
surface will not be flush with the console surface.
The rear passengers have access to two cup holders that
pull out from the lower center of the rear seat.
Front Cup Holders
Rear Cup Holders
UNDERSTANDING THE FEATURES OF YOUR VEHICLE 171
3
Page 260 of 490

side window demister grilles. Some airflow is delivered
to the floor while in defrost so that comfort can be
maintained.
Floor
Air flows through the floor outlets located under
the instrument panel and into the rear seating area
through vents under the front seats. Some airflow is
delivered to defrost while in the floor mode so that
comfort can be maintained.
Bi-Level
Air flows both through the outlets located in the
instrument panel and those located on the floor. Air
flows through the registers in the back of the center
console, and under the front seats to the rear seat
passengers. These registers can be closed to partially
block airflow. The center console outlets deliver condi-
tioned air while the floor outlets deliver heated air.Panel
Air flows through the outlets located in the instru-
ment panel. Air flows through the registers in the
back of the center console to the rear seat passengers.
These registers can be closed to block airflow.
Recirculation
The recirculation feature can be selected with
the mode control knob. You may choose be-
tween Bi-Level Recirculation and Panel Recir-
culation air outlets while in this mode. Nor-
mally, air enters from outside the vehicle. However, when
in Recirculation mode air inside the vehicle is re-used.
Use this mode to rapidly cool the inside of the vehicle.
The Recirculation mode can also be used to temporarily
block out outside odors, smoke, and dust.
Air Conditioning Operation
To turn on the Air Conditioning, set the fan control
at any speed and press the snowflake button
260 UNDERSTANDING YOUR INSTRUMENT PANEL
Page 267 of 490

Air flows through the registers in the back of the
center console, and under the front seats to the rear
seat passengers. These registers can be closed to block
airflow. The center console outlets deliver conditioned
air while the floor outlets deliver heated air.
²Panel
Air flows through the outlets located in the in-
strument panel. Air flows through the registers in
the back of the center console to the rear seat passen-
gers. These registers can be closed to block airflow.
Depress this button to turn on and off the air
conditioning during manual operation only. Con-
ditioned outside air is then directed through the
outlets selected on the mode control dial. The button
includes an LED that illuminates when manual operation
is selected.
NOTE:To manually control the air conditioning the
mode selector must be moved out of the AUTO position.This button can be used to block out smoke,
odors, dust, high humidity, or if rapid cooling
is desired. The recirculation mode should only
be used temporarily. The button includes an
LED that illuminates, which indicates that the recircula-
tion mode is active. You may use this feature separately.
NOTE:Extended use of recirculation may cause the
windows to fog. If the interior of the windows begins to
fog, press the ªRecirculateº icon button to return to
outside air. Some temp./humidity conditions will cause
captured interior air to condense on windows and ham-
per visibility. For this reason, the system will not allow
ªRecirculateº to be selected while in the defrost or
defrost/floor modes. Attempting to use the recirculation
while in these modes will cause the LED in the button to
blink and then turn off.
UNDERSTANDING YOUR INSTRUMENT PANEL 267
4
Page 472 of 490

Cargo Area Features...................... 172
Cargo Compartment...................... 172
Light............................... 172
Luggage Carrier....................... 179
Cargo Light............................ 172
Cargo Load Floor........................ 176
Cargo Tie-Downs........................ 174
Catalytic Converter...................... 399
CD (Compact Disc) Player................. 241
Cellular Phone.......................... 81
Center High Mounted Stop Light............ 439
Certification Label....................... 348
Chains, Tire............................ 325
Changing A Flat Tire..................... 372
Chart, Tire Sizing........................ 311
Checks, Safety.........................69,70
Child Restraint....................58,59,63,65
Child Restraint Tether Anchors.............62,63
Child Safety Locks........................ 30Climate Control......................... 258
Clock........................215,230,242,244
Cold Weather Operation................... 276
Compact Disc (CD) Maintenance............. 257
Compass.............................. 204
Compass Calibration..................... 205
Compass Variance....................... 205
Computer, Trip/Travel.................... 201
Connector
UCI ................................ 246
Universal Consumer Interface (UCI)......... 246
Console, Overhead....................... 157
Contract, Service........................ 462
Converter, Catalytic...................... 399
Cooling System......................... 407
Adding Coolant (Antifreeze).............. 409
Coolant Capacity...................... 440
Coolant Level......................... 410
Disposal of Used Coolant................ 410
472 INDEX