2008 Hyundai Tiburon fuel
[x] Cancel search: fuelPage 64 of 268
1FEATURES OF YOUR HYUNDAI52
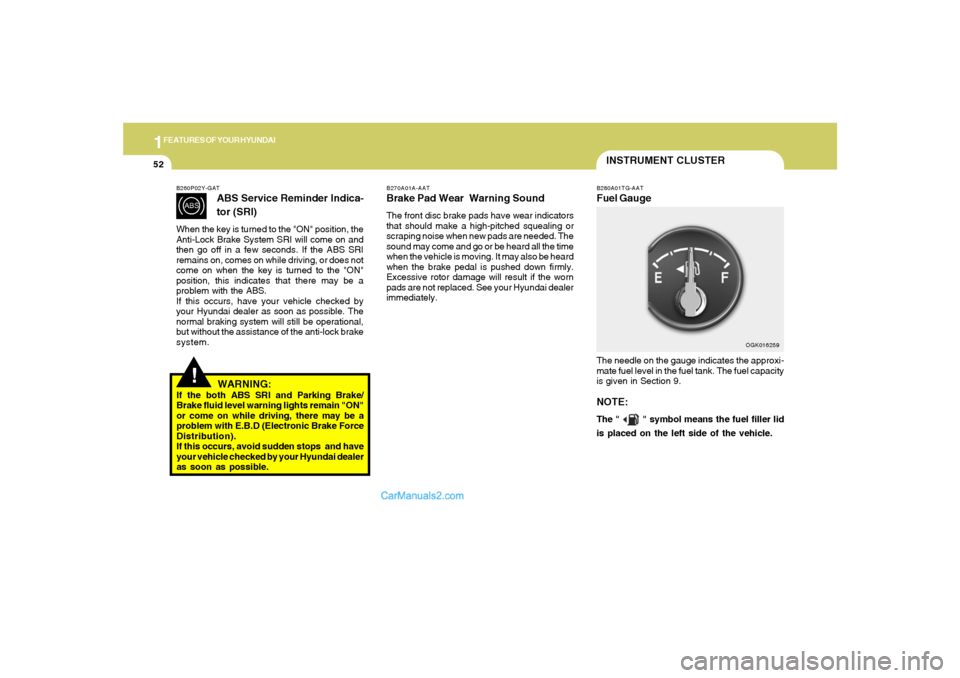
INSTRUMENT CLUSTERB280A01TG-AATFuel GaugeThe needle on the gauge indicates the approxi-
mate fuel level in the fuel tank. The fuel capacity
is given in Section 9.NOTE:The "
" symbol means the fuel filler lid
is placed on the left side of the vehicle.
OGK016259 B270A01A-AAT
Brake Pad Wear Warning SoundThe front disc brake pads have wear indicators
that should make a high-pitched squealing or
scraping noise when new pads are needed. The
sound may come and go or be heard all the time
when the vehicle is moving. It may also be heard
when the brake pedal is pushed down firmly.
Excessive rotor damage will result if the worn
pads are not replaced. See your Hyundai dealer
immediately.
!
B260P02Y-GAT
ABS Service Reminder Indica-
tor (SRI)
When the key is turned to the "ON" position, the
Anti-Lock Brake System SRI will come on and
then go off in a few seconds. If the ABS SRI
remains on, comes on while driving, or does not
come on when the key is turned to the "ON"
position, this indicates that there may be a
problem with the ABS.
If this occurs, have your vehicle checked by
your Hyundai dealer as soon as possible. The
normal braking system will still be operational,
but without the assistance of the anti-lock brake
system.
WARNING:
If the both ABS SRI and Parking Brake/
Brake fluid level warning lights remain "ON"
or come on while driving, there may be a
problem with E.B.D (Electronic Brake Force
Distribution).
If this occurs, avoid sudden stops and have
your vehicle checked by your Hyundai dealer
as soon as possible.
Page 67 of 268

1
FEATURES OF YOUR HYUNDAI
55
TRIP COMPUTERB400B04GK-AAT(If installed)The trip computer is a microcomputer-con-
trolled driver information gauge that displays
information related to driving, such as estimated
distance to empty, average speed and drive
time on the LCD.
Reset Switcho The reset switch is used to zero the multi-
functional display mode.
o Pushing in the reset switch on the left side of
the tachometer changes the display as
follows;
DISTANCE TO EMPTY
AVERAGE SPEED
DRIVE TIME
OGK016400N
Type A
Type B
1. Distance to Emptyo This mode provides the estimated distance
to empty from the current fuel level in the fuel
tank.
o The trip computer may not register additional
fuel if less than 1.36 gallons (6 liters) of fuel
are added to the vehicle.
o When the battery has been reinstalled after
being discharged or disconnected, drive
more than 20 miles (32km) for an accurate
distance to empty.
OGK016401N
Type A
Type B
Page 68 of 268

1FEATURES OF YOUR HYUNDAI56
3. Drive Timeo This mode indicates the drive time travelled
since the last drive time reset.
o To reset the drive time to zero, press and
hold the reset switch for more than 1 second
while the drive time is being displayed.
OGK016403N
Type A
Type B
o When the distance to empty is less than 31
miles (50 km), the symbol will always come
on and the distance to empty digits will
indicate "---" with flash until more fuel is
added.NOTE:o The distance to empty can differ from
the actual tripmeter according to driving
conditions.
o The distance to empty can vary accord-
ing to the driving conditions, driving
pattern or vehicle speed.
OGK016402N
Type A
Type B
2. Average Speedo This mode indicates the average speed
travelled since the last average speed reset.
o To reset the average speed to zero, press
and hold the reset switch for more than 1
second while the average speed is being
displayed.
OGK046033N
Type A
Type B
Page 69 of 268
1
FEATURES OF YOUR HYUNDAI
57
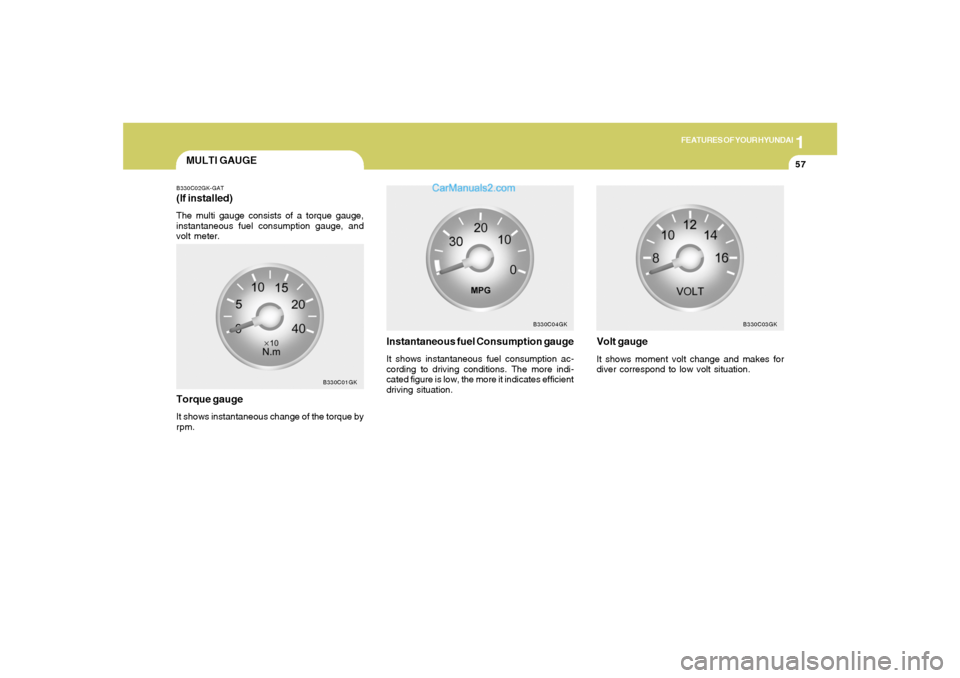
MULTI GAUGEB330C02GK-GAT(If installed)The multi gauge consists of a torque gauge,
instantaneous fuel consumption gauge, and
volt meter.
B330C01GK
Torque gaugeIt shows instantaneous change of the torque by
rpm.
Instantaneous fuel Consumption gaugeIt shows instantaneous fuel consumption ac-
cording to driving conditions. The more indi-
cated figure is low, the more it indicates efficient
driving situation.
B330C04GK
Volt gaugeIt shows moment volt change and makes for
diver correspond to low volt situation.
B330C03GK
Page 86 of 268
1FEATURES OF YOUR HYUNDAI74
WARNING:
o Gasoline vapors are dangerous. Before
refueling, always stop the engine and
never smoke or allow sparks and open
flames near the filler area.
o Never operate your vehicle without a
filler cap properly installed, flammable
vapors and gasoline could leak out in
dangerous situations such as a collision
or rollover. If the filler cap must be
replaced, only use genuine Hyundai re-
placement parts.
o After refueling, make sure the fuel cap is
installed securely to prevent fuel spill-
age in the event of an accident.
o Tighten the cap until it clicks, otherwise
the "
"light will illuminate.
!
OGK046014
REMOTE FUEL-FILLER LID
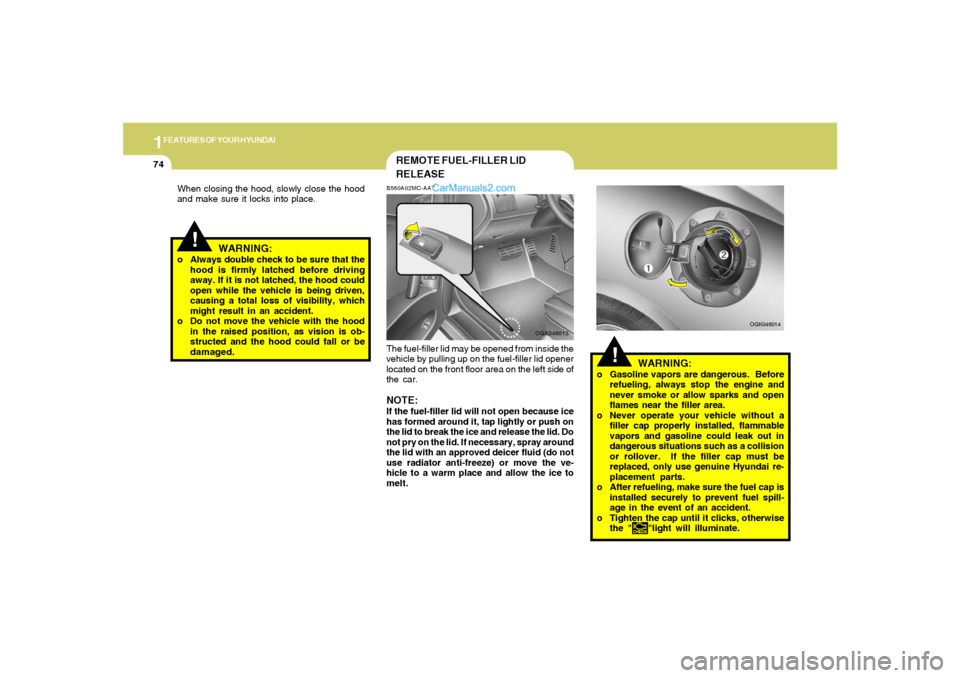
RELEASEB560A02MC-AATThe fuel-filler lid may be opened from inside the
vehicle by pulling up on the fuel-filler lid opener
located on the front floor area on the left side of
the car.NOTE:If the fuel-filler lid will not open because ice
has formed around it, tap lightly or push on
the lid to break the ice and release the lid. Do
not pry on the lid. If necessary, spray around
the lid with an approved deicer fluid (do not
use radiator anti-freeze) or move the ve-
hicle to a warm place and allow the ice to
melt.
OGK046013
!
When closing the hood, slowly close the hood
and make sure it locks into place.
WARNING:
o Always double check to be sure that the
hood is firmly latched before driving
away. If it is not latched, the hood could
open while the vehicle is being driven,
causing a total loss of visibility, which
might result in an accident.
o Do not move the vehicle with the hood
in the raised position, as vision is ob-
structed and the hood could fall or be
damaged.
Page 87 of 268
1
FEATURES OF YOUR HYUNDAI
75
o If you open the fuel filler cap during high
ambient temperatures, a slight "pres-
sure sound" may be heard. This is nor-
mal and not a cause for concern. When-
ever you open the fuel filler cap, turn it
slowly.
o Do not "top off" after the nozzle auto-
matically shuts off when refueling.
o Automotive fuels are flammable/explo-
sive materials. When refueling, please
note the following guidelines carefully.
Failure to follow these guidelines may
result in severe personal injury, severe
burns or death by fire or explosion.
- Before refueling always note the loca-
tion of the Emergency Gasoline Shut-
Off, if available, at the gas station
facility.
- Before touching the fuel nozzle or fuel
filler cap, you should eliminate poten-
tially dangerous static electricity dis-
charge by touching another metal part
of the front of the vehicle, a safe dis-
tance away from the fuel filler neck,
nozzle, or other gas source.
- Do not get back into a vehicle once
you have begun refueling. Do not
touch, rub or slide against any item or
fabric (polyester, satin, nylon, etc.)
!
WARNING:
!
WARNING:
capable of producing static electric-
ity. Static electricity discharge can
ignite fuel vapors resulting in explo-
sion.
If you must re-enter the vehicle, you
should once again eliminate poten-
tially dangerous static electricity dis-
charge by touching a metal part of the
vehicle, away from the fuel filler neck,
nozzle or other gasoline source.
- When using a portable fuel container
be sure to place the container on the
ground prior to refueling. Static elec-
tricity discharge from the container
can ignite fuel vapors causing a fire.
Once refueling has begun, contact
with the vehicle should be maintained
until the filling is complete. Use only
portable fuel containers designed to
carry and store gasoline.
- Do not use cellular phones around a
gas station or while refueling any ve-
hicle. Electric current and/or electronic
interference from cellular phones can
potentially ignite fuel vapors causing
a fire. If you must use your cellular
phone use it in a place away from the
gas station.
!
WARNING:
- When refueling always shut the en-
gine off. Sparks produced by electri-
cal components related to the engine
can ignite fuel vapors causing a fire.
Always insure that the engine is OFF
before and during refueling. Once re-
fueling is complete, check to make
sure the fuel filler cap and door are
securely closed, before starting the
engine.
- Do not light any fire around a gas
station. DO NOT use matches or a
lighter and DO NOT SMOKE or leave a
lit cigarette in your vehicle while at a
gas station especially during refuel-
ing. Automotive fuel is highly flam-
mable and can, when ignited, result in
explosion by flames.
- If a fire breaks out during refueling,
leave the vicinity of the vehicle, and
immediately contact the manager of
the gas station or contact the police
and local fire department. Follow any
safety instructions they provide.
Page 142 of 268
2
DRIVING YOUR HYUNDAI
3
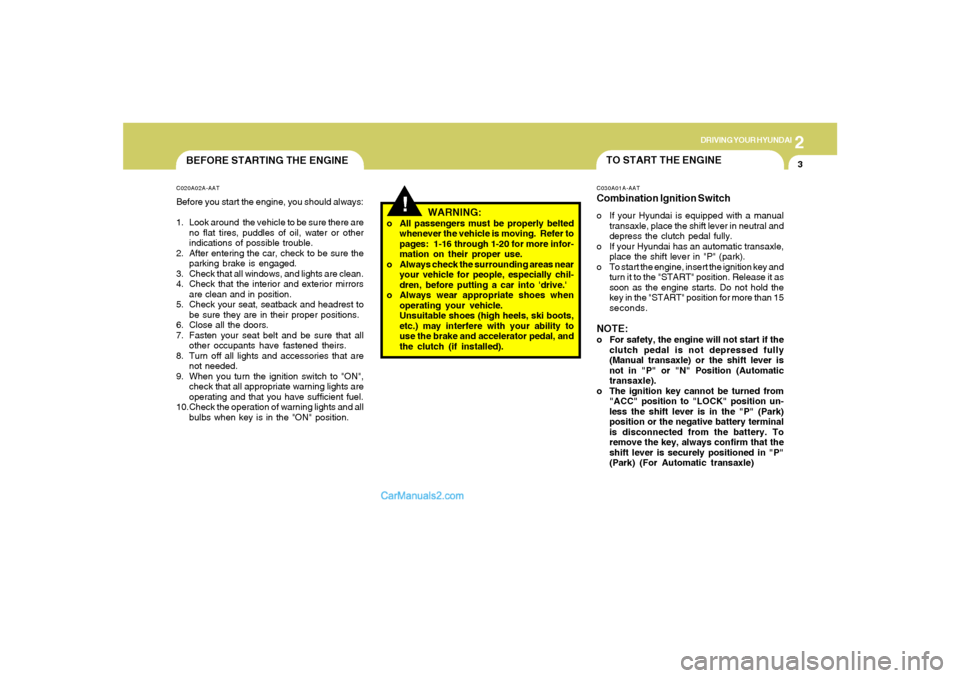
BEFORE STARTING THE ENGINEC020A02A-AATBefore you start the engine, you should always:
1. Look around the vehicle to be sure there are
no flat tires, puddles of oil, water or other
indications of possible trouble.
2. After entering the car, check to be sure the
parking brake is engaged.
3. Check that all windows, and lights are clean.
4. Check that the interior and exterior mirrors
are clean and in position.
5. Check your seat, seatback and headrest to
be sure they are in their proper positions.
6. Close all the doors.
7. Fasten your seat belt and be sure that all
other occupants have fastened theirs.
8. Turn off all lights and accessories that are
not needed.
9. When you turn the ignition switch to "ON",
check that all appropriate warning lights are
operating and that you have sufficient fuel.
10.Check the operation of warning lights and all
bulbs when key is in the "ON" position.
TO START THE ENGINEC030A01A-AATCombination Ignition Switcho If your Hyundai is equipped with a manual
transaxle, place the shift lever in neutral and
depress the clutch pedal fully.
o If your Hyundai has an automatic transaxle,
place the shift lever in "P" (park).
o To start the engine, insert the ignition key and
turn it to the "START" position. Release it as
soon as the engine starts. Do not hold the
key in the "START" position for more than 15
seconds.NOTE:o For safety, the engine will not start if the
clutch pedal is not depressed fully
(Manual transaxle) or the shift lever is
not in "P" or "N" Position (Automatic
transaxle).
o The ignition key cannot be turned from
"ACC" position to "LOCK" position un-
less the shift lever is in the "P" (Park)
position or the negative battery terminal
is disconnected from the battery. To
remove the key, always confirm that the
shift lever is securely positioned in "P"
(Park) (For Automatic transaxle)
!
WARNING:
o All passengers must be properly belted
whenever the vehicle is moving. Refer to
pages: 1-16 through 1-20 for more infor-
mation on their proper use.
o Always check the surrounding areas near
your vehicle for people, especially chil-
dren, before putting a car into 'drive.'
o Always wear appropriate shoes when
operating your vehicle.
Unsuitable shoes (high heels, ski boots,
etc.) may interfere with your ability to
use the brake and accelerator pedal, and
the clutch (if installed).
Page 147 of 268
2
DRIVING YOUR HYUNDAI
8
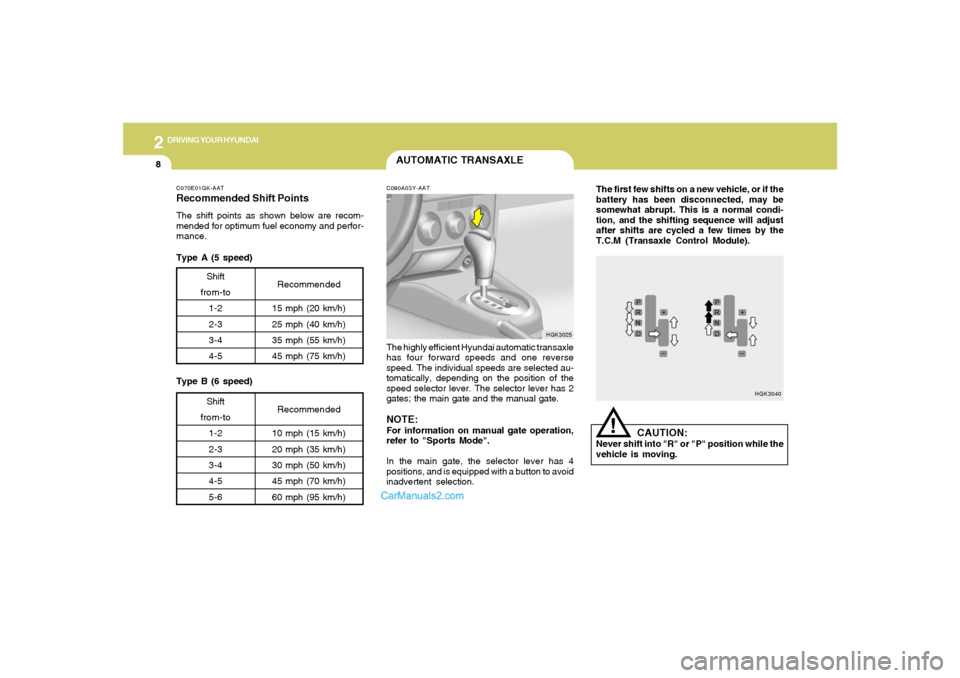
The first few shifts on a new vehicle, or if the
battery has been disconnected, may be
somewhat abrupt. This is a normal condi-
tion, and the shifting sequence will adjust
after shifts are cycled a few times by the
T.C.M (Transaxle Control Module).
HGK3040
!
CAUTION:
Never shift into "R" or "P" position while the
vehicle is moving.
C070E01GK-AATRecommended Shift PointsThe shift points as shown below are recom-
mended for optimum fuel economy and perfor-
mance.
Shift
from-to
1-2
2-3
3-4
4-5Recommended
15 mph (20 km/h)
25 mph (40 km/h)
35 mph (55 km/h)
45 mph (75 km/h)Shift
from-to
1-2
2-3
3-4
4-5
5-6Recommended
10 mph (15 km/h)
20 mph (35 km/h)
30 mph (50 km/h)
45 mph (70 km/h)
60 mph (95 km/h)
Type A (5 speed)
Type B (6 speed)
AUTOMATIC TRANSAXLEC090A03Y-AATThe highly efficient Hyundai automatic transaxle
has four forward speeds and one reverse
speed. The individual speeds are selected au-
tomatically, depending on the position of the
speed selector lever. The selector lever has 2
gates; the main gate and the manual gate.NOTE:For information on manual gate operation,
refer to "Sports Mode".
In the main gate, the selector lever has 4
positions, and is equipped with a button to avoid
inadvertent selection.
HGK3025