2008 Hyundai Tiburon coolant level
[x] Cancel search: coolant levelPage 204 of 268
6
DO-IT-YOURSELF MAINTENANCE
4
GENERAL CHECKS
G020C01A-AATVehicle InteriorThe following should be checked each time
when the vehicle is driven:
o Lights operation
o Windshield wiper operation
o Horn operation
o Defroster, heating system operation (and air
conditioning, if installed)
o Steering operation and condition
o Mirror condition and operation
o Turn signal operation
o Accelerator pedal operation
o Brake operation, including parking brake
o Manual transaxle operation, including clutch
operation
o Automatic transaxle operation, including
"Park" mechanism operation
o Seat control condition and operation
o Seat belt condition and operation
o Sunvisor operation
If you notice anything that does not operate
correctly or appears to be functioning incor-
rectly, inspect it carefully and seek assistance
from your Hyundai dealer if service is needed.
G020B01A-AATVehicle ExteriorThe following should be checked monthly:
o Overall appearance and condition
o Wheel condition and wheel nut torque
o Exhaust system condition
o Light condition and operation
o Windshield glass condition
o Wiper blade condition
o Paint condition and body corrosion
o Fluid leaks
o Door and hood lock condition
o Tire pressure and condition (including spare
tire)
G020A01A-AATEngine CompartmentThe following should be checked regularly:
o Engine oil level and condition
o Transaxle fluid level and condition
o Brake fluid level
o Clutch fluid level
o Engine coolant level
o Windshield washer fluid level
o Accessory drive belt condition
o Engine coolant hose condition
o Fluid leaks (on or below components)
o Power steering fluid level
o Battery condition
o Air filter condition
Page 207 of 268
6
DO-IT-YOURSELF MAINTENANCE
7
CHECKING AND CHANGING THE
ENGINE COOLANT!
G050A01TG-AAT
WARNING:
Do not remove the radiator cap when the
engine is hot. When the engine is hot, the
engine coolant is under pressure and may
erupt through the opening if the cap is
removed. You could be seriously burned if
you do not observe this precaution. Do not
remove the radiator cap until the radiator is
cool to the touch.NOTE:It is recommended that the engine coolant
should be changed by an authorized
Hyundai dealer.
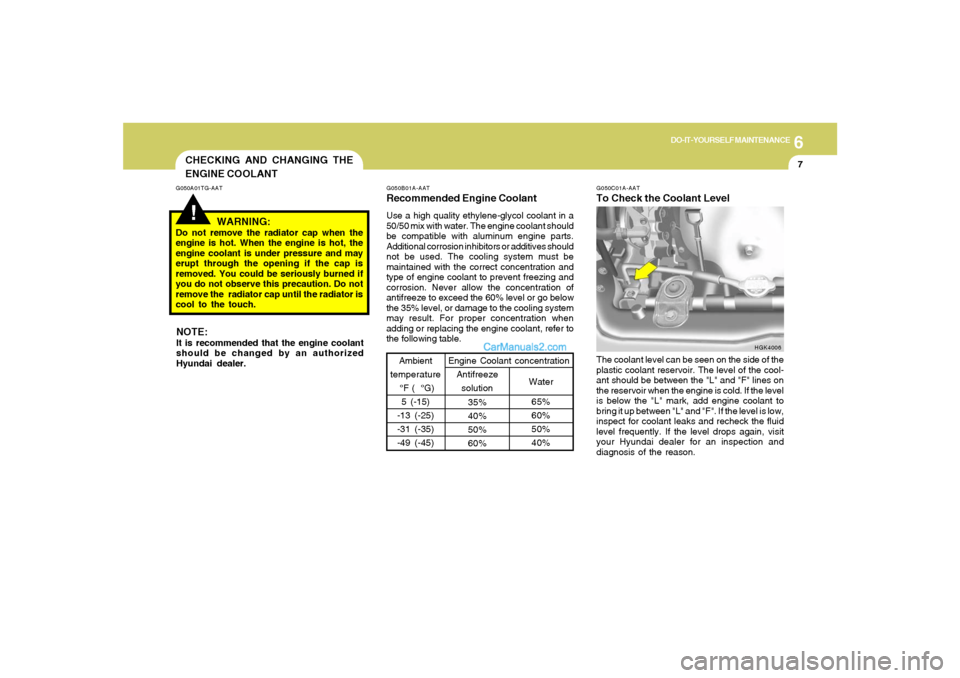
G050C01A-AATTo Check the Coolant LevelThe coolant level can be seen on the side of the
plastic coolant reservoir. The level of the cool-
ant should be between the "L" and "F" lines on
the reservoir when the engine is cold. If the level
is below the "L" mark, add engine coolant to
bring it up between "L" and "F". If the level is low,
inspect for coolant leaks and recheck the fluid
level frequently. If the level drops again, visit
your Hyundai dealer for an inspection and
diagnosis of the reason.
HGK4006 G050B01A-AAT
Recommended Engine CoolantUse a high quality ethylene-glycol coolant in a
50/50 mix with water. The engine coolant should
be compatible with aluminum engine parts.
Additional corrosion inhibitors or additives should
not be used. The cooling system must be
maintained with the correct concentration and
type of engine coolant to prevent freezing and
corrosion. Never allow the concentration of
antifreeze to exceed the 60% level or go below
the 35% level, or damage to the cooling system
may result. For proper concentration when
adding or replacing the engine coolant, refer to
the following table.
Ambient
temperature
°F ( °G)
5 (-15)
-13 (-25)
-31 (-35)
-49 (-45)
65%
60%
50%
40% 35%
40%
50%
60%Water Antifreeze
solution Engine Coolant concentration
Page 208 of 268
6
DO-IT-YOURSELF MAINTENANCE
8
G050D03A-AATTo Change the Engine CoolantThe engine coolant should be changed at those
intervals specified in the vehicle maintenance
schedule in Section 5.
CAUTION:
Engine coolant can damage the finish of
your car. If you spill engine coolant on the
car, wash it off thoroughly with clean water.
1. Park the car on level ground, set the park-
ing brake and remove the radiator cap when
cool.
2. Be sure your drain receptacle is in place.
Open the drain cock on the radiator. Allow all
the engine coolant to drain from the cooling
system, then securely close the drain cock.
3. Check Section 9 for the capacity of the
cooling system in your car. Then, following
the manufacturer’s directions on the engine
coolant container, add the appropriate quan-
tity of coolant to the radiator.
!
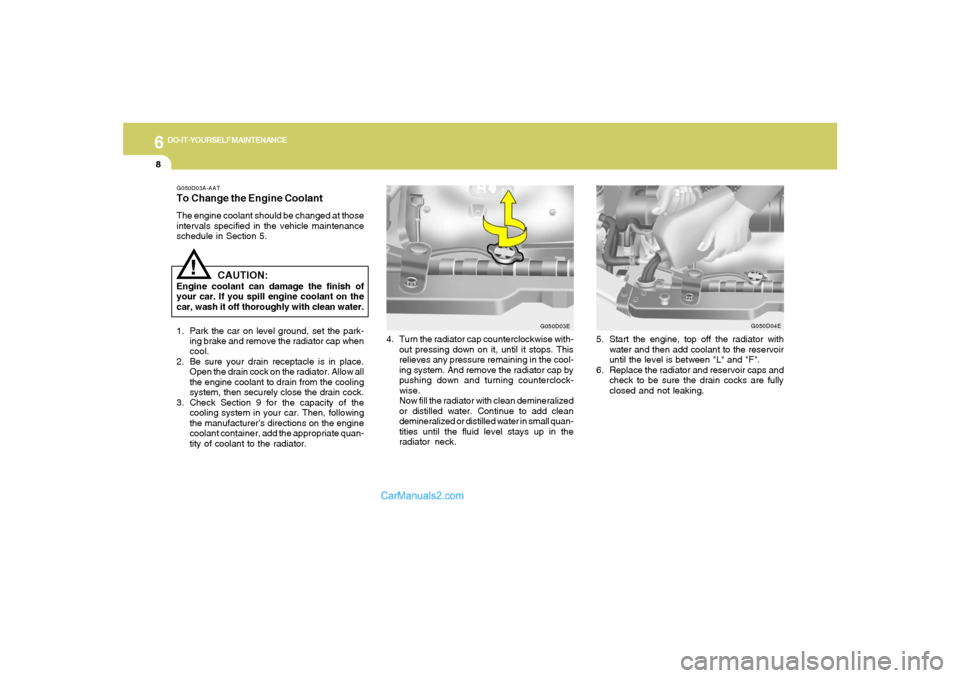
4. Turn the radiator cap counterclockwise with-
out pressing down on it, until it stops. This
relieves any pressure remaining in the cool-
ing system. And remove the radiator cap by
pushing down and turning counterclock-
wise.
Now fill the radiator with clean demineralized
or distilled water. Continue to add clean
demineralized or distilled water in small quan-
tities until the fluid level stays up in the
radiator neck.
G050D03E
5. Start the engine, top off the radiator with
water and then add coolant to the reservoir
until the level is between "L" and "F".
6. Replace the radiator and reservoir caps and
check to be sure the drain cocks are fully
closed and not leaking.
G050D04E
Page 211 of 268

6
DO-IT-YOURSELF MAINTENANCE
11
!
G100A05GK-AATTransaxle lubricant in the manual transaxle
should be checked at those intervals specified
in the vehicle maintenance schedule in Section
5.
HGK5009
Filler plug
Drain plug
CHECKING THE TRANSAXLE OIL
(MANUAL)
CAUTION:
o Radiator anti-freeze (engine coolant)
should not be used in the washer system
because it will damage the car’s finish.
o The washer should not be operated if
the washer reservoir is empty. This can
damage the washer fluid pump.
o In areas where water freezes in winter,
use windshield washer antifreeze.
!
FILLING THE WASHER RESERVOIRG090A03A-AATThe washer fluid reservoir supplies fluid to the
windshield washer system.
A good quality washer fluid should be used to fill
the washer reservoir. The fluid level should be
checked more frequently during inclement
weather or whenever the washer system is in
more frequent use.
The capacity of the washer reservoir is 3.2 U.S.
quarts (3.0 Liters).
HGK5014
WARNING:
o Windshield washer fluid agents contain
some amounts of alcohol and can be
flammable under certain circumstances.
Do not allow sparks or flame to contact
the washer fluid or the washer fluid
reservoir. Damage to the vehicle or its
occupants could occur.
o Windshield washer fluid is poisonous to
humans and animals. Do not drink wind-
shield washer fluid. Serious injury or
death could occur.
Page 213 of 268
6
DO-IT-YOURSELF MAINTENANCE
13
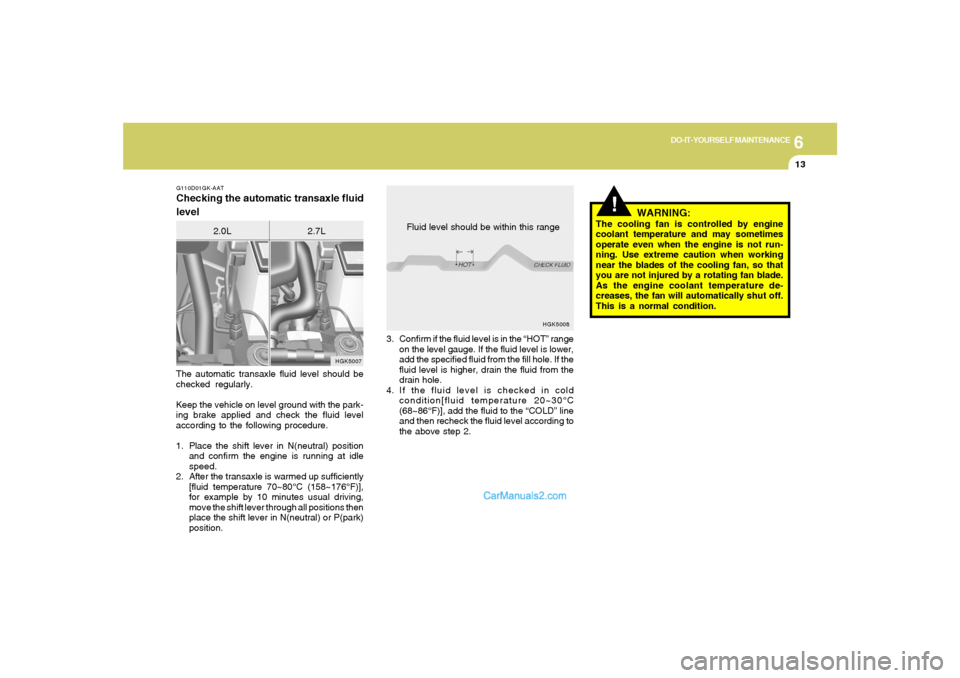
3. Confirm if the fluid level is in the “HOT” range
on the level gauge. If the fluid level is lower,
add the specified fluid from the fill hole. If the
fluid level is higher, drain the fluid from the
drain hole.
4. If the fluid level is checked in cold
condition[fluid temperature 20~30°C
(68~86°F)], add the fluid to the “COLD” line
and then recheck the fluid level according to
the above step 2.
G110D01GK-AATChecking the automatic transaxle fluid
levelThe automatic transaxle fluid level should be
checked regularly.
Keep the vehicle on level ground with the park-
ing brake applied and check the fluid level
according to the following procedure.
1. Place the shift lever in N(neutral) position
and confirm the engine is running at idle
speed.
2. After the transaxle is warmed up sufficiently
[fluid temperature 70~80°C (158~176°F)],
for example by 10 minutes usual driving,
move the shift lever through all positions then
place the shift lever in N(neutral) or P(park)
position.
HGK5007
2.0L 2.7L
!
HGK5008
Fluid level should be within this range
WARNING:
The cooling fan is controlled by engine
coolant temperature and may sometimes
operate even when the engine is not run-
ning. Use extreme caution when working
near the blades of the cooling fan, so that
you are not injured by a rotating fan blade.
As the engine coolant temperature de-
creases, the fan will automatically shut off.
This is a normal condition.
Page 221 of 268
6
DO-IT-YOURSELF MAINTENANCE
21
!
CHECKING ELECTRIC COOLING
FANS!
G220A01A-AAT
WARNING:
The cooling fan is controlled by engine
coolant temperature and may sometimes
operate even when the engine is not run-
ning. Use extreme caution when working
near the blades of the coolant fan, so that
you are not injured by a rotating fan blade.
As the engine coolant temperature de-
creases the fan will automatically shut off.
This is a normal condition. If electrolyte gets on your skin,
thoroughly wash the contacted
area.
If you feel a pain or a burning
sensation, get medical attention
immediately.
Wear eye protection when charg-
ing or working near a battery.
Always provide ventilation when
working in an enclosed space.
o When lifting a plastic-cased battery, ex-
cessive pressure on the case may cause
battery acid to leak, resulting in personal
injury. Lift with a battery carrier or with
your hands on opposite corners.
o Never attempt to charge the battery when
the battery cables are connected.
o The electrical ignition system works with
high voltage.
Never touch these components with the
engine running or the ignition switched
on.
WARNING:
G220C01A-AATChecking Condenser Cooling FanThe condenser coolant fan should come on
automatically whenever the air conditioning is in
operation.G220B01A-AATChecking Engine Cooling FanThe engine cooling fan should come on auto-
matically if the engine coolant temperature is
high.
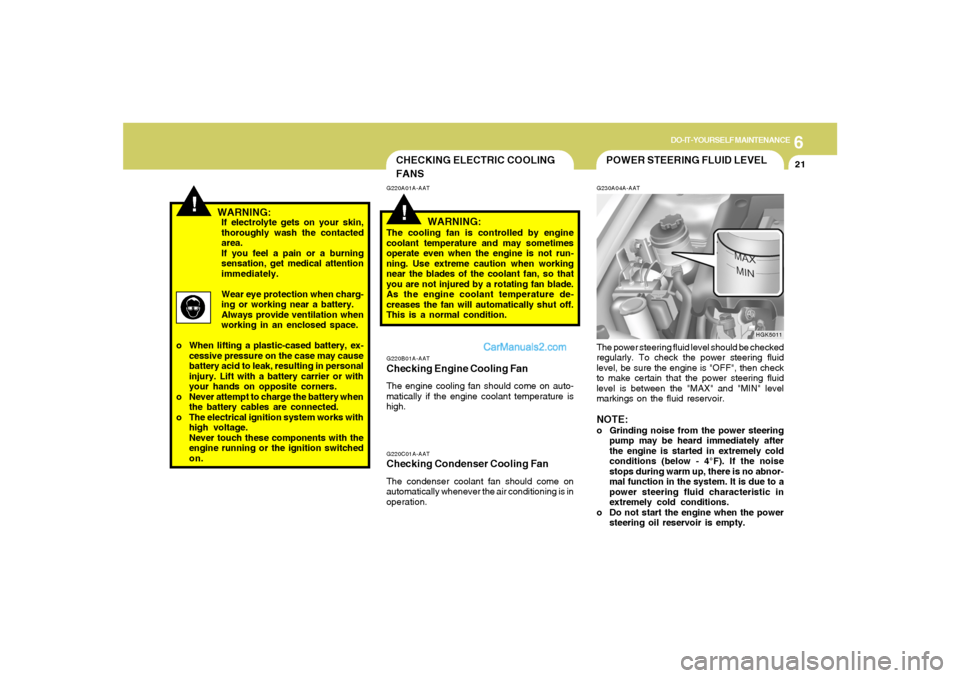
POWER STEERING FLUID LEVELG230A04A-AATThe power steering fluid level should be checked
regularly. To check the power steering fluid
level, be sure the engine is "OFF", then check
to make certain that the power steering fluid
level is between the "MAX" and "MIN" level
markings on the fluid reservoir.NOTE:o Grinding noise from the power steering
pump may be heard immediately after
the engine is started in extremely cold
conditions (below - 4°F). If the noise
stops during warm up, there is no abnor-
mal function in the system. It is due to a
power steering fluid characteristic in
extremely cold conditions.
o Do not start the engine when the power
steering oil reservoir is empty.
HGK5011
Page 223 of 268
6
DO-IT-YOURSELF MAINTENANCE
23
G290B02GK-AATAdjustment After Headlight Assembly
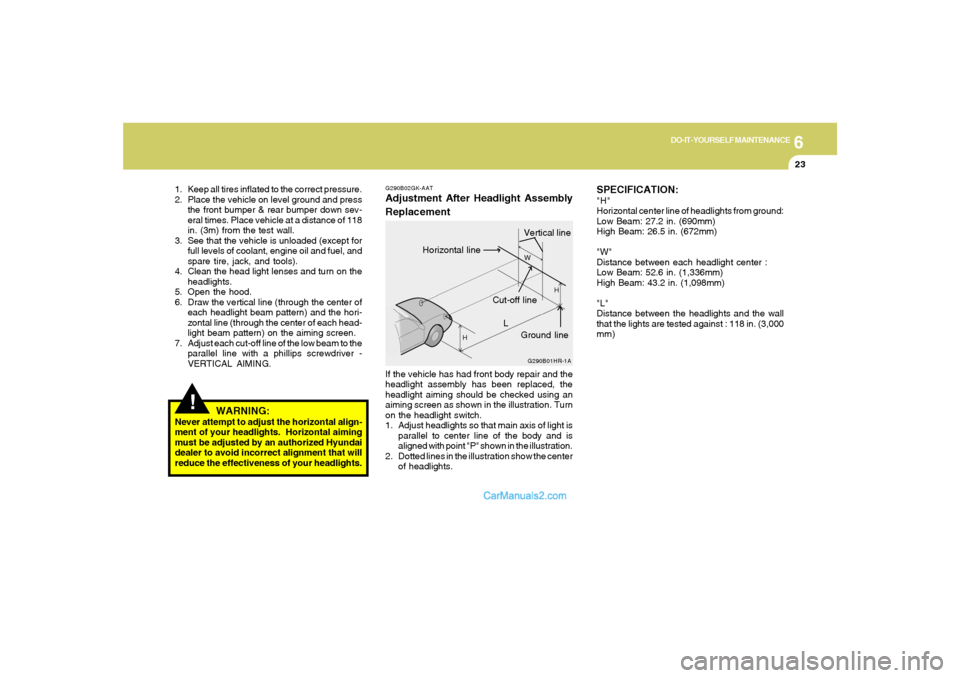
ReplacementIf the vehicle has had front body repair and the
headlight assembly has been replaced, the
headlight aiming should be checked using an
aiming screen as shown in the illustration. Turn
on the headlight switch.
1. Adjust headlights so that main axis of light is
parallel to center line of the body and is
aligned with point "P" shown in the illustration.
2. Dotted lines in the illustration show the center
of headlights.
G290B01HR-1A
L
W
H
H
Cut-off line
Ground line
Horizontal lineVertical line
!
1. Keep all tires inflated to the correct pressure.
2. Place the vehicle on level ground and press
the front bumper & rear bumper down sev-
eral times. Place vehicle at a distance of 118
in. (3m) from the test wall.
3. See that the vehicle is unloaded (except for
full levels of coolant, engine oil and fuel, and
spare tire, jack, and tools).
4. Clean the head light lenses and turn on the
headlights.
5. Open the hood.
6. Draw the vertical line (through the center of
each headlight beam pattern) and the hori-
zontal line (through the center of each head-
light beam pattern) on the aiming screen.
7. Adjust each cut-off line of the low beam to the
parallel line with a phillips screwdriver -
VERTICAL AIMING.
WARNING:
Never attempt to adjust the horizontal align-
ment of your headlights. Horizontal aiming
must be adjusted by an authorized Hyundai
dealer to avoid incorrect alignment that will
reduce the effectiveness of your headlights.
SPECIFICATION:"H"
Horizontal center line of headlights from ground:
Low Beam: 27.2 in. (690mm)
High Beam: 26.5 in. (672mm)
"W"
Distance between each headlight center :
Low Beam: 52.6 in. (1,336mm)
High Beam: 43.2 in. (1,098mm)
"L"
Distance between the headlights and the wall
that the lights are tested against : 118 in. (3,000
mm)