Page 88 of 355

1FEATURES OF YOUR HYUNDAI76
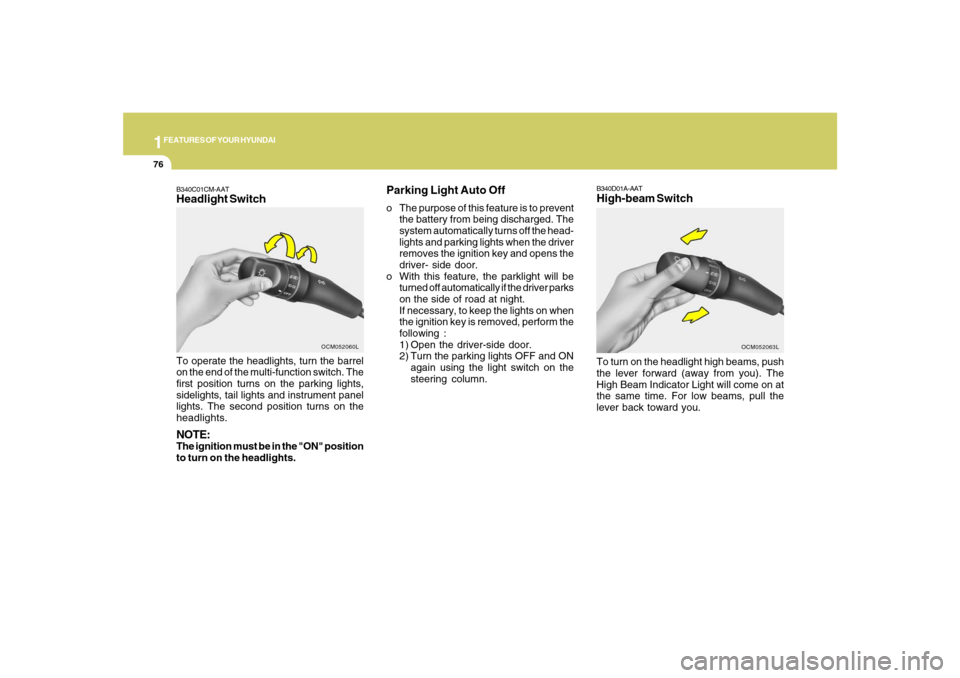
B340D01A-AATHigh-beam SwitchTo turn on the headlight high beams, push
the lever forward (away from you). The
High Beam Indicator Light will come on at
the same time. For low beams, pull the
lever back toward you.
OCM052063L
B340C01CM-AATHeadlight SwitchTo operate the headlights, turn the barrel
on the end of the multi-function switch. The
first position turns on the parking lights,
sidelights, tail lights and instrument panel
lights. The second position turns on the
headlights.NOTE:The ignition must be in the "ON" position
to turn on the headlights.
OCM052060L
Parking Light Auto Offo The purpose of this feature is to prevent
the battery from being discharged. The
system automatically turns off the head-
lights and parking lights when the driver
removes the ignition key and opens the
driver- side door.
o With this feature, the parklight will be
turned off automatically if the driver parks
on the side of road at night.
If necessary, to keep the lights on when
the ignition key is removed, perform the
following :
1) Open the driver-side door.
2) Turn the parking lights OFF and ON
again using the light switch on the
steering column.
Page 89 of 355
1
FEATURES OF YOUR HYUNDAI
77
B340E01A-AATHeadlight FlasherTo flash the headlights, pull the switch
lever toward you, then release it. The head-
lights can be flashed even though the
headlight switch is in the "OFF" position.
OCM052064L
B340G01LZ-AATAuto Light (If Installed)
OCM052061L
To operate the automatic light feature, turn
the barrel on the end of the multi-function
switch. If you set the multi-function switch
to "AUTO", the tail lights and headlights
will be turned automatically on or off ac-
cording to external illumination conditions.NOTE:Turn the lights manually in foggy, cloudy
and rainy conditions.
NOTE:o Never place anything over the sensor
located on the instrument panel to
ensure better auto light system con-
trol.
o Don't clean the sensor using a win-
dow cleaner.
o If your vehicle has window tint or other
types of coating on the windshield, the
AUTO light system may not work prop-
erly.
Auto light sensor
OCM052062
Page 96 of 355

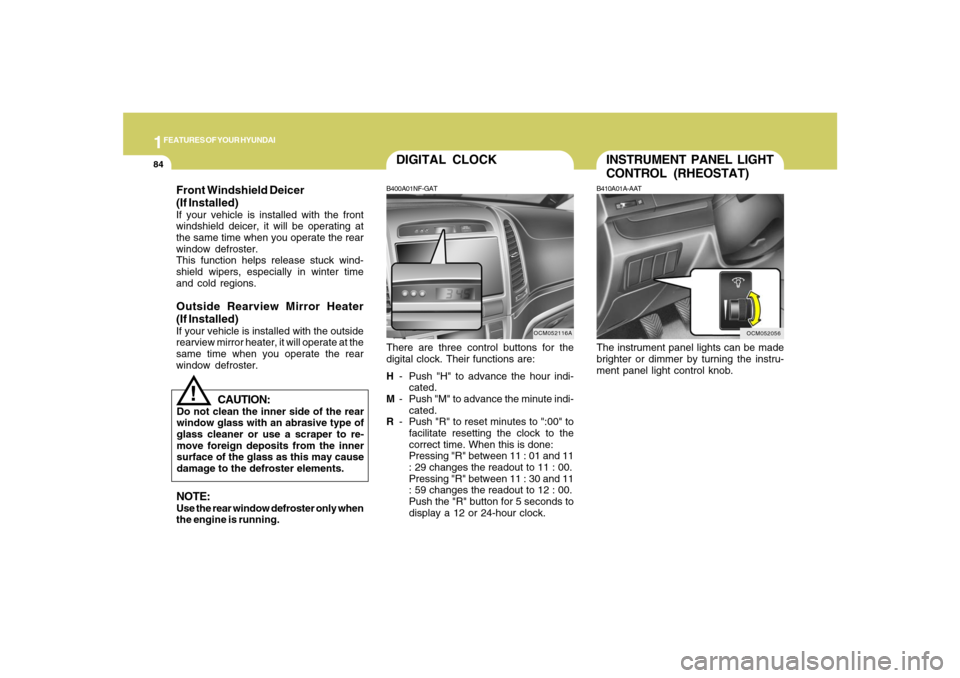
1FEATURES OF YOUR HYUNDAI84
INSTRUMENT PANEL LIGHT
CONTROL (RHEOSTAT)B410A01A-AATThe instrument panel lights can be made
brighter or dimmer by turning the instru-
ment panel light control knob.
OCM052056
DIGITAL CLOCKB400A01NF-GATThere are three control buttons for the
digital clock. Their functions are:
H- Push "H" to advance the hour indi-
cated.
M- Push "M" to advance the minute indi-
cated.
R- Push "R" to reset minutes to ":00" to
facilitate resetting the clock to the
correct time. When this is done:
Pressing "R" between 11 : 01 and 11
: 29 changes the readout to 11 : 00.
Pressing "R" between 11 : 30 and 11
: 59 changes the readout to 12 : 00.
Push the "R" button for 5 seconds to
display a 12 or 24-hour clock.
OCM052116A
CAUTION:
Do not clean the inner side of the rear
window glass with an abrasive type of
glass cleaner or use a scraper to re-
move foreign deposits from the inner
surface of the glass as this may cause
damage to the defroster elements.
!
NOTE:Use the rear window defroster only when
the engine is running.Front Windshield Deicer
(If Installed)If your vehicle is installed with the front
windshield deicer, it will be operating at
the same time when you operate the rear
window defroster.
This function helps release stuck wind-
shield wipers, especially in winter time
and cold regions.Outside Rearview Mirror Heater
(If Installed)If your vehicle is installed with the outside
rearview mirror heater, it will operate at the
same time when you operate the rear
window defroster.
Page 148 of 355
1FEATURES OF YOUR HYUNDAI
136
B980B01Y-AATFan Speed Control SwitchThe fan speed can be set to the desired
speed by pressing the appropriate fan
speed control button. The higher the fan
speed is, the more air is delivered. Press-
ing the "OFF" button turns off the fan.
OCM052097 B980A01Y-AAT
Manual OperationThe heating and cooling system can be
controlled manually as well by pushing
buttons other than the "AUTO" button. In
this state, the system sequentially works
according to the order of buttons selected.
The function of the buttons which are not
selected will be controlled automatically.
Press the "AUTO" button in order to convert
to automatic control of the system.
OCM052062
Photo SensorNOTE:Never place anything over the sensor
which is located on the instrument panel
to ensure better control of the heating
and cooling system.
Page 187 of 355

1175175175175175175
FEATURES OF YOUR HYUNDAI
USING EXTERNAL CONTROLSThe Dimmer controlThe Dimmer control setting determines
the brightness of the entire vehicle’s dis-
plays.
Turn the scroll wheel up or down to in-
crease or decrease the brightness of the
vehicle’s instrument panels, backlit dis-
plays and the audio system’s LCD screen
and backlit controls.
Steering wheel audio controlsSteering wheel-mounted audio controls
allow you to make adjustments to the most
frequently used audio controls without tak-
ing your eyes off the road. Control Function
MODE button Press this button to switch between the FM1/FM2/AM/XM1/
XM2/XM3/CD/RSE modes. Check the LCD screen display
to confirm if you have selected the mode you want.
NOTE:
The modes available depend on the model of your audio
system and also on whether any auxiliary/RSE device is
connected to your audio system.
-VOL+ rocker switchPress and hold to decrease (-) or increase (+) the volume.
-SEEK+ rocker switchIn Tuner mode:
Press and release + and – to switch to the next or previous
preset station. For example, to switch from preset station 1
to preset station 3, press + twice.Press and hold (about 1 second) + and – to scan up and
down the frequency range for the next available radio station
and automatically lock on to that frequency.
In CD mode:
During CD playback,
press and release – and + to select and
play the previous or next track on the disc. The LCD screen
displays the track number as you press the buttons. You can
press the button several times to select the track you want.
Page 232 of 355

2
DRIVING YOUR HYUNDAI
21
GOOD BRAKING PRACTICESC130A02A-AAT
WARNING:
o Whenever leaving vehicle or parking,
always set the parking brake as far as
possible and fully engage the vehicle's
transaxle into the park position. Ve-
hicles not fully engaged in park with
the parking brake set are at risk for
moving inadvertently and injuring
yourself or others.
o All vehicles should always have the
parking brake fully engaged when
parking to avoid inadvertent move-
ment of the car which can injure occu-
pants or pedestrians.
o Nothing should be carried on top of
the shelf panel behind the rear seat. If
there were an accident or a sudden
stop, such objects could move for-
ward and cause damage to the ve-
hicle or injure the occupants.
!
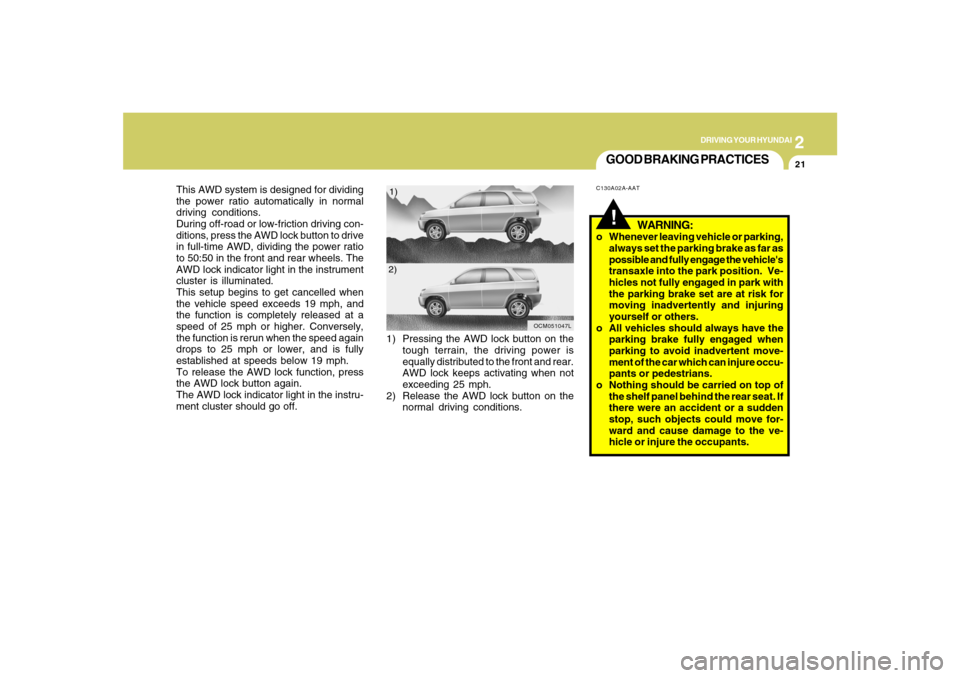
This AWD system is designed for dividing
the power ratio automatically in normal
driving conditions.
During off-road or low-friction driving con-
ditions, press the AWD lock button to drive
in full-time AWD, dividing the power ratio
to 50:50 in the front and rear wheels. The
AWD lock indicator light in the instrument
cluster is illuminated.
This setup begins to get cancelled when
the vehicle speed exceeds 19 mph, and
the function is completely released at a
speed of 25 mph or higher. Conversely,
the function is rerun when the speed again
drops to 25 mph or lower, and is fully
established at speeds below 19 mph.
To release the AWD lock function, press
the AWD lock button again.
The AWD lock indicator light in the instru-
ment cluster should go off.1) Pressing the AWD lock button on the
tough terrain, the driving power is
equally distributed to the front and rear.
AWD lock keeps activating when not
exceeding 25 mph.
2) Release the AWD lock button on the
normal driving conditions.
OCM051047L
1)
2)
Page 320 of 355

6
DO-IT-YOURSELF MAINTENANCE
34
G200E01CM-AATInner Panel
OCM055024N
FUSE RATING
15A
25A
15A
10A
15A
10A
10A
10A
30A
10A
15A
10A
10A
10A
10A
10A
10ACIRCUIT PROTECTED
CIGARETTE LIGHTER
FRONT POWER OUTLET, REAR POWER OUTLET
CENTER POWER OUTLET
POWER OUTSIDE MIRROR SWITCH, AUDIO, ATM KEY LOCK CONTROL MODULE,
DIGITAL CLOCK
MULTIFUNCTION SWITCH, REAR WIPER CONTROL MODULE,REAR WIPER
MOTOR
RAIN SENSOR
RHEOSTAT, BCM, INSTRUMENT CLUSTER
A/C CONTROL MODULE, INCAR & HUMIDITY SENSOR, HIGH BLOWER RELAY,
REAR A/CON SWITCH, ICM RELAY BOX, AQS SENSOR, SUNROOF MOTOR,
BLOWER BELAY, ELECTRO CHROMIC MIRROR
BLOWER RELAY, BLOWER MOTOR, A/C CONTROL MODULE
A/C CONTROL MODULE
SRS CONTROL MODULE
PAB ON/OFF SWITCH, INSTRUMENT CLUSTER
HAZARD SWITCH
MULTIFUNTION SWITCH, STEERING ANGLE SENSOR, ESC SWITCH, ATM KEY
LOCK CONTROL MODULE SEAT WARMER MODULE
OIL LEVEL SENSOR MODULE, BCM
INSTRUMENT CLUSTER, PRE-EXCITATION RESISTOR, BCM, GENERATOR, SEMI
ACTIVE CONTROL MODULE (GASOLINE)
BURGLAR ALARM RELAY
C/LIGHTER
P/OUTLET
P/OUTLET
CTR
AUDIO #2
RR WIPER
IMS
BCM #2
A/CON 2
BLOWER
A/CON 1
A/BAG #1
A/BAG IND
T/SIG
ATM LOCK
BCM #1
CLUSTER
STARTFUSE
Page 327 of 355
8
CONSUMER INFORMATION, REPORTING SAFETY DEFECTS & BINDING ARBITRATION OF WARRANTY CLAIMS2
ENGINE NUMBER
VEHICLE IDENTIFICATION
NUMBER (VIN)
I010B01A-AATThe engine number is stamped on the
engine block as shown in the drawing.
I010A01CM-AAT
OCM056001
OCM056002N
The vehicle identification number (VIN) is
the number used in registering your car
and in all legal matters pertaining to its
ownership, etc. It can be found in three
different places on your car:
1. On the engine side of the bulkhead
between the engine and passenger
compartment.
2. On the left top side of the instrument
panel where it can be seen by looking
down through the windshield.
3. Door edge post (Driver's side).
OCM053107L
OCM056003A
3.3 V62.7 V6
OCM056004N