2008 HYUNDAI ENTOURAGE lights
[x] Cancel search: lightsPage 161 of 393
3 145
Features of your vehicle
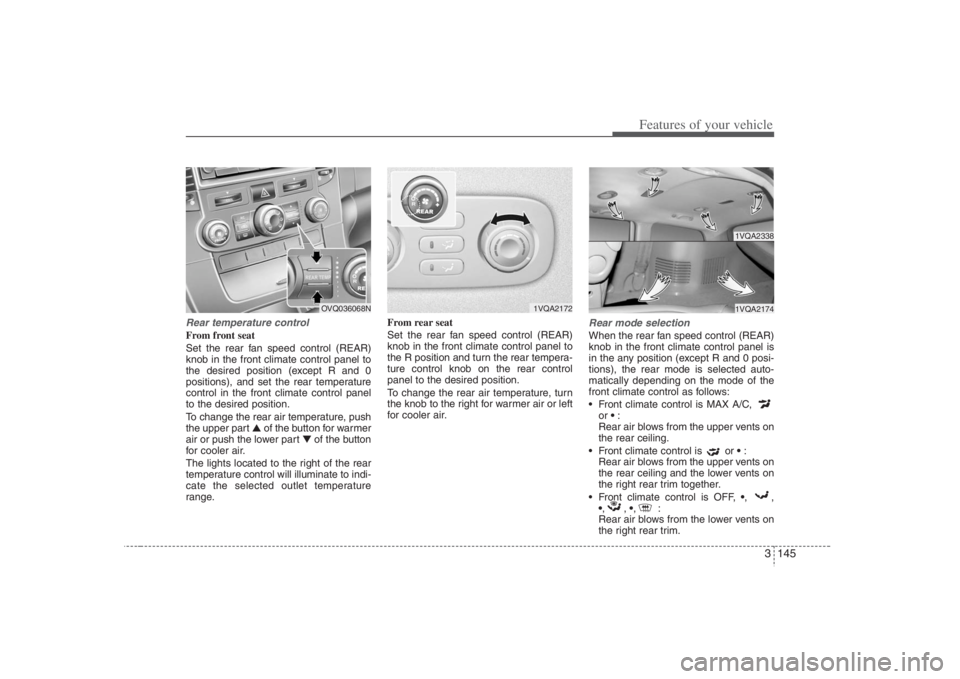
Rear temperature controlFrom front seat
Set the rear fan speed control (REAR)
knob in the front climate control panel to
the desired position (except R and 0
positions), and set the rear temperature
control in the front climate control panel
to the desired position.
To change the rear air temperature, push
the upper part ▲ of the button for warmer
air or push the lower part ▼of the button
for cooler air.
The lights located to the right of the rear
temperature control will illuminate to indi-
cate the selected outlet temperature
range.From rear seat
Set the rear fan speed control (REAR)
knob in the front climate control panel to
the R position and turn the rear tempera-
ture control knob on the rear control
panel to the desired position.
To change the rear air temperature, turn
the knob to the right for warmer air or left
for cooler air.
Rear mode selectionWhen the rear fan speed control (REAR)
knob in the front climate control panel is
in the any position (except R and 0 posi-
tions), the rear mode is selected auto-
matically depending on the mode of the
front climate control as follows:
Front climate control is MAX A/C,
or :
Rear air blows from the upper vents on
the rear ceiling.
Front climate control is or :
Rear air blows from the upper vents on
the rear ceiling and the lower vents on
the right rear trim together.
Front climate control is OFF, ,,
,, ,:
Rear air blows from the lower vents on
the right rear trim.
1VQA2172
1VQA23381VQA2174
OVQ036068N
Page 243 of 393
43
Driving your vehicle
Before entering vehicle:• Be sure that all windows, outside mir-
ror(s), and outside lights are clean.
Check the condition of the tires.
Check under the vehicle for any sign of
leaks.
Be sure there are no obstacles behind
you if you intend to back up.Necessary inspections Fluid levels, such as engine oil, engine
coolant, brake fluid, and washer fluid
should be checked on a regular basis,
with the exact interval depending on the
fluid. Further details are provided in
Section 6, Maintenance.
Before starting Close and lock all doors.
Position the seat so that all controls are
easily reached.
Adjust the inside and outside rearview
mirrors.
Be sure that all lights work.
Check all gauges.
Check the operation of warning lights
when the ignition switch is turned to
the ON position.
Release the parking brake and make
sure the brake warning light goes out.
For safe operation, be sure you are famil-
iar with your vehicle and its equipment.
PROPOSITION 65 WARN-
ING
Engine exhaust and a wide variety
of automobile components and
parts, including components found
in the interior furnishings in a vehi-
cle, contain or emit chemicals
known to the State of California to
cause cancer and birth defects and
reproductive harm. In addition, cer-
tain fluids contained in vehicles
and certain products of component
wear contain or emit chemicals
known to the State of California to
cause cancer and birth defects or
other reproductive harm.
BEFORE DRIVING
Page 245 of 393
45
Driving your vehicle
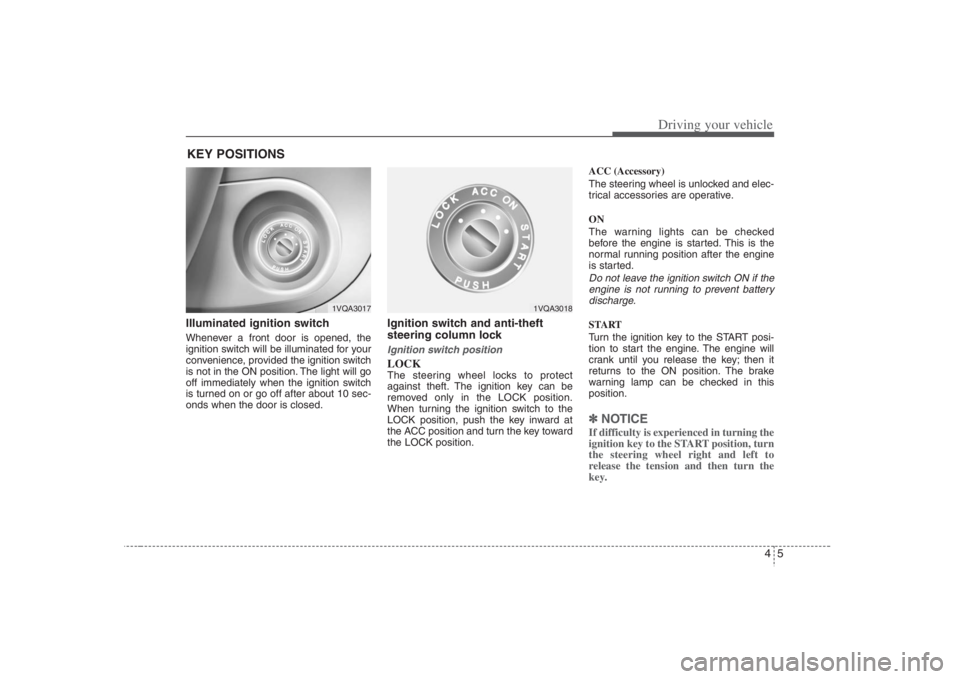
Illuminated ignition switch Whenever a front door is opened, the
ignition switch will be illuminated for your
convenience, provided the ignition switch
is not in the ON position. The light will go
off immediately when the ignition switch
is turned on or go off after about 10 sec-
onds when the door is closed.
Ignition switch and anti-theft
steering column lock Ignition switch positionLOCKThe steering wheel locks to protect
against theft. The ignition key can be
removed only in the LOCK position.
When turning the ignition switch to the
LOCK position, push the key inward at
the ACC position and turn the key toward
the LOCK position.ACC (Accessory)
The steering wheel is unlocked and elec-
trical accessories are operative.
ON
The warning lights can be checked
before the engine is started. This is the
normal running position after the engine
is started.
Do not leave the ignition switch ON if the
engine is not running to prevent battery
discharge.START
Turn the ignition key to the START posi-
tion to start the engine. The engine will
crank until you release the key; then it
returns to the ON position. The brake
warning lamp can be checked in this
position.✽ ✽
NOTICEIf difficulty is experienced in turning the
ignition key to the START position, turn
the steering wheel right and left to
release the tension and then turn the
key.
KEY POSITIONS
1VQA3017
1VQA3018
Page 262 of 393
Driving your vehicle22 4
The Electronic Stability Control (ESC)
system is designed to stabilize the vehicle
during cornering manuevers. ESC checks
where you are steering and where the
vehicle is actually going. ESC applies the
brakes at individual wheels and
intervenes in the engine management
system to stabilize the vehicle.
The Electronic Stability Control (ESC)
system is an electronic system designed
to help the driver maintain vehicle control
under adverse conditions. It is not a
substitute for safe driving practices.
Factors including speed, road conditions
and driver steering input can all affect
whether ESC will be effective in
preventing a loss of control. It is still your
responsibility to drive and corner at
reasonable speeds and to leave a
sufficient margin of safety.
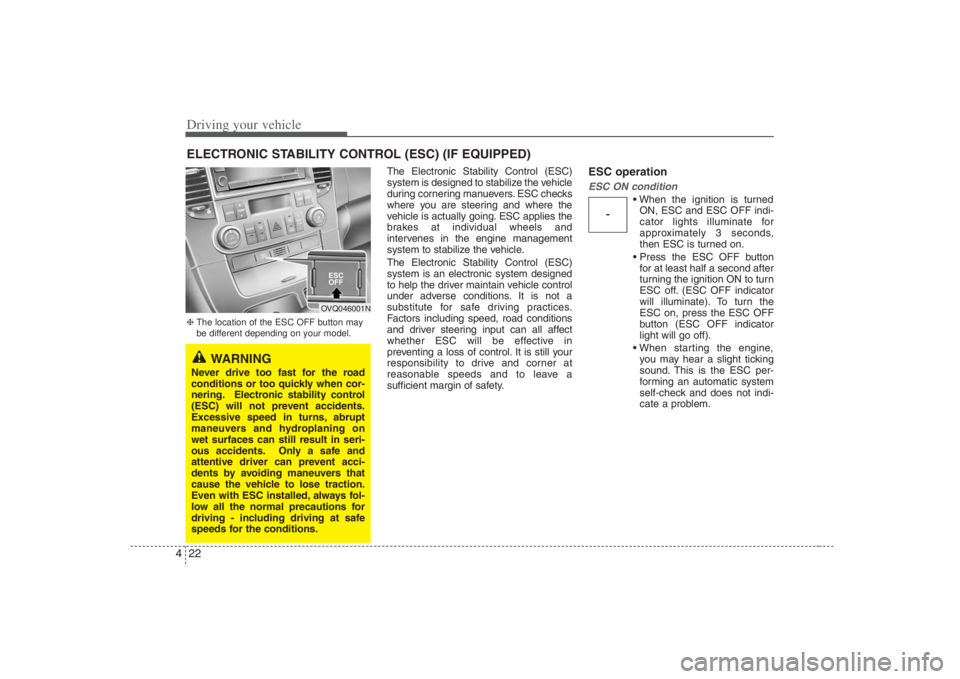
ESC operationESC ON condition
ON, ESC and ESC OFF indi-
cator lights illuminate for
approximately 3 seconds,
then ESC is turned on.
for at least half a second after
turning the ignition ON to turn
ESC off. (ESC OFF indicator
will illuminate). To turn the
ESC on, press the ESC OFF
button (ESC OFF indicator
light will go off).
you may hear a slight ticking
sound. This is the ESC per-
forming an automatic system
self-check and does not indi-
cate a problem.
ELECTRONIC STABILITY CONTROL (ESC) (IF EQUIPPED)
-
WARNING
Never drive too fast for the road
conditions or too quickly when cor-
nering. Electronic stability control
(ESC) will not prevent accidents.
Excessive speed in turns, abrupt
maneuvers and hydroplaning on
wet surfaces can still result in seri-
ous accidents. Only a safe and
attentive driver can prevent acci-
dents by avoiding maneuvers that
cause the vehicle to lose traction.
Even with ESC installed, always fol-
low all the normal precautions for
driving - including driving at safe
speeds for the conditions.❈The location of the ESC OFF button may
be different depending on your model.
OVQ046001N
Page 271 of 393

431
Driving your vehicle
Driving at night Because night driving presents more
hazards than driving in the daylight, here
are some important tips to remember:
Slow down and keep more distance
between you and other vehicles, as it
may be more difficult to see at night,
especially in areas where there may
not be any street lights.
Adjust your mirrors to reduce the glare
from other driver's headlights.
Keep your headlights clean and prop-
erly aimed on vehicles not equipped
with the automatic headlight aiming
feature. Dirty or improperly aimed
headlights will make it much more diffi-
cult to see at night.
Avoid staring directly at the headlights
of oncoming vehicles. You could be
temporarily blinded, and it will take
several seconds for your eyes to read-
just to the darkness.
Driving in the rain Rain and wet roads can make driving
dangerous, especially if you’re not pre-
pared for the slick pavement. Here are a
few things to consider when driving in the
rain:
A heavy rainfall will make it harder to
see and will increase the distance
needed to stop your vehicle, so slow
down.
Keep your windshield wiping equip-
ment in good shape. Replace your
windshield wiper blades when they
show signs of streaking or missing
areas on the windshield.
If your tires are not in good condition,
making a quick stop on wet pavement
can cause a skid and possibly lead to
an accident. Be sure your tires are in
good shape.
Turn on your headlights to make it eas-
ier for others to see you.
Driving too fast through large puddles
can affect your brakes. If you must go
through puddles, try to drive through
them slowly.
If you believe you may have gotten
your brakes wet, apply them lightly
while driving until normal braking oper-
ation returns.
Driving in flooded areas Avoid driving through flooded areas
unless you are sure the water is no high-
er than the bottom of the wheel hub.
Drive through any water slowly. Allow
adequate stopping distance because
brake performance may be affected.
After driving through water, dry the
brakes by gently applying them several
times while the vehicle is moving slowly.
Page 276 of 393
Driving your vehicle36 4Driving with a trailer Towing a trailer requires a certain
amount of experience. Before setting out
for the open road, you must get to know
your trailer. Acquaint yourself with the
feel of handling and braking with the
added weight of the trailer. And always
keep in mind that the vehicle you are
driving is now a good deal longer and not
nearly so responsive as your vehicle is
by itself.
Before you start, check the trailer hitch
and platform, safety chains, electrical
connector(s), lights, tires and mirror
adjustment. If the trailer has electric
brakes, start your vehicle and trailer mov-
ing and then apply the trailer brake con-
troller by hand to be sure the brakes are
working. This lets you check your electri-
cal connection at the same time.
During your trip, check occasionally to be
sure that the load is secure, and that the
lights and any trailer brakes are still work-
ing.
Following distance Stay at least twice as far behind the vehi-
cle ahead as you would when driving
your vehicle without a trailer. This can
help you avoid situations that require
heavy braking and sudden turns.Passing You’ll need more passing distance up
ahead when you’re towing a trailer. And,
because of the increased vehicle length,
you’ll need to go much farther beyond the
passed vehicle before you can return to
your lane.Backing up Hold the bottom of the steering wheel
with one hand. Then, to move the trailer
to the left, just move your hand to the left.
To move the trailer to the right, move your
hand to the right. Always back up slowly
and, if possible, have someone guide
you.Making turns When you’re turning with a trailer, make
wider turns than normal. Do this so your
trailer won’t strike soft shoulders, curbs,
road signs, trees, or other objects. Avoid
jerky or sudden maneuvers. Signal well
in advance.
Turn signals when towing a trailer When you tow a trailer, your vehicle has
to have a different turn signal flasher and
extra wiring. The green arrows on your
instrument panel will flash whenever you
signal a turn or lane change. Properly
connected, the trailer lights will also flash
to alert other drivers you’re about to turn,
change lanes, or stop.
When towing a trailer, the green arrows
on your instrument panel will flash for
turns even if the bulbs on the trailer are
burned out. Thus, you may think drivers
behind you are seeing your signals
when, in fact, they are not. It’s important
to check occasionally to be sure the trail-
er bulbs are still working. You must also
check the lights every time you discon-
nect and then reconnect the wires.
Do not connect a trailer lighting system
directly to your vehicle’s lighting system.
Use only an approved trailer wiring har-
ness.
Your Authorized Hyundai Dealer can
assist you in installing the wiring harness.
WARNING
Failure to use an approved trailer
wiring harness could result in dam-
age to the vehicle electrical system
and/or personal injury.
Page 288 of 393

What to do in an emergency2 5ROAD WARNING Hazard warning flasher The hazard warning flasher serves as a
warning to other drivers to exercise
extreme caution when approaching,
overtaking, or passing your vehicle.It should be used whenever emergency
repairs are being made or when the vehi-
cle is stopped near the edge of a road-
way.
Depress the flasher switch with the igni-
tion switch in any position. The flasher
switch is located in the center console
switch panel. All turn signal lights will
flash simultaneously.
• The hazard warning flasher operates
whether your vehicle is running or not.
The turn signals do not work when the
hazard flasher is on.
Care must be taken when using the
hazard warning flasher while the vehi-
cle is being towed.
If engine doesn't turn over or
turns over slowly1. If your car has an automatic transaxle,
be sure the gear selector lever is in "N"
or "P" and the emergency brake is set.
2. Check the battery connections to be
sure they are clean and tight.
3. Turn on the interior light. If the light
dims or goes out when you operate the
starter, the battery is discharged.
4. Check the starter connections to be
sure they are securely tightened.
5. Do not push or pull the vehicle to start
it. See instructions for "Jump Starting".IF THE ENGINE WILL NOT START
OVQ036059NOVQ036060N
Type AType B
WARNING
If the engine will not start, do not
push or pull the car to start it. This
could result in a collision or cause
other damage. In addition, push or
pull starting may cause the catalyt-
ic converter to be overloaded and
create a fire hazard.
Page 318 of 393

69
Maintenance
OWNER MAINTENANCE Owner maintenance schedule The following lists are vehicle checks and
inspections that should be performed by
the owner or an Authorized Hyundai
Dealer at the frequencies indicated to
help ensure safe, dependable operation
of your vehicle.
Any adverse conditions should be
brought to the attention of your dealer as
soon as possible.
These Owner Maintenance Checks are
generally not covered by warranties and
you may be charged for labor, parts and
lubricants used.When you stop for fuel: Check the engine oil level.
Check coolant level in coolant reser-
voir.
Check the windshield washer fluid
level.
Look for low or under-inflated tires.
While operating your vehicle: Note any changes in the sound of the
exhaust or any smell of exhaust fumes
in the vehicle.
Check for vibrations in the steering
wheel. Notice any increased steering
effort or looseness in the steering
wheel, or change in its straight-ahead
position.
Notice if your vehicle constantly turns
slightly or “pulls” to one side when trav-
eling on smooth, level roads.
When stopping, listen and check for
unusual sounds, pulling to one side,
increased brake pedal travel or “hard-
to-push” brake pedal.
If any slipping or changes in the oper-
ation of your transaxle occurs, check
the transaxle fluid level.
Check automatic transaxle P (Park)
function.
Check parking brake.
Check for fluid leaks under your vehicle
(water dripping from the air condition-
ing system during or after use is nor-
mal).
At least monthly: Check coolant level in the coolant
recovery reservoir.
Check the operation of all exterior
lights, including the stoplights, turn sig-
nals and hazard warning flashers.
Check the inflation pressures of all
tires including the spare.At least twice a year
(i.e., every Spring and Fall): Check radiator, heater and air condi-
tioning hoses for leaks or damage.
Check windshield washer spray and
wiper operation. Clean wiper blades
with clean cloth dampened with wash-
er fluid.
Check headlight alignment.
Check muffler, exhaust pipes, shields
and clamps.
Check the lap/shoulder belts for wear
and function.
Check for worn tires and loose wheel
lug nuts.
WARNING
Be careful when checking your
engine coolant level when the
engine is hot. Scalding hot coolant
and steam may blow out under
pressure. This could cause burns or
other serious injury.