2008 HYUNDAI ENTOURAGE tailgate
[x] Cancel search: tailgatePage 297 of 393
511
What to do in an emergency
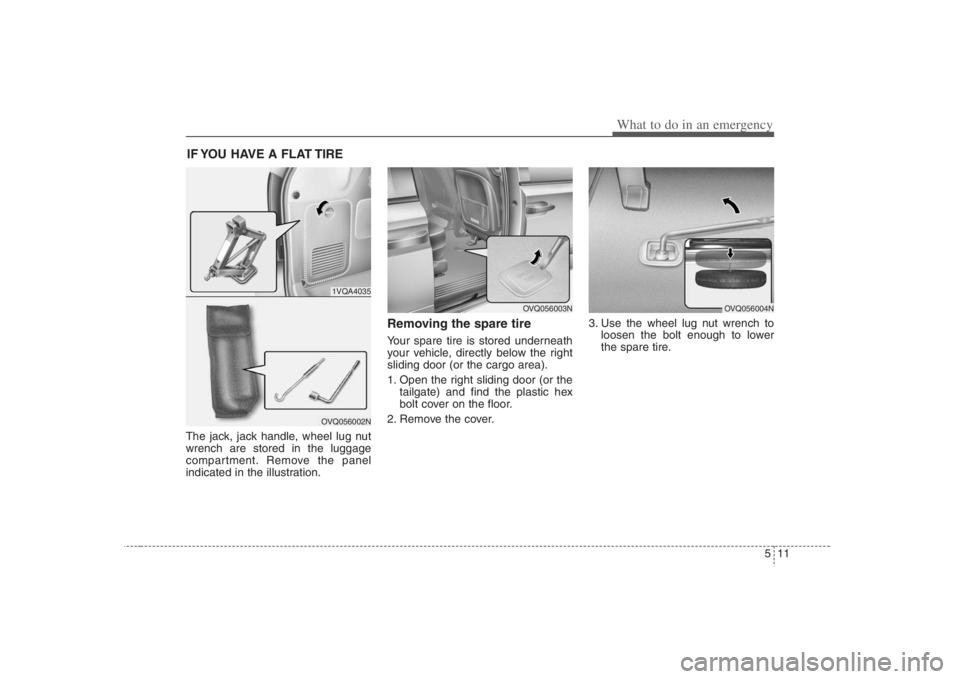
IF YOU HAVE A FLAT TIRE The jack, jack handle, wheel lug nut
wrench are stored in the luggage
compartment. Remove the panel
indicated in the illustration.
Removing the spare tire Your spare tire is stored underneath
your vehicle, directly below the right
sliding door (or the cargo area).
1. Open the right sliding door (or the
tailgate) and find the plastic hex
bolt cover on the floor.
2. Remove the cover.3. Use the wheel lug nut wrench to
loosen the bolt enough to lower
the spare tire.
1VQA4035OVQ056002N
OVQ056003N
OVQ056004N
Page 339 of 393

Maintenance30 6Driver's side fuse panel
Description Fuse rating Protected component
AUDIO 15A Audio, Step lamp
MEMORY 7.5A Climate control module, Clock, Cluster, Trip computer, Front area module, Power sliding door module, Power
tailgate module, Driver's door module, Front passenger door module, Driver's power seat module,
Driver position memory system unit
IG2-1 7.5A Air conditioner control module, Multi function switch, Inside relay box, ECM mirror, Rain sensor, Seat Warmer
IG2-2 7.5A Rear climate control button, Front area module, Power sliding door module, Power tailgate module, Driver's door
module, Front passenger door module, Driver's power seat module, Driver position memory system unit
OBD-II 7.5A OBD-II, Diagonosis connector
ROOM 7.5A Vanity mirror, Map lamp, Overhead console, Room lamp switch, Climate control module, Homelink
K/LOCK 7.5A Key interlock solenoid
ILLUMI 7.5A Instrument panel illumination
AMP 25A Amplifier
SEAT WARMER 20A Inside relay box(Seat warmer)
SUNROOF 25A Sunroof module
DDM 30A Driver's door module
TPMS 7.5A Tire pressure monitoring system
PEDAL 15A Power adjustable pedal relay(None-driver position memory system only)
P/OUTLET 1 15A Power outlet(Front)
ASS P/SEAT 20A Front passenger's power seat module
DRV P/SEAT 30A Driver's power seat module
ADM 30A Front passenger door module
ACC 7.5A Audio, Clock, Outside rearview mirror control and folding switch
P/OUTLET 2 15A Cigar lighter, Power outlet
START 7.5A Start relay
AIRBAG IND 7.5A Cluster
Page 340 of 393

631
Maintenance
Description Fuse rating Protected component
ENG 7.5A Automatic shift lever switch, Vehicle speed sensor, Inhibitor switch, Transaxle control module,
Input speed sensor, Output speed sensor, Back-up lamp switch, Fuel filter
IG1 7.5A Trip computer, Buzzer(Back warning system), Cluster, ESC switch, Ambient temperature sensor, Generator
ABS 7.5A ABS control module, ESC control module, Yaw rate sensor, Steering angle sensor
AIRBAG 15A Air bag control module
ALTERNATOR - Generator relay
SHUNT - Shunt connector
Description Fuse rating Protected component
RR D/LOCK 20A Sliding door lock relay, Sliding door unlock relay, Sliding door lock actuator, Tailgate lock actuator
RR WIPER 15A Rear wiper relay, Rear wiper motor
RR DEFOG 25A Rear window defroster relay, Rear window defroster
POWER TAIL GATE 30A Power tailgate module
P/QUARTER 10A Power rear quarter glass open relay, Power rear quarter glass close relay, Power rear quarter glass motor
RR P/WIN-RH 25A Sliding door power window relay(Right), Sliding door power window motor(Right)
RR P/WIN-LH 25A Sliding door power window relay(Left), Sliding door power window motor(Left)
PSD-RH 30A Power sliding door module(Right)
PSD-LH 30A Power sliding door module(Left)
LUGGAGE 7.5A Step lamp, Power tailgate ON/OFF switch, Tailgate lamp
FUEL DOOR 15A Fuel filler lid relay, Fuel filler lid actuator
RR P/OTLT-LH 15A Rear power outlet(Left)
RR P/OTLT-RH 15A Rear power outlet(Right)
RR DEFOG RELAY - Rear window defroster relayRear cargo area panel
Page 345 of 393
Maintenance36 6For best battery service: Keep the battery securely mounted.
Keep the battery top clean and dry.
Keep the terminals and connections
clean, tight, and coated with petroleum
jelly or terminal grease.
Rinse any spilled electrolyte from the
battery immediately with a solution of
water and baking soda.
If the vehicle is not going to be used for
an extended time, disconnect the bat-
tery cables.Battery recharging Your vehicle has a maintenance-free,
calcium-based battery.
If the battery becomes discharged in a
short time (because, for example, the
headlights or interior lights were left on
while the vehicle was not in use),
recharge it by slow charging (trickle)
for 10 hours.
If the battery gradually discharges
because of high electric load while the
vehicle is being used, recharge it at 20-
30A for two hours.
Items to be reset after the battery
has been discharged or the bat-
tery has been disconnected. Clock (See Chapter 3)
Sunroof (See Chapter 3)
Trip computer (See Chapter 3)
Climate control system (See Chapter
3)
Audio (See Chapter 3)
Power sliding door and power tailgate
(See Chapter 3)
CAUTION
Before performing maintenance
or recharging the battery, turn off
all accessories and stop the
engine.
The negative battery cable must
be removed first and installed last
when the battery is disconnected.
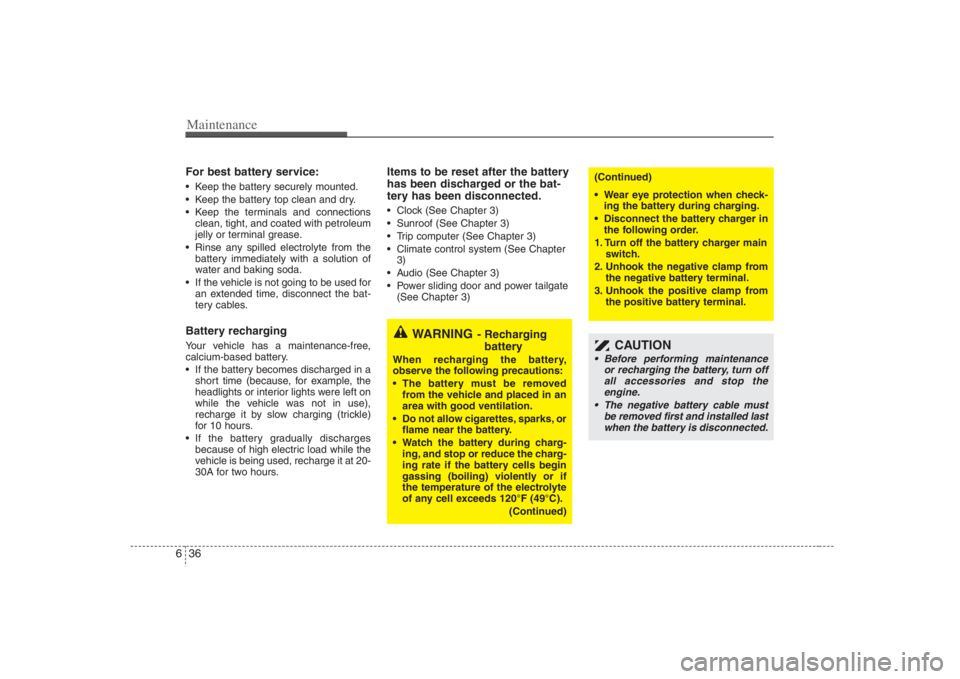
WARNING
- Recharging
battery
When recharging the battery,
observe the following precautions:
The battery must be removed
from the vehicle and placed in an
area with good ventilation.
Do not allow cigarettes, sparks, or
flame near the battery.
Watch the battery during charg-
ing, and stop or reduce the charg-
ing rate if the battery cells begin
gassing (boiling) violently or if
the temperature of the electrolyte
of any cell exceeds 120°F (49°C).
(Continued)
(Continued)
Wear eye protection when check-
ing the battery during charging.
Disconnect the battery charger in
the following order.
1. Turn off the battery charger main
switch.
2. Unhook the negative clamp from
the negative battery terminal.
3. Unhook the positive clamp from
the positive battery terminal.
Page 364 of 393
655
Maintenance
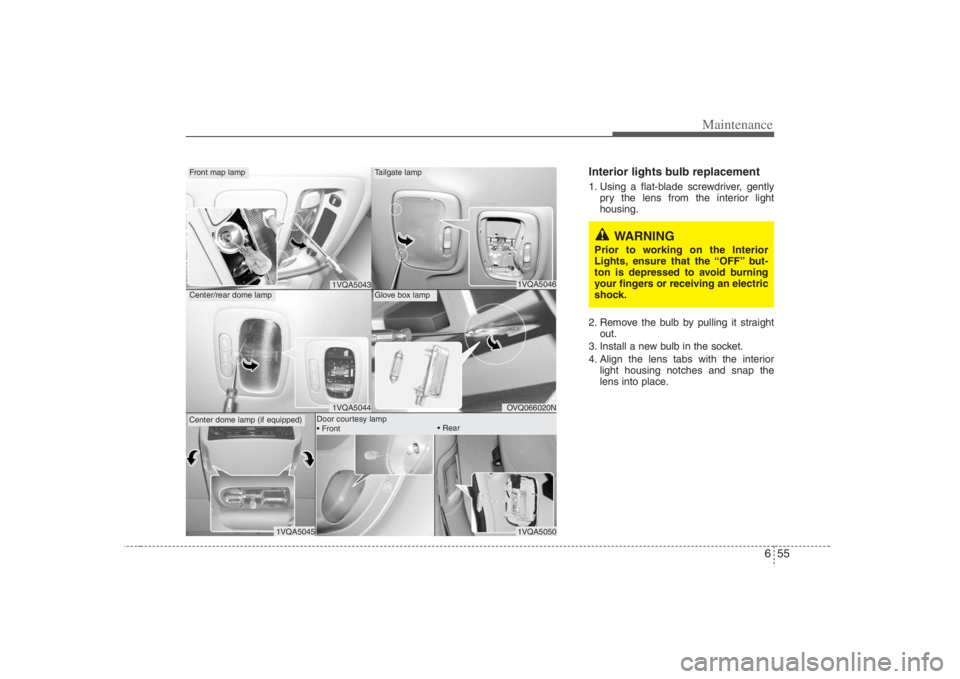
Interior lights bulb replacement1. Using a flat-blade screwdriver, gently
pry the lens from the interior light
housing.
2. Remove the bulb by pulling it straight
out.
3. Install a new bulb in the socket.
4. Align the lens tabs with the interior
light housing notches and snap the
lens into place.
1VQA5046OVQ066020N
Tailgate lampGlove box lamp
1VQA50431VQA5044
Front map lampCenter/rear dome lampCenter dome lamp (if equipped)
1VQA5050
1VQA5045
Door courtesy lamp
WARNING
Prior to working on the Interior
Lights, ensure that the “OFF” but-
ton is depressed to avoid burning
your fingers or receiving an electric
shock.
Page 365 of 393
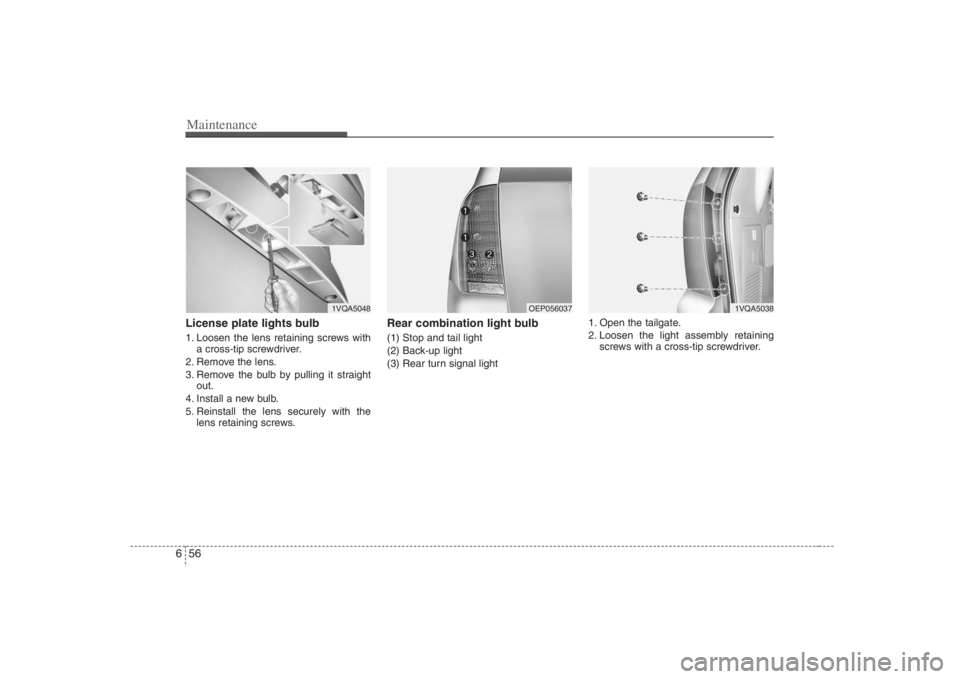
Maintenance56 6License plate lights bulb 1. Loosen the lens retaining screws with
a cross-tip screwdriver.
2. Remove the lens.
3. Remove the bulb by pulling it straight
out.
4. Install a new bulb.
5. Reinstall the lens securely with the
lens retaining screws.
Rear combination light bulb (1) Stop and tail light
(2) Back-up light
(3) Rear turn signal light1. Open the tailgate.
2. Loosen the light assembly retaining
screws with a cross-tip screwdriver.
1VQA5048
OEP056037
1VQA5038
Page 384 of 393

Specifications2 8
Item in (mm)
Overall length 202.0 (5130)
Overall width 78.1 (1985)
*1/ 76.4 (1940)
Overall height 71.5 (1815)*2/ 69.3 (1760)
Front tread 66.3 (1685)
Rear tread 66.3 (1685)
Wheelbase 118.9 (3020)
DIMENSIONS*1With door handle
*2With roof rack
Light Bulb Wattage
Headlights (Low) 55
Headlights (High) 55
Front turn signal/Position lights 28/8 (Amber)
Side mark lights 5
Front fog lights 51
Stop and tail lights 27/8
Rear turn signal lights 27 (Amber)
Back-up lights 16
High mounted stop light LED
*1
License plate lights 5
Front map lamps 10
Center dome lamps 10
Tailgate lamp 10
Door courtesy lamps 5
Glove box lamp 5
Vanity mirror lamps 3BULB WATTAGE*1LED : Light-emitting diode
Page 388 of 393
93
Index
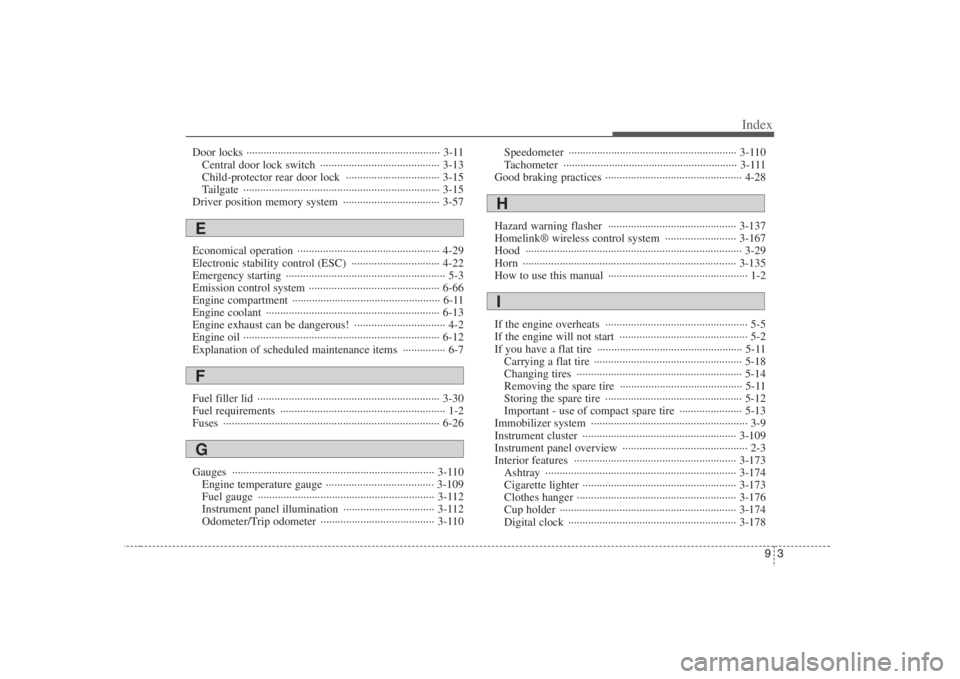
Door locks ···································································· 3-11
Central door lock switch ·········································· 3-13
Child-protector rear door lock ································· 3-15
Tailgate ····································································· 3-15
Driver position memory system ·································· 3-57
Economical operation ·················································· 4-29
Electronic stability control (ESC) ······························· 4-22
Emergency starting ························································ 5-3
Emission control system ·············································· 6-66
Engine compartment ···················································· 6-11
Engine coolant ····························································· 6-13
Engine exhaust can be dangerous! ································ 4-2
Engine oil ····································································· 6-12
Explanation of scheduled maintenance items ··············· 6-7
Fuel filler lid ································································ 3-30
Fuel requirements ·························································· 1-2
Fuses ············································································ 6-26
Gauges ······································································· 3-110
Engine temperature gauge ······································ 3-109
Fuel gauge ······························································ 3-112
Instrument panel illumination ································ 3-112
Odometer/Trip odometer ········································ 3-110Speedometer ··························································· 3-110
Tachometer ····························································· 3-111
Good braking practices ················································ 4-28
Hazard warning flasher ············································· 3-137
Homelink® wireless control system ························· 3-167
Hood ············································································ 3-29
Horn ··········································································· 3-135
How to use this manual ················································· 1-2
If the engine overheats ·················································· 5-5
If the engine will not start ············································· 5-2
If you have a flat tire ··················································· 5-11
Carrying a flat tire ···················································· 5-18
Changing tires ·························································· 5-14
Removing the spare tire ··········································· 5-11
Storing the spare tire ················································ 5-12
Important - use of compact spare tire ······················ 5-13
Immobilizer system ······················································· 3-9
Instrument cluster ······················································ 3-109
Instrument panel overview ············································ 2-3
Interior features ························································· 3-173
Ashtray ··································································· 3-174
Cigarette lighter ······················································ 3-173
Clothes hanger ························································ 3-176
Cup holder ······························································ 3-174
Digital clock ··························································· 3-178EFG
HI