2008 Hyundai Elantra Exhaust
[x] Cancel search: ExhaustPage 286 of 360

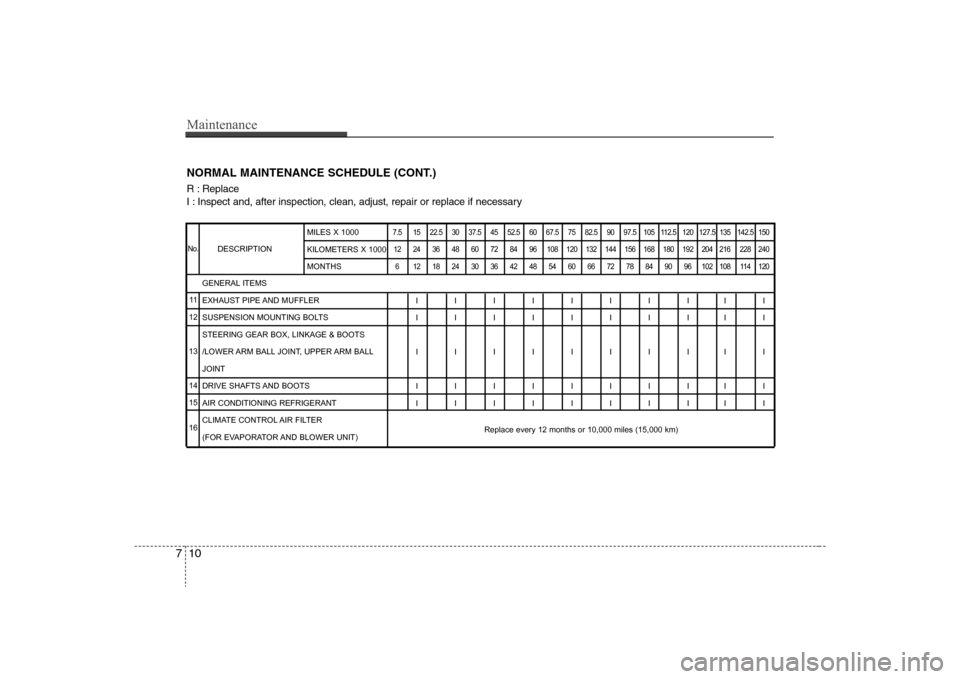
Maintenance10 7NORMAL MAINTENANCE SCHEDULE (CONT.)R : Replace
I : Inspect and, after inspection, clean, adjust, repair or replace if necessary
DESCRIPTION
7.5 15 22.5 30 37.5 45 52.5 60 67.5 75 82.5 90 97.5 105 112.5 120 127.5 135 142.5 150
12 24 36 48 60 72 84 96 108 120 132 144 156 168 180 192 204 216 228 240
6 121824303642485460667278849096102108114120
IIIIIIIIII
IIIIIIIIII
IIIIIIIIII
IIIIIIIIII
IIIIIIIIII
Replace every 12 months or 10,000 miles (15,000 km) GENERAL ITEMS
EXHAUST PIPE AND MUFFLER
SUSPENSION MOUNTING BOLTS
STEERING GEAR BOX, LINKAGE & BOOTS
/LOWER ARM BALL JOINT, UPPER ARM BALL
JOINT
DRIVE SHAFTS AND BOOTS
AIR CONDITIONING REFRIGERANT
CLIMATE CONTROL AIR FILTER
(FOR EVAPORATOR AND BLOWER UNIT)MILES X 1000
KILOMETERS X 1000
MONTHS
No.11
12
13
14
15
16
Page 289 of 360

713
Maintenance
Timing beltInspect all parts related to the timing belt
for damage and deformation. Replace
any damaged parts immediately.Vapor hose and fuel filler capThe vapor hose and fuel filler cap should
be inspected at those intervals specified
in the maintenance schedule. Make sure
that a new vapor hose or fuel filler cap is
correctly replaced.
Vacuum crankcase ventilation
hosesInspect the surface of hoses for evidence
of heat and/or mechanical damage. Hard
and brittle rubber, cracking, tears, cuts,
abrasions, and excessive swelling indi-
cate deterioration. Particular attention
should be paid to examine those hose
surfaces nearest to high heat sources,
such as the exhaust manifold.
Inspect the hose routing to assure that
the hoses do not come in contact with
any heat source, sharp edges or moving
component which might cause heat dam-
age or mechanical wear. Inspect all hose
connections, such as clamps and cou-
plings, to make sure they are secure, and
that no leaks are present. Hoses should
be replaced immediately if there is any
evidence of deterioration or damage.
Air cleaner filterA Genuine Hyundai air cleaner filter is
recommended when the filter is
replaced.Spark plugsMake sure to install new spark plugs of
the correct heat range.Valve clearanceInspect excessive valve noise and/or
engine vibration and adjust if necessary.
A qualified technician should perform the
operation.Cooling systemCheck the cooling system parts, such as
radiator, coolant reservoir, hoses and
connections for leakage and damage.
Replace any damaged parts.CoolantThe coolant should be changed at the
intervals specified in the maintenance
schedule.
Page 290 of 360

Maintenance14 7Manual transaxle fluid
(if equipped)Inspect the manual transaxle fluid
according to the maintenance schedule.✽ ✽
NOTICEIf the oil level is low, check for possible
leaks before adding oil. Do not overfill.Automatic transaxle fluid
(if equipped)The fluid level should be in the "HOT"
range of the dipstick, after the engine
and transaxle are at normal operating
temperature. Check the automatic
transaxle fluid level with the engine run-
ning and the transaxle in neutral, with the
parking brake properly applied.Brake hoses and linesVisually check for proper installation,
chafing, cracks, deterioration and any
leakage. Replace any deteriorated or
damaged parts immediately.
Brake fluidCheck brake fluid level in the brake fluid
reservoir. The level should be between
“MIN” and “MAX” marks on the side of
the reservoir. Use only hydraulic brake
fluid conforming to DOT 3 or DOT 4
specification.Rear disc brake / linings, parking
brakeCheck the rear disc brake and linings for
scoring, burning, leaking fluid, broken
parts, and excessive wear. Inspect the
parking brake system including the park-
ing brake lever and cables.Brake pads, calipers and rotorsCheck the pads for excessive wear, discs
for run out and wear, and calipers for fluid
leakage.Exhaust pipe and mufflerVisually inspect the exhaust pipes, muf-
fler and hangers for cracks, deterioration,
or damage. Start the engine and listen
carefully for any exhaust gas leakage.
Tighten connections or replace parts as
necessary.
Suspension mounting boltsCheck the suspension connections for
looseness or damage. Retighten to the
specified torque.Steering gear box, linkage &
boots/lower arm ball jointWith the vehicle stopped and engine off,
check for excessive free-play in the
steering wheel.
Check the linkage for bends or damage.
Check the dust boots and ball joints for
deterioration, cracks, or damage.
Replace any damaged parts.Drive shafts and bootsCheck the drive shafts, boots and clamps
for cracks, deterioration, or damage.
Replace any damaged parts and, if nec-
essary, repack the grease.Air conditioning refrigerant
(if equipped)Check the air conditioning lines and con-
nections for leakage and damage.
Page 297 of 360

721
Maintenance
✽ ✽
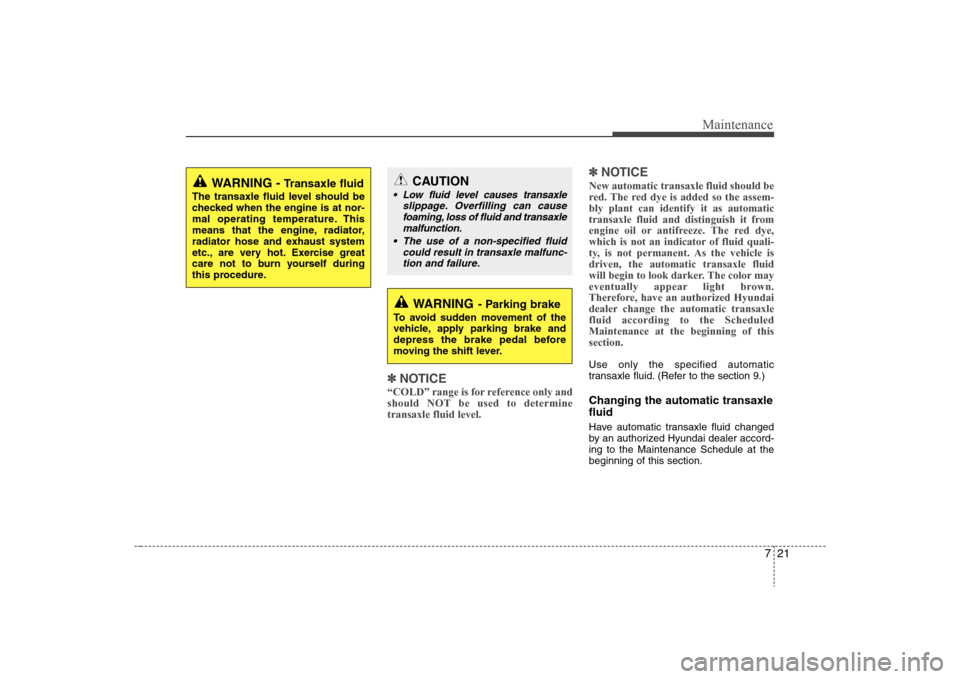
NOTICE“COLD” range is for reference only and
should NOT be used to determine
transaxle fluid level.
✽ ✽
NOTICENew automatic transaxle fluid should be
red. The red dye is added so the assem-
bly plant can identify it as automatic
transaxle fluid and distinguish it from
engine oil or antifreeze. The red dye,
which is not an indicator of fluid quali-
ty, is not permanent. As the vehicle is
driven, the automatic transaxle fluid
will begin to look darker. The color may
eventually appear light brown.
Therefore, have an authorized Hyundai
dealer change the automatic transaxle
fluid according to the Scheduled
Maintenance at the beginning of this
section.Use only the specified automatic
transaxle fluid. (Refer to the section 9.)Changing the automatic transaxle
fluidHave automatic transaxle fluid changed
by an authorized Hyundai dealer accord-
ing to the Maintenance Schedule at the
beginning of this section.
WARNING -
Transaxle fluid
The transaxle fluid level should be
checked when the engine is at nor-
mal operating temperature. This
means that the engine, radiator,
radiator hose and exhaust system
etc., are very hot. Exercise great
care not to burn yourself during
this procedure.
WARNING
- Parking brake
To avoid sudden movement of the
vehicle, apply parking brake and
depress the brake pedal before
moving the shift lever.
CAUTION
Low fluid level causes transaxle
slippage. Overfilling can cause
foaming, loss of fluid and transaxle
malfunction.
The use of a non-specified fluid
could result in transaxle malfunc-
tion and failure.
Page 337 of 360

761
Maintenance
Underbody maintenanceCorrosive materials used for ice and
snow removal and dust control may col-
lect on the underbody. If these materials
are not removed, accelerated rusting can
occur on underbody parts such as the
fuel lines, frame, floor pan and exhaust
system, even though they have been
treated with rust protection.
Thoroughly flush the vehicle underbody
and wheel openings with lukewarm or
cold water once a month, after off-road
driving and at the end of each winter. Pay
special attention to these areas because
it is difficult to see all the mud and dirt. It
will do more harm than good to wet down
the road grime without removing it. The
lower edges of doors, rocker panels, and
frame members have drain holes that
should not be allowed to clog with dirt;
trapped water in these areas can cause
rusting.
Aluminum wheel maintenance The aluminum wheels are coated with a
clear protective finish.
Do not use any abrasive cleaner, pol-
ishing compound, solvent, or wire
brushes on aluminum wheels. They
may scratch or damage the finish.
Use only a mild soap or neutral deter-
gent, and rinse thoroughly with water.
Also, be sure to clean the wheels after
driving on salted roads. This helps pre-
vent corrosion.
Avoid washing the wheels with high-
speed car wash brushes.
Do not use any acid detergent. It may
damage and corrode the aluminum
wheels coated with a clear protective
finish.
WARNING
After washing the vehicle, test the
brakes while driving slowly to see if
they have been affected by water. If
braking performance is impaired,
dry the brakes by applying them
lightly while maintaining a slow for-
ward speed.
Page 341 of 360

765
Maintenance
EMISSION CONTROL SYSTEMThe emission control system of your
vehicle is covered by a written limited
warranty. Please see the warranty infor-
mation contained in the Owner’s
Handbook & Warranty Information book-
let in your vehicle.
Your vehicle is equipped with an emis-
sion control system to meet all emission
regulations.
There are three emission control sys-
tems which are as follows.
(1) Crankcase emission control system
(2) Evaporative emission control system
(3) Exhaust emission control system
In order to assure the proper function of
the emission control systems, it is rec-
ommended that you have your car
inspected and maintained by an author-
ized Hyundai dealer in accordance with
the maintenance schedule in this manu-
al.Caution for the Inspection and
Maintenance Test (With Electronic
Stability Control (ESC) system)
To prevent the vehicle from misfir-
ing during dynamometer testing,
turn the Electronic Stability Control
(ESC) system off by pressing the
ESC switch.
After dynamometer testing is com-
pleted, turn the ESC system back on
by pressing the ESC switch again.
1. Crankcase emission control
systemThe positive crankcase ventilation sys-
tem is employed to prevent air pollution
caused by blow-by gases being emitted
from the crankcase. This system supplies
fresh filtered air to the crankcase through
the air intake hose. Inside the crankcase,
the fresh air mixes with blow-by gases,
which then pass through the PCV valve
into the induction system.
2. Evaporative emission control
(including ORVR: Onboard
Refueling Vapor Recovery)
SystemThe Evaporative Emission Control
System is designed to prevent fuel
vapors from escaping into the atmos-
phere.
(The ORVR system is designed to allow
the vapors from the fuel tank to be
loaded into a canister while refueling at
the gas station, preventing the escape of
fuel vapors into the atmosphere.)CanisterFuel vapors generated inside the fuel
tank are absorbed and stored in the
onboard canister. When the engine is
running, the fuel vapors absorbed in the
canister are drawn into the surge tank
through the purge control solenoid valve.Purge Control Solenoid Valve (PCSV)The purge control solenoid valve is con-
trolled by the Engine Control Module
(ECM); when the engine coolant temper-
ature is low during idling, the PCSV clos-
es so that evaporated fuel is not taken
into the engine. After the engine warms-
up during ordinary driving, the PCSV
opens to introduce evaporated fuel to the
engine.
Page 342 of 360

Maintenance66 73. Exhaust emission control
systemThe Exhaust Emission Control System is
a highly effective system which controls
exhaust emissions while maintaining
good vehicle performance.Vehicle modifications This vehicle should not be modified.
Modification of your vehicle could affect
its performance, safety or durability and
may even violate governmental safety
and emissions regulations.
In addition, damage or performance
problems resulting from any modification
may not be covered under warranty.Engine exhaust gas precautions (car-
bon monoxide) Carbon monoxide can be present with
other exhaust fumes. Therefore, if you
smell exhaust fumes of any kind inside
your vehicle, have it inspected and
repaired immediately. If you ever sus-
pect exhaust fumes are coming into
your vehicle, drive it only with all the
windows fully open. Have your vehicle
checked and repaired immediately. Do not operate the engine in confined
or closed areas (such as garages) any
more than what is necessary to move
the vehicle in or out of the area.
When the vehicle is stopped in an
open area for more than a short time
with the engine running, adjust the
ventilation system (as needed) to draw
outside air into the vehicle.
Never sit in a parked or stopped vehi-
cle for any extended time with the
engine running.
When the engine stalls or fails to start,
excessive attempts to restart the
engine may cause damage to the
emission control system.
WARNING
- Exhaust
Engine exhaust gases contain car-
bon monoxide (CO). Though color-
less and odorless, it is dangerous
and could be lethal if inhaled.
Follow the instructions on this
page to avoid CO poisoning.
PROPOSITION 65
WARNING
Engine exhaust and a wide variety
of automobile components and
parts, including components found
in the interior furnishings in a vehi-
cle, contain or emit chemicals
known to the State of California to
cause cancer and birth defects and
reproductive harm. In addition, cer-
tain fluids contained in vehicles
and certain products of component
wear contain or emit chemicals
known to the State of California to
cause cancer and birth defects or
other reproductive harm.
Page 343 of 360

767
Maintenance
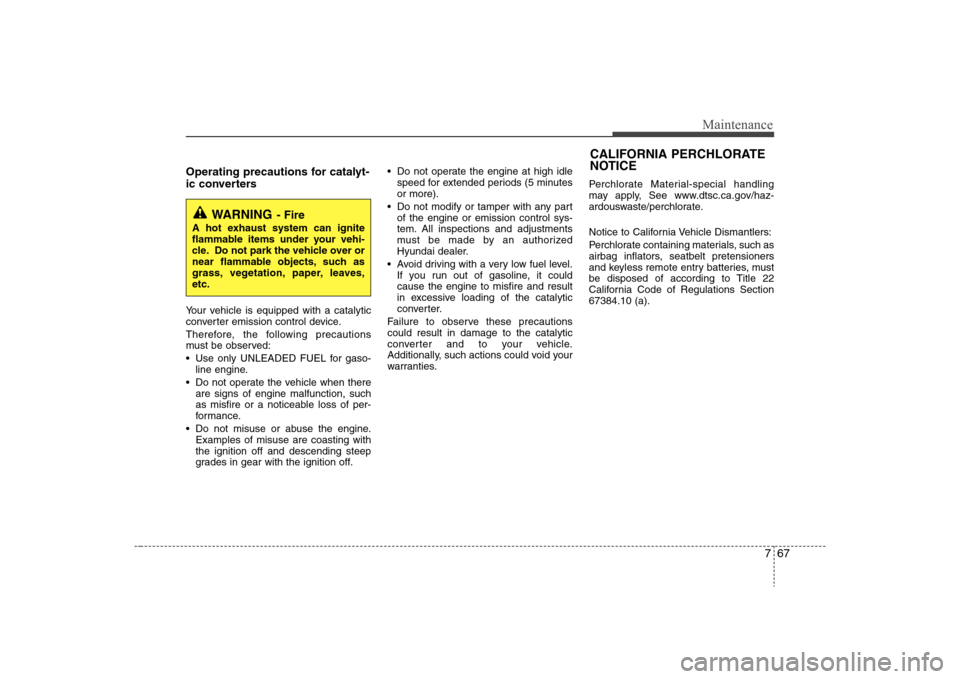
Operating precautions for catalyt-
ic converters Your vehicle is equipped with a catalytic
converter emission control device.
Therefore, the following precautions
must be observed:
Use only UNLEADED FUEL for gaso-
line engine.
Do not operate the vehicle when there
are signs of engine malfunction, such
as misfire or a noticeable loss of per-
formance.
Do not misuse or abuse the engine.
Examples of misuse are coasting with
the ignition off and descending steep
grades in gear with the ignition off. Do not operate the engine at high idle
speed for extended periods (5 minutes
or more).
Do not modify or tamper with any part
of the engine or emission control sys-
tem. All inspections and adjustments
must be made by an authorized
Hyundai dealer.
Avoid driving with a very low fuel level.
If you run out of gasoline, it could
cause the engine to misfire and result
in excessive loading of the catalytic
converter.
Failure to observe these precautions
could result in damage to the catalytic
converter and to your vehicle.
Additionally, such actions could void your
warranties.Perchlorate Material-special handling
may apply, See www.dtsc.ca.gov/haz-
ardouswaste/perchlorate.
Notice to California Vehicle Dismantlers:
Perchlorate containing materials, such as
airbag inflators, seatbelt pretensioners
and keyless remote entry batteries, must
be disposed of according to Title 22
California Code of Regulations Section
67384.10 (a).
WARNING
- Fire
A hot exhaust system can ignite
flammable items under your vehi-
cle. Do not park the vehicle over or
near flammable objects, such as
grass, vegetation, paper, leaves,
etc.
CALIFORNIA PERCHLORATE
NOTICE