Page 138 of 524

�µ�µ
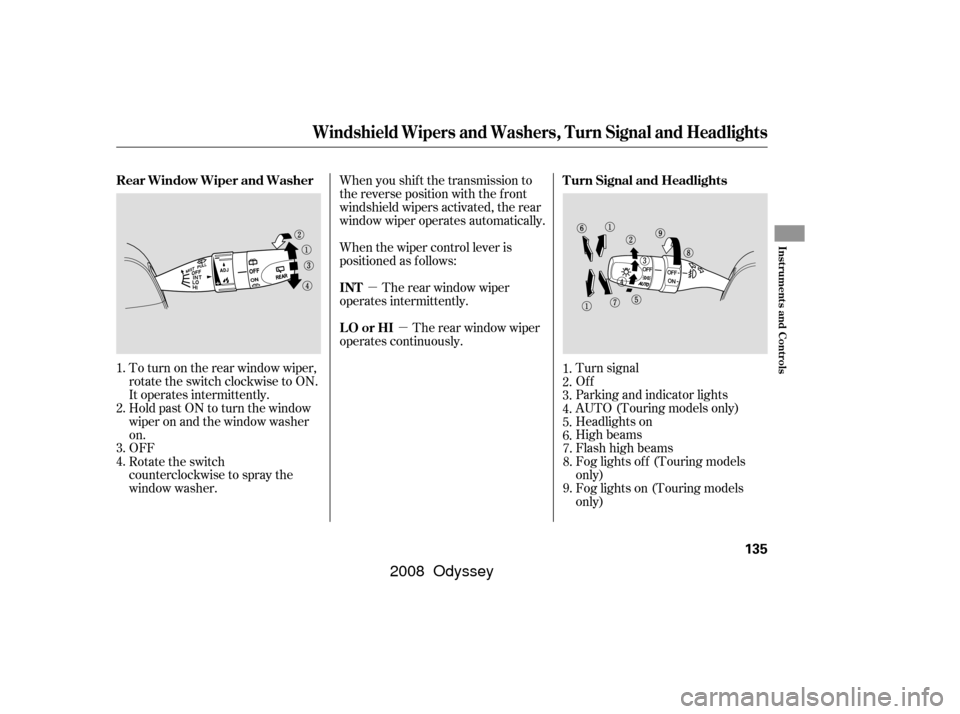
To turn on the rear window wiper,
rotate the switch clockwise to ON.
It operates intermittently. Turn signal
Of f
Parking and indicator lights
AUTO (Touring models only)
Headlights on
High beams
Flashhighbeams
Fog lights of f (Touring models
only)
Fog lights on (Touring models
only)
OFF Hold past ON to turn the window
wiper on and the window washer
on. When you shif t the transmission to
the reverse position with the f ront
windshield wipers activated, the rear
window wiper operates automatically.
When the wiper control lever is
positioned as f ollows:
The rear window wiper
operates intermittently.
The rear window wiper
operates continuously.
Rotate the switch
counterclockwise to spray the
window washer. 7.
8.
9.
1.
2.
3.
4.
5.
6.
1.
2.
3.
4. Turn Signal and Headlights
Rear Window Wiper and Washer
INT
LO or HI
Windshield Wipers and Washers, Turn Signal and Headlights
Inst rument s and Cont rols
135
�����—�����—�����y���������������y���
�(�����������y���
�����y
2008 Odyssey
Page 408 of 524

This section explains why it is
important to keep your vehicle well
maintained and how to f ollow basic
maintenance saf ety precautions.
This section also includes
instructions on how to read the
maintenance minder messages on
the inf ormation display or multi-
inf ormation display (depending on
models), and instructions f or simple
maintenance tasks you may want to
take care of yourself .
If you have the skills and tools to
perf orm more complex maintenance
tasks on your vehicle, you may want
to purchase the service manual. See
page f or inf ormation on how to
obtain a copy, or see your dealer.......................
Maintenance Saf ety .406
....................
Maintenance Minder .407
..............................
Fluid Locations .417
........................
Adding Engine Oil .418
Changing the Engine Oil and
...........................................
Filter .420
..............................
Engine Coolant .422
....................
Windshield Washers .424
....
Automatic Transmission Fluid .425
....................................
Brake Fluid .427
....................
Power Steering Fluid .428
....................................
Timing Belt .428
.............................................
Lights .429
................
Cleaning the Seat Belts .436
.....................................
Floor Mats .436
..................
Dust and Pollen Filter .436
.................................
Wiper Blades .437
...........................................
Wheels .442
...............................................
Tires .442
...................
Checking the Battery .450
.............................
Vehicle Storage .451
505
Maintenance
Maint enance
405
�����—�����—�����y���������������y���
�(�����������y�����
���y
2008 Odyssey
Page 427 of 524

Check the f luid level in the
windshield washer reservoir at least
monthly during normal use. This
reservoir supplies the windshield and
rear window washers.
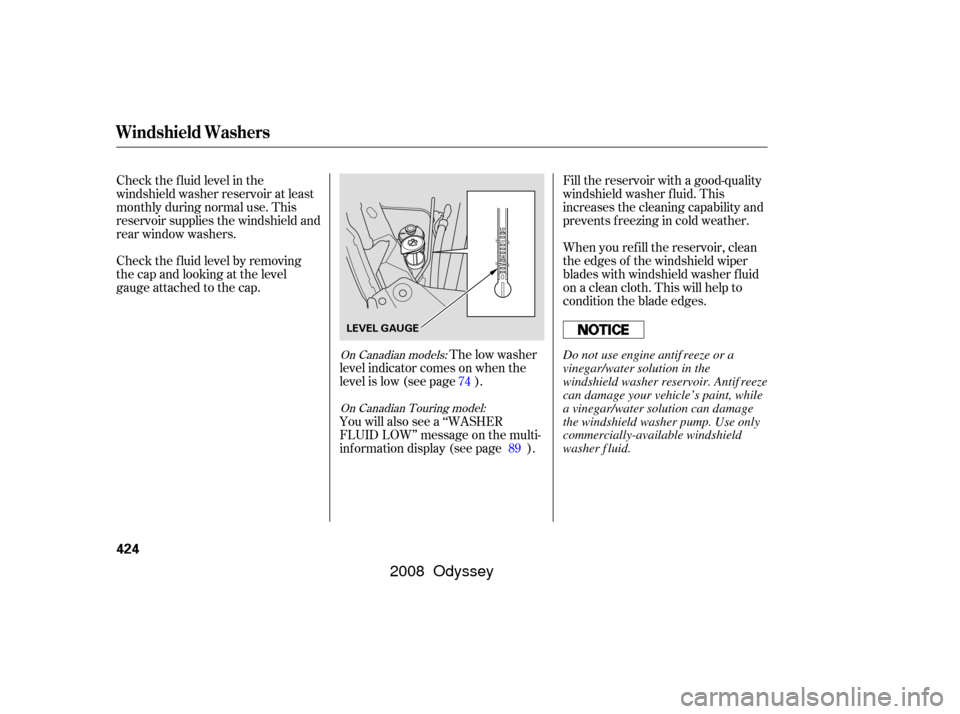
Check the f luid level by removing
the cap and looking at the level
gauge attached to the cap.The low washer
level indicator comes on when the
level is low (see page ).
You will also see a ‘‘WASHER
FLUID LOW’’ message on the multi-
inf ormation display (see page ). Fill the reservoir with a good-quality
windshield washer f luid. This
increases the cleaning capability and
prevents f reezing in cold weather.
When you ref ill the reservoir, clean
the edges of the windshield wiper
blades with windshield washer f luid
on a clean cloth. This will help to
condition the blade edges.
89
74
On Canadian models:
On Canadian Touring model:
Windshield Washers
424
LEVEL GAUGE
Do not use engine antif reeze or a
vinegar/water solution in the
windshield washer reservoir. Antif reeze
can damage your vehicle’s paint, while
a vinegar/water solution can damage
the windshield washer pump. Use only
commercially-available windshield
washer f luid.
�����—�����—�����y���
����
��
���y���
�(�����������y���������y
2008 Odyssey
Page 440 of 524
Check the condition of the wiper
blades at least every 6 months.
Replace them if you f ind signs of
cracking in the rubber, and areas
that are getting hard or if they leave
streaks and unwiped areas when
used.Raise the wiper arm of f the
windshield. Raise the driver’s side
first, then the passenger’s side.Disconnect the blade assembly
from the wiper arm:
Put a cloth on the edge of the lock
tab, then push up on the lock tab
caref ully with a f lat-tip screwdriver.
To replace a f ront wiper blade: 2.
1.
CONT INUED
Wiper Blades
Maint enance
437
WIPER ARMS
LOCK TAB
Do not open the hood when the wiper
arms are raised, or you will damage the
hood and the arms.
�����—�����—�����y���
�����������y���
�(�����������y���������y
2008 Odyssey
Page 441 of 524
Pivot the blade assembly toward
the wiper arm until it releases
from the wiper arm.
When replacing a wiper blade,
make sure not to drop the wiper
blade or wiper arm down on the
windshield.Examine the new wiper blades. If
they have no plastic or metal
reinf orcement along the back
edge, remove the metal
reinf orcement strips f rom the old
wiper blade, and install them in
the slots along the edge of the new
blade.
Remove the blade f rom its holder
by grabbing the tabbed end of the
blade. Pull f irmly until the tabs
come out of the holder.
3. 4.
Wiper Blades
438
BLADE
WIPER ARM
�����—�����—�����y���
�������
���y���
�(�����������y���������y
2008 Odyssey
Page 442 of 524
Slide the wiper blade assembly
onto the wiper arm. Push down
the lock tab. Make sure the wiper
blade assembly locks in place.
Lower the wiper arm down against
the windshield, the passenger’s
side first, then the driver’s side.
Place the top of the wiper blade on
the end of the blade assembly, and
slide the blade onto the assembly
in the direction pointed to by the
arrow.
Make sure the tab on the blade
assembly fits in the indent of the
wiper blade and the blade is
completely installed.
Make sure the three rubber tabs
inside the blade f it to each notch of
the reinf orcement, as shown.
5.6.
7.
CONT INUED
Wiper Blades
Maint enance
439
REINFORCEMENT
BLADE
TOP
�����—�����—�����y���
�������
���y���
�(�����������y���������y
2008 Odyssey
Page 443 of 524
Pull one end of the blade out f rom
the holder.
Slide the blade out of the holder.
To replace a rear wiper blade:
Disconnect the blade assembly
f rom the wiper arm by pivoting the
blade assembly upward. Examine the new wiper blades. If
they have no plastic or metal
reinf orcement along the back
edge, remove the metal
reinf orcement strips f rom the old
wiper blade, and install them in
the slots along the edge of the new
blade.
1.
2. 3.
Wiper Blades
440
BLADE
REINFORCEMENT
�����—�����—�����y���
�����������y���
�(�����������y���������y
2008 Odyssey
Page 444 of 524
Slide the new blade into the wiper
arm. Make sure it is engaged in
the slot along its f ull length.
Insert both ends of the blade into
the holder. Make sure they are
secure.Install the wiper blade assembly
onto the wiper arm. Make sure it
locks in place.
Lower the wiper arm against the
windshield.
4. 5.
6.
Wiper Blades
Maint enance
441
�����—�����—�����y���
���������
�y���
�(�����������y���������y
2008 Odyssey