2008 GMC SIERRA wheel torque
[x] Cancel search: wheel torquePage 120 of 578

Automatic Transmission Operation
If your vehicle is has an automatic transmission, it
has an electronic shift position indicator within
the instrument panel cluster. This display comes on
when the ignition key is turned to the ON/RUN position.
There are several different positions for the shift lever.
See “Range Selection Mode” later in this section.
PARK (P):This position locks your rear wheels. It is
the best position to use when you start the engine
because your vehicle cannot move easily. When parked
on a hill, especially when the vehicle has a heavy
load, you might notice an increase in the effort to shift
out of Park. See Torque Lock (Automatic Transmission)
underShifting Into PARK (P) on page 2-50for more
information.
Hydra-Matic
®4-Speed
Automatic Transmission
Allison Transmission®or Hydra-Matic®6-Speed
Automatic Transmission
2-28
Page 125 of 578

To use this feature, do the following:
1. Move the shift lever to the MANUAL MODE (M).
2. Press the plus/minus buttons, located on the
steering column shift lever, to select the desired
range of gears for your current driving conditions.
When MANUAL MODE (M) is selected a number
displays next to the M, indicating the current gear.
This number is the highest gear that can be used.
However, your vehicle can automatically shift to lower
gears as it adjusts to driving conditions. This means that
all gears below that number are available. When
FIFTH (5) is selected, FIRST (1) through FIFTH (5)
gears are automatically shifted by the vehicle, but
SIXTH (6) cannot be used until the plus/minus button
located on the steering column lever is used to change
to the gear.
Grade Braking is not available when the Range
Selection Mode is active. SeeTow/Haul Mode on
page 2-34.While using the Range Selection mode feature, cruise
control and the Tow/Haul mode can be used.
Notice:Spinning the tires or holding the vehicle in
one place on a hill using only the accelerator
pedal may damage the transmission. The repair will
not be covered by your warranty. If you are stuck,
do not spin the tires. When stopping on a hill,
use the brakes to hold the vehicle in place.
Low Traction Mode
If your vehicle has the Allison Transmission®,orthe
Hydra-Matic®6-Speed Automatic Transmission, it has a
Low Traction Mode that assist in vehicle acceleration
when road conditions are slippery, such as with ice
or snow. While the vehicle is at a stop, select the second
gear range using the Range Selection system. This
will limit torque to the wheels after it detects wheel slip,
preventing the tires from spinning.
2-33
Page 129 of 578

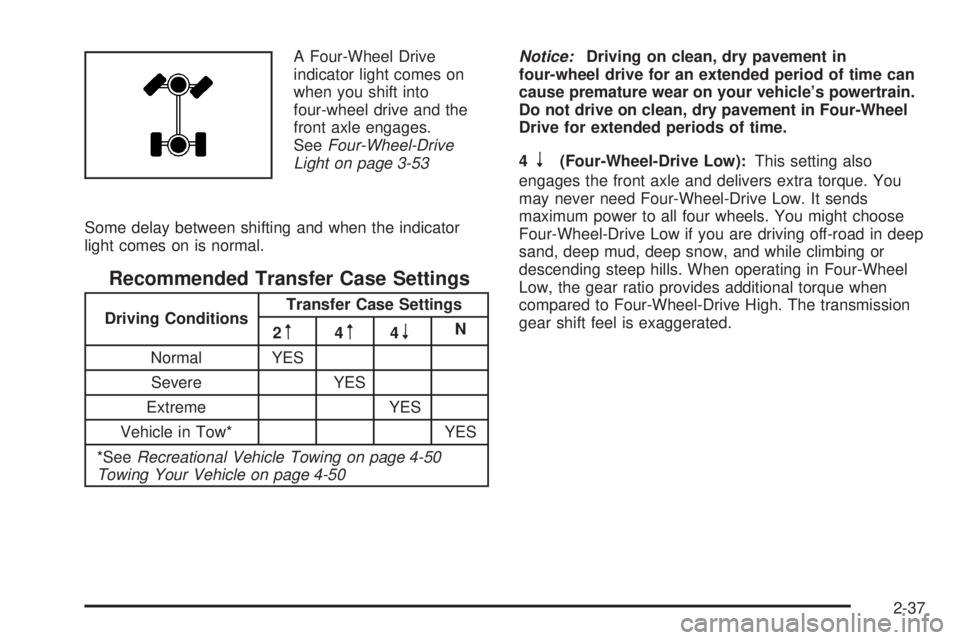
A Four-Wheel Drive
indicator light comes on
when you shift into
four-wheel drive and the
front axle engages.
SeeFour-Wheel-Drive
Light on page 3-53
Some delay between shifting and when the indicator
light comes on is normal.
Recommended Transfer Case Settings
Driving ConditionsTransfer Case Settings
2m4m4nN
Normal YES
Severe YES
Extreme YES
Vehicle in Tow* YES
*SeeRecreational Vehicle Towing on page 4-50
Towing Your Vehicle on page 4-50Notice:Driving on clean, dry pavement in
four-wheel drive for an extended period of time can
cause premature wear on your vehicle’s powertrain.
Do not drive on clean, dry pavement in Four-Wheel
Drive for extended periods of time.
4
n(Four-Wheel-Drive Low):This setting also
engages the front axle and delivers extra torque. You
may never need Four-Wheel-Drive Low. It sends
maximum power to all four wheels. You might choose
Four-Wheel-Drive Low if you are driving off-road in deep
sand, deep mud, deep snow, and while climbing or
descending steep hills. When operating in Four-Wheel
Low, the gear ratio provides additional torque when
compared to Four-Wheel-Drive High. The transmission
gear shift feel is exaggerated.
2-37
Page 133 of 578

Electronic Transfer Case
The transfer case knob is
located next to the
steering column.
Use the dial to shift into and out of four-wheel drive.
Recommended Transfer Case Settings
Driving ConditionsTransfer Case Settings
2m4m4nN
Normal YES
Severe YES
Extreme YES
Vehicle in Tow* YES
*SeeRecreational Vehicle Towing on page 4-50
Towing Your Vehicle on page 4-50You can choose among four driving settings:
Indicator lights in the dial show which setting you are in.
The indicator lights will come on brie�y when you turn
on the ignition and one will stay on. If the lights do
not come on, you should take your vehicle to your dealer
for service. An indicator light �ashes while shifting the
transfer case and remains illuminated when the
shift is complete. If for some reason the transfer case
cannot make a requested shift, it will return to the
last chosen setting.
2
m(Two-Wheel-Drive High):This setting is used for
driving in most street and highway situations. The
front axle is not engaged in Two-Wheel Drive. This
setting also provides the best fuel economy.
4
m(Four-Wheel-Drive High):Use the
Four-Wheel-Drive High position when extra traction is
needed, such as on snowy or icy roads or in most
off-road situations. This setting also engages the front
axle to help drive your vehicle. This is the best setting to
use when plowing snow.
4
n(Four-Wheel-Drive Low):This setting also
engages the front axle and delivers extra torque. You
may never need this setting. It sends maximum power to
all four wheels. You might choose Four-Wheel-Drive
Low while driving off-road in deep sand, deep mud, deep
snow, and while climbing or descending steep hills.
StabiliTrak
®will not engage in this mode.
2-41
Page 137 of 578

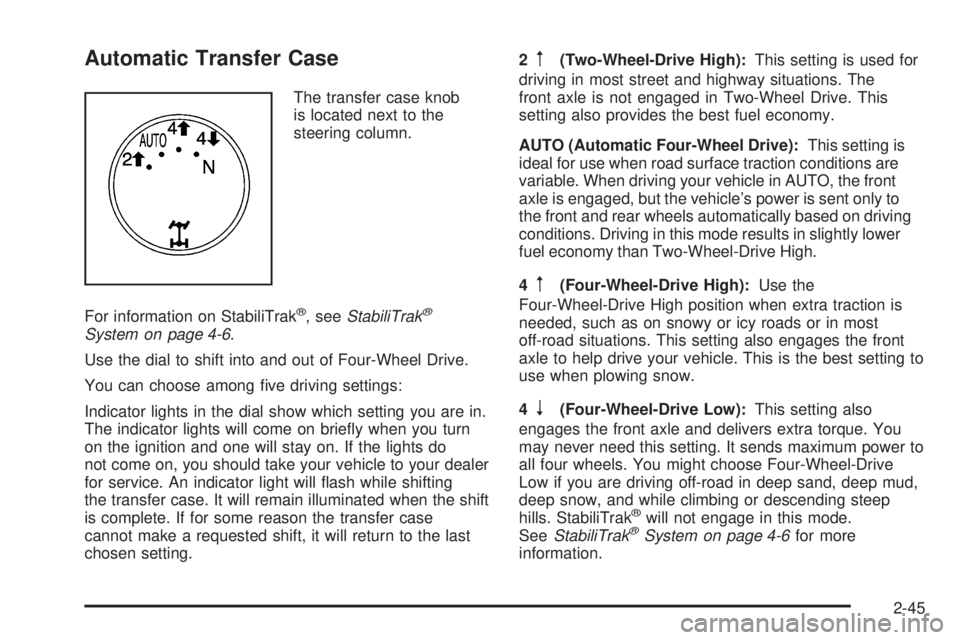
Automatic Transfer Case
The transfer case knob
is located next to the
steering column.
For information on StabiliTrak
®, seeStabiliTrak®
System on page 4-6.
Use the dial to shift into and out of Four-Wheel Drive.
You can choose among �ve driving settings:
Indicator lights in the dial show which setting you are in.
The indicator lights will come on brie�y when you turn
on the ignition and one will stay on. If the lights do
not come on, you should take your vehicle to your dealer
for service. An indicator light will �ash while shifting
the transfer case. It will remain illuminated when the shift
is complete. If for some reason the transfer case
cannot make a requested shift, it will return to the last
chosen setting.2
m(Two-Wheel-Drive High):This setting is used for
driving in most street and highway situations. The
front axle is not engaged in Two-Wheel Drive. This
setting also provides the best fuel economy.
AUTO (Automatic Four-Wheel Drive):This setting is
ideal for use when road surface traction conditions are
variable. When driving your vehicle in AUTO, the front
axle is engaged, but the vehicle’s power is sent only to
the front and rear wheels automatically based on driving
conditions. Driving in this mode results in slightly lower
fuel economy than Two-Wheel-Drive High.
4
m(Four-Wheel-Drive High):Use the
Four-Wheel-Drive High position when extra traction is
needed, such as on snowy or icy roads or in most
off-road situations. This setting also engages the front
axle to help drive your vehicle. This is the best setting to
use when plowing snow.
4
n(Four-Wheel-Drive Low):This setting also
engages the front axle and delivers extra torque. You
may never need this setting. It sends maximum power to
all four wheels. You might choose Four-Wheel-Drive
Low if you are driving off-road in deep sand, deep mud,
deep snow, and while climbing or descending steep
hills. StabiliTrak
®will not engage in this mode.
SeeStabiliTrak®System on page 4-6for more
information.
2-45
Page 143 of 578

CAUTION: (Continued)
If you have four-wheel drive and your transfer
case is in NEUTRAL, your vehicle will be free
to roll, even if your shift lever is in PARK (P).
So be sure the transfer case is in a drive
gear — not in NEUTRAL.
And, if you leave the vehicle with the engine
running, it could overheat and even catch �re.
You or others could be injured. Do not leave
your vehicle with the engine running unless
you have to.
If you have to leave your vehicle with the engine
running, be sure your vehicle is in PARK (P) and the
parking brake is �rmly set before you leave it. After you
move the shift lever into PARK (P), hold the regular
brake pedal down. Then, see if you can move the shift
lever away from PARK (P) without �rst pulling it
toward you. If you can, it means that the shift lever was
not fully locked into PARK (P).
Torque Lock
If you are parking on a hill and you do not shift your
transmission into PARK (P) properly, the weight of the
vehicle may put too much force on the parking pawl
in the transmission. You may �nd it difficult to pull the
shift lever out of PARK (P). This is called torque lock. To
prevent torque lock, set the parking brake and then
shift into PARK (P) properly before you leave the driver’s
seat. To �nd out how, seeShifting Into PARK (P) on
page 2-50.
When you are ready to drive, move the shift lever out of
PARK (P) before you release the parking brake.
If torque lock does occur, you may need to have another
vehicle push yours a little uphill to take some of the
pressure from the parking pawl in the transmission, then
you will be able to pull the shift lever out of PARK (P).
2-51
Page 436 of 578

Brake Wear
Your vehicle has front disc brakes and could have rear
drum brakes or rear disc brakes.
Disc brake pads have built-in wear indicators that make
a high-pitched warning sound when the brake pads
are worn and new pads are needed. The sound can
come and go or be heard all the time your vehicle is
moving, except when you are pushing on the brake
pedal �rmly.
{CAUTION:
The brake wear warning sound means that
soon the brakes will not work well. That could
lead to an accident. When you hear the brake
wear warning sound, have your vehicle
serviced.
Notice:Continuing to drive with worn-out brake
pads could result in costly brake repair.
Some driving conditions or climates can cause a brake
squeal when the brakes are �rst applied or lightly
applied. This does not mean something is wrong with
the brakes.Properly torqued wheel nuts are necessary to help
prevent brake pulsation. When tires are rotated, inspect
brake pads for wear and evenly tighten wheel nuts in
the proper sequence to torque speci�cations in
Capacities and Specifications on page 5-130.
If you have rear drum brakes, they do not have wear
indicators, but if you ever hear a rear brake rubbing
noise, have the rear brake linings inspected immediately.
Rear brake drums should be removed and inspected
each time the tires are removed for rotation or changing.
Drum brakes have an inspection hole to inspect lining
wear during scheduled maintenance. When you have
the front brake pads replaced, have the rear brakes
inspected, too.
Brake linings should always be replaced as complete
axle sets.
Brake Pedal Travel
See your dealer/retailer if the brake pedal does not
return to normal height, or if there is a rapid increase in
pedal travel. This could be a sign that brake service
might be required.
Brake Adjustment
Every time you make a brake stop, the brakes adjust
for wear.
5-44
Page 468 of 578

Dual Tire Operation
When the vehicle is new, or whenever a wheel,
wheel bolt or wheel nut is replaced, check the wheel
nut torque after 100, 1,000 and 6,000 miles
(160, 1 600 and 10 000 km) of driving. For proper
torque and wheel nut tightening information, see
Removing the Spare Tire and Tools on page 5-93.
The outer tire on a dual wheel setup generally wears
faster than the inner tire. Your tires will wear more
evenly and last longer if you rotate the tires periodically,
seeTire Inspection and Rotation on page 5-81. Also see
Scheduled Maintenance (Gasoline Engine) on page 6-4.
{CAUTION:
If you operate your vehicle with a tire that is
badly underin�ated, the tire can overheat. An
overheated tire can lose air suddenly or catch
�re. You or others could be injured. Be sure all
tires (including the spare) are properly in�ated.
SeeInflation - Tire Pressure on page 5-74, for
information on proper tire in�ation.
Tire Pressure Monitor System
The Tire Pressure Monitor System (TPMS) uses radio
and sensor technology to check tire pressure levels. The
TPMS sensors monitor the air pressure in your vehicle’s
tires and transmit tire pressure readings to a receiver
located in the vehicle.
Each tire, including the spare (if provided), should be
checked monthly when cold and in�ated to the in�ation
pressure recommended by the vehicle manufacturer
on the vehicle placard or tire in�ation pressure label.
(If your vehicle has tires of a different size than the size
indicated on the vehicle placard or tire in�ation pressure
label, you should determine the proper tire in�ation
pressure for those tires.)
As an added safety feature, your vehicle has been
equipped with a tire pressure monitoring system (TPMS)
that illuminates a low tire pressure telltale when one or
more of your tires is signi�cantly under-in�ated.
Accordingly, when the low tire pressure telltale
illuminates, you should stop and check your tires as
soon as possible, and in�ate them to the proper
pressure. Driving on a signi�cantly under-in�ated tire
causes the tire to overheat and can lead to tire failure.
Under-in�ation also reduces fuel efficiency and tire
tread life, and may affect the vehicle’s handling and
stopping ability.
5-76