2008 GMC SIERRA rear view mirror
[x] Cancel search: rear view mirrorPage 154 of 578
Park Tilt Mirrors
If your vehicle has the memory package, the outside
mirrors are able to perform the park tilt function. This
feature may be useful in allowing the driver to view the
curb when parallel parking. This feature will cause the
passenger’s and/or driver’s mirror to tilt to a preselected
position when the vehicle is in REVERSE (R).
The passenger’s and/or driver’s mirror will return to its
original position when the vehicle is shifted out of
REVERSE (R), or the ignition is turned off or to
OFF/LOCK.
This feature can be turned on or off through the Driver
Information Center (DIC). SeeDIC Vehicle
Customization (With DIC Buttons) on page 3-72.
Heated Mirrors
The button to turn the heated mirrors on or off is located
on the climate control panel. Press this button to
warm the driver’s and passenger’s outside rearview
mirrors to help clear them of ice, snow, and
condensation.
See “Rear Window Defogger” underDual Automatic
Climate Control System on page 3-28for more
information.
Convex Mirror
{CAUTION:
A convex mirror can make things (like other
vehicles) look farther away than they really are.
If you cut too sharply into the right lane, you
could hit a vehicle on your right. Check your
inside mirror or glance over your shoulder
before changing lanes.
The passenger’s side mirror may have convex glass. A
convex mirror’s surface is curved so more can be
seen from the driver’s seat.
Your vehicle may also have a turn signal indicator on
the mirror. An arrow on the mirror will �ash in the
direction of the turn or lane change.
2-62
Page 171 of 578
Sunroof
If your vehicle has a power sliding sunroof, the ignition
needs to be turned to RUN, or the Retained Accessory
Power (RAP) must be activated to open or close
the sunroof. When RAP is active, the sunroof will work
for 10 minutes after the ignition is turned off, or until
the driver’s door is opened. SeeRetained Accessory
Power (RAP) on page 2-23for more information.
Extended Cab
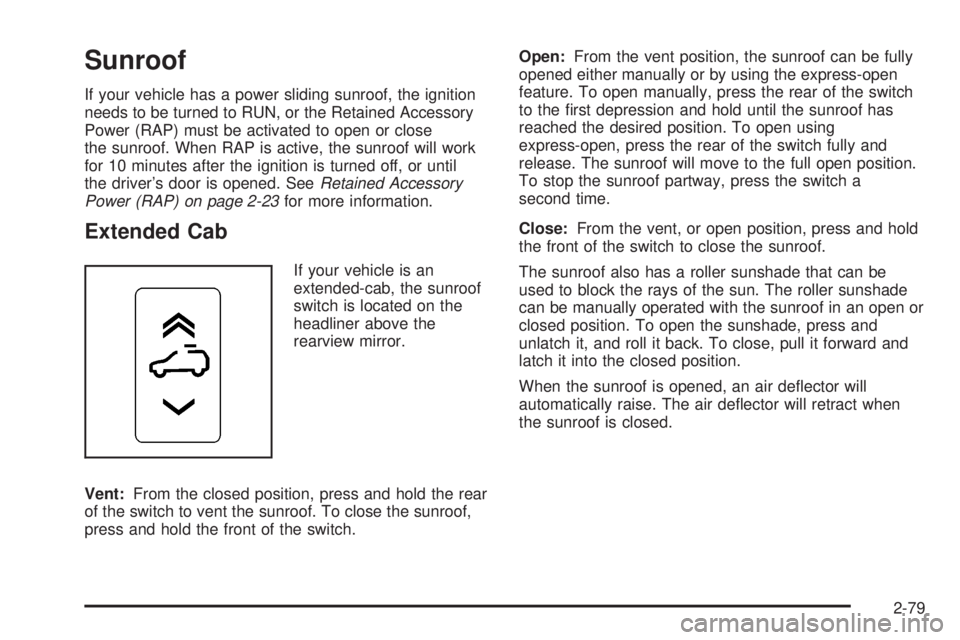
If your vehicle is an
extended-cab, the sunroof
switch is located on the
headliner above the
rearview mirror.
Vent:From the closed position, press and hold the rear
of the switch to vent the sunroof. To close the sunroof,
press and hold the front of the switch.Open:From the vent position, the sunroof can be fully
opened either manually or by using the express-open
feature. To open manually, press the rear of the switch
to the �rst depression and hold until the sunroof has
reached the desired position. To open using
express-open, press the rear of the switch fully and
release. The sunroof will move to the full open position.
To stop the sunroof partway, press the switch a
second time.
Close:From the vent, or open position, press and hold
the front of the switch to close the sunroof.
The sunroof also has a roller sunshade that can be
used to block the rays of the sun. The roller sunshade
can be manually operated with the sunroof in an open or
closed position. To open the sunshade, press and
unlatch it, and roll it back. To close, pull it forward and
latch it into the closed position.
When the sunroof is opened, an air de�ector will
automatically raise. The air de�ector will retract when
the sunroof is closed.
2-79
Page 172 of 578
Crew Cab
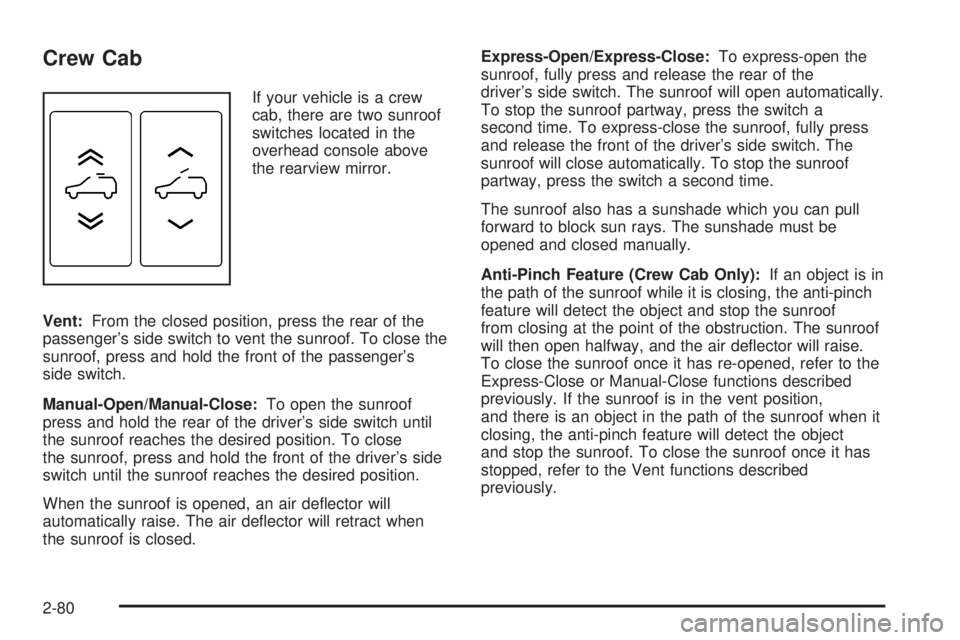
If your vehicle is a crew
cab, there are two sunroof
switches located in the
overhead console above
the rearview mirror.
Vent:From the closed position, press the rear of the
passenger’s side switch to vent the sunroof. To close the
sunroof, press and hold the front of the passenger’s
side switch.
Manual-Open/Manual-Close:To open the sunroof
press and hold the rear of the driver’s side switch until
the sunroof reaches the desired position. To close
the sunroof, press and hold the front of the driver’s side
switch until the sunroof reaches the desired position.
When the sunroof is opened, an air de�ector will
automatically raise. The air de�ector will retract when
the sunroof is closed.Express-Open/Express-Close:To express-open the
sunroof, fully press and release the rear of the
driver’s side switch. The sunroof will open automatically.
To stop the sunroof partway, press the switch a
second time. To express-close the sunroof, fully press
and release the front of the driver’s side switch. The
sunroof will close automatically. To stop the sunroof
partway, press the switch a second time.
The sunroof also has a sunshade which you can pull
forward to block sun rays. The sunshade must be
opened and closed manually.
Anti-Pinch Feature (Crew Cab Only):If an object is in
the path of the sunroof while it is closing, the anti-pinch
feature will detect the object and stop the sunroof
from closing at the point of the obstruction. The sunroof
will then open halfway, and the air de�ector will raise.
To close the sunroof once it has re-opened, refer to the
Express-Close or Manual-Close functions described
previously. If the sunroof is in the vent position,
and there is an object in the path of the sunroof when it
closing, the anti-pinch feature will detect the object
and stop the sunroof. To close the sunroof once it has
stopped, refer to the Vent functions described
previously.
2-80
Page 184 of 578

Windshield Wipers
Clear ice and snow from the wiper blades before using
them. If they are frozen to the windshield, gently
loosen or thaw them. Damaged wiper blades may not
clear the windshield well, making it harder to see
and drive safely. If the blades do become damaged,
install new blades or blade inserts. For more information,
seeWindshield Wiper Blade Replacement on page 5-65.
Heavy snow or ice can overload the wiper motor. A
circuit breaker will stop the motor until it cools down.
Clear away snow or ice to prevent an overload.
Turn the band with the wiper symbol to control the
windshield wipers.
8(Mist):Turn the band to mist for a single wiping
cycle. Hold it there until the wipers start. Then let
go. The wipers stop after one wipe. Hold the band on
mist longer, for more wipe cycles.
9(Off):To stop the wipers, move the band to off.
6(Delay):Turn the band to adjust the delay time. The
delay between wiping cycles becomes shorter as
the band is moved to the top of the lever. This can be
very useful in light rain or snow.
6(Low Speed):Turn the band away from you to
the �rst solid band past the delay settings, for steady
wiping at low speed.
?(High Speed):Turn the band further, to the
second solid band past the delay settings, for
high-speed wiping.
Rainsense™ II Wipers
If your vehicle has Rainsense™ II windshield wipers,
the moisture sensor is located next to the inside
rearview mirror and is mounted on the windshield. When
active, these sensors are able to detect moisture on
the windshield and automatically turn on the wipers.
To turn on the Rainsense™ feature, the wipers must be
set to one of the �ve delay settings on the multifunction
lever. Each of the �ve settings adjusts the sensitivity
of the rainsensor.
Since different drivers have different setting preferences,
it is recommended that the mid-range setting (position 3)
be used initially. For more wipes, select the higher
settings; for fewer wipes, select the lower settings
located closer to the off position on the multifunction
lever.
3-12
Page 204 of 578

On hot days, open the windows long enough to let hot
inside air escape. This helps to reduce the time it
takes for the vehicle to cool down. It also helps the
system to operate more efficiently.
The air conditioning system removes moisture from the
air, so a small amount of water might drip underneath
the vehicle while idling or after turning off the engine.
This is normal.
Sensors
The solar sensor, located in the defrost grille, in the
middle of the instrument panel, monitors the solar
radiation. Do not cover the solar sensor or the system
will not work properly.The interior temperature
sensor, located in the
headliner, measures the
temperature of the air
inside the vehicle.
There is also an exterior temperature sensor located
behind the front grille. This sensor reads the outside air
temperature and helps maintain the temperature
inside the vehicle. Any cover on the front of the vehicle
could cause a false reading in the displayed
temperature on the rearview mirror.
The climate control system uses the information from
these sensors to maintain your comfort setting by
adjusting the outlet temperature, fan speed, and the air
delivery mode. The system may also supply cooler
air to the side of the vehicle facing the sun. The
recirculation mode will also be used as needed to
maintain cool outlet temperatures.
3-32
Page 205 of 578
Defogging and Defrosting
Fog on the inside of the windows is a result of high
humidity (moisture) condensing on the cool window
glass. This can be minimized if the climate control
system is used properly. There are two modes to clear
fog or frost from the windshield.
Use
HandGto select the defog or defrost modes.
-(Defog):Press this button to clear the windows of
fog or moisture and warm the passengers. This
mode directs air to the windshield, �oor outlets, and
side window vents. When this mode is selected,
the system turns off recirculation and runs the air
conditioning compressor unless the outside temperature
is close to freezing. The recirculation mode cannot be
selected while in the defog mode. Do not drive the
vehicle until all the windows are clear.
0(Defrost):Press this button to remove fog or frost
from the windshield more quickly. This mode directs
a portion of the air to the windshield and side window
vents and some to the �oor vents. In this mode, the
system will automatically force outside air into your
vehicle. The recirculation mode cannot be selected while
in the defrost mode. The air conditioning compressor
will run automatically in this setting, unless the outside
temperature is close to freezing. Do not drive the
vehicle until all the windows are clear.
Rear Window Defogger
The rear window defogger uses a warming grid to
remove fog from the rear window.
<(Rear Window Defogger):If your vehicle has this
feature, press this button to turn the defogger on or
off. It automatically turns off several minutes after it has
been activated. The defogger can also be turned off
by turning the engine off. Do not drive the vehicle until
all the windows are clear.
Notice:Do not use a razor blade or sharp object to
clear the inside rear window. Do not adhere
anything to the defogger grid lines in the rear glass.
These actions may damage the rear defogger.
Repairs would not be covered by your warranty.
Heated Mirrors:If your vehicle has heated outside
rearview mirrors, the mirrors will heat to help clear fog
or frost from the surface of the mirror when the rear
window defog button is pressed. SeeOutside Power
Mirrors on page 2-59.
Outlet Adjustment
Use the air outlets located in the center and on the side
of the instrument panel to direct the air�ow.
3-33
Page 325 of 578
After Off-Road Driving
Remove any brush or debris that has collected on the
underbody, chassis, or under the hood. These
accumulations can be a �re hazard.
After operation in mud or sand, have the brake linings
cleaned and checked. These substances can cause
glazing and uneven braking. Check the body structure,
steering, suspension, wheels, tires, and exhaust
system for damage. Also, check the fuel lines and
cooling system for any leakage.
Your vehicle will require more frequent service due to
off-road use. Refer to the Maintenance Schedule
for additional information.
Driving at Night
Night driving is more dangerous than day driving
because some drivers are likely to be impaired — by
alcohol or drugs, with night vision problems, or by
fatigue.Night driving tips include:
Drive defensively.
Do not drink and drive.
Reduce headlamp glare by adjusting the inside
rearview mirror.
Slow down and keep more space between you and
other vehicles because your headlamps can only
light up so much road ahead.
Watch for animals.
When tired, pull off the road.
Do not wear sunglasses.
Avoid staring directly into approaching headlamps.
Keep the windshield and all glass on your vehicle
clean — inside and out.
Keep your eyes moving, especially during turns or
curves.
No one can see as well at night as in the daytime. But,
as we get older, these differences increase. A
50-year-old driver might need at least twice as much
light to see the same thing at night as a 20-year-old.
4-27
Page 327 of 578

Other Rainy Weather Tips
Besides slowing down, other wet weather driving tips
include:
Allow extra following distance.
Pass with caution.
Keep windshield wiping equipment in good shape.
Keep the windshield washer �uid reservoir �lled.
Have good tires with proper tread depth. SeeTires
on page 5-66.
Before Leaving on a Long Trip
To prepare your vehicle for a long trip, consider having
it serviced by your dealer/retailer before departing.
Things to check on your own include:
Windshield Washer Fluid:Reservoir full? Windows
clean — inside and outside?
Wiper Blades:In good shape?
Fuel, Engine Oil, Other Fluids:All levels checked?
Lamps:Do they all work and are lenses clean?
Tires:Are treads good? Are tires in�ated to
recommended pressure?
Weather and Maps:Safe to travel? Have up-to-date
maps?
Highway Hypnosis
Always be alert and pay attention to your surroundings
while driving. If you become tired or sleepy, �nd a
safe place to park your vehicle and rest.
Other driving tips include:
Keep the vehicle well ventilated.
Keep interior temperature cool.
Keep your eyes moving — scan the road ahead
and to the sides.
Check the rearview mirror and vehicle instruments
often.
4-29