2008 GEELY MK air filter
[x] Cancel search: air filterPage 49 of 416

Chapter 2 Engine MechanicalSection 1 Engine ComponentsComponent ViewFigure 2-1Engine MechanicalEngine Components3-8Upside of radiator support
Engine cover lock assembly
Starter assembly
Output pipe of oil cooler
Input pipe of oil coolerTransmission control cable assembly Fuel oil sub-assembly Accelerator control cable assemble
Water inlet pipe of heater
Water outlet pipe of heaterTransmission control cable assemblySuitable for 1.5L/1.6L(Tight coupling)Suitable for 1.3L/1.5L(Non-tight coupling) Radiator assemblyAir filter assembly with hose
Clutch release assembly
Water inlet pipe of radiator
Water outlet pipe of radiator
Battery -
Page 51 of 416

Component ViewFigure 2-3Engine MechanicalEngine Components3-10adjusting support
with power steering
Vane pump assembly with
power steering
Pump support with
power steeringHex. flange
bolt M6¡Á50
Ignition coil
Ignition coilinstallation bracket
Bolt M8¡Á31Fuel oil pipe subassembly
Fuel oil pipe clip
Vent ductSecondary wireBypass hose
Rear end housingWater outlet
pipe housing
No.1 heat shield of
exhaust manifoldOil filter assembly
Washer
Exhaust manifold
Support of exhaust
manifoldO-ring
Fastener of
No.1
injectorInjector
O-ring
Throttle assemblySuction manifold Washer
WasherKnock sensor
Water temperature sensorCrankshaft position sensorGenerator assemblyNo.1 support of compressor
Air conditioner compressorWater inlet pipe housing -
Page 52 of 416

Component ViewFigure 2-4Air filter assembly with hoseEngine MechanicalEngine Components3-11V-belt of vane pump with
power steering Support of the right engine
V-belt of fan and generator
No.1 V-belt
No.3 Timing belt hood
No.2 Timing belt hood
No.1 Timing belt hoodFan sheaveSecondary wireWasher of the cylinder headCylinder headVent duct
Gasket
Washer
Timing belt
Timing belt guide pulley
Crankshaft
sheave
Generator assembly: Non-reusable parts -
Page 53 of 416

Section 2 Throttle BodyComponent ViewFigure 2-5Engine MechanicalThrottle Body3-12Washer
Throttle body
Air filter case with pipe
Idle control valve assemblySealAccelerator cable
Bypass hose
Throttle position sensor
Vent duct: Non-reusable parts -
Page 54 of 416

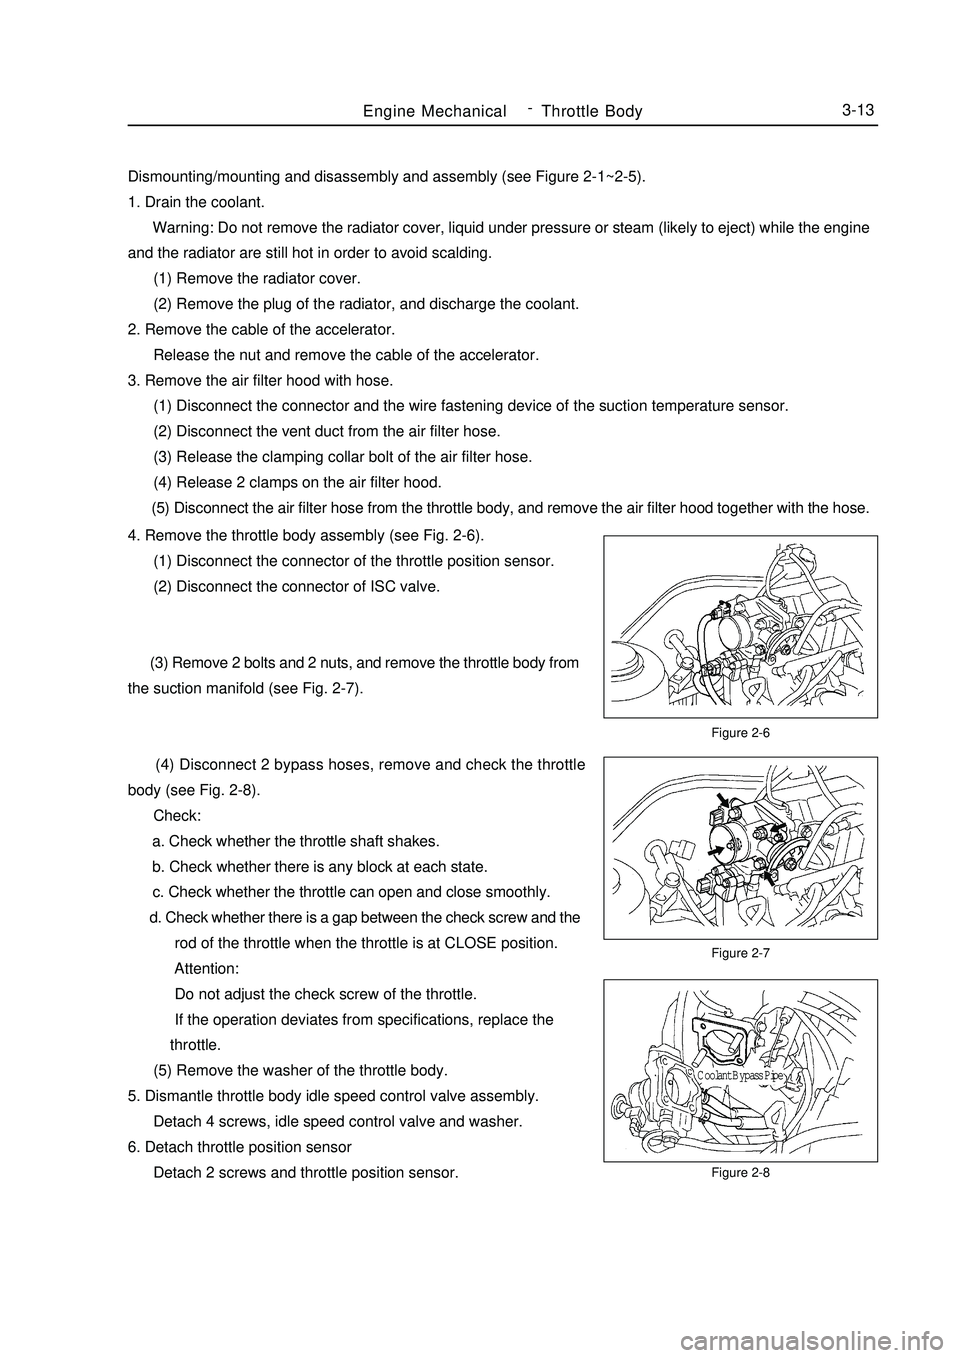
Dismounting/mounting and disassembly and assembly (see Figure 2-1~2-5).
1. Drain the coolant.
Warning: Do not remove the radiator cover, liquid under pressure or steam (likely to eject) while the engine
and the radiator are still hot in order to avoid scalding.
(1) Remove the radiator cover.
(2) Remove the plug of the radiator, and discharge the coolant.
2. Remove the cable of the accelerator.
Release the nut and remove the cable of the accelerator.
3. Remove the air filter hood with hose.
(1) Disconnect the connector and the wire fastening device of the suction temperature sensor.
(2) Disconnect the vent duct from the air filter hose.
(3) Release the clamping collar bolt of the air filter hose.
(4) Release 2 clamps on the air filter hood.
(5) Disconnect the air filter hose from the throttle body, and remove the air filter hood together with the hose.Figure 2-6
Figure 2-7
Figure 2-8Engine MechanicalThrottle Body3-134. Remove the throttle body assembly (see Fig. 2-6).
(1) Disconnect the connector of the throttle position sensor.
(2) Disconnect the connector of ISC valve.
(3) Remove 2 bolts and 2 nuts, and remove the throttle body from
the suction manifold (see Fig. 2-7).
(4) Disconnect 2 bypass hoses, remove and check the throttle
body (see Fig. 2-8).
Check:
a. Check whether the throttle shaft shakes.
b. Check whether there is any block at each state.
c. Check whether the throttle can open and close smoothly.
d. Check whether there is a gap between the check screw and the
rod of the throttle when the throttle is at CLOSE position.
Attention:
Do not adjust the check screw of the throttle.
If the operation deviates from specifications, replace the
throttle.
(5) Remove the washer of the throttle body.
5. Dismantle throttle body idle speed control valve assembly.
Detach 4 screws, idle speed control valve and washer.
6. Detach throttle position sensor
Detach 2 screws and throttle position sensor.Coolant Bypass Pipe -
Page 310 of 416

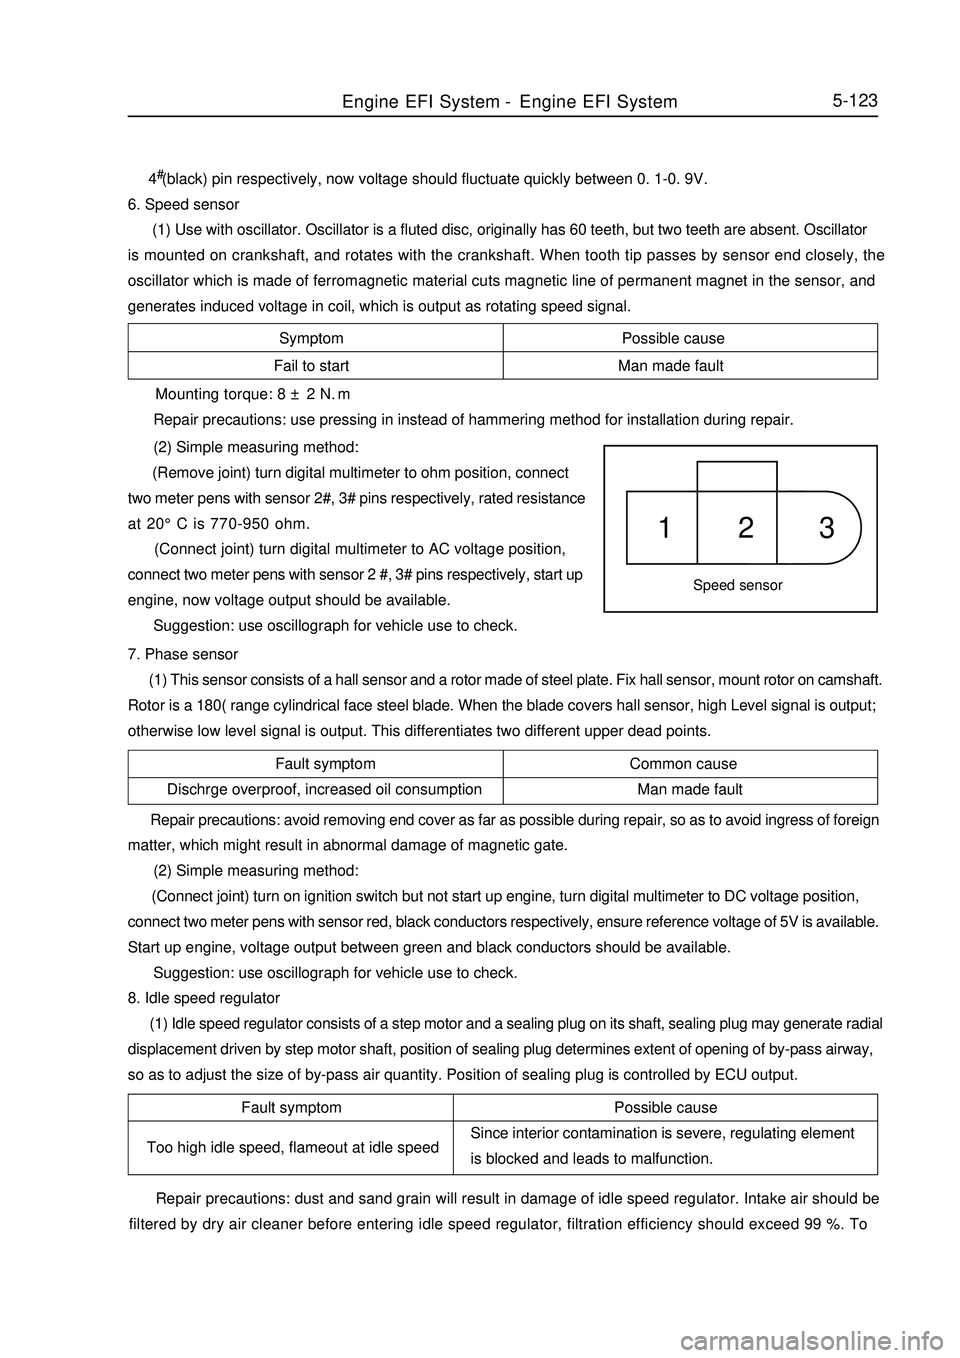
Symptom Possible cause
Fail to start Man made faultSpeed sensor1 2 3Fault symptom Common cause
Dischrge overproof, increased oil consumption Man made fault5-1234#(black) pin respectively, now voltage should fluctuate quickly between 0. 1-0. 9V.
6. Speed sensor
(1) Use with oscillator. Oscillator is a fluted disc, originally has 60 teeth, but two teeth are absent. Oscillator
is mounted on crankshaft, and rotates with the crankshaft. When tooth tip passes by sensor end closely, the
oscillator which is made of ferromagnetic material cuts magnetic line of permanent magnet in the sensor, and
generates induced voltage in coil, which is output as rotating speed signal. Mounting torque: 8 ± 2 N.m
Repair precautions: use pressing in instead of hammering method for installation during repair.
(2) Simple measuring method:
(Remove joint) turn digital multimeter to ohm position, connect
two meter pens with sensor 2#, 3# pins respectively, rated resistance
at 20°C is 770-950 ohm.
(Connect joint) turn digital multimeter to AC voltage position,
connect two meter pens with sensor 2 #, 3# pins respectively, start up
engine, now voltage output should be available.
Suggestion: use oscillograph for vehicle use to check.
7. Phase sensor
(1) This sensor consists of a hall sensor and a rotor made of steel plate. Fix hall sensor, mount rotor on camshaft.
Rotor is a 180( range cylindrical face steel blade. When the blade covers hall sensor, high Level signal is output;
otherwise low level signal is output. This differentiates two different upper dead points. Repair precautions: avoid removing end cover as far as possible during repair, so as to avoid ingress of foreign
matter, which might result in abnormal damage of magnetic gate.
(2) Simple measuring method:
(Connect joint) turn on ignition switch but not start up engine, turn digital multimeter to DC voltage position,
connect two meter pens with sensor red, black conductors respectively, ensure reference voltage of 5V is available.
Start up engine, voltage output between green and black conductors should be available.
Suggestion: use oscillograph for vehicle use to check.
8. Idle speed regulator
(1) Idle speed regulator consists of a step motor and a sealing plug on its shaft, sealing plug may generate radial
displacement driven by step motor shaft, position of sealing plug determines extent of opening of by-pass airway,
so as to adjust the size of by-pass air quantity. Position of sealing plug is controlled by ECU output.Fault symptom
Too high idle speed, flameout at idle speedPossible cause
Since interior contamination is severe, regulating element
is blocked and leads to malfunction.
Repair precautions: dust and sand grain will result in damage of idle speed regulator. Intake air should be
filtered by dry air cleaner before entering idle speed regulator, filtration efficiency should exceed 99 %. ToEngine EFI System-Engine EFI System
Page 312 of 416

Symptom
Poor idle speed, malfunction etc
Symptom
Fail to start5-125 Repair precautions:
1. according to engine requirement, electric fuel pumps with different flows are available, they have the same
appearance, mountable fuel pump may not be exactly suitable, during repair, part number of fuel pump used must
be consistent with original one, wrong replacement is not permitted;
2. in order to prevent fuel pump from damaging, please do not run it in dry state for a long time;
3. in case fuel pump needs to be replaced, please pay attention to clean fuel tank and pipeline and replace fuel
filter.
(2) Simple measuring method:
(Remove joint) turn digital multimeter to ohm position, connect two meter pens with fuel pump pins
respectively, measure internal resistance, it should not be zero or infinite (namely not in short circuit, open circuit
condition).
(Connect joint) connect fuel pressure gauge on sucker, start up engine, run the engine at idle speed, now fuel
pressure of engine should be about 260kPa; unplug fuel pressure regulator vacuum tube, now fuel pressure should
be about 300KPa.
11. Canister control valve
(1) Canister in fuel evaporation control system adsorbs oil vapor from oil tank until saturated. Electronic
control unit controls opening of canister control valve, fresh air and saturated fuel vapor in canister form
regeneration stream, which is led into engine intake pipe again. Electronic control unit changes duty ratio of pulsing
signal to canister control valve solenoid according to different operating conditions of engine, thus controls flow
of regeneration stream. In addition, this flow is also influenced by pressure difference at both ends.
Possible cause
Entering of foreign matter into valve inside results in
corrosion or poor leak tightness etc
Repair precautions:
1. To install, airflow direction must meet the specification;
2. when black granules inside valve body result in malfunction of control valve, and control valve needs to be
replaced, please check the condition of canister;
3. avoid water, oil etc liquids from entering valve as far as possible during repair;
4. in order to avoid transfer of solid-borne noise, it is recommended to install canister control valve suspending
on the hose or use soft rubber to fix.
(2) Simple measuring method:
(Remove joint) turn digital multimeter to ohm position, connect two meter pens with canister control valve pins
respectively, rated resistance at 20°C is 22 - 30 ohm.
12. Ignition coil
(1) When earthing channel of primary winding is connected, this primary winding is charged. Once ECU cut
off primary winding circuit, charging stops, high voltage is induced in secondary winding at the same time, so spark
plug discharges. Ignition coil ZSK 22 (both ends of 2 secondary windings are connected with a spark plug
respectively, so these two spark plugs ignite simultaneously.
Possible cause
Too heavy current leads to burnout, damaged by external force Repair precautions: it is prohibited to use "short circuit ignition testing method" to test ignition function, soEngine EFI System-
Engine EFI System