Page 8 of 352
These are some of the symbols you may see on your vehicle.
Vehicle Symbol Glossary
Safety Alert
See Owner’s Guide
Fasten Safety BeltAirbag - Front
Airbag - SideChild Seat Lower
Anchor
Child Seat Tether
AnchorBrake System
Anti-Lock Brake SystemParking Brake System
Brake Fluid -
Non-Petroleum BasedParking Aid System
Stability Control SystemSpeed Control
Master Lighting SwitchHazard Warning Flasher
Fog Lamps-FrontFuse Compartment
Fuel Pump ResetWindshield Wash/Wipe
Windshield
Defrost/DemistRear Window
Defrost/Demist
2008 Taurus X(219)
Owners Guide (post-2002-fmt)
USA(fus)
Introduction
8
Page 78 of 352

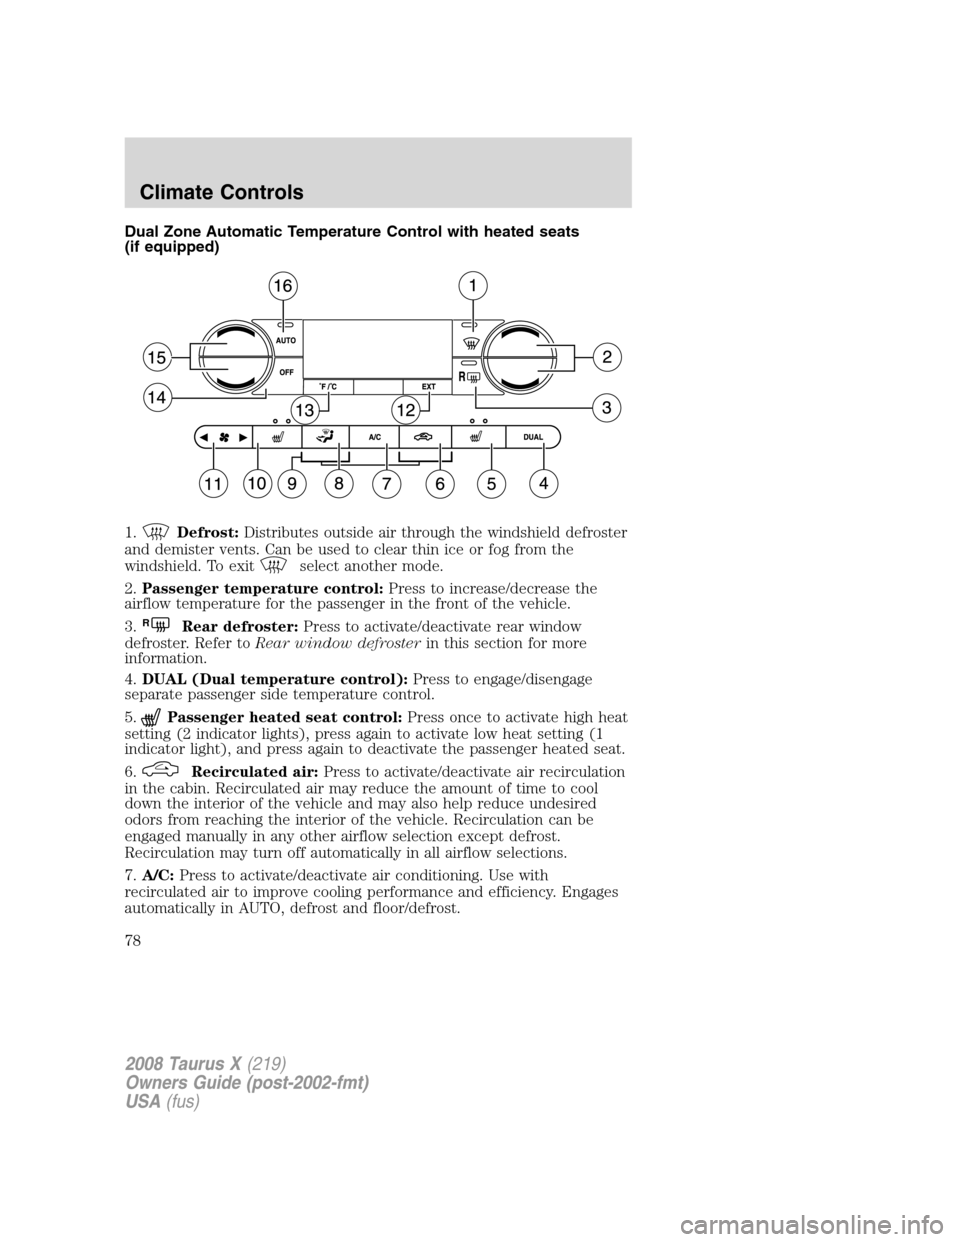
Dual Zone Automatic Temperature Control with heated seats
(if equipped)
1.
Defrost:Distributes outside air through the windshield defroster
and demister vents. Can be used to clear thin ice or fog from the
windshield. To exit
select another mode.
2.Passenger temperature control:Press to increase/decrease the
airflow temperature for the passenger in the front of the vehicle.
3.
RRear defroster:Press to activate/deactivate rear window
defroster. Refer toRear window defrosterin this section for more
information.
4.DUAL (Dual temperature control):Press to engage/disengage
separate passenger side temperature control.
5.
Passenger heated seat control:Press once to activate high heat
setting (2 indicator lights), press again to activate low heat setting (1
indicator light), and press again to deactivate the passenger heated seat.
6.
Recirculated air:Press to activate/deactivate air recirculation
in the cabin. Recirculated air may reduce the amount of time to cool
down the interior of the vehicle and may also help reduce undesired
odors from reaching the interior of the vehicle. Recirculation can be
engaged manually in any other airflow selection except defrost.
Recirculation may turn off automatically in all airflow selections.
7.A/C:Press to activate/deactivate air conditioning. Use with
recirculated air to improve cooling performance and efficiency. Engages
automatically in AUTO, defrost and floor/defrost.
2008 Taurus X(219)
Owners Guide (post-2002-fmt)
USA(fus)
Climate Controls
78
Page 84 of 352

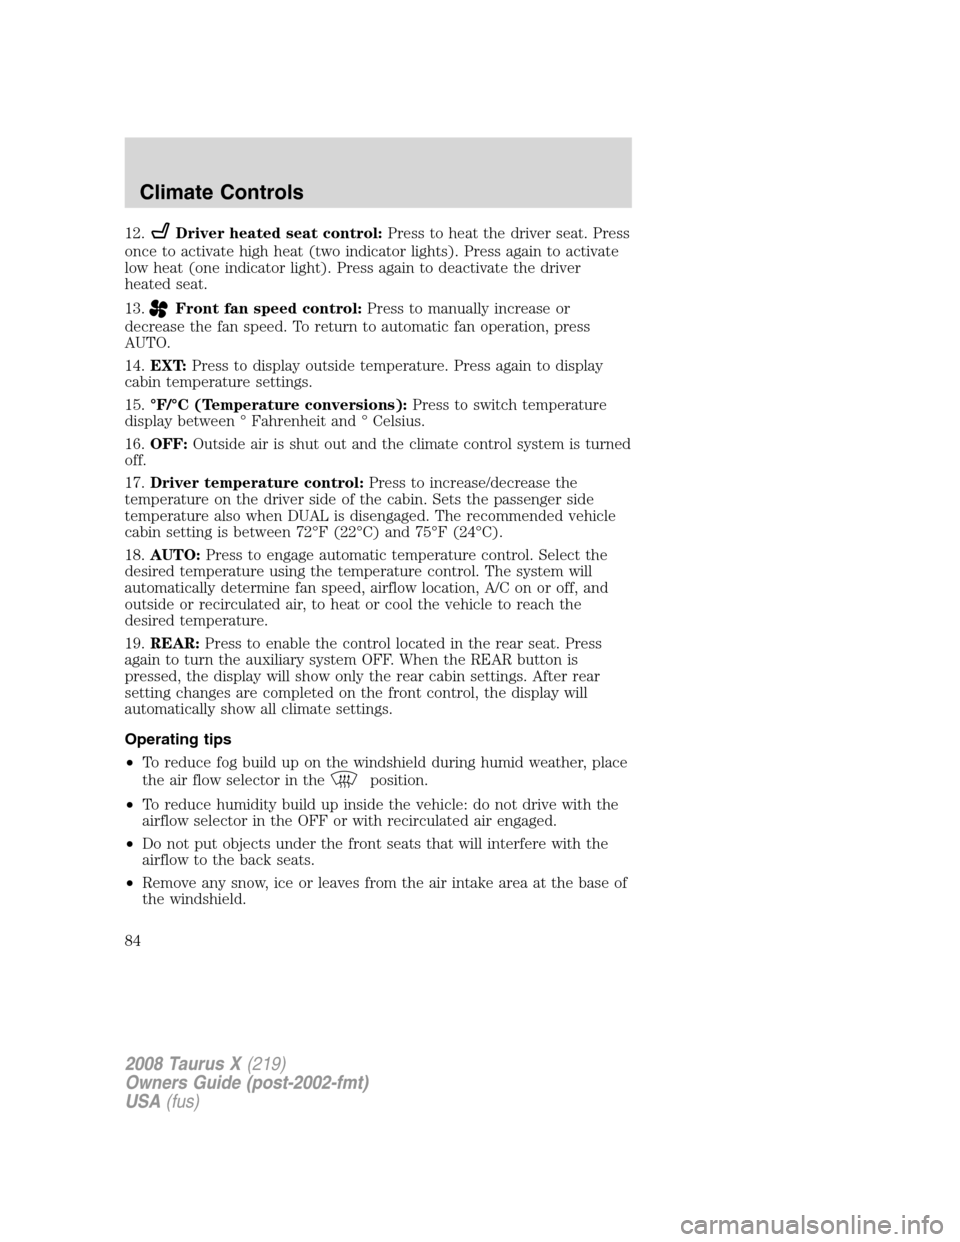
12.Driver heated seat control:Press to heat the driver seat. Press
once to activate high heat (two indicator lights). Press again to activate
low heat (one indicator light). Press again to deactivate the driver
heated seat.
13.
Front fan speed control:Press to manually increase or
decrease the fan speed. To return to automatic fan operation, press
AUTO.
14.EXT:Press to display outside temperature. Press again to display
cabin temperature settings.
15.°F/°C (Temperature conversions):Press to switch temperature
display between ° Fahrenheit and ° Celsius.
16.OFF:Outside air is shut out and the climate control system is turned
off.
17.Driver temperature control:Press to increase/decrease the
temperature on the driver side of the cabin. Sets the passenger side
temperature also when DUAL is disengaged. The recommended vehicle
cabin setting is between 72°F (22°C) and 75°F (24°C).
18.AUTO:Press to engage automatic temperature control. Select the
desired temperature using the temperature control. The system will
automatically determine fan speed, airflow location, A/C on or off, and
outside or recirculated air, to heat or cool the vehicle to reach the
desired temperature.
19.REAR:Press to enable the control located in the rear seat. Press
again to turn the auxiliary system OFF. When the REAR button is
pressed, the display will show only the rear cabin settings. After rear
setting changes are completed on the front control, the display will
automatically show all climate settings.
Operating tips
•To reduce fog build up on the windshield during humid weather, place
the air flow selector in the
position.
•To reduce humidity build up inside the vehicle: do not drive with the
airflow selector in the OFF or with recirculated air engaged.
•Do not put objects under the front seats that will interfere with the
airflow to the back seats.
•Remove any snow, ice or leaves from the air intake area at the base of
the windshield.
2008 Taurus X(219)
Owners Guide (post-2002-fmt)
USA(fus)
Climate Controls
84
Page 85 of 352

•For maximum cooling performance (MAX A/C):
In AUTO mode, press AUTO control and set to desired temperature.
In manual override control, select
or, A/C and recirculated
air
and set the temperature to 60°F (16°C). Set the fan to the
highest speed initially, then adjust to maintain passenger comfort.
•To improve the A/C cool down, drive with the windows slightly open
for 2–3 minutes after starting the vehicle or until the vehicle has
“aired out.”
In extremely cold temperatures, to maximize overall heater performance
it is suggested to not operate the auxiliary system (if so equipped) until
the engine temperature gauge crosses into the normal operating range.
To aid in side window defogging/demisting in cold weather:
1. Select
.
2. Select A/C.
3. Adjust the temperature control to maintain comfort.
4. Set the fan to the highest speed.
5. Direct the outer instrument panel vents towards the side windows.
Do not place objects on top of the instrument panel as these
objects may become projectiles in a collision or sudden stop.
AUXILIARY CLIMATE CONTROL (IF EQUIPPED)
1.Fan speed:Turn to select the
desired fan speed.
2.Temperature/mode selection:
The distribution of air from the
overhead and floor registers is based
on the temperature selected. Turn
to select for comfort.
To use the rear climate controls,
ensure thatREARis pressed on the main climate control face located on
the instrument panel.
2008 Taurus X(219)
Owners Guide (post-2002-fmt)
USA(fus)
Climate Controls
85
Page 88 of 352
3. Turn the ignition switch to RUN and then back to LOCK.
4. Turn the headlamp switch to the autolamp position. The headlamps
will turn on.
5. Wait the desired amount of time for the exit delay you want (up to
three minutes), then turn the headlamp switch to
. The headlamps
will turn off.
Foglamp control (if equipped)
With the ignition on, the foglamps
can be turned on when the
headlamp control is pulled toward
you and is in any of the following
positions:
•Parking lamps
•Low beams
•Autolamps (when active)
The foglamps will not operate when
the high beams are active.
High beams
Push the lever toward the
instrument panel to activate. Pull
the lever towards you to deactivate.
Flash to pass
Pull toward you to activate and
release to deactivate.
2008 Taurus X(219)
Owners Guide (post-2002-fmt)
USA(fus)
Lights
88
Page 92 of 352

Using the right bulbs
Replacement bulbs are specified in the chart below. Headlamp bulbs
must be marked with an authorized “D.O.T.” for North America and an
“E” for Europe to ensure lamp performance, light brightness and pattern
and safe visibility. The correct bulbs will not damage the lamp assembly
or void the lamp assembly warranty and will provide quality bulb burn
time.
Function Number of bulbsTrade
number
Front park/turn lamp 23457A or
3457AK
(amber)
Front sidemarker lamp 2 194
Headlamp (low beam) 2 H11
Headlamp (high beam) 2 9005
* Tail/brake/turn signal
lamp2 LED
* Rear sidemarker 2 LED
Backup lamp 2 921
License plate lamp 2 168
High-mount brake lamp 5 W5W
Foglamp (if equipped) 2 H11 LL
Map lamp 2 12V6W
Dome/reading lamps 6 578
All replacement bulbs are clear in color except where noted.
To replace all instrument panel lights - see your authorized dealer.
* To replace these lamps - see your authorized dealer.
Replacing the interior bulbs
Check the operation of all bulbs frequently.
Replacing exterior bulbs
Check the operation of all the bulbs frequently.
Replacing headlamp (low beam and high beam) bulbs
1. Make sure headlamp switch is in the OFF position, then open the
hood.
2008 Taurus X(219)
Owners Guide (post-2002-fmt)
USA(fus)
Lights
92
Page 95 of 352
Replacing high-mount brake lamp bulbs
1. Make sure the ignition control is
in the OFF position.
2. Remove the two screws.
3. Unclip the bulb holder from the
reflector.
4. Pull the bulb straight out.
Install in reverse order.
Replacing license plate lamp bulbs
1. Make sure the headlamp switch is
in the OFF position.
2. Remove the screw from the
license plate lamp assembly and pull
it down.
3. Remove bulb socket by turning
counterclockwise.
4. Carefully pull the bulb out from
the socket.
Install new bulb(s) in reverse order.
Replacing foglamp bulbs
1. Make sure the foglamp switch is
in the OFF position.
2. Remove the bulb socket from the
foglamp by turning
counterclockwise.
3. Disconnect the electrical
connector.
Install the new bulb in reverse order.
2008 Taurus X(219)
Owners Guide (post-2002-fmt)
USA(fus)
Lights
95
Page 269 of 352
Fuse/Relay
LocationFuse Amp
RatingPassenger Compartment Fuse
Panel Description
8 10A Low beam headlamps (right)
9 15A Interior lights, Cargo lamps
10 15A Backlighting, Puddle lamps
11 10A All wheel drive
12 7. 5A Memory seat/mirror switches,
Memory module
13 5A FEPS module
14 10A Power liftgate module
15 10A Climate control
16 15A Spare
17 20A All power lock motor feeds,
Liftgate release
18 20A 2nd row power seat
19 25A Moon roof
20 15A OBDII connector
21 15A Fog lamps
22 15A Park lamps, License lamps
23 15A High beam headlamps
24 20A Horn relay
25 10A Demand lamps/Interior lamps
26 10A Instrument panel cluster
27 20A Adjustable pedal switch
28 5A Radio, Radio start signal
29 5A Instrument panel cluster
30 5A Overdrive cancel switch
31 10A Compass, Automatic dimming rear
view mirror
32 10A Restraint control module
33 10A Spare
34 5A AWD module
2008 Taurus X(219)
Owners Guide (post-2002-fmt)
USA(fus)
Roadside Emergencies
269