Page 2 of 368
Locks and Security 136
Keys 136
Locks 136
Anti-theft system 148
Seating and Safety Restraints 151
Seating 151
Safety restraints 158
Airbags 171
Child restraints 180
Tires, Wheels and Loading 192
Tire information 195
Tire inflation 196
Vehicle loading 212
Trailer towing 219
Trailer brake controller-integrated 223
Recreational towing 230
Driving 231
Starting 231
Brakes 235
Traction Control™ 237
Transmission operation 240
Roadside Emergencies 265
Getting roadside assistance 265
Hazard flasher switch 267
Fuel pump shut-off switch 267
Fuses and relays 268
Changing tires 277
Lug nut torque 289
Jump starting 290
Wrecker towing 296
Table of Contents
2
2008 F-250/350/450/550(f23)
Owners Guide (post-2002-fmt)
USA(fus)
Page 6 of 368

SPECIAL NOTICES
New Vehicle Limited Warranty
For a detailed description of what is covered and what is not covered by
your vehicle’s New Vehicle Limited Warranty, refer to theWarranty
Guidethat is provided to you along with yourOwner’s Guide.
Service Data Recording
Service data recorders in your vehicle are capable of collecting and
storing diagnostic information about your vehicle. This potentially
includes information about the performance or status of various systems
and modules in the vehicle, such as engine, throttle, steering or brake
systems. In order to properly diagnose and service your vehicle, Ford
Motor Company, Ford of Canada, Ford Motor Company, S.A. de C.V. and
service and repair facilities may access vehicle diagnostic information
through a direct connection to your vehicle when diagnosing or servicing
your vehicle.
Event Data Recording
Other modules in your vehicle — event data recorders — are capable of
collecting and storing data during a crash or near crash event. The
recorded information may assist in the investigation of such an event.
The modules may record information about both the vehicle and the
occupants, potentially including information such as:
•how various systems in your vehicle were operating;
•whether or not the driver and passenger seatbelts were buckled;
•how far (if at all) the driver was depressing the accelerator and/or the
brake pedal;
•how fast the vehicle was traveling; and
•where the driver was positioning the steering wheel.
To access this information, special equipment must be directly connected
to the recording modules. Ford Motor Company, Ford of Canada and
Ford Motor Company, S.A. de C.V. do not access event data recorder
information without obtaining consent, unless pursuant to court order or
where required by law enforcement, other government authorities or
other third parties acting with lawful authority. Other parties may seek to
access the information independently of Ford Motor Company, Ford of
Canada and Ford Motor Company, S.A. de C.V.
2008 F-250/350/450/550(f23)
Owners Guide (post-2002-fmt)
USA(fus)
Introduction
6
Page 10 of 368
These are some of the symbols you may see on your vehicle.
Vehicle Symbol Glossary
Safety Alert
See Owner’s Guide
Fasten Safety BeltAirbag - Front
Airbag - SideChild Seat Lower
Anchor
Child Seat Tether
AnchorBrake System
Anti-Lock Brake SystemParking Brake System
Brake Fluid -
Non-Petroleum BasedParking Aid System
Stability Control SystemSpeed Control
Master Lighting SwitchHazard Warning Flasher
Fog Lamps-FrontFuse Compartment
Fuel Pump ResetWindshield Wash/Wipe
Windshield
Defrost/DemistRear Window
Defrost/Demist
2008 F-250/350/450/550(f23)
Owners Guide (post-2002-fmt)
USA(fus)
Introduction
10
Page 13 of 368

bulbs work. If any light remains on after starting the vehicle, refer to the
respective system warning light description for additional information.
Note:Some Warning Lights are reconfigurable telltale (RTT) indicator
lights and will illuminate in the Message Center Display and function the
same as the warning light.
Check engine:TheCheck engine
indicator light illuminates when the
ignition is first turned to the RUN
position to check the bulb. Solid
illumination after the engine is started indicates the On Board
Diagnostics System (OBD-II) has detected a malfunction. Refer toOn
board diagnostics (OBD-II)in theMaintenance and Specifications
chapter. If the light is blinking, engine misfire is occurring which could
damage your catalytic converter. Drive in a moderate fashion (avoid
heavy acceleration and deceleration) and have your vehicle serviced
immediately.
Under engine misfire conditions, excessive exhaust temperatures
could damage the catalytic converter, the fuel system, interior
floor coverings or other vehicle components, possibly causing a fire.
Brake system warning light:To
confirm the brake system warning
light is functional, it will
momentarily illuminate when the
ignition is turned to the RUN
position when the engine is not running, or in a position between RUN
and START, or by applying the parking brake when the ignition is turned
to the RUN position. If the brake system warning light does not
illuminate at this time, seek service immediately from your authorized
dealer. Illumination after releasing the parking brake indicates low brake
fluid level and the brake system should be inspected immediately by
your servicing authorized dealer.
Driving a vehicle with the brake system warning light on is
dangerous. A significant decrease in braking performance may
occur. It will take you longer to stop the vehicle. Have the vehicle
checked by your authorized dealer immediately. Driving extended
distances with the parking brake engaged can cause brake failure and
the risk of personal injury.
P!
BRAKE
2008 F-250/350/450/550(f23)
Owners Guide (post-2002-fmt)
USA(fus)
Instrument Cluster
13
Page 14 of 368

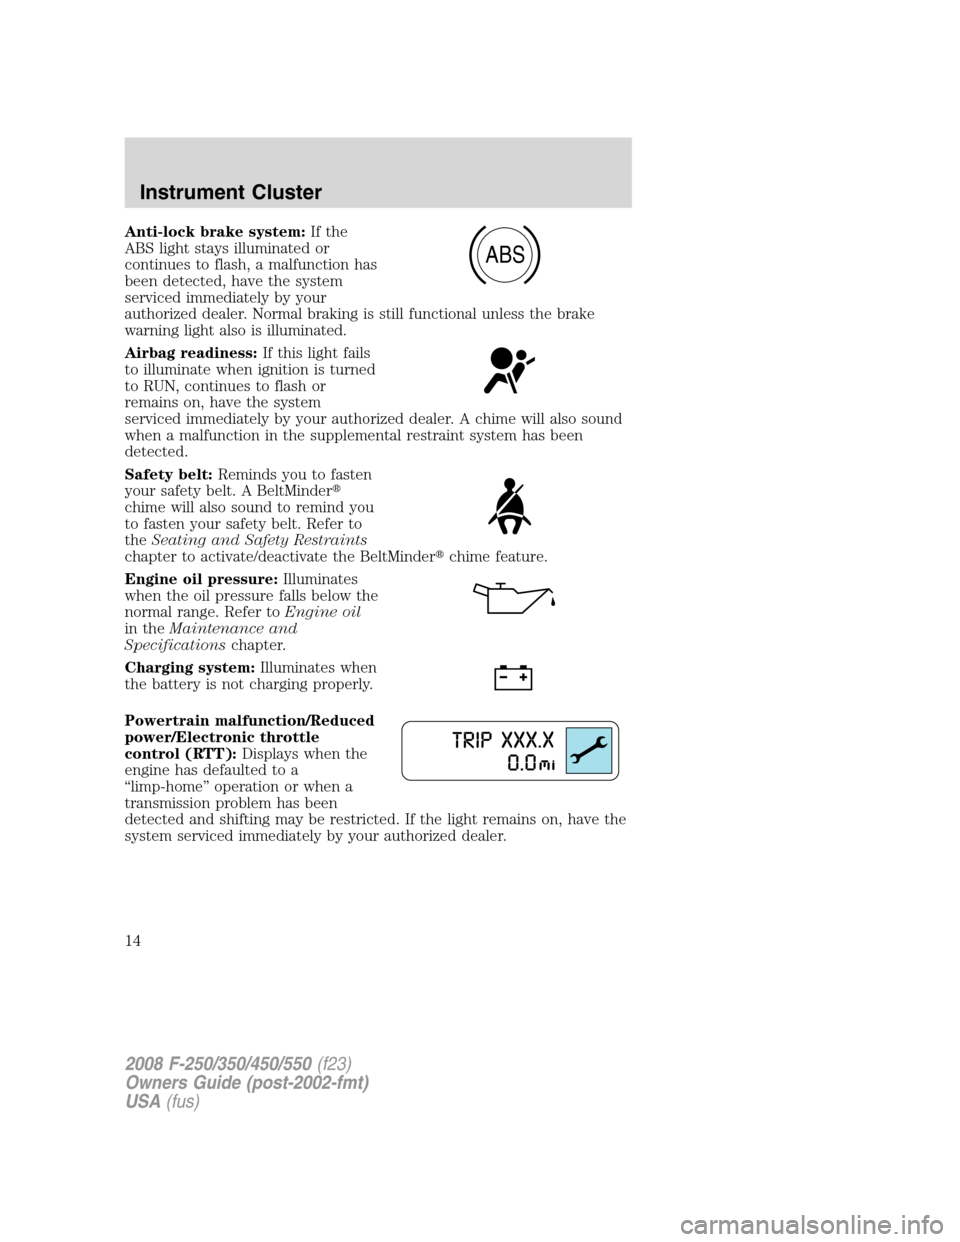
Anti-lock brake system:If the
ABS light stays illuminated or
continues to flash, a malfunction has
been detected, have the system
serviced immediately by your
authorized dealer. Normal braking is still functional unless the brake
warning light also is illuminated.
Airbag readiness:If this light fails
to illuminate when ignition is turned
to RUN, continues to flash or
remains on, have the system
serviced immediately by your authorized dealer. A chime will also sound
when a malfunction in the supplemental restraint system has been
detected.
Safety belt:Reminds you to fasten
your safety belt. A BeltMinder�
chime will also sound to remind you
to fasten your safety belt. Refer to
theSeating and Safety Restraints
chapter to activate/deactivate the BeltMinder�chime feature.
Engine oil pressure:Illuminates
when the oil pressure falls below the
normal range. Refer toEngine oil
in theMaintenance and
Specificationschapter.
Charging system:Illuminates when
the battery is not charging properly.
Powertrain malfunction/Reduced
power/Electronic throttle
control (RTT):Displays when the
engine has defaulted to a
“limp-home” operation or when a
transmission problem has been
detected and shifting may be restricted. If the light remains on, have the
system serviced immediately by your authorized dealer.
ABS
2008 F-250/350/450/550(f23)
Owners Guide (post-2002-fmt)
USA(fus)
Instrument Cluster
14
Page 17 of 368

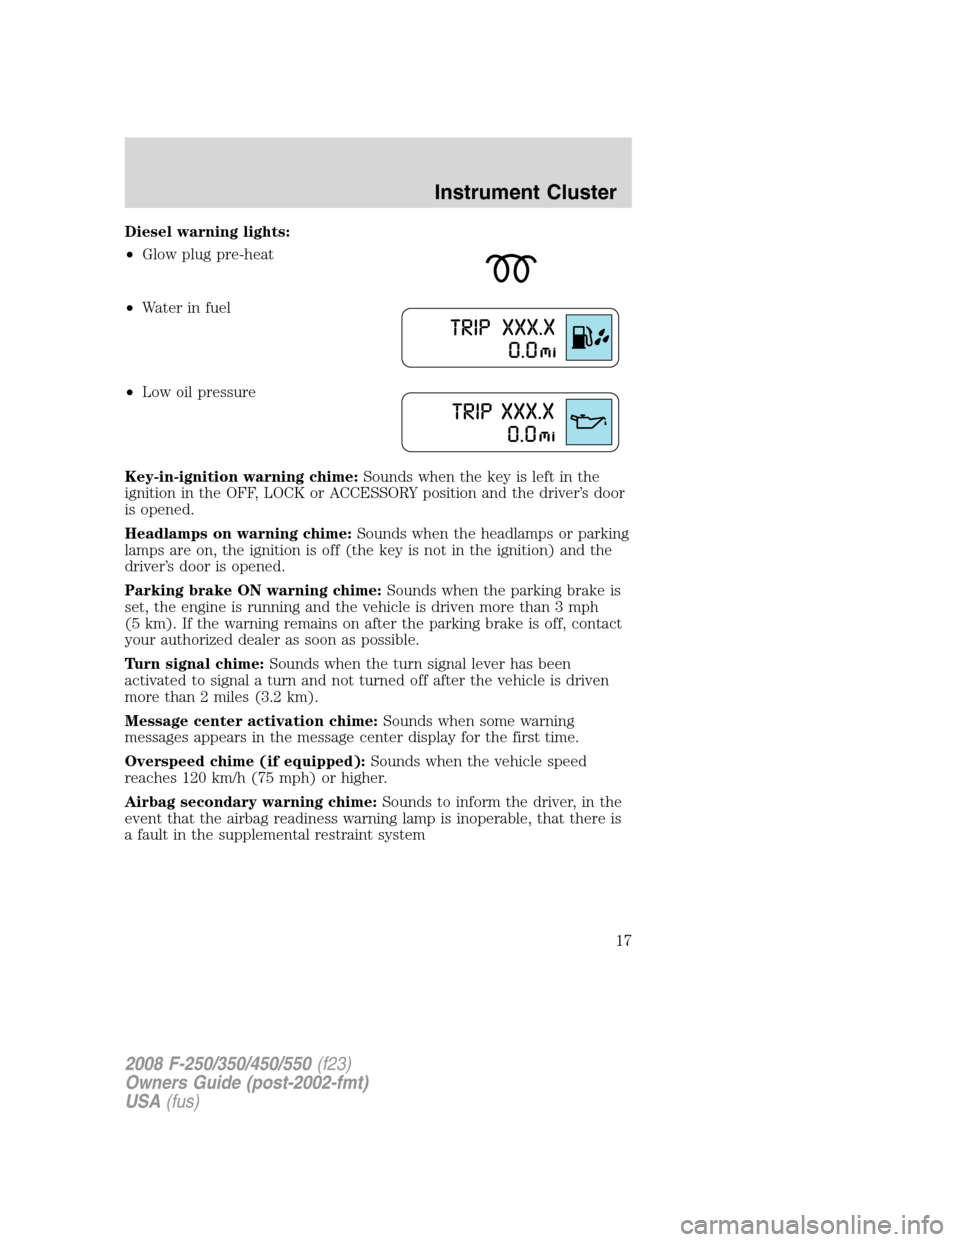
Diesel warning lights:
•Glow plug pre-heat
•Waterinfuel
•Low oil pressure
Key-in-ignition warning chime:Sounds when the key is left in the
ignition in the OFF, LOCK or ACCESSORY position and the driver’s door
is opened.
Headlamps on warning chime:Sounds when the headlamps or parking
lamps are on, the ignition is off (the key is not in the ignition) and the
driver’s door is opened.
Parking brake ON warning chime:Sounds when the parking brake is
set, the engine is running and the vehicle is driven more than 3 mph
(5 km). If the warning remains on after the parking brake is off, contact
your authorized dealer as soon as possible.
Turn signal chime:Sounds when the turn signal lever has been
activated to signal a turn and not turned off after the vehicle is driven
more than 2 miles (3.2 km).
Message center activation chime:Sounds when some warning
messages appears in the message center display for the first time.
Overspeed chime (if equipped):Sounds when the vehicle speed
reaches 120 km/h (75 mph) or higher.
Airbag secondary warning chime:Sounds to inform the driver, in the
event that the airbag readiness warning lamp is inoperable, that there is
a fault in the supplemental restraint system
2008 F-250/350/450/550(f23)
Owners Guide (post-2002-fmt)
USA(fus)
Instrument Cluster
17
Page 81 of 368
Daytime running lamps (DRL) (if equipped)
Turns the headlamps on with a reduced output.
To activate:
•the ignition must be in the ON position,
•the headlamp control is in the OFF or parking lamp position and
•the parking brake must be disengaged.
Always remember to turn on your headlamps at dusk or during
inclement weather. The Daytime Running Lamp (DRL) system
does not activate the tail lamps and generally may not provide
adequate lighting during these conditions. Failure to activate your
headlamps under these conditions may result in a collision.
High beams
Push the lever toward the
instrument panel to activate. Pull
the lever towards you to deactivate.
Flash to pass
Pull toward you slightly to activate
and release to deactivate.
O
F
F
2008 F-250/350/450/550(f23)
Owners Guide (post-2002-fmt)
USA(fus)
Lights
81
Page 91 of 368
Replacing brake/tail/turn/back-up lamp bulbs - Pick-ups only
1. Make sure the headlamp switch is
in the OFF position and then open
the tailgate to expose the lamp
assemblies.
2. Remove the two bolts from the
tail lamp assembly and carefully pull
the lamp assembly from the tailgate
pillar by releasing the two retaining
tabs.
3. Rotate the bulb socket counterclockwise and remove from lamp
assembly.
4. Pull the bulb straight out of the socket.
Install the new bulb(s) in reverse order.
Replacing brake/tail/turn/back-up lamp bulbs - Chassis cabs only
1. Make sure the headlamp switch is
in the OFF position.
2. Remove the four screws and the
lamp lens from lamp assembly.
3. Carefully pull the bulb straight
out of the socket and push in the
new bulb.
2008 F-250/350/450/550(f23)
Owners Guide (post-2002-fmt)
USA(fus)
Lights
91