2008 FORD SUPER DUTY ECU
[x] Cancel search: ECUPage 150 of 368
operate your vehicle’s engine) and the new unprogrammed key(s) readily
accessible for timely implementation of each step in the procedure.
If two previously programmed coded keys are not available, you must
bring your vehicle to your authorized dealer to have the spare coded
key(s) programmed.
Please read and understand the entire procedure before you begin.
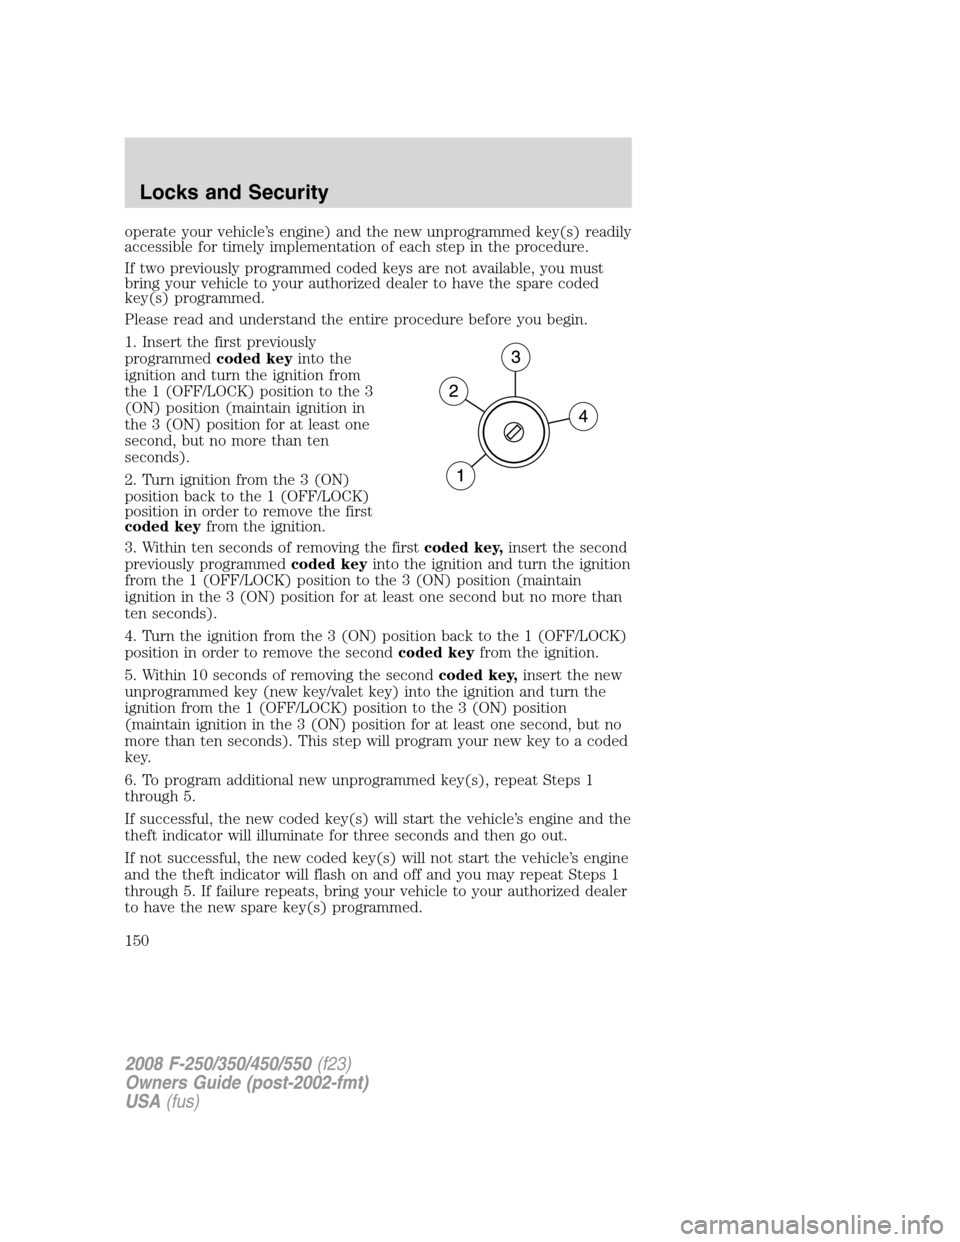
1. Insert the first previously
programmedcoded keyinto the
ignition and turn the ignition from
the 1 (OFF/LOCK) position to the 3
(ON) position (maintain ignition in
the 3 (ON) position for at least one
second, but no more than ten
seconds).
2. Turn ignition from the 3 (ON)
position back to the 1 (OFF/LOCK)
position in order to remove the first
coded keyfrom the ignition.
3. Within ten seconds of removing the firstcoded key,insert the second
previously programmedcoded keyinto the ignition and turn the ignition
from the 1 (OFF/LOCK) position to the 3 (ON) position (maintain
ignition in the 3 (ON) position for at least one second but no more than
ten seconds).
4. Turn the ignition from the 3 (ON) position back to the 1 (OFF/LOCK)
position in order to remove the secondcoded keyfrom the ignition.
5. Within 10 seconds of removing the secondcoded key,insert the new
unprogrammed key (new key/valet key) into the ignition and turn the
ignition from the 1 (OFF/LOCK) position to the 3 (ON) position
(maintain ignition in the 3 (ON) position for at least one second, but no
more than ten seconds). This step will program your new key to a coded
key.
6. To program additional new unprogrammed key(s), repeat Steps 1
through 5.
If successful, the new coded key(s) will start the vehicle’s engine and the
theft indicator will illuminate for three seconds and then go out.
If not successful, the new coded key(s) will not start the vehicle’s engine
and the theft indicator will flash on and off and you may repeat Steps 1
through 5. If failure repeats, bring your vehicle to your authorized dealer
to have the new spare key(s) programmed.
2008 F-250/350/450/550(f23)
Owners Guide (post-2002-fmt)
USA(fus)
Locks and Security
150
Page 156 of 368
To operate the heated seats, do the following (engine must be running):
Push
to activate; pushagain to deactivate.
The indicator light on the control will illuminate when activated.
The system will automatically shut off after 10 minutes unless the
control is pushed to deactivate. The system will reset after each ignition
key cycle.
Memory seats/power mirrors/adjustable pedals (if equipped)
This system allows automatic
positioning of the driver seat, power
mirrors, and adjustable pedals to
two programmable positions.
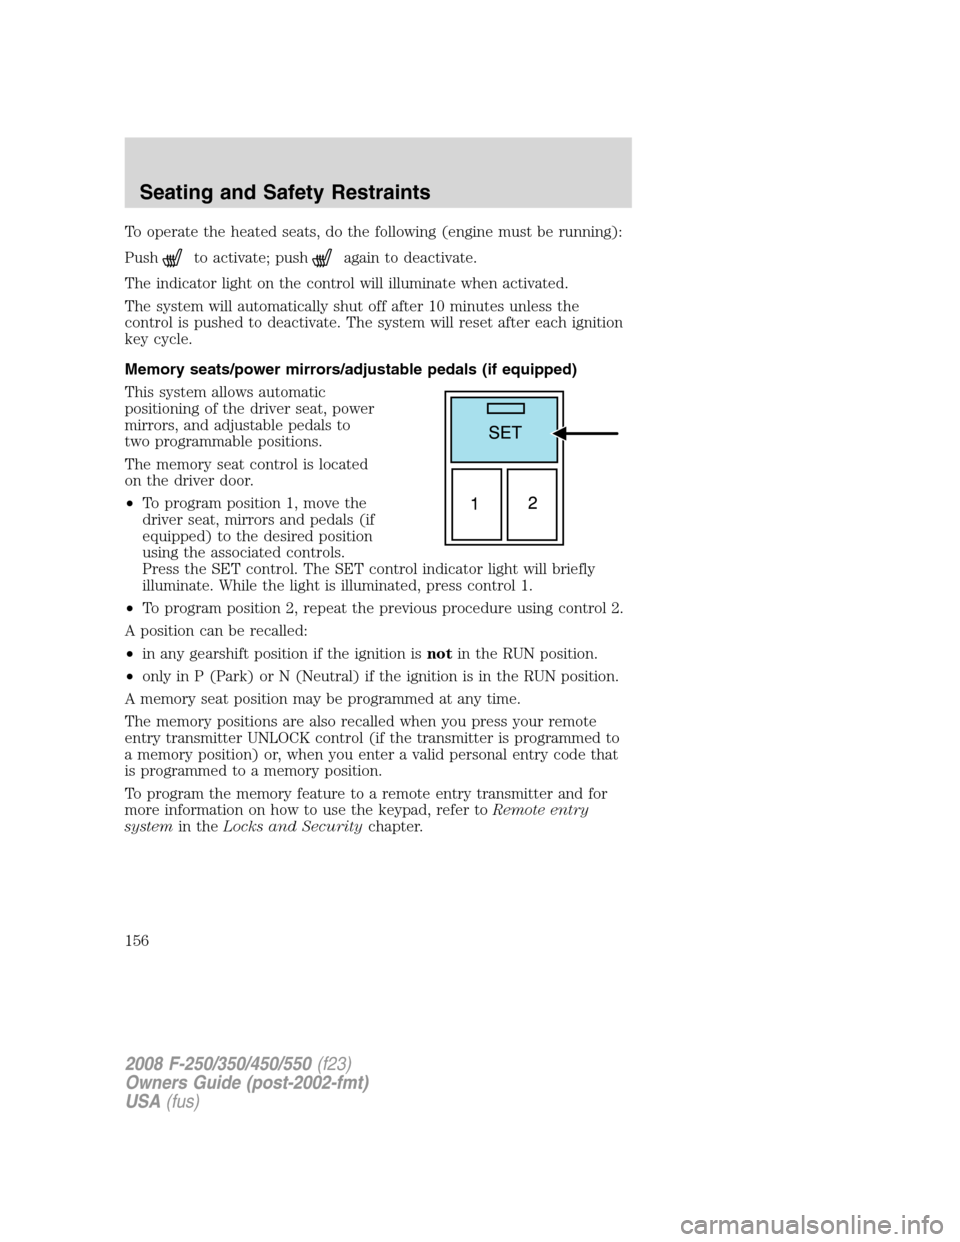
The memory seat control is located
on the driver door.
•To program position 1, move the
driver seat, mirrors and pedals (if
equipped) to the desired position
using the associated controls.
Press the SET control. The SET control indicator light will briefly
illuminate. While the light is illuminated, press control 1.
•To program position 2, repeat the previous procedure using control 2.
A position can be recalled:
•in any gearshift position if the ignition isnotin the RUN position.
•only in P (Park) or N (Neutral) if the ignition is in the RUN position.
A memory seat position may be programmed at any time.
The memory positions are also recalled when you press your remote
entry transmitter UNLOCK control (if the transmitter is programmed to
a memory position) or, when you enter a valid personal entry code that
is programmed to a memory position.
To program the memory feature to a remote entry transmitter and for
more information on how to use the keypad, refer toRemote entry
systemin theLocks and Securitychapter.
2008 F-250/350/450/550(f23)
Owners Guide (post-2002-fmt)
USA(fus)
Seating and Safety Restraints
156
Page 160 of 368
Combination lap and shoulder belts
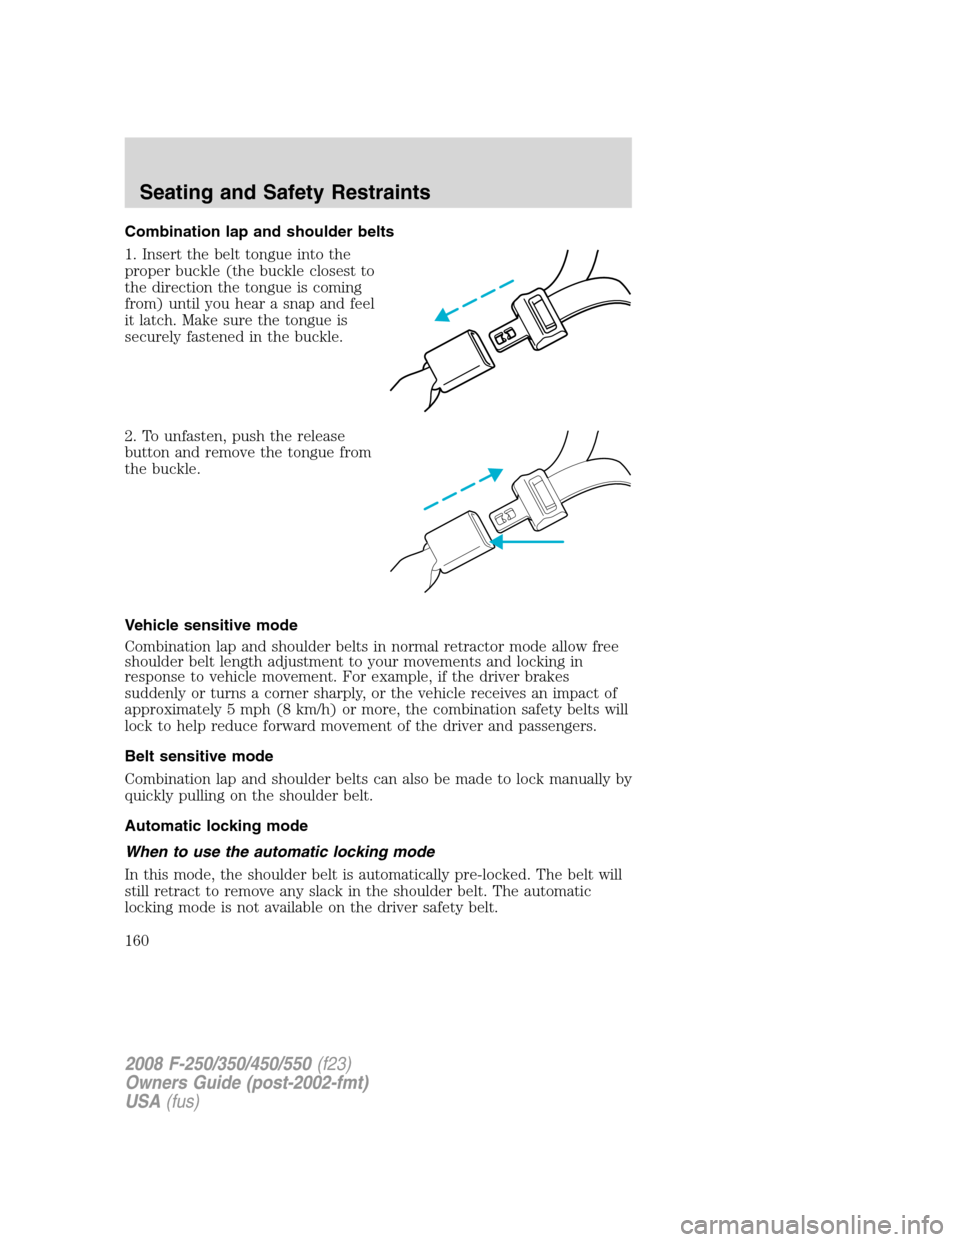
1. Insert the belt tongue into the
proper buckle (the buckle closest to
the direction the tongue is coming
from) until you hear a snap and feel
it latch. Make sure the tongue is
securely fastened in the buckle.
2. To unfasten, push the release
button and remove the tongue from
the buckle.
Vehicle sensitive mode
Combination lap and shoulder belts in normal retractor mode allow free
shoulder belt length adjustment to your movements and locking in
response to vehicle movement. For example, if the driver brakes
suddenly or turns a corner sharply, or the vehicle receives an impact of
approximately 5 mph (8 km/h) or more, the combination safety belts will
lock to help reduce forward movement of the driver and passengers.
Belt sensitive mode
Combination lap and shoulder belts can also be made to lock manually by
quickly pulling on the shoulder belt.
Automatic locking mode
When to use the automatic locking mode
In this mode, the shoulder belt is automatically pre-locked. The belt will
still retract to remove any slack in the shoulder belt. The automatic
locking mode is not available on the driver safety belt.
2008 F-250/350/450/550(f23)
Owners Guide (post-2002-fmt)
USA(fus)
Seating and Safety Restraints
160
Page 165 of 368
longer. The cinch tongue is designed to slip during a crash, so always
wear the shoulder belt properly and don’t allow any slack in either the
lap or shoulder portions.
Before you can reach and latch a combination lap and shoulder belt
having a cinch tongue into the buckle, you may have to lengthen the lap
belt portion of it.
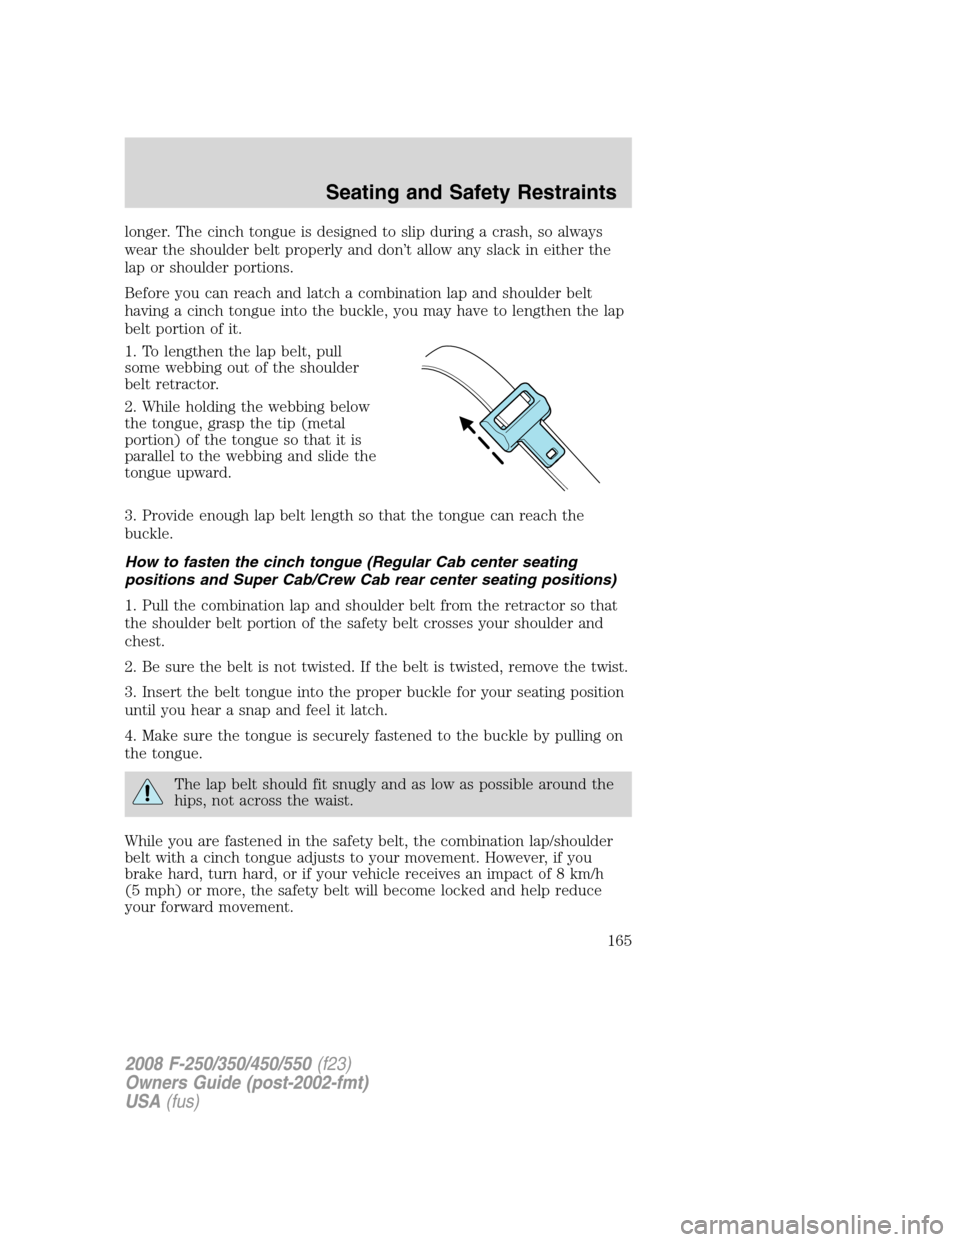
1. To lengthen the lap belt, pull
some webbing out of the shoulder
belt retractor.
2. While holding the webbing below
the tongue, grasp the tip (metal
portion) of the tongue so that it is
parallel to the webbing and slide the
tongue upward.
3. Provide enough lap belt length so that the tongue can reach the
buckle.
How to fasten the cinch tongue (Regular Cab center seating
positions and Super Cab/Crew Cab rear center seating positions)
1. Pull the combination lap and shoulder belt from the retractor so that
the shoulder belt portion of the safety belt crosses your shoulder and
chest.
2. Be sure the belt is not twisted. If the belt is twisted, remove the twist.
3. Insert the belt tongue into the proper buckle for your seating position
until you hear a snap and feel it latch.
4. Make sure the tongue is securely fastened to the buckle by pulling on
the tongue.
The lap belt should fit snugly and as low as possible around the
hips, not across the waist.
While you are fastened in the safety belt, the combination lap/shoulder
belt with a cinch tongue adjusts to your movement. However, if you
brake hard, turn hard, or if your vehicle receives an impact of 8 km/h
(5 mph) or more, the safety belt will become locked and help reduce
your forward movement.
2008 F-250/350/450/550(f23)
Owners Guide (post-2002-fmt)
USA(fus)
Seating and Safety Restraints
165
Page 184 of 368

Follow all instructions provided by the manufacturer of the
booster seat.
Never put the shoulder belt under a child’s arm or behind the
back because it eliminates the protection for the upper part of
the body and may increase the risk of injury or death in a collision.
Never use pillows, books, or towels to boost a child. They can
slide around and increase the likelihood of injury or death in a
collision.
SAFETY SEATS FOR CHILDREN
Child and infant or child safety seats
Use a safety seat that is recommended for the size and weight of the
child. Carefully follow all of the manufacturer’s instructions with the
safety seat you put in your vehicle. If you do not install and use the
safety seat properly, the child may be injured in a sudden stop or
collision.
When installing a child safety seat:
•Review and follow the information
presented in theAirbag
supplemental restraint system
(SRS) section in this chapter.
•Use the correct safety belt buckle
for that seating position (the
buckle closest to the direction the
tongue is coming from).
•Insert the belt tongue into the
proper buckle until you hear a
snap and feel it latch. Make sure the tongue is securely fastened in the
buckle.
•Keep the buckle release button pointing up and away from the safety
seat, with the tongue between the child seat and the release button,
to prevent accidental unbuckling.
•Place seat back in upright position.
•Put the safety belt in the automatic locking mode. Refer toAutomatic
locking mode(passenger side front and outboard rear seating
positions) (if equipped) section in this chapter.
2008 F-250/350/450/550(f23)
Owners Guide (post-2002-fmt)
USA(fus)
Seating and Safety Restraints
184
Page 186 of 368

2. Pull down on the shoulder belt
and then grasp the shoulder belt
and lap belt together.
3. While holding the shoulder and
lap belt portions together, route the
tongue through the child seat
according to the child seat
manufacturer’s instructions. Be sure
the belt webbing is not twisted.
4. Insert the belt tongue into the
proper buckle (the buckle closest to
the direction the tongue is coming
from) for that seating position until
you hear and feel the latch engage.
Make sure the tongue is latched
securely by pulling on it.
2008 F-250/350/450/550(f23)
Owners Guide (post-2002-fmt)
USA(fus)
Seating and Safety Restraints
186
Page 187 of 368
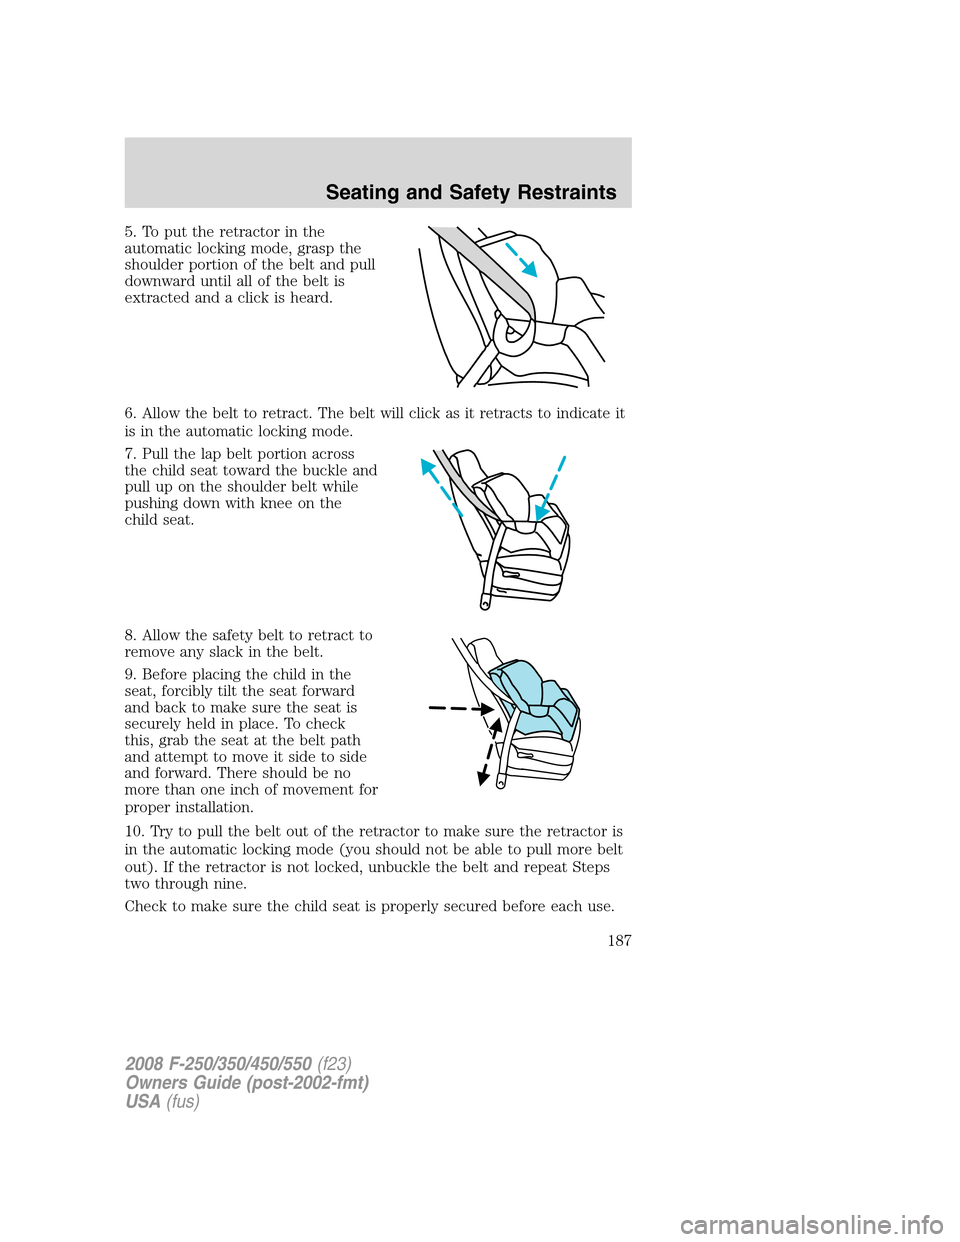
5. To put the retractor in the
automatic locking mode, grasp the
shoulder portion of the belt and pull
downward until all of the belt is
extracted and a click is heard.
6. Allow the belt to retract. The belt will click as it retracts to indicate it
is in the automatic locking mode.
7. Pull the lap belt portion across
the child seat toward the buckle and
pull up on the shoulder belt while
pushing down with knee on the
child seat.
8. Allow the safety belt to retract to
remove any slack in the belt.
9. Before placing the child in the
seat, forcibly tilt the seat forward
and back to make sure the seat is
securely held in place. To check
this, grab the seat at the belt path
and attempt to move it side to side
and forward. There should be no
more than one inch of movement for
proper installation.
10. Try to pull the belt out of the retractor to make sure the retractor is
in the automatic locking mode (you should not be able to pull more belt
out). If the retractor is not locked, unbuckle the belt and repeat Steps
two through nine.
Check to make sure the child seat is properly secured before each use.
2008 F-250/350/450/550(f23)
Owners Guide (post-2002-fmt)
USA(fus)
Seating and Safety Restraints
187
Page 190 of 368
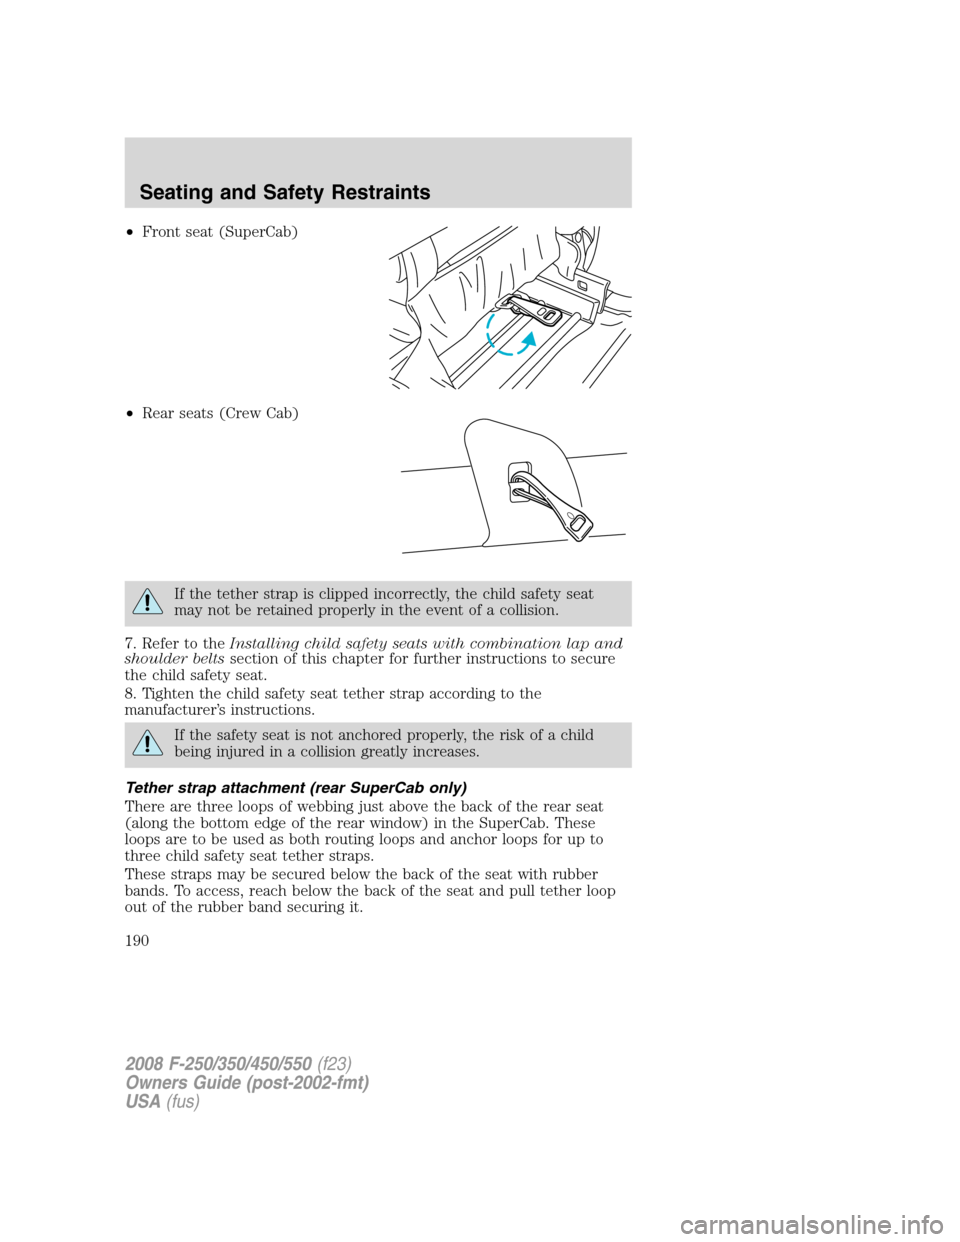
•Front seat (SuperCab)
•Rear seats (Crew Cab)
If the tether strap is clipped incorrectly, the child safety seat
may not be retained properly in the event of a collision.
7. Refer to theInstalling child safety seats with combination lap and
shoulder beltssection of this chapter for further instructions to secure
the child safety seat.
8. Tighten the child safety seat tether strap according to the
manufacturer’s instructions.
If the safety seat is not anchored properly, the risk of a child
being injured in a collision greatly increases.
Tether strap attachment (rear SuperCab only)
There are three loops of webbing just above the back of the rear seat
(along the bottom edge of the rear window) in the SuperCab. These
loops are to be used as both routing loops and anchor loops for up to
three child safety seat tether straps.
These straps may be secured below the back of the seat with rubber
bands. To access, reach below the back of the seat and pull tether loop
out of the rubber band securing it.
2008 F-250/350/450/550(f23)
Owners Guide (post-2002-fmt)
USA(fus)
Seating and Safety Restraints
190