2008 FORD FREESTYLE remote control
[x] Cancel search: remote controlPage 45 of 352
Your vehicle may be equipped with a Family Entertainment System
(FES) which allows you to listen to audio CDs, MP3 discs, watch DVDs
and to plug in and play a variety of standard video game systems. The
DVD player is capable of playing standard DVDs, CDs, MP3s and is
compatible with CD-R/W, CD-R and certain CD-ROM media.
Please review this material to become familiar with the FES features and
controls as well as the very important safety information.
The driver should not attempt to operate any function of the
DVD system while the vehicle is in motion. Give full attention to
driving and to the road. Pull off the road in a safe place before
inserting or extracting DVDs from the system. A remote control is
included in the system to allow the rear seat occupants to operate the
FES functions without distracting the driver.
Quick start
Your Family Entertainment System includes a DVD system, two sets of
wireless infrared (IR) headphones and a wireless infrared (IR) remote
control.
To play a DVD in the DVD system:
The DVD system can play DVD-Video, DVD-R, DVD-R/W discs as well as
audio CDs and video CDs. To ensure proper disc operation, check the
disc for finger prints, scratches and cleanliness. Clean with a soft cloth,
wiping from center to edge.
1. Ensure that the vehicle ignition is in the RUN or ACCESSORY
position.
2. Insert a DVD into the system,
label-side up to turn on the system.
It will load automatically.
3. Press the power button on the
DVD player, then press Play (
)
to begin to play the disc.
If a DVD is already loaded into the
system, press PLAY on the DVD
player.
Note:If sound can be heard, but no video is present, press VIDEO to
select the video source (DVD or aux-inputs).
2008 Taurus X(219)
Owners Guide (post-2002-fmt)
USA(fus)
Entertainment Systems
45
ProCarManuals.com
Page 51 of 352
7.VIDEO:Press repeatedly to cycle
through the following video state
options which will be indicated on
the bottom right hand corner of the
display: DVD DISC, DVD-AUX,
NON-DVD and Off (no indicator). If you select the DVD-AUX video
source, the display will turn off if there is no video signal detected. When
a video signal is detected on the auxiliary video input, and the display is
in the DVD-AUX video mode, the display will automatically turn on.
8.Infrared (IR) Receiver & Transmitter:System sensor which reads
the signals from the remote control and sends audio signals to the
infrared (IR) wireless headphones.
9.LCD screen:The eight inch diagonal screen rotates down to view and
up into housing to store when not in use. Ensure that the screen is
latched into the housing when being stored.
10.Volume:When in Single Play,
press to increase (
) or decrease
(
) the volume over all speakers.
When in Dual Play, press to increase
(
) or decrease () the volume
for the wired headphones. (Wireless headphone volume is controlled
with the rotary dial on the right ear piece.)
11.
/(Headphones/Speakers): Press once for Dual Play
(Headphone mode- the rear speakers are muted) and press again for
Single Play (same media playing through all speakers). You can also
press the 2 and 4 memory preset buttons on the audio system at the
same time to perform the same function. For further interaction
information, refer toSingle Play/Dual play.
12.MEDIA:Press repeatedly to
select from the various possible
playing media sources (AM, FM1,
FM2, SAT (if equipped), CD, DVD, DVD-AUX). The media will show in
the status display on the top of the screen when in Dual Play mode.
When in Single Play mode, the media source will be displayed on the
radio.
Note:Channel A can access any possible media source (AM, FM1, FM2,
SAT (if equipped), CD, DVD, DVD-AUX). Channel B can only access
DVD and DVD-AUX sources.
2008 Taurus X(219)
Owners Guide (post-2002-fmt)
USA(fus)
Entertainment Systems
51
ProCarManuals.com
Page 52 of 352
13.RETURN:Press to return to the
playing media or to resume
playback.
14.MENU:When playing a DVD,
press MENU once to enter the DVD
disc menu (if available) and press
twice to enter the system set-up menu. From the set-up menu, you may
select from Angle, Aspect Ratio, Language, Subtitles, Disc resume,
Compression, Restore Defaults and Back. For more detailed information,
refer toMenu mode.
15.ENTER:Press to select/confirm
the current selection.
16.Cursor /Brightness controls:
Use the cursor controls to make
various selections when in any
menu. When not in a menu, and in
DVD mode, press
/to adjust
the brightness. A display bar will appear at the bottom of the screen
indicating the brightness levels.
Remote control
Unless otherwise stated, all operations can be carried out with the
remote control. Always point the remote control directly at the player.
Ensure that there are no obstructions between the remote and player.
2008 Taurus X(219)
Owners Guide (post-2002-fmt)
USA(fus)
Entertainment Systems
52
ProCarManuals.com
Page 55 of 352
23.ILLUMINATION: Press to illuminate the remote control and
backlight all of the buttons.
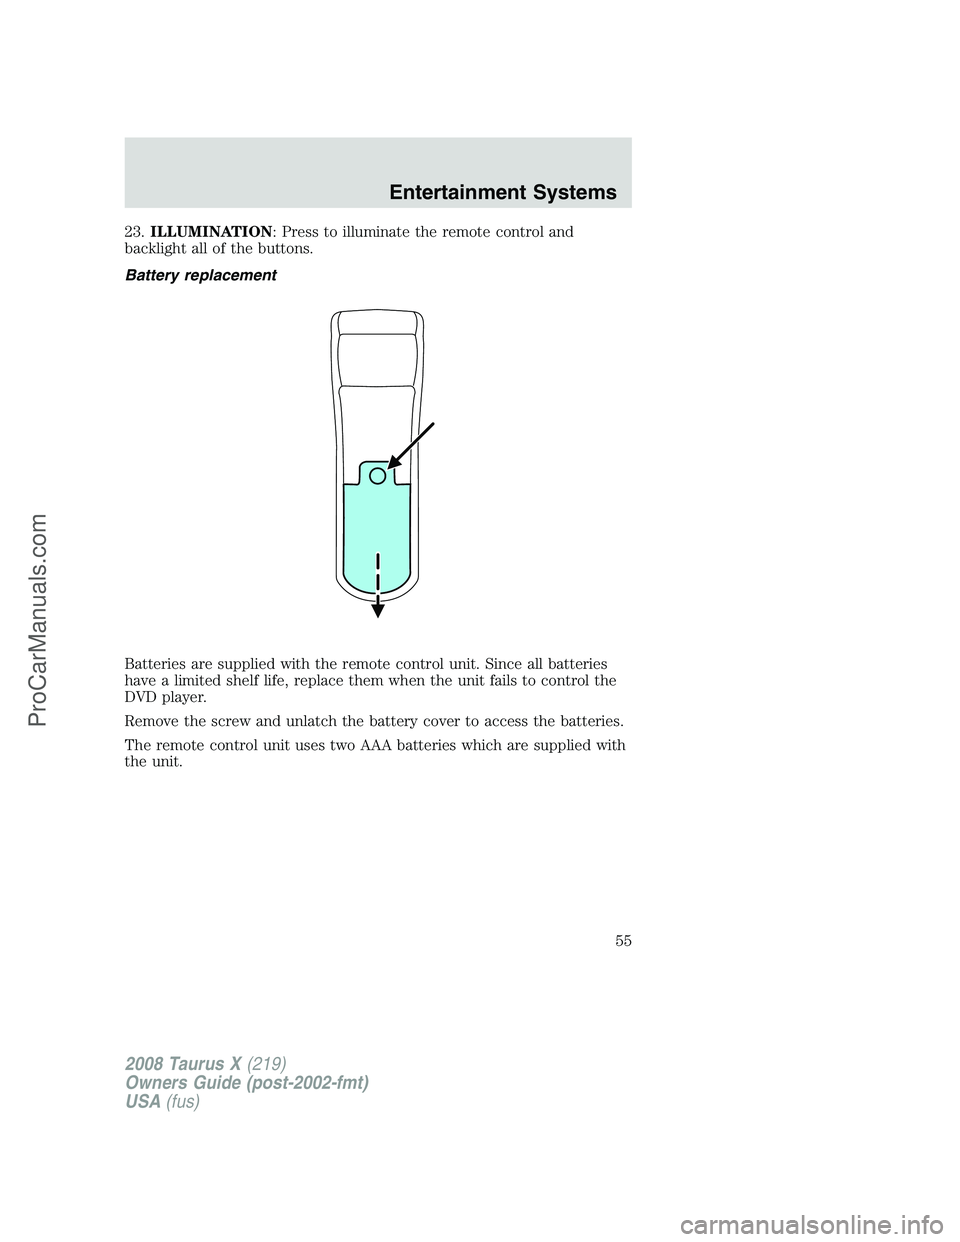
Battery replacement
Batteries are supplied with the remote control unit. Since all batteries
have a limited shelf life, replace them when the unit fails to control the
DVD player.
Remove the screw and unlatch the battery cover to access the batteries.
The remote control unit uses two AAA batteries which are supplied with
the unit.
2008 Taurus X(219)
Owners Guide (post-2002-fmt)
USA(fus)
Entertainment Systems
55
ProCarManuals.com
Page 71 of 352
Do not leave children unattended in the vehicle and do not let
children operate the system while unsupervised. If wired
headphones or auxiliary systems are used, children may become
entangled in the cords and seriously injure themselves.
The front glass on the liquid crystal display (LCD) flip-down
screen may break when hit with a hard surface. If the glass
breaks, do not touch the liquid crystalline material. In case of contact
with skin, wash immediately with soap and water.
The driver should not attempt to operate any function of the
DVD system while the vehicle is in motion. Give full attention to
driving and to the road. Pull off the road in a safe place before
inserting or extracting DVDs from the system. A remote control is
included in the system to allow the rear seat occupants to operate the
FES functions without distracting the driver.
Do not expose the liquid crystal display (LCD) flip-down screen
to direct sunlight or intensive ultraviolet rays for extensive
periods of time. Ultraviolet rays deteriorate the liquid crystal.
Be sure to review User Manuals for video games and video game
equipment when used as auxiliary inputs for your Family Entertainment
System (FES).
Do not operate video games or video equipment if the power cords
and/or cables are broken, split or damaged. Carefully place cords and/or
cables where they will not be stepped on or interfere with the operation
of seats and/or compartments.
Disconnect video games and video equipment power cords and/or cables
when not in use.
Avoid touching auxiliary input jacks with your fingers. Do not blow on
them or allow them to get wet or dirty.
Do not clean any part of the DVD player with benzene, paint thinner or
any other solvent.
2008 Taurus X(219)
Owners Guide (post-2002-fmt)
USA(fus)
Entertainment Systems
71
ProCarManuals.com
Page 106 of 352

Memory feature (if equipped)
The accelerator and brake pedal positions are saved when doing a
memory set function and can be recalled along with the vehicle
personality features when a memory position is selected through the
remote entry transmitter, keyless entry keypad or memory switch on the
driver’s door (if equipped with memory feature). Refer toMemory
seats/power mirrors/adjustable pedalsin theSeating and Safety
Restraintschapter.
SPEED CONTROL
With speed control set, you can maintain a set speed without keeping
your foot on the accelerator pedal.
Do not use the speed control in heavy traffic or on roads that
are winding, slippery or unpaved.
Setting speed control
The controls for using your speed
control are located on the steering
wheel for your convenience.
1. Press the ON control and release
it.
2. Accelerate to the desired speed.
3. Press the SET + control and
release it.
4. Take your foot off the accelerator
pedal.
5. The indicator
light on the
instrument cluster will turn on.
Note:
•Vehicle speed may vary momentarily when driving up and down a
steep hill.
SET
SET
RSM CNCLON
OFF
SET
SET
RSM CNCLON
OFF
2008 Taurus X(219)
Owners Guide (post-2002-fmt)
USA(fus)
Driver Controls
106
ProCarManuals.com
Page 127 of 352
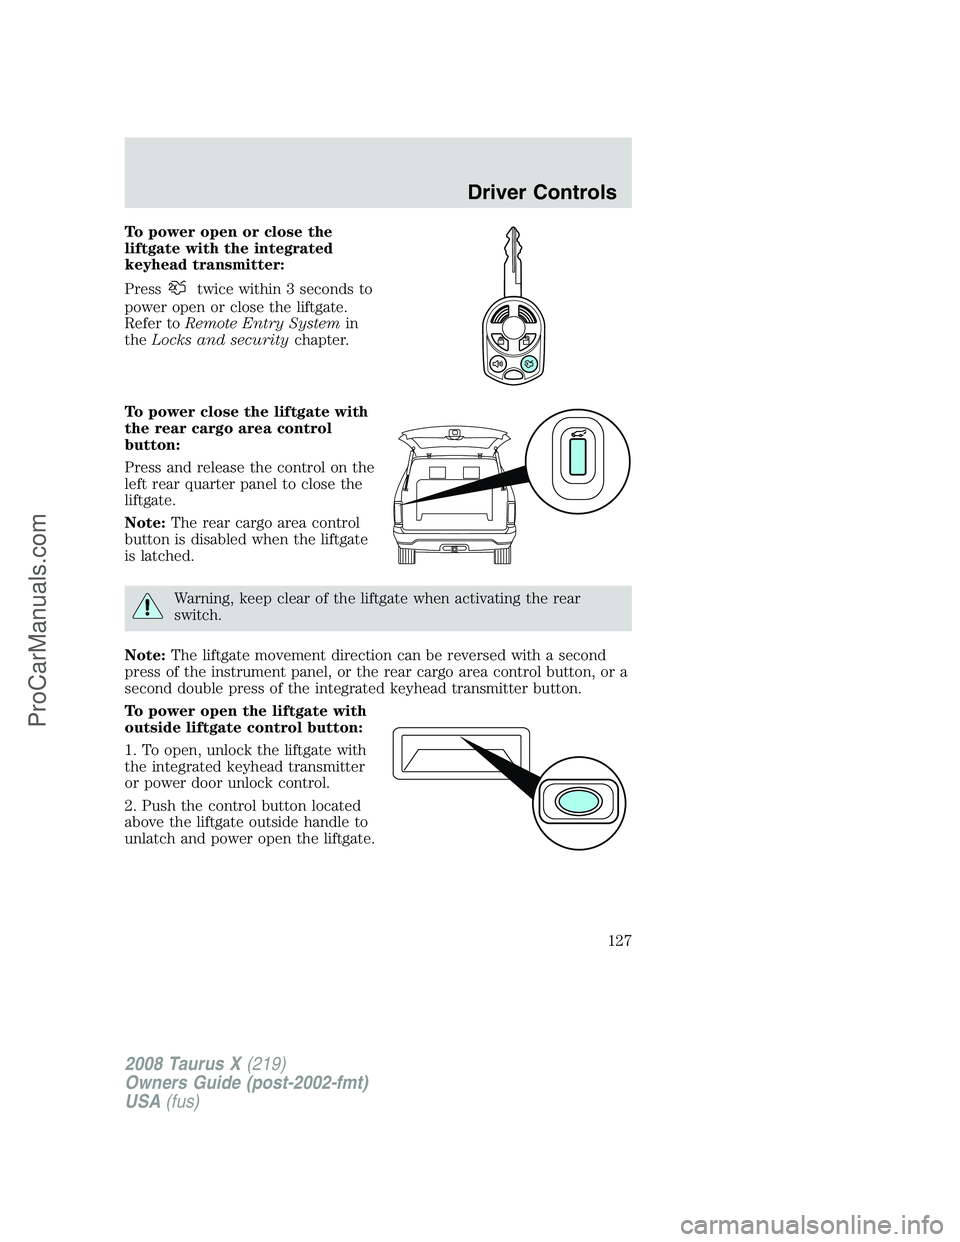
To power open or close the
liftgate with the integrated
keyhead transmitter:
Press
twice within 3 seconds to
power open or close the liftgate.
Refer toRemote Entry Systemin
theLocks and securitychapter.
To power close the liftgate with
the rear cargo area control
button:
Press and release the control on the
left rear quarter panel to close the
liftgate.
Note:The rear cargo area control
button is disabled when the liftgate
is latched.
Warning, keep clear of the liftgate when activating the rear
switch.
Note:The liftgate movement direction can be reversed with a second
press of the instrument panel, or the rear cargo area control button, or a
second double press of the integrated keyhead transmitter button.
To power open the liftgate with
outside liftgate control button:
1. To open, unlock the liftgate with
the integrated keyhead transmitter
or power door unlock control.
2. Push the control button located
above the liftgate outside handle to
unlatch and power open the liftgate.
2008 Taurus X(219)
Owners Guide (post-2002-fmt)
USA(fus)
Driver Controls
127
ProCarManuals.com
Page 129 of 352
MANUAL LIFTGATE
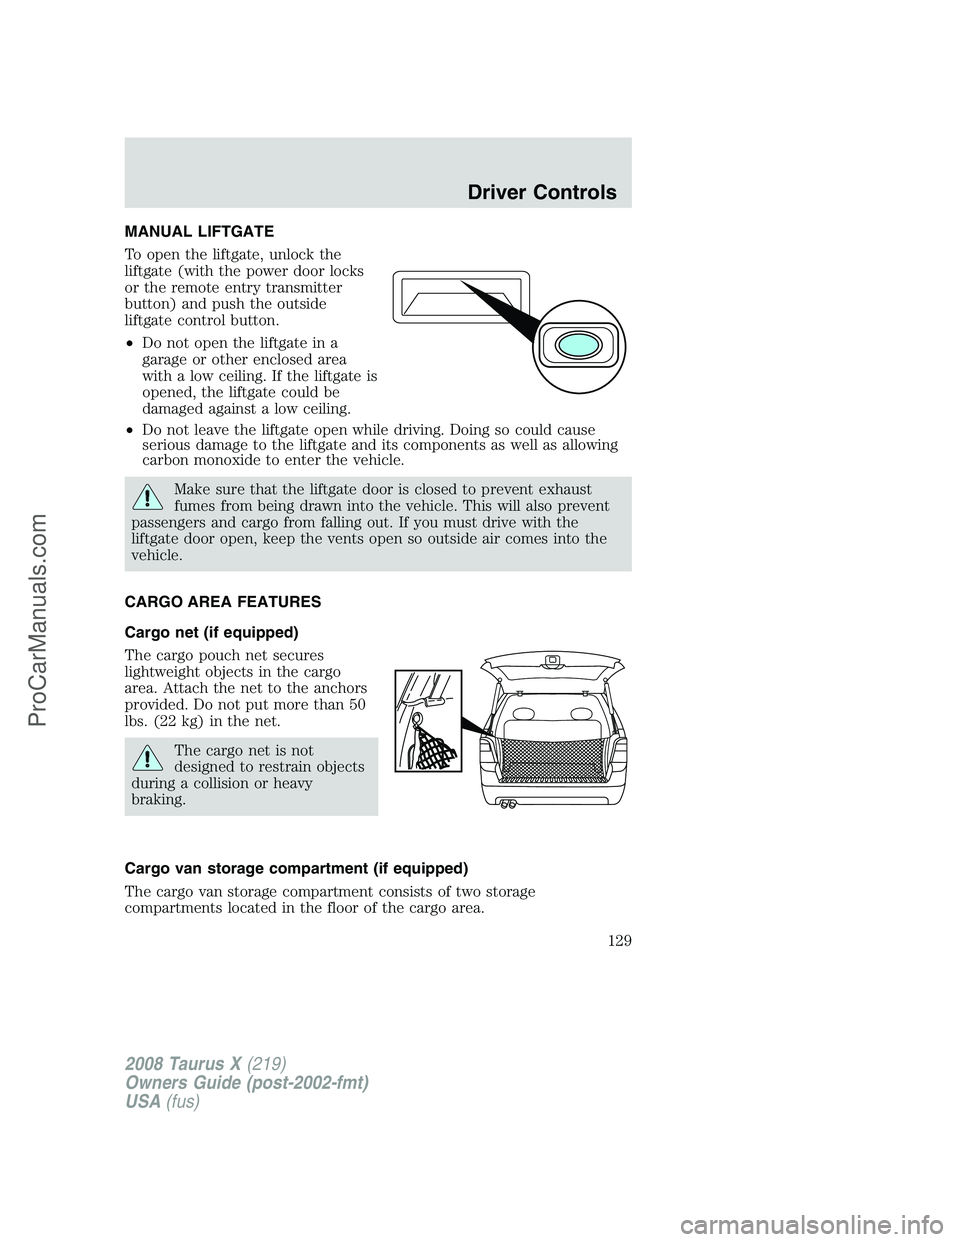
To open the liftgate, unlock the
liftgate (with the power door locks
or the remote entry transmitter
button) and push the outside
liftgate control button.
•Do not open the liftgate in a
garage or other enclosed area
with a low ceiling. If the liftgate is
opened, the liftgate could be
damaged against a low ceiling.
•Do not leave the liftgate open while driving. Doing so could cause
serious damage to the liftgate and its components as well as allowing
carbon monoxide to enter the vehicle.
Make sure that the liftgate door is closed to prevent exhaust
fumes from being drawn into the vehicle. This will also prevent
passengers and cargo from falling out. If you must drive with the
liftgate door open, keep the vents open so outside air comes into the
vehicle.
CARGO AREA FEATURES
Cargo net (if equipped)
The cargo pouch net secures
lightweight objects in the cargo
area. Attach the net to the anchors
provided. Do not put more than 50
lbs. (22 kg) in the net.
The cargo net is not
designed to restrain objects
during a collision or heavy
braking.
Cargo van storage compartment (if equipped)
The cargo van storage compartment consists of two storage
compartments located in the floor of the cargo area.
2008 Taurus X(219)
Owners Guide (post-2002-fmt)
USA(fus)
Driver Controls
129
ProCarManuals.com