2008 FORD F250 mirror
[x] Cancel search: mirrorPage 104 of 400

Automatic dimming inside rear view mirror (if equipped)
Your vehicle may be equipped with
an inside rear view mirror which has
an auto-dimming function. The
electronic day/night mirror will
change from the normal (high
reflective) state to the non-glare
(darkened) state when bright lights (glare) reach the mirror. When the
mirror detects bright light from behind the vehicle, it will automatically
adjust (darken) to minimize glare.
The mirror will automatically return to the normal state whenever the
vehicle is placed in R (Reverse) (when the mirror is on) to ensure a
bright clear view when backing up.
Do not block the sensors on the front and back of the inside rear
view mirror since this may impair proper mirror performance.
Do not clean the housing or glass of any mirror with harsh
abrasives, fuel or other petroleum-based cleaning products.
Note:If equipped with a Reverse Camera System (RCS), a video image
will display in the mirror when the vehicle is put in (R) Reverse. Refer to
Reverse Camera System (RCS)in theDrivingchapter.
POWER SIDE VIEW MIRRORS (IF EQUIPPED)
To adjust your mirrors:
1. Rotate the control clockwise to
adjust the right mirror and rotate
the control counterclockwise to
adjust the left mirror.
2. Move the control in the direction
you wish to tilt the mirror.
3. Return to the center position to lock mirrors in place.
The spotter mirror below the main glass (if equipped) must be adjusted
manually.
2008 F-250/350/450/550(f23)
Owners Guide (post-2002-fmt)
USA(fus)
Driver Controls
104
Page 105 of 400
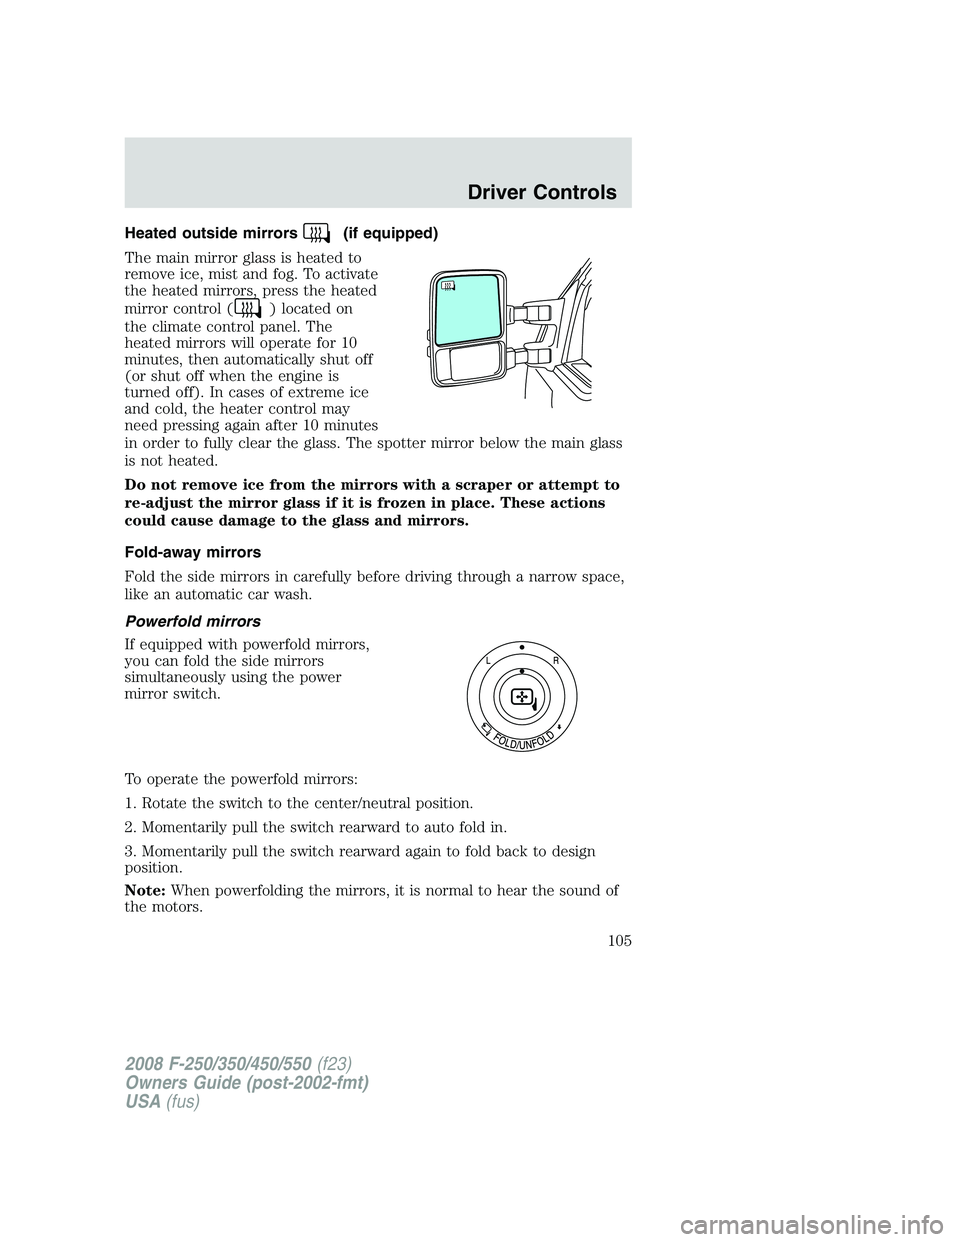
Heated outside mirrors(if equipped)
The main mirror glass is heated to
remove ice, mist and fog. To activate
the heated mirrors, press the heated
mirror control (
) located on
the climate control panel. The
heated mirrors will operate for 10
minutes, then automatically shut off
(or shut off when the engine is
turned off). In cases of extreme ice
and cold, the heater control may
need pressing again after 10 minutes
in order to fully clear the glass. The spotter mirror below the main glass
is not heated.
Do not remove ice from the mirrors with a scraper or attempt to
re-adjust the mirror glass if it is frozen in place. These actions
could cause damage to the glass and mirrors.
Fold-away mirrors
Fold the side mirrors in carefully before driving through a narrow space,
like an automatic car wash.
Powerfold mirrors
If equipped with powerfold mirrors,
you can fold the side mirrors
simultaneously using the power
mirror switch.
To operate the powerfold mirrors:
1. Rotate the switch to the center/neutral position.
2. Momentarily pull the switch rearward to auto fold in.
3. Momentarily pull the switch rearward again to fold back to design
position.
Note:When powerfolding the mirrors, it is normal to hear the sound of
the motors.
2008 F-250/350/450/550(f23)
Owners Guide (post-2002-fmt)
USA(fus)
Driver Controls
105
Page 106 of 400
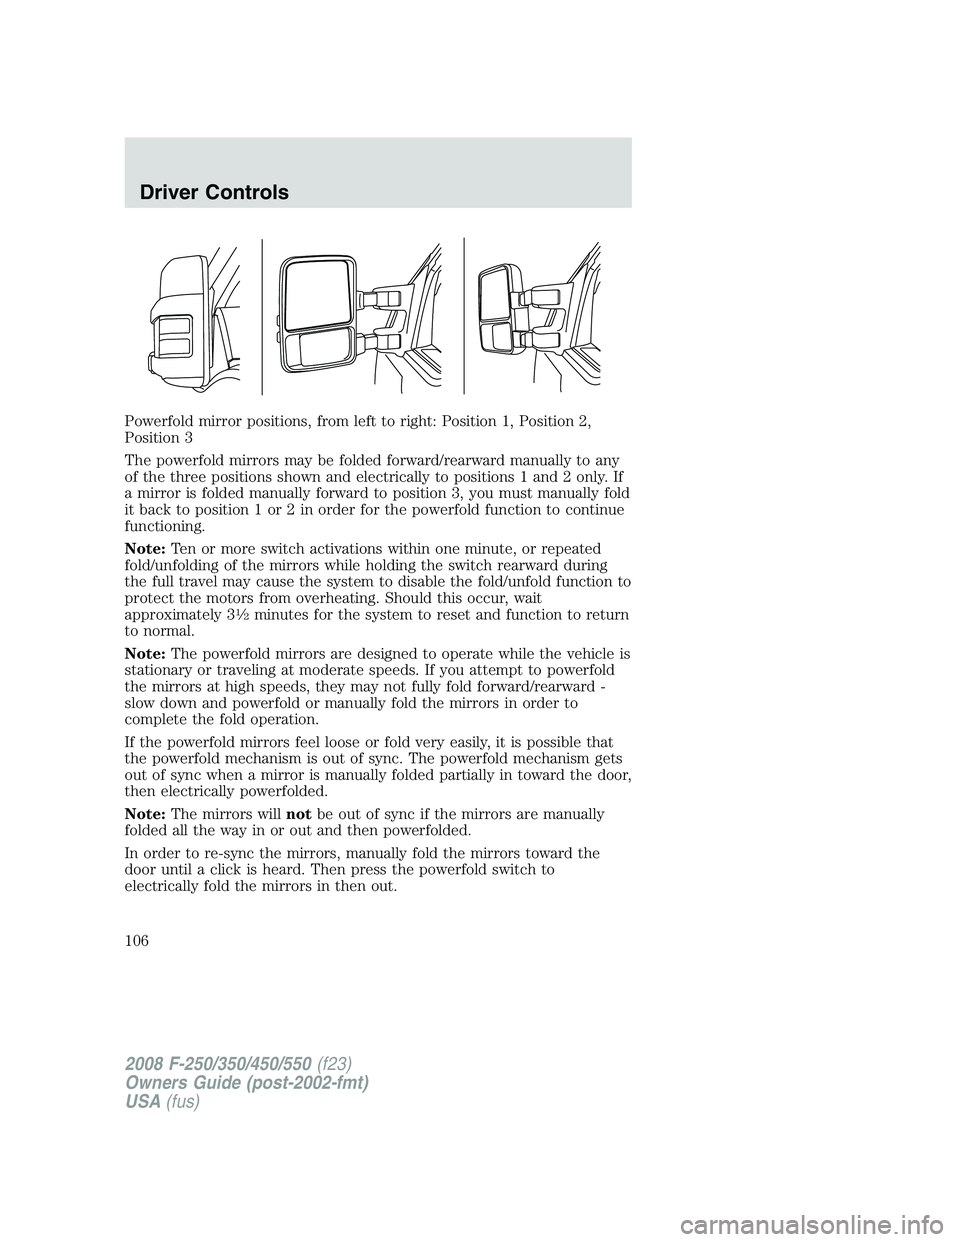
Powerfold mirror positions, from left to right: Position 1, Position 2,
Position 3
The powerfold mirrors may be folded forward/rearward manually to any
of the three positions shown and electrically to positions 1 and 2 only. If
a mirror is folded manually forward to position 3, you must manually fold
it back to position 1 or 2 in order for the powerfold function to continue
functioning.
Note:Ten or more switch activations within one minute, or repeated
fold/unfolding of the mirrors while holding the switch rearward during
the full travel may cause the system to disable the fold/unfold function to
protect the motors from overheating. Should this occur, wait
approximately 3
1�2minutes for the system to reset and function to return
to normal.
Note:The powerfold mirrors are designed to operate while the vehicle is
stationary or traveling at moderate speeds. If you attempt to powerfold
the mirrors at high speeds, they may not fully fold forward/rearward -
slow down and powerfold or manually fold the mirrors in order to
complete the fold operation.
If the powerfold mirrors feel loose or fold very easily, it is possible that
the powerfold mechanism is out of sync. The powerfold mechanism gets
out of sync when a mirror is manually folded partially in toward the door,
then electrically powerfolded.
Note:The mirrors willnotbe out of sync if the mirrors are manually
folded all the way in or out and then powerfolded.
In order to re-sync the mirrors, manually fold the mirrors toward the
door until a click is heard. Then press the powerfold switch to
electrically fold the mirrors in then out.
2008 F-250/350/450/550(f23)
Owners Guide (post-2002-fmt)
USA(fus)
Driver Controls
106
Page 107 of 400
Note:If the power fold/telescope mirror glass appears loose or vibrates
when driving, it is possible that the mirrors have been manually folded or
telescoped. To minimize the vibration, ensure that the mirrors are
electronically folded and telescoped in/out with the switches on the door
trim panel.
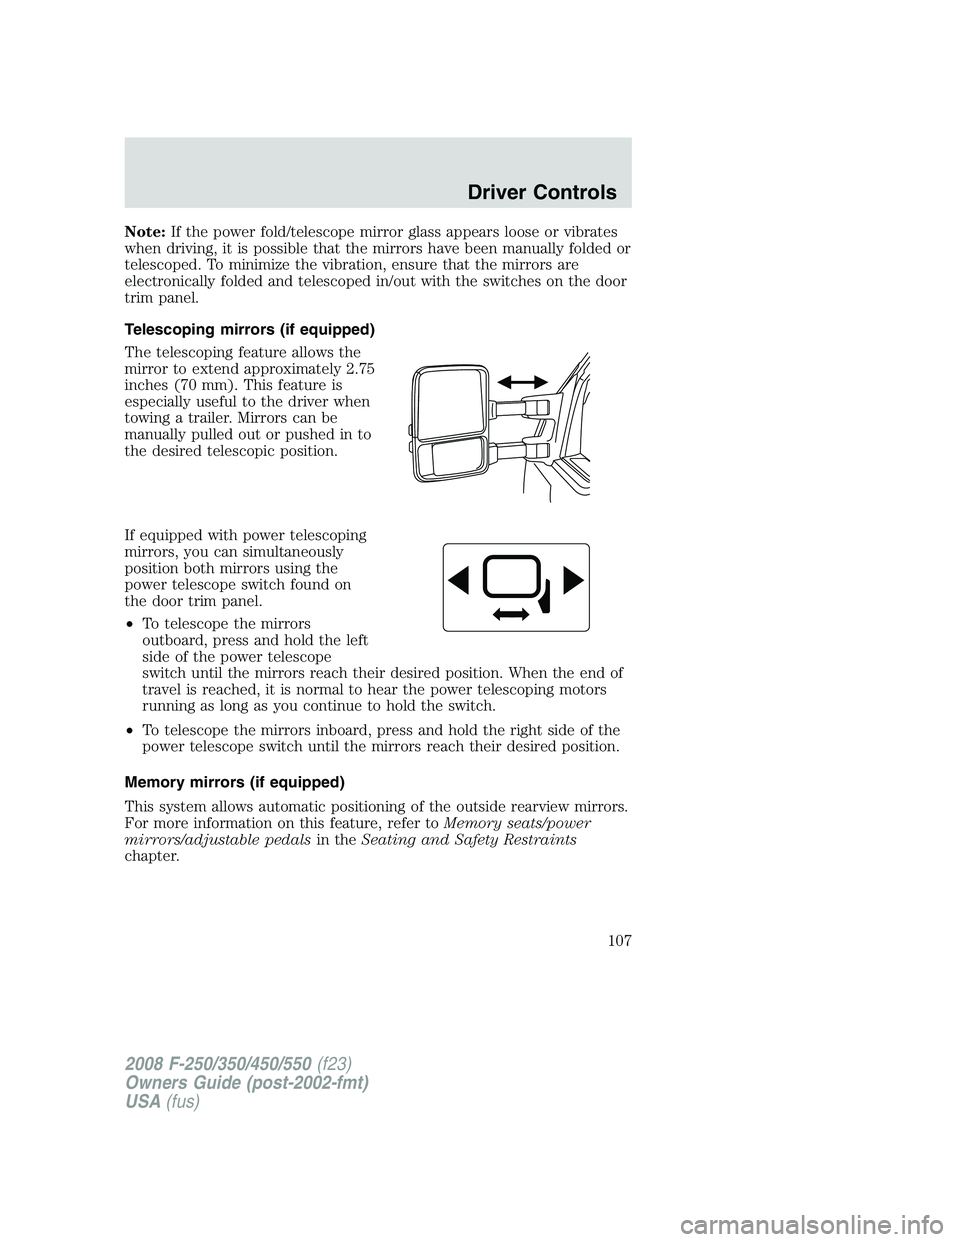
Telescoping mirrors (if equipped)
The telescoping feature allows the
mirror to extend approximately 2.75
inches (70 mm). This feature is
especially useful to the driver when
towing a trailer. Mirrors can be
manually pulled out or pushed in to
the desired telescopic position.
If equipped with power telescoping
mirrors, you can simultaneously
position both mirrors using the
power telescope switch found on
the door trim panel.
•To telescope the mirrors
outboard, press and hold the left
side of the power telescope
switch until the mirrors reach their desired position. When the end of
travel is reached, it is normal to hear the power telescoping motors
running as long as you continue to hold the switch.
•To telescope the mirrors inboard, press and hold the right side of the
power telescope switch until the mirrors reach their desired position.
Memory mirrors (if equipped)
This system allows automatic positioning of the outside rearview mirrors.
For more information on this feature, refer toMemory seats/power
mirrors/adjustable pedalsin theSeating and Safety Restraints
chapter.
2008 F-250/350/450/550(f23)
Owners Guide (post-2002-fmt)
USA(fus)
Driver Controls
107
Page 108 of 400
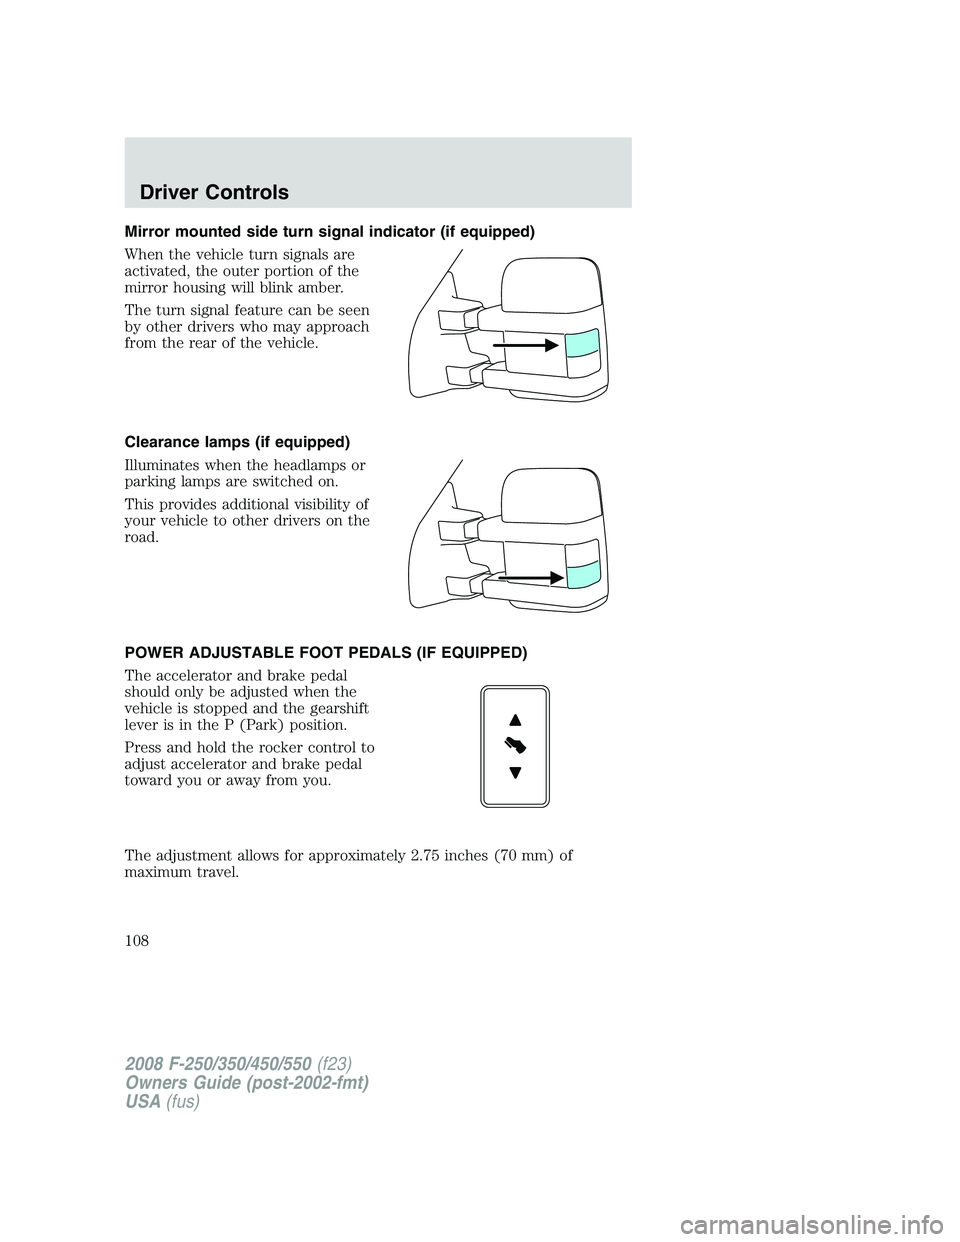
Mirror mounted side turn signal indicator (if equipped)
When the vehicle turn signals are
activated, the outer portion of the
mirror housing will blink amber.
The turn signal feature can be seen
by other drivers who may approach
from the rear of the vehicle.
Clearance lamps (if equipped)
Illuminates when the headlamps or
parking lamps are switched on.
This provides additional visibility of
your vehicle to other drivers on the
road.
POWER ADJUSTABLE FOOT PEDALS (IF EQUIPPED)
The accelerator and brake pedal
should only be adjusted when the
vehicle is stopped and the gearshift
lever is in the P (Park) position.
Press and hold the rocker control to
adjust accelerator and brake pedal
toward you or away from you.
The adjustment allows for approximately 2.75 inches (70 mm) of
maximum travel.
2008 F-250/350/450/550(f23)
Owners Guide (post-2002-fmt)
USA(fus)
Driver Controls
108
Page 109 of 400
Never adjust the accelerator and brake pedal with feet on the
pedals while the vehicle is moving.
The accelerator and brake pedal positions are saved when doing a
memory set function and can be recalled along with the vehicle
personality features when a memory position is selected through the
remote entry transmitter, keyless entry keypad or memory switch on the
driver’s door (if equipped with memory feature). Refer toMemory
seats/power mirrors/adjustable pedalsin theSeating and Safety
Restraintschapter.
SPEED CONTROL (IF EQUIPPED)
With speed control set, you can maintain a set speed without keeping
your foot on the accelerator pedal.
Do not use the speed control in heavy traffic or on roads that
are winding, slippery or unpaved.
Setting speed control
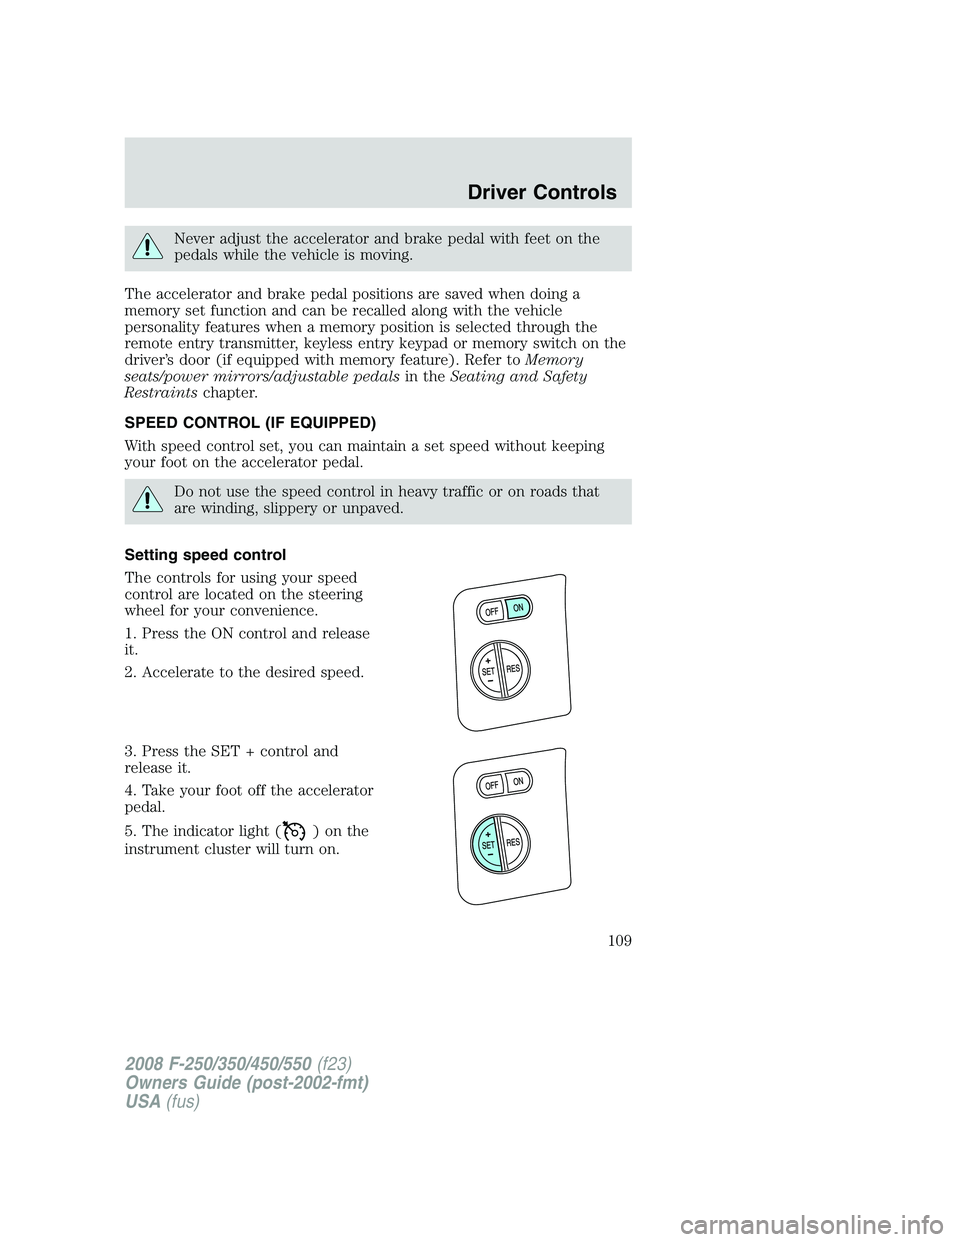
The controls for using your speed
control are located on the steering
wheel for your convenience.
1. Press the ON control and release
it.
2. Accelerate to the desired speed.
3. Press the SET + control and
release it.
4. Take your foot off the accelerator
pedal.
5. The indicator light (
)onthe
instrument cluster will turn on.
2008 F-250/350/450/550(f23)
Owners Guide (post-2002-fmt)
USA(fus)
Driver Controls
109
Page 152 of 400
One step door unlocking
If the one step door unlocking feature is activated, press
and release
once to unlock all of the doors.Note:The interior lamps will illuminate
(refer to theIlluminated entryfeature later in this section) if the
control on the overhead lamp isnotset to theoffposition.
Switching from two step to one step door unlocking
Your vehicle comes with two step unlocking enabled. Unlocking can be
switched between two step and one step door unlocking by pressing and
holding both the
andbuttons simultaneously on the remote entry
transmitter for approximately 4 seconds. The hazard lamps will flash
twice to indicate that the vehicle has switched to one step unlocking.
Repeat the procedure to switch back to two-step unlocking.
Locking the doors
1. Press
and release to lock all the doors. The parking lamps will
flash if all the doors are closed and locked.
2. Press
and release again within three seconds to confirm that all
the doors are closed and locked.Note:The doors will lock again, the
horn will chirp once, and the parking lamps will flash once more.
If any of the doors are not properly closed the horn will make two quick
chirps and the parklamps will not flash.
Car finder
Press
twice within 3 seconds. the horn will chirp and the turn lamps
will flash. It is recommended that this method be used to locate your
vehicle, rather than using the panic alarm.
Sounding a panic alarm
Press
to activate the alarm. Press again or turn the ignition to 3
(ON) to deactivate.
Note:The panic alarm will only operate when the ignition is in the 1
(OFF/LOCK) position.
Memory seats/adjustable pedals/mirrors (if equipped)
The remote entry system can also control the memory seat/adjustable
pedals/mirrors.
Press
to automatically move the seat, adjustable pedals and mirrors to
the desired memory position (the seat position corresponds to the
transmitter being used).
2008 F-250/350/450/550(f23)
Owners Guide (post-2002-fmt)
USA(fus)
Locks and Security
152
Page 153 of 400
Activating the memory seat feature
To activate this feature:
1. Position the seat, adjustable pedals and mirrors to the position
desired.
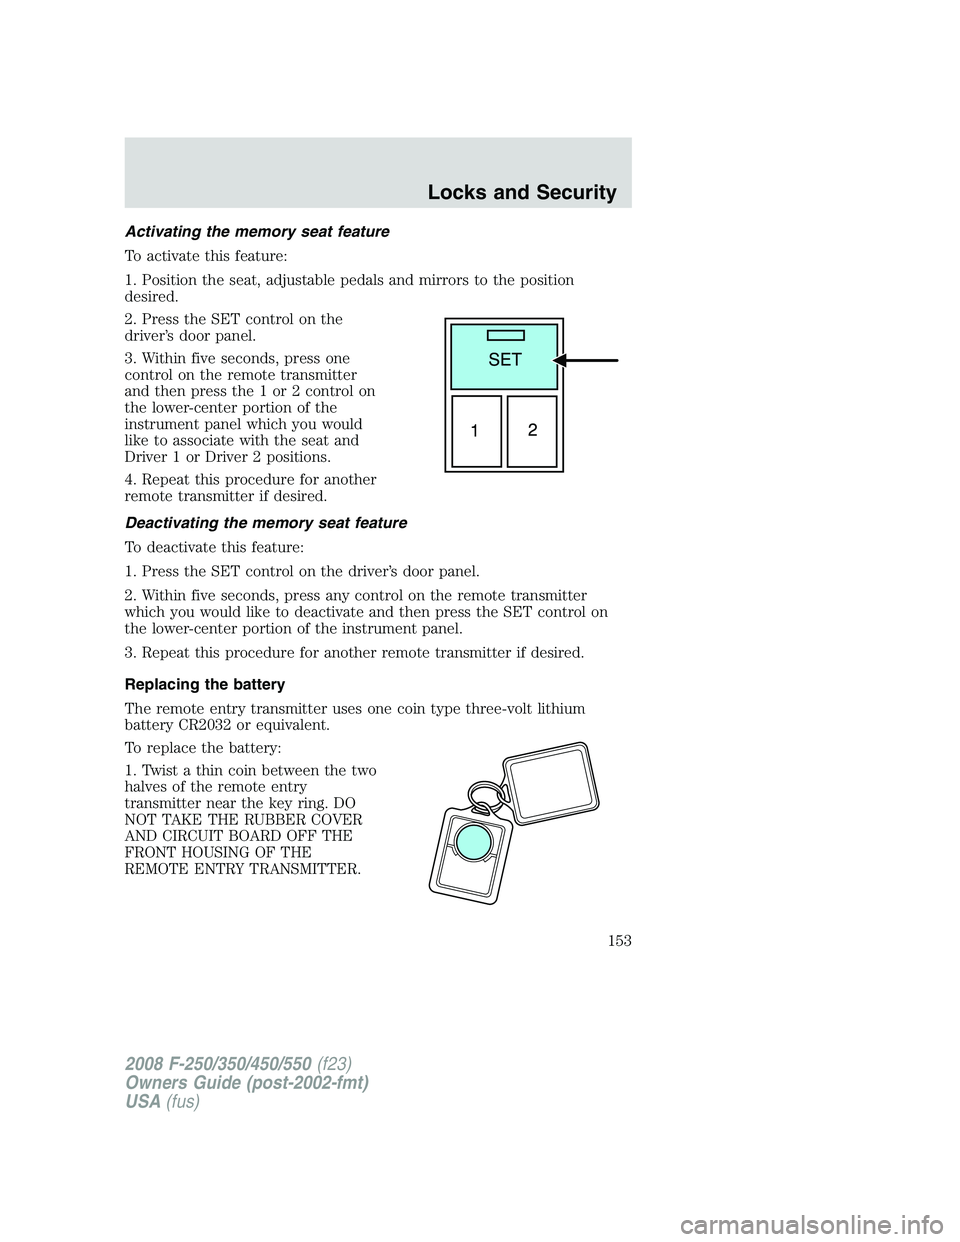
2. Press the SET control on the
driver’s door panel.
3. Within five seconds, press one
control on the remote transmitter
and then press the 1 or 2 control on
the lower-center portion of the
instrument panel which you would
like to associate with the seat and
Driver 1 or Driver 2 positions.
4. Repeat this procedure for another
remote transmitter if desired.
Deactivating the memory seat feature
To deactivate this feature:
1. Press the SET control on the driver’s door panel.
2. Within five seconds, press any control on the remote transmitter
which you would like to deactivate and then press the SET control on
the lower-center portion of the instrument panel.
3. Repeat this procedure for another remote transmitter if desired.
Replacing the battery
The remote entry transmitter uses one coin type three-volt lithium
battery CR2032 or equivalent.
To replace the battery:
1. Twist a thin coin between the two
halves of the remote entry
transmitter near the key ring. DO
NOT TAKE THE RUBBER COVER
AND CIRCUIT BOARD OFF THE
FRONT HOUSING OF THE
REMOTE ENTRY TRANSMITTER.
2008 F-250/350/450/550(f23)
Owners Guide (post-2002-fmt)
USA(fus)
Locks and Security
153