Page 302 of 392

Push in the flasher control and all front and rear direction signals will
flash. Press the flasher control again to turn them off. Use it when your
vehicle is disabled and is creating a safety hazard for other motorists.
Note:With extended use, the flasher may run down your battery.
FUEL PUMP SHUT-OFF SWITCH
FUEL
RESET
The fuel pump shut-off switch is a device intended to stop the electric
fuel pump when your vehicle has been involved in a substantial jolt.
After a collision, if the engine cranks but does not start, the fuel pump
shut-off switch may have been activated.
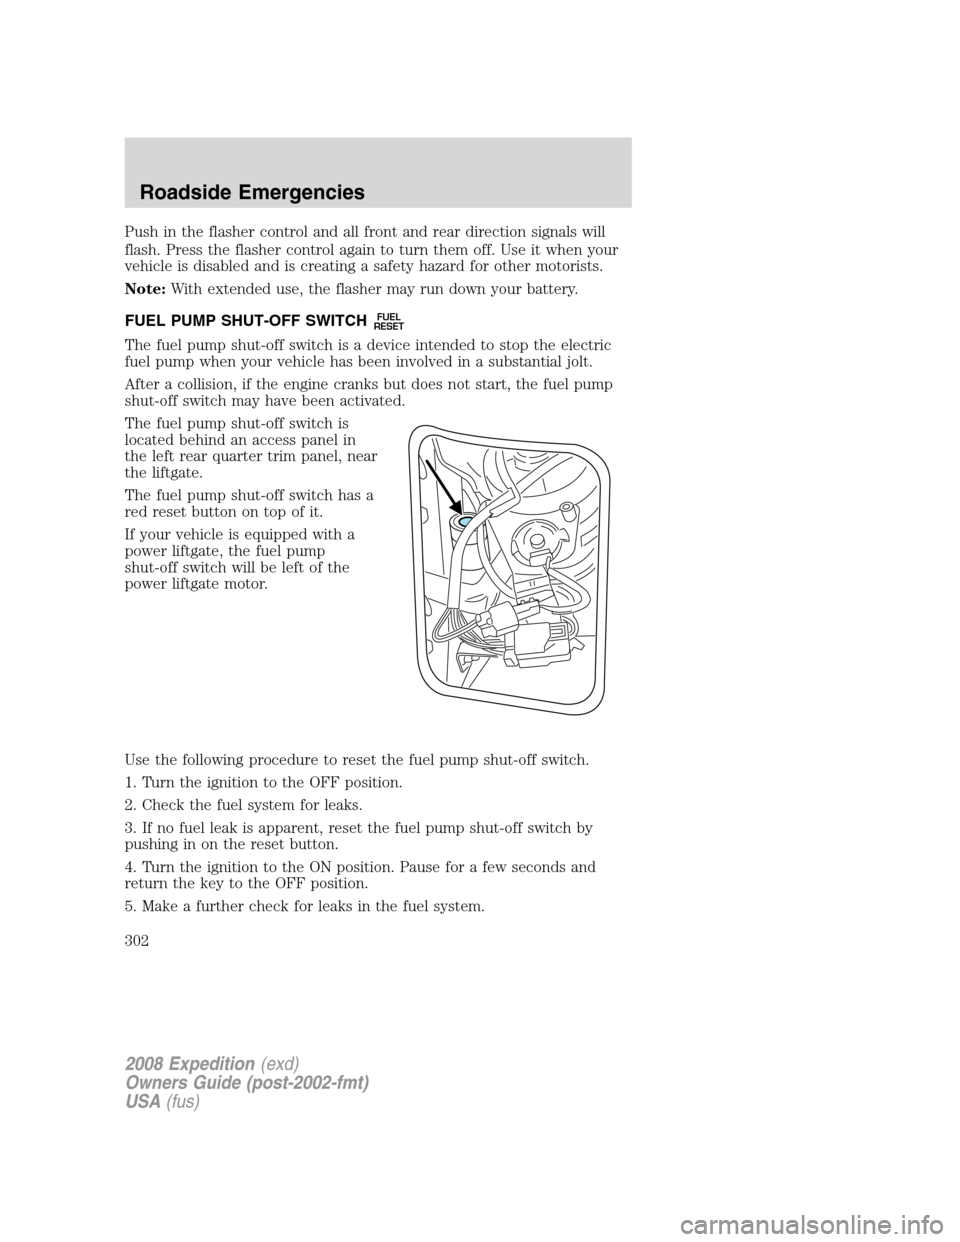
The fuel pump shut-off switch is
located behind an access panel in
the left rear quarter trim panel, near
the liftgate.
The fuel pump shut-off switch has a
red reset button on top of it.
If your vehicle is equipped with a
power liftgate, the fuel pump
shut-off switch will be left of the
power liftgate motor.
Use the following procedure to reset the fuel pump shut-off switch.
1. Turn the ignition to the OFF position.
2. Check the fuel system for leaks.
3. If no fuel leak is apparent, reset the fuel pump shut-off switch by
pushing in on the reset button.
4. Turn the ignition to the ON position. Pause for a few seconds and
return the key to the OFF position.
5. Make a further check for leaks in the fuel system.
2008 Expedition(exd)
Owners Guide (post-2002-fmt)
USA(fus)
Roadside Emergencies
302
Page 307 of 392
Power distribution box
The power distribution box is located in the engine compartment. The
power distribution box contains high-current fuses that protect your
vehicle’s main electrical systems from overloads.
Always disconnect the battery before servicing high current
fuses.
To reduce risk of electrical shock, always replace the cover to
the Power Distribution Box before reconnecting the battery or
refilling fluid reservoirs.
If the battery has been disconnected and reconnected, refer to the
Batterysection of theMaintenance and Specificationschapter.
The high-current fuses are coded as follows:
Fuse/Relay
LocationFuse
Amp
RatingPower Distribution Box Description
1 — Blower relay
2 — Not used
3 — Rear window defroster relay
4 30A** Third row seats (driver side)
5 30A ** Trailer tow connector (electric brake)
6 60A** ABS (valves)
2008 Expedition(exd)
Owners Guide (post-2002-fmt)
USA(fus)
Roadside Emergencies
307
Page 313 of 392

Stopping and securing the vehicle
1. Park on a level surface, activate
the hazard flashers and set the
parking brake.
2. Place the gearshift in P (Park)
and turn the engine OFF.
Location of the spare tire and tools
The spare tire and tools for your vehicle are stowed in the following
locations:
Item Location
Spare tire Under the vehicle, just forward of
the rear bumper
Jack tools and jacking instructions Under the access panel located in
the floor compartment behind the
rear seat
Removing the jack and tools
1. Open the liftgate, then locate the
access panel on the floor behind the
3rd row seat. Unlatch and remove
the panel.
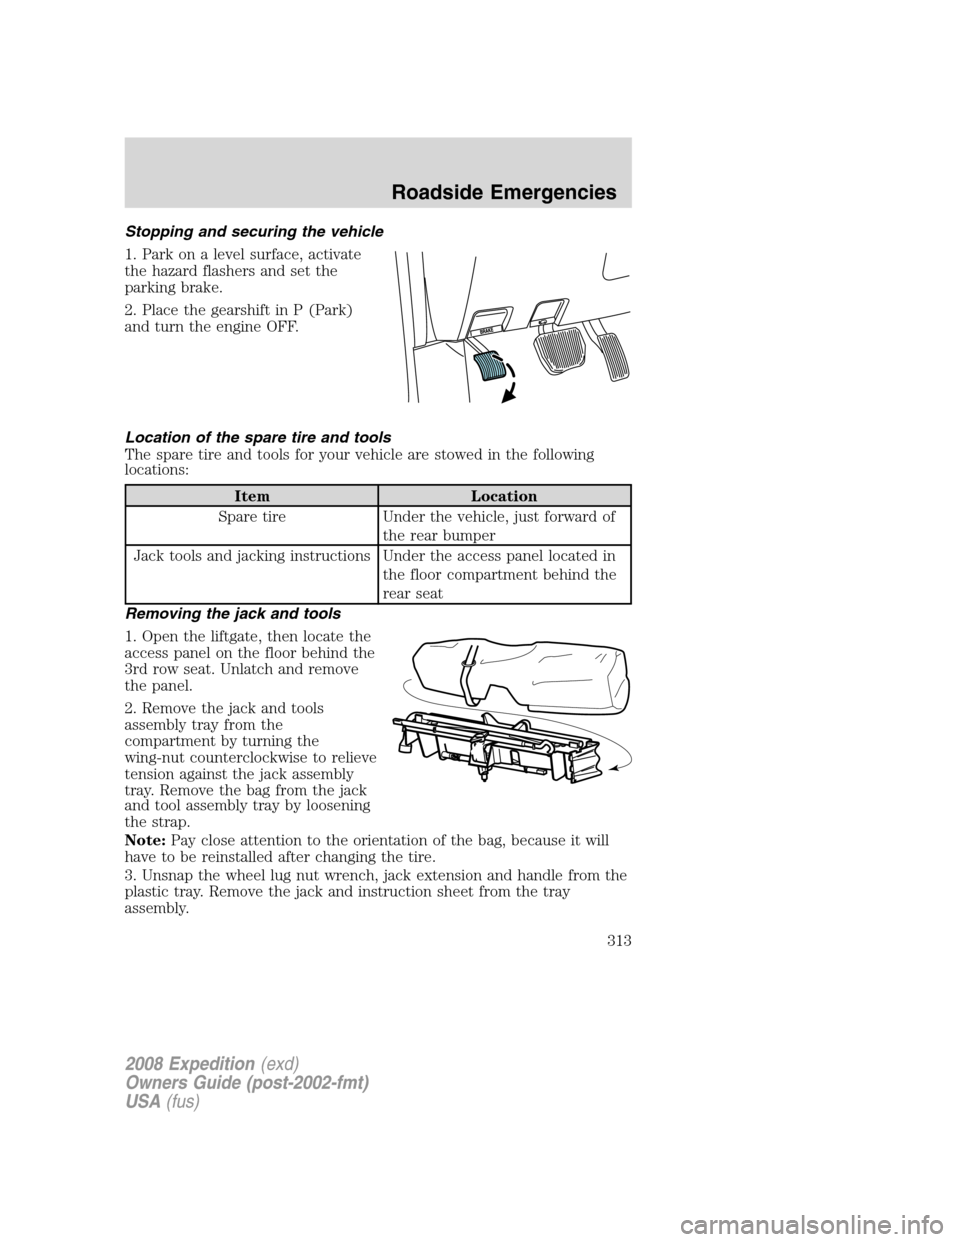
2. Remove the jack and tools
assembly tray from the
compartment by turning the
wing-nut counterclockwise to relieve
tension against the jack assembly
tray. Remove the bag from the jack
and tool assembly tray by loosening
the strap.
Note:Pay close attention to the orientation of the bag, because it will
have to be reinstalled after changing the tire.
3. Unsnap the wheel lug nut wrench, jack extension and handle from the
plastic tray. Remove the jack and instruction sheet from the tray
assembly.
2008 Expedition(exd)
Owners Guide (post-2002-fmt)
USA(fus)
Roadside Emergencies
313
Page 317 of 392

Turn off the running boards
(if equipped) before jacking
or placing any object under the
vehicle. Never place your hand
between the extended running
board and the vehicle. A moving
running board may cause injury.
To lessen the risk of personal injury, do not put any part of your
body under the vehicle while changing a tire. Do not start the
engine when your vehicle is on the jack. The jack is only meant for
changing the tire.
• Never use the front or rear differential as a jacking point.
7. Remove the lug nuts with the lug wrench.
8. Replace the flat tire with the spare tire, making sure the valve stem is
facing outward. Reinstall the lug nuts until the wheel is snug against the
hub. Do not fully tighten the lug nuts until the wheel has been lowered.
9. Lower the wheel by turning the jack handle counterclockwise.
10. Remove the jack and fully
tighten the lug nuts in the order
shown and reinstall the wheel cover.
Refer to Wheel lug nut torque
specifications later in this chapter
for the proper lug nut torque
specification.
11. Unblock the wheels.
12. Put flat tire, jack, lug wrench
and tools away. Make sure the jack
bag is properly reinstalled around the jack and tools assembly tray with
the strap securely fastened. Be sure to tighten the wing nut sufficiently
so it does not rattle when you drive.
13. Turn on the air suspension system (if equipped). Refer to Message
center in theDriver Controls chapter for instructions on turning the air
suspension system on.
Stowing the spare tire
1. Lay the tire on the ground, near the rear of the vehicle, with the valve
stem side facing up.
2008 Expedition (exd)
Owners Guide (post-2002-fmt)
USA (fus)
Roadside Emergencies
317
Page 320 of 392

Preparing your vehicle
When the battery is disconnected or a new battery is installed, the
automatic transmission must relearn its shift strategy. As a result, the
transmission may have firm and/or soft shifts. This operation is
considered normal and will not affect function or durability of the
transmission. Over time, the adaptive learning process will fully update
transmission operation.
1.Use only a 12–volt supply to start your vehicle.
2. Do not disconnect the battery of the disabled vehicle as this could
damage the vehicle’s electrical system.
3. Park the booster vehicle close to the hood of the disabled vehicle
making sure the two vehiclesdo nottouch. Set the parking brake on
both vehicles and stay clear of the engine cooling fan and other moving
parts.
4. Check all battery terminals and remove any excessive corrosion before
you attach the battery cables. Ensure that vent caps are tight and level.
5. Turn the heater fan on in both vehicles to protect from any electrical
surges. Turn all other accessories off.
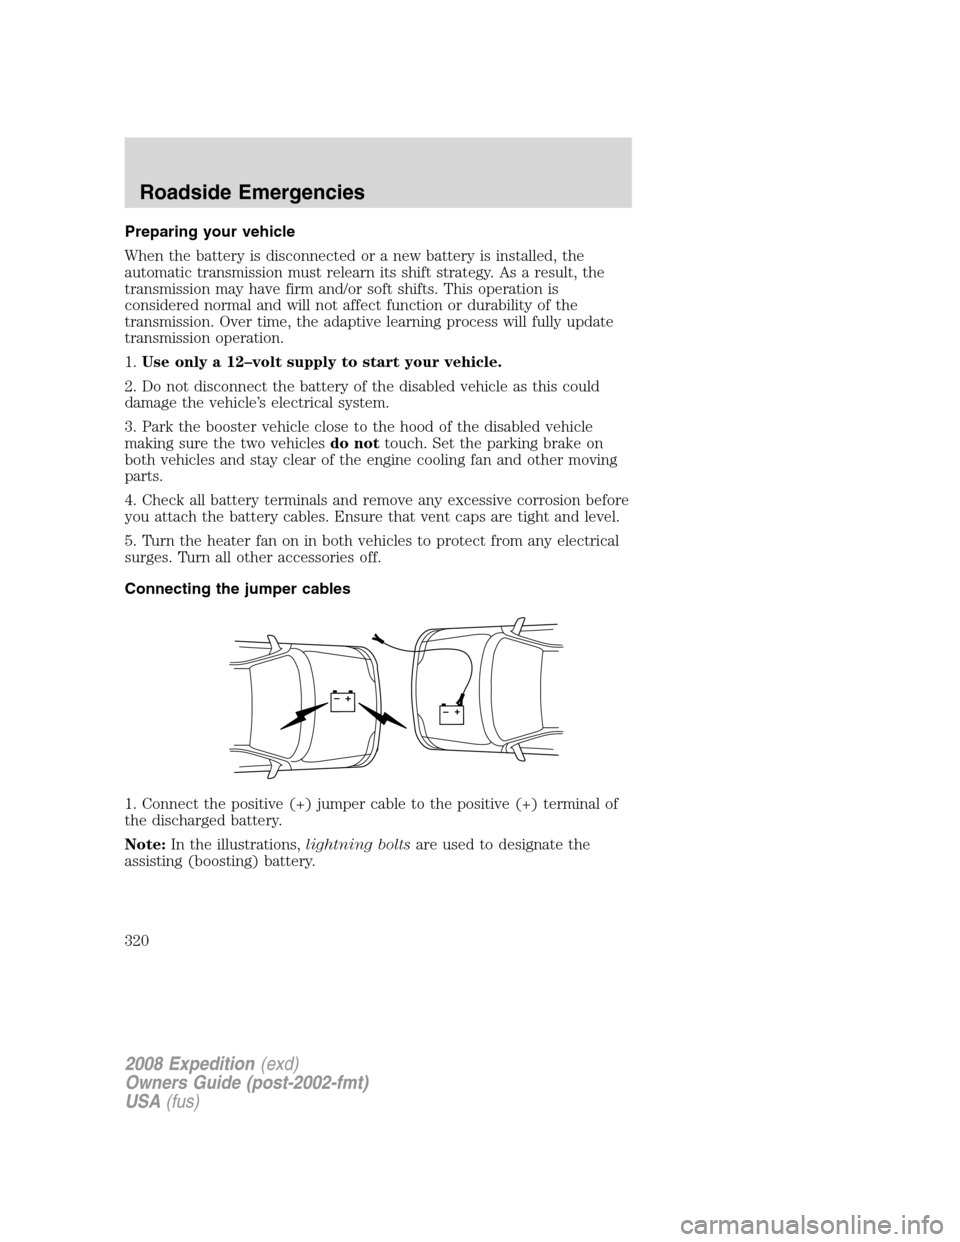
Connecting the jumper cables
1. Connect the positive (+) jumper cable to the positive (+) terminal of
the discharged battery.
Note:In the illustrations,lightning boltsare used to designate the
assisting (boosting) battery.
+–+–
2008 Expedition(exd)
Owners Guide (post-2002-fmt)
USA(fus)
Roadside Emergencies
320
Page 322 of 392
4. Make the final connection of the negative (-) cable to the jump
starting stud located in the engine compartment, near the washer fluid
bottle.Do notuse fuel lines, engine rocker covers or the intake manifold
asgroundingpoints.
Do not connect the end of the second cable to the negative (-)
terminal of the battery to be jumped. A spark may cause an
explosion of the gases that surround the battery.
5. Ensure that the cables are clear of fan blades, belts, moving parts of
both engines, or any fuel delivery system parts.
+–+–
2008 Expedition(exd)
Owners Guide (post-2002-fmt)
USA(fus)
Roadside Emergencies
322
Page 323 of 392
Jump starting
1. Start the engine of the booster vehicle and run the engine at
moderately increased speed.
2. Start the engine of the disabled vehicle.
3. Once the disabled vehicle has been started, run both engines for an
additional three minutes before disconnecting the jumper cables.
Removing the jumper cables
Remove the jumper cables in the reverse order that they were
connected.
1. Remove the jumper cable from the jump starting stud.
Note:In the illustrations,lightning boltsare used to designate the
assisting (boosting) battery.
+–+–
2008 Expedition(exd)
Owners Guide (post-2002-fmt)
USA(fus)
Roadside Emergencies
323
Page 325 of 392
4. Remove the jumper cable from the positive (+) terminal of the
disabled vehicle’s battery.
After the disabled vehicle has been started and the jumper cables
removed, allow it to idle for several minutes so the engine computer can
relearnits idle conditions.
+–+–
2008 Expedition(exd)
Owners Guide (post-2002-fmt)
USA(fus)
Roadside Emergencies
325