Page 60 of 392
When replacing the batteries, use two new batteries (alkaline
recommended) and install them with the correct orientation as indicated
in the battery housing.
To operate the headphones:
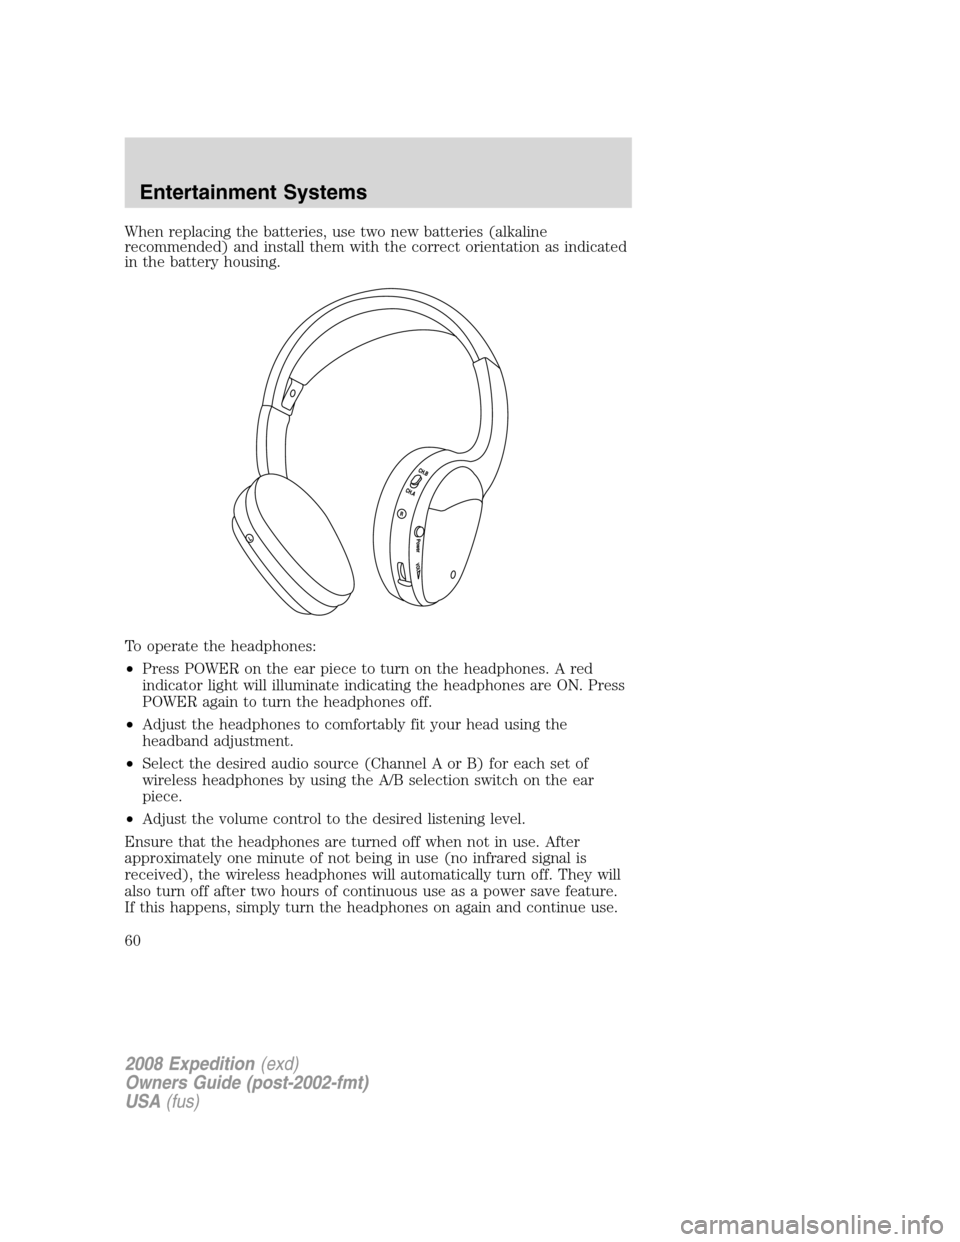
•Press POWER on the ear piece to turn on the headphones. A red
indicator light will illuminate indicating the headphones are ON. Press
POWER again to turn the headphones off.
•Adjust the headphones to comfortably fit your head using the
headband adjustment.
•Select the desired audio source (Channel A or B) for each set of
wireless headphones by using the A/B selection switch on the ear
piece.
•Adjust the volume control to the desired listening level.
Ensure that the headphones are turned off when not in use. After
approximately one minute of not being in use (no infrared signal is
received), the wireless headphones will automatically turn off. They will
also turn off after two hours of continuous use as a power save feature.
If this happens, simply turn the headphones on again and continue use.
2008 Expedition(exd)
Owners Guide (post-2002-fmt)
USA(fus)
Entertainment Systems
60
Page 90 of 392

3. Turn on the low beam headlamps to illuminate the wall or screen and
open the hood. Cover one of the headlamps so no light from that lamp
hits the wall.
4. On the wall or screen you will
observe a light pattern with a
distinct horizontal edge towards the
right. If this edge is not at the
horizontal reference line, the beam will need to be adjusted so the edge
is at the same height as the horizontal reference line.
5. Locate the vertical adjuster on
each headlamp, then use a Phillips
#2 screwdriver to turn the adjuster
either counterclockwise (to adjust
down) or clockwise (to adjust up)
aligning the upper edge of the light
pattern up to the horizontal line.
6. HORIZONTAL AIM IS NOT
REQUIRED FOR THIS VEHICLE
AND IS NON-ADJUSTABLE.
7. Repeat Steps 3–5 for the other headlamp.
8. Close the hood and turn off the lamps.
TURN SIGNAL CONTROL
•Push down to activate the left
turn signal.
•Push up to activate the right turn
signal.
2008 Expedition(exd)
Owners Guide (post-2002-fmt)
USA(fus)
Lights
90
Page 93 of 392
Function Number of
bulbsTrade number
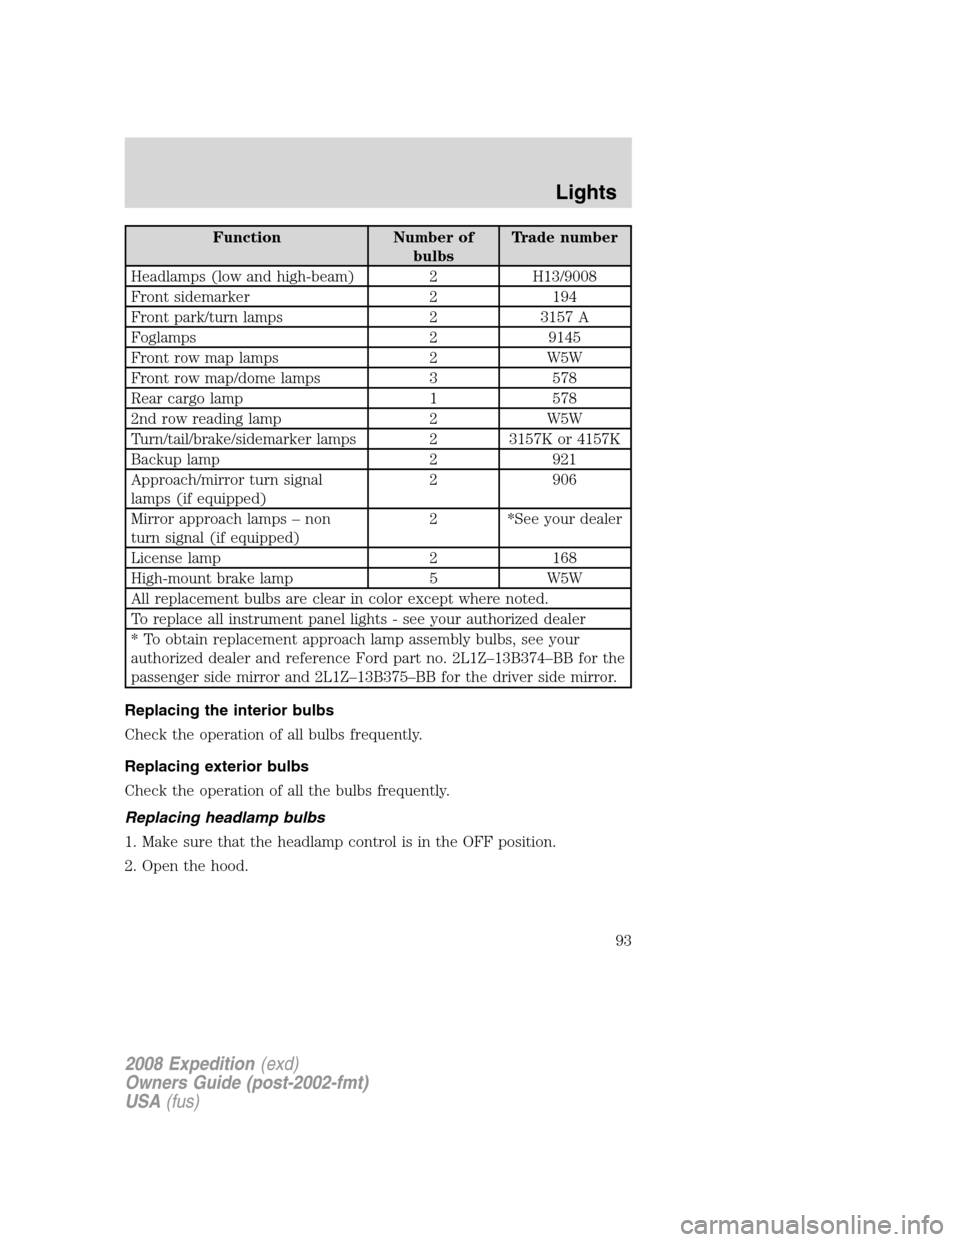
Headlamps (low and high-beam) 2 H13/9008
Front sidemarker 2 194
Front park/turn lamps 2 3157 A
Foglamps 2 9145
Front row map lamps 2 W5W
Front row map/dome lamps 3 578
Rear cargo lamp 1 578
2nd row reading lamp 2 W5W
Turn/tail/brake/sidemarker lamps 2 3157K or 4157K
Backup lamp 2 921
Approach/mirror turn signal
lamps (if equipped)2 906
Mirror approach lamps – non
turn signal (if equipped)2 *See your dealer
License lamp 2 168
High-mount brake lamp 5 W5W
All replacement bulbs are clear in color except where noted.
To replace all instrument panel lights - see your authorized dealer
* To obtain replacement approach lamp assembly bulbs, see your
authorized dealer and reference Ford part no. 2L1Z–13B374–BB for the
passenger side mirror and 2L1Z–13B375–BB for the driver side mirror.
Replacing the interior bulbs
Check the operation of all bulbs frequently.
Replacing exterior bulbs
Check the operation of all the bulbs frequently.
Replacing headlamp bulbs
1. Make sure that the headlamp control is in the OFF position.
2. Open the hood.
2008 Expedition(exd)
Owners Guide (post-2002-fmt)
USA(fus)
Lights
93
Page 94 of 392
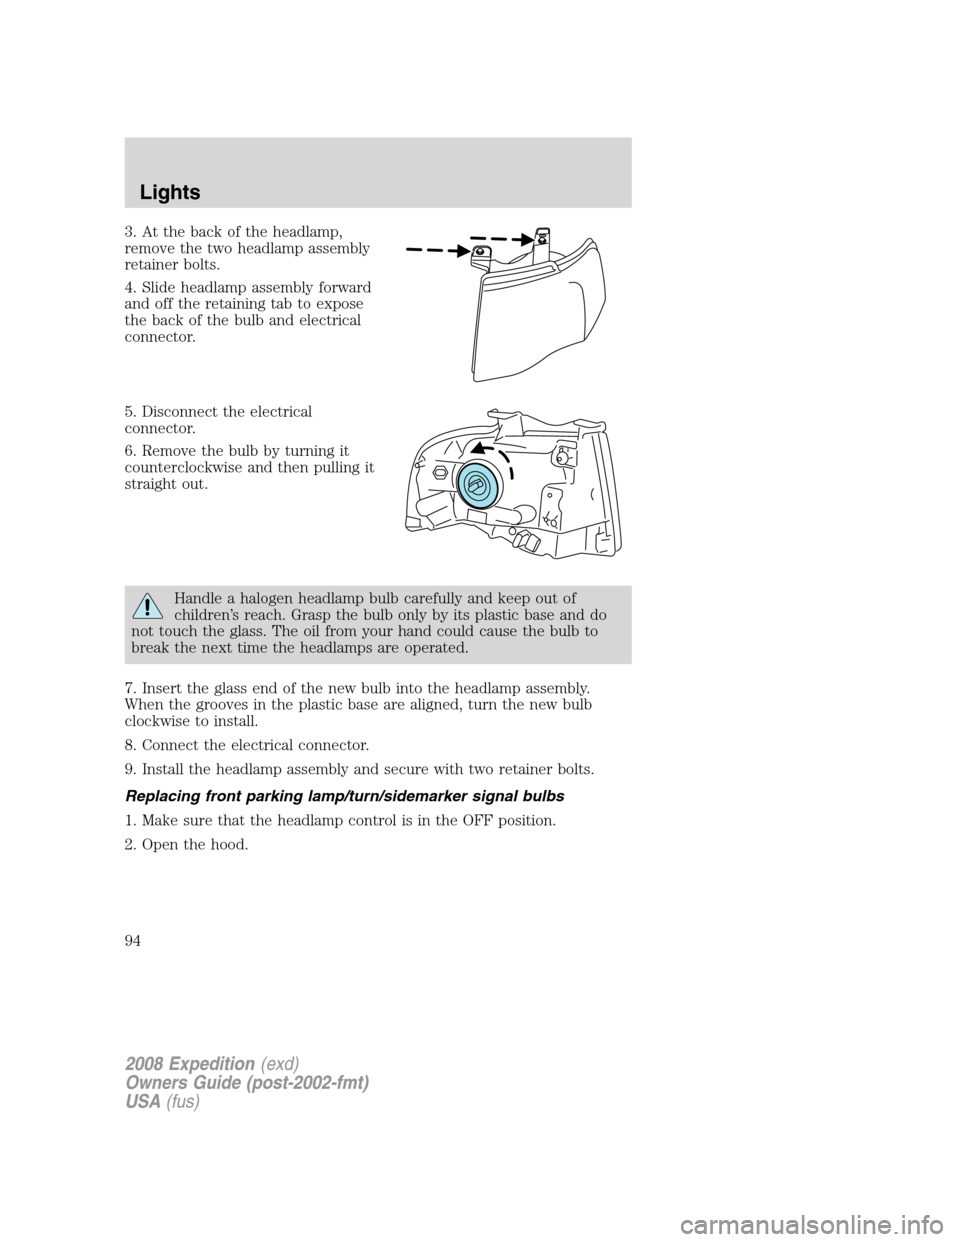
3. At the back of the headlamp,
remove the two headlamp assembly
retainer bolts.
4. Slide headlamp assembly forward
and off the retaining tab to expose
the back of the bulb and electrical
connector.
5. Disconnect the electrical
connector.
6. Remove the bulb by turning it
counterclockwise and then pulling it
straight out.
Handle a halogen headlamp bulb carefully and keep out of
children’s reach. Grasp the bulb only by its plastic base and do
not touch the glass. The oil from your hand could cause the bulb to
break the next time the headlamps are operated.
7. Insert the glass end of the new bulb into the headlamp assembly.
When the grooves in the plastic base are aligned, turn the new bulb
clockwise to install.
8. Connect the electrical connector.
9. Install the headlamp assembly and secure with two retainer bolts.
Replacing front parking lamp/turn/sidemarker signal bulbs
1. Make sure that the headlamp control is in the OFF position.
2. Open the hood.
2008 Expedition(exd)
Owners Guide (post-2002-fmt)
USA(fus)
Lights
94
Page 97 of 392
Replacing license plate lamp bulb
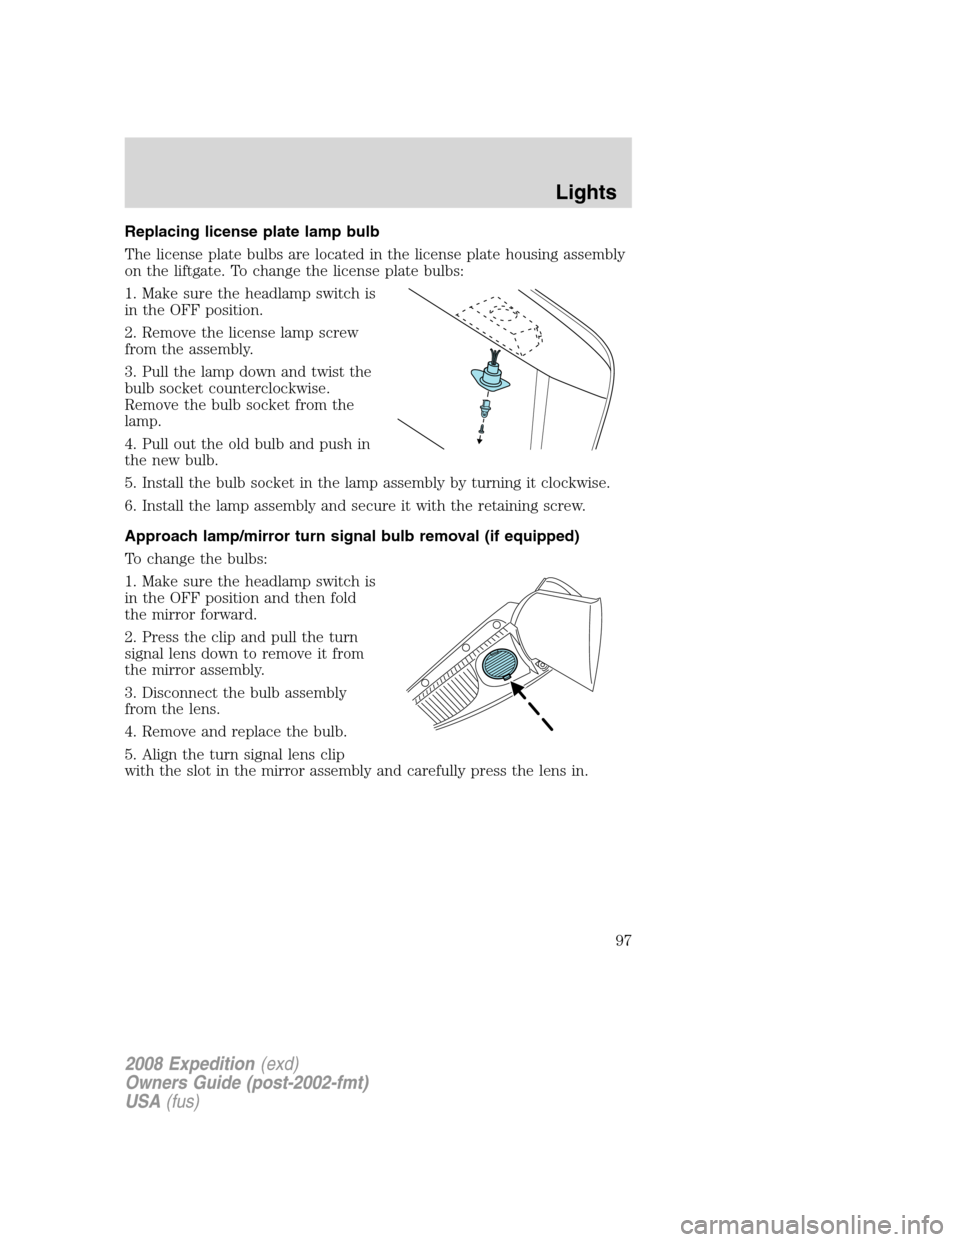
The license plate bulbs are located in the license plate housing assembly
on the liftgate. To change the license plate bulbs:
1. Make sure the headlamp switch is
in the OFF position.
2. Remove the license lamp screw
from the assembly.
3. Pull the lamp down and twist the
bulb socket counterclockwise.
Remove the bulb socket from the
lamp.
4. Pull out the old bulb and push in
the new bulb.
5. Install the bulb socket in the lamp assembly by turning it clockwise.
6. Install the lamp assembly and secure it with the retaining screw.
Approach lamp/mirror turn signal bulb removal (if equipped)
To change the bulbs:
1. Make sure the headlamp switch is
in the OFF position and then fold
the mirror forward.
2. Press the clip and pull the turn
signal lens down to remove it from
the mirror assembly.
3. Disconnect the bulb assembly
from the lens.
4. Remove and replace the bulb.
5. Align the turn signal lens clip
with the slot in the mirror assembly and carefully press the lens in.
2008 Expedition(exd)
Owners Guide (post-2002-fmt)
USA(fus)
Lights
97
Page 110 of 392
Do not remove ice from the mirrors with a scraper or attempt to
readjust the mirror glass if it is frozen in place. These actions
could cause damage to the glass and mirrors.
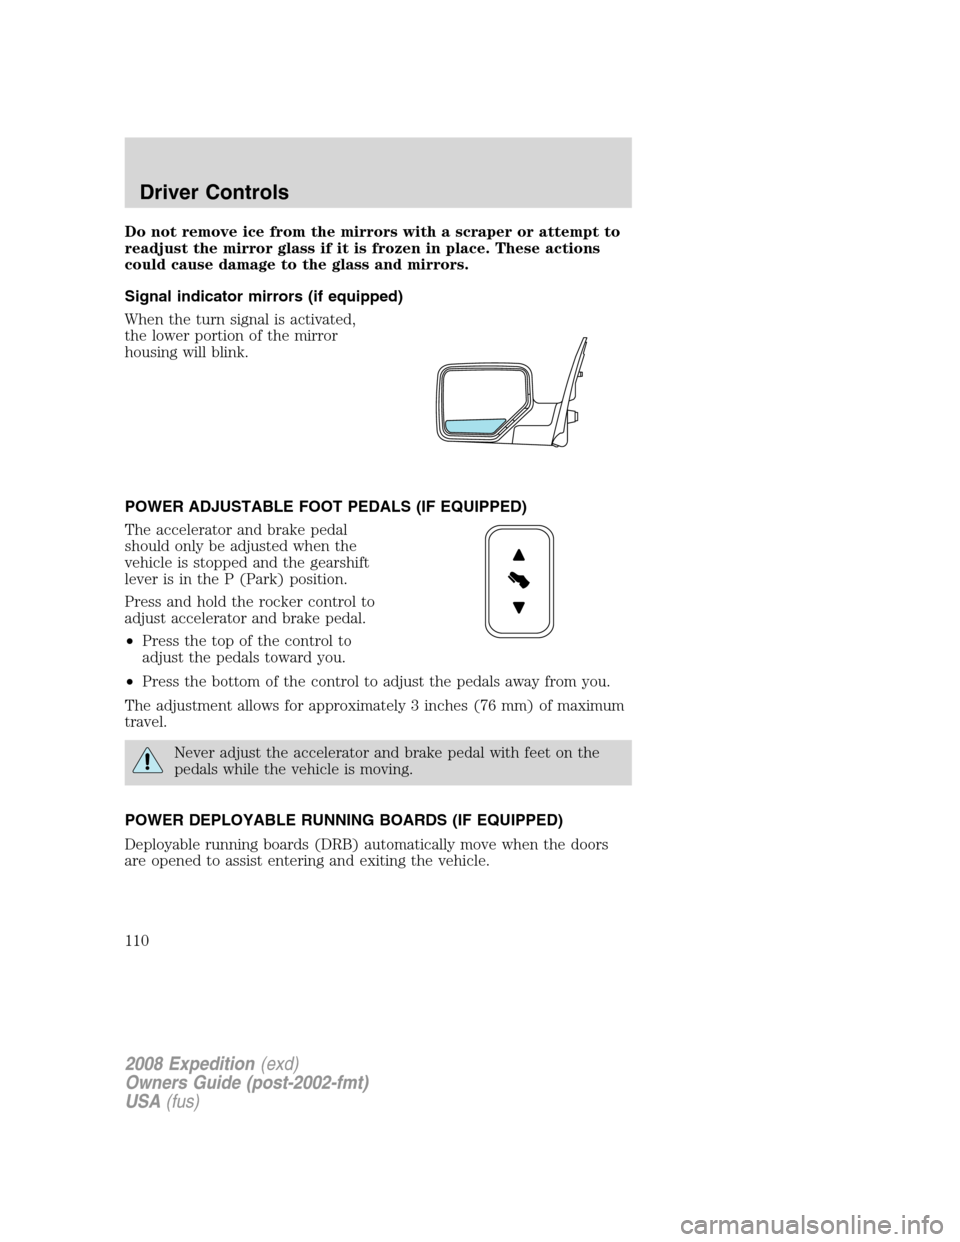
Signal indicator mirrors (if equipped)
When the turn signal is activated,
the lower portion of the mirror
housing will blink.
POWER ADJUSTABLE FOOT PEDALS (IF EQUIPPED)
The accelerator and brake pedal
should only be adjusted when the
vehicle is stopped and the gearshift
lever is in the P (Park) position.
Press and hold the rocker control to
adjust accelerator and brake pedal.
•Press the top of the control to
adjust the pedals toward you.
•Press the bottom of the control to adjust the pedals away from you.
The adjustment allows for approximately 3 inches (76 mm) of maximum
travel.
Never adjust the accelerator and brake pedal with feet on the
pedals while the vehicle is moving.
POWER DEPLOYABLE RUNNING BOARDS (IF EQUIPPED)
Deployable running boards (DRB) automatically move when the doors
are opened to assist entering and exiting the vehicle.
2008 Expedition(exd)
Owners Guide (post-2002-fmt)
USA(fus)
Driver Controls
110
Page 119 of 392
When programming your HomeLink�Wireless Control System to
a garage door or gate, be sure that people and objects are out of
the way to prevent potential harm or damage.
Do not use the HomeLink�Wireless Control System with any garage
door opener that lacks safety stop and reverse features as required by
U.S. federal safety standards (this includes any garage door opener
model manufactured before April 1, 1982). A garage door which cannot
detect an object, signaling the door to stop and reverse, does not meet
current U.S. federal safety standards. For more information, contact
HomeLink�at:www.homelink.comor1–800–355–3515.
Retain the original transmitter for use in other vehicles as well as for
future programming procedures (i.e. new HomeLink�equipped vehicle
purchase). It is also suggested that upon the sale of the vehicle, the
programmed Homelink�buttons be erased for security purposes, refer to
Programmingin this section.
Programming
Do not program HomeLink�with the vehicle parked in the garage.
Note:Your vehicle may require the ignition switch to be turned to the
ACC position for programming and/or operation of the HomeLink�.Itis
also recommended that a new battery be placed in the hand-held
transmitter of the device being programmed to HomeLink�for quicker
training and accurate transmission of the radio-frequency signal.
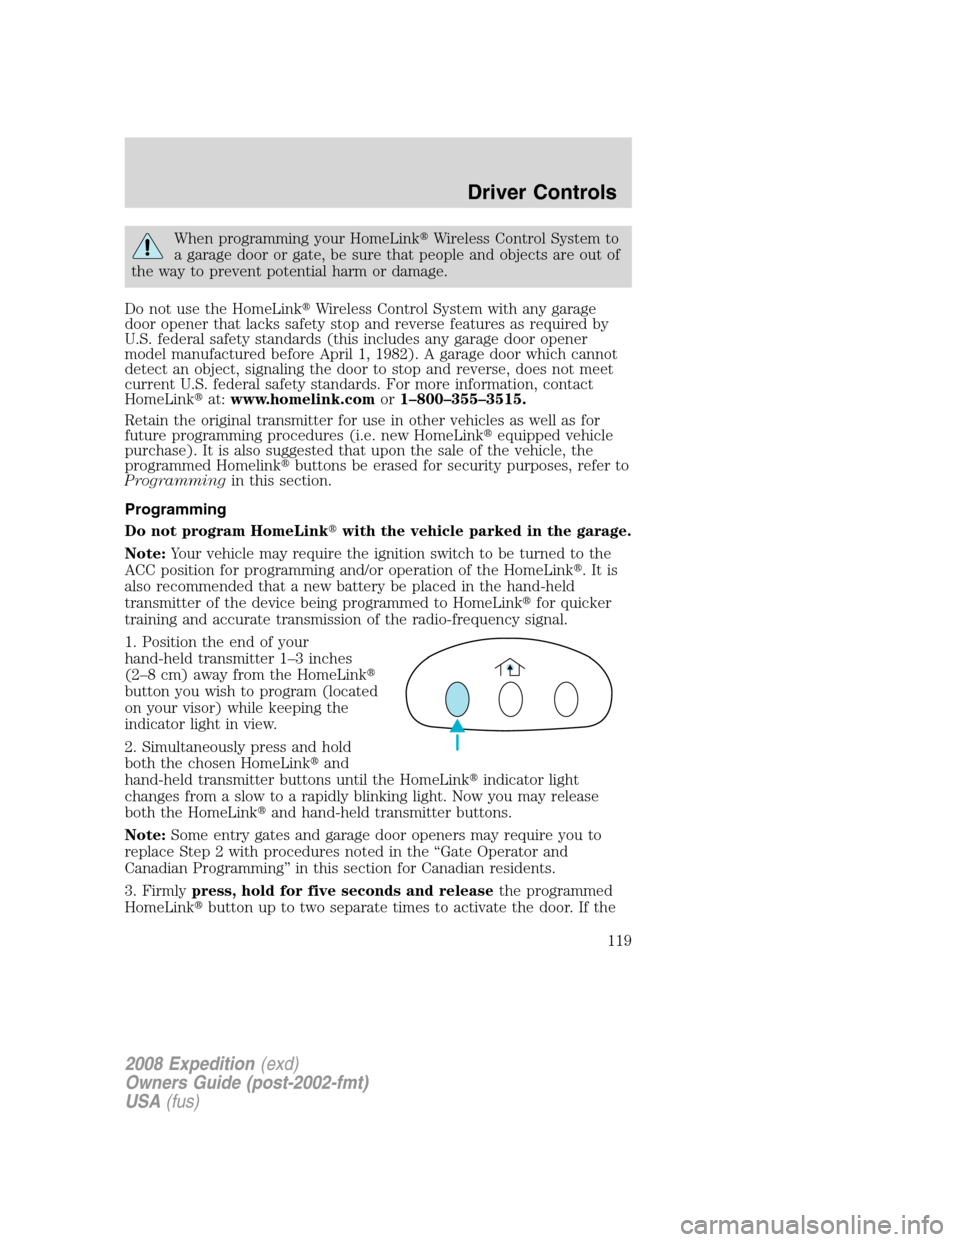
1. Position the end of your
hand-held transmitter 1–3 inches
(2–8 cm) away from the HomeLink�
button you wish to program (located
on your visor) while keeping the
indicator light in view.
2. Simultaneously press and hold
both the chosen HomeLink�and
hand-held transmitter buttons until the HomeLink�indicator light
changes from a slow to a rapidly blinking light. Now you may release
both the HomeLink�and hand-held transmitter buttons.
Note:Some entry gates and garage door openers may require you to
replace Step 2 with procedures noted in the “Gate Operator and
Canadian Programming” in this section for Canadian residents.
3. Firmlypress, hold for five seconds and releasethe programmed
HomeLink�button up to two separate times to activate the door. If the
2008 Expedition(exd)
Owners Guide (post-2002-fmt)
USA(fus)
Driver Controls
119
Page 120 of 392
door does not activate, press and hold the just-trained HomeLink�
button and observe the indicator light.
•If the indicator lightstays on constantly, programming is complete
and your device should activate when the HomeLink�button is pressed
and released.
•If the indicator light blinksrapidly for two seconds and then turns
to a constant light continue with “Programming” Steps 4 through
6to complete programming of a rolling code equipped device (most
commonly a garage door opener).
4. At the garage door opener receiver (motor-head unit) in the garage,
locate the “learn” or “smart” button (usually near where the hanging
antenna wire is attached to the unit).
5. Firmly press and release the “learn” or “smart” button. (The name and
color of the button may vary by manufacturer.)
Note:There are 30 seconds in which to initiate Step 6.
6. Return to the vehicle and firmlypress, hold for two seconds and
releasethe programmed HomeLink�button. Repeat the
press/hold/releasesequence again and, depending on the brand of the
garage door opener (or other rolling code equipped device), repeat this
sequence a third time to complete the programming.
HomeLink�should now activate your rolling code equipped device. To
program additional HomeLink�buttons begin with Step 1 in the
“Programming” section. For questions or comments, please contact
HomeLink�atwww.homelink.comor1–800–355–3515.
Gate Operator & Canadian Programming
During programming, your
hand-held transmitter may
automatically stop transmitting —
not allowing enough time for
HomeLink�to accept the signal
from the hand-held transmitter.
After completing Step 1 outlined in
the“Programming”section,
replace Step 2 with the following:
Note:If programming a garage door opener or gate operator, it is
advised to unplug the device during the “cycling” process to prevent
overheating.
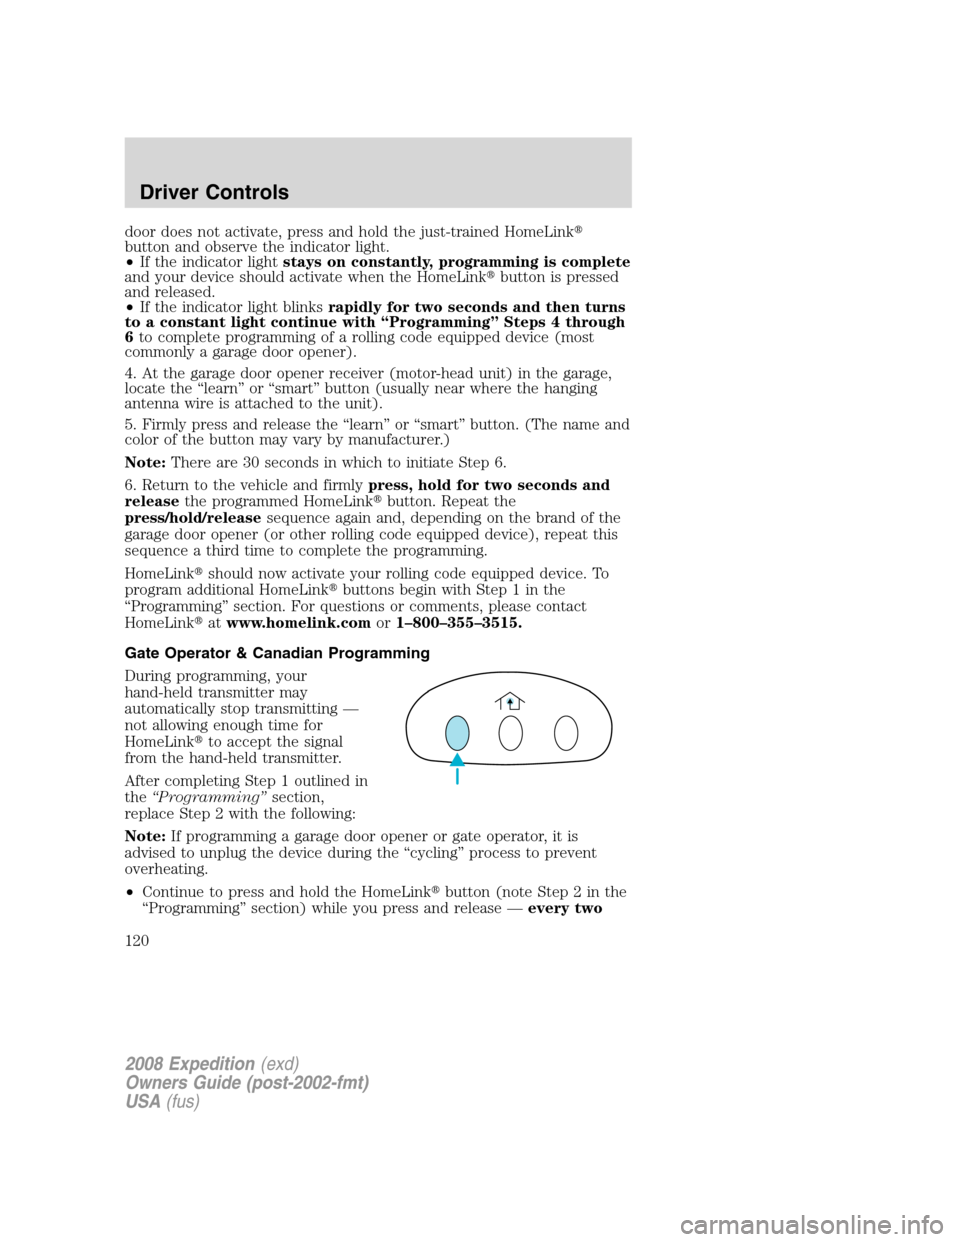
•Continue to press and hold the HomeLink�button (note Step 2 in the
“Programming” section) while you press and release —every two
2008 Expedition(exd)
Owners Guide (post-2002-fmt)
USA(fus)
Driver Controls
120